Downloading files from the internet is risky, as malware, trojans, and ransomware disguise themselves as harmless downloads. You’re better safe than sorry, though, which is why you should always check your downloads are safe before opening them.
6
Use Windows Security (or Your Built-in Antivirus)
The easiest way to check your downloads is with Windows Security, which is already installed on your PC. Windows Security (formerly known as Windows Defender) works in the background but can scan suspicious files you download.
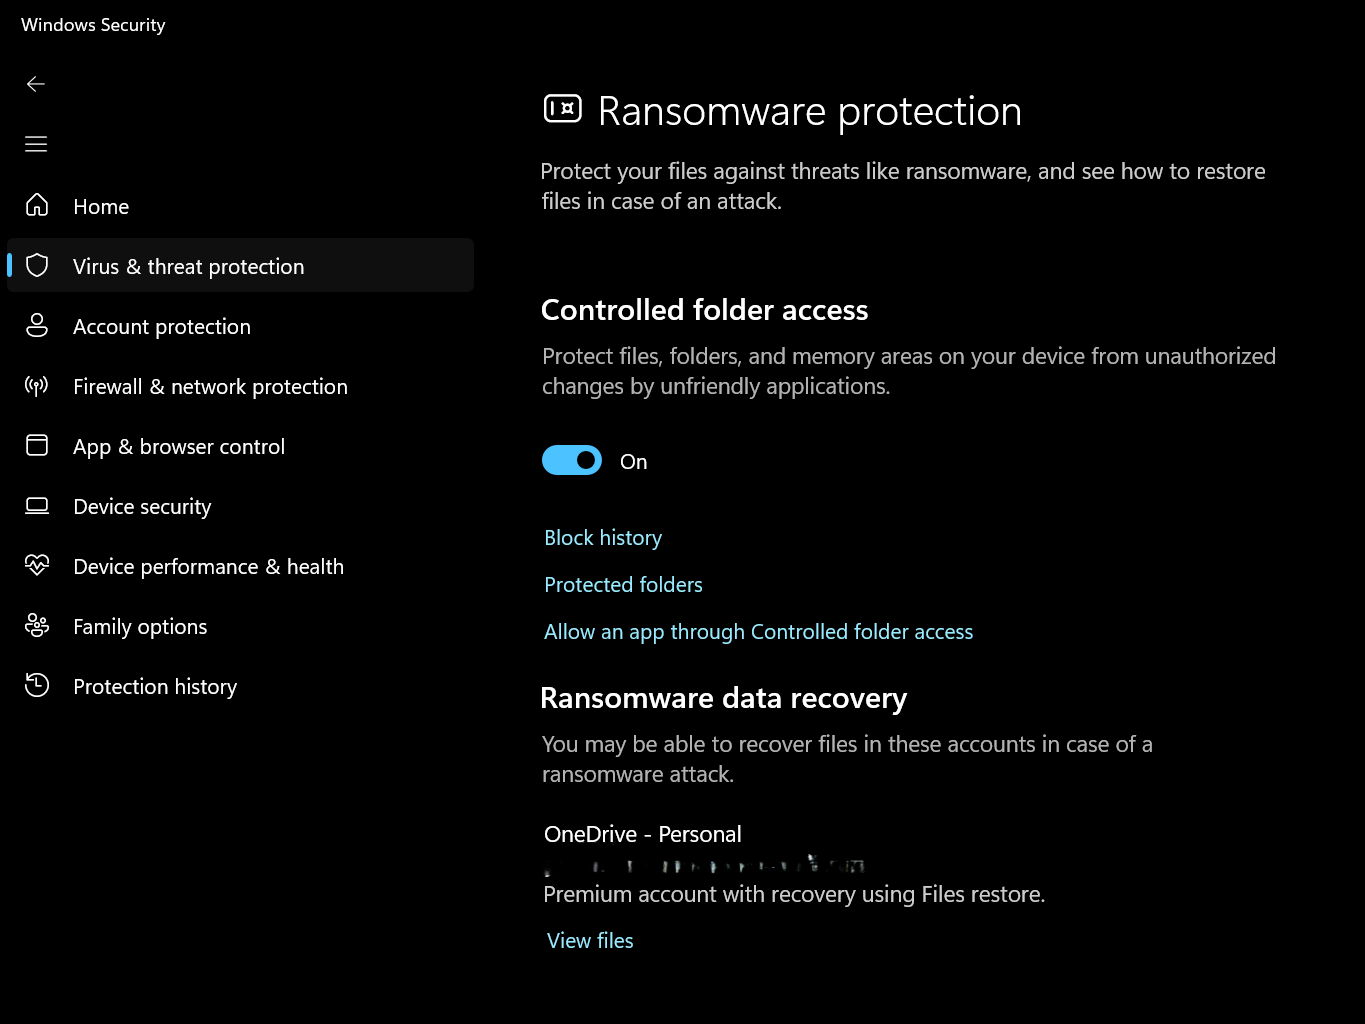
To scan a file, right-click it and click Scan with Windows Security from the menu. The scan typically takes just seconds and provides immediate peace of mind. For maximum protection, make sure you’ve also enabled Ransomware Protection in the Windows Security settings.
But, what about those fancy paid antivirus programs? Honestly, Windows Security has improved significantly over the years. Unless you’re handling extremely sensitive data or visiting sketchy corners of the internet regularly, the built-in protection handles most threats effectively. It especially works well when paired with the essential Windows 11 security checklist.
Mac and Linux have similar built-in protections, though they work differently. No matter your operating system, always run a scan before opening downloaded files, particularly executables (.exe) or script files that could potentially run harmful code on your system.
Related
10 Ways to Protect Your Mac From Malware
Although Macs are more secure than Windows machines, they aren’t immune to malware attacks. So, here are some tips to keep your Mac protected.
5
Verify File Extensions Before Opening
One of the oldest tricks in the cybercriminal playbook is disguising malicious files with fake extensions. That innocent-looking “photo.jpg” might be “photo.jpg.exe” waiting to wreak havoc on your computer.
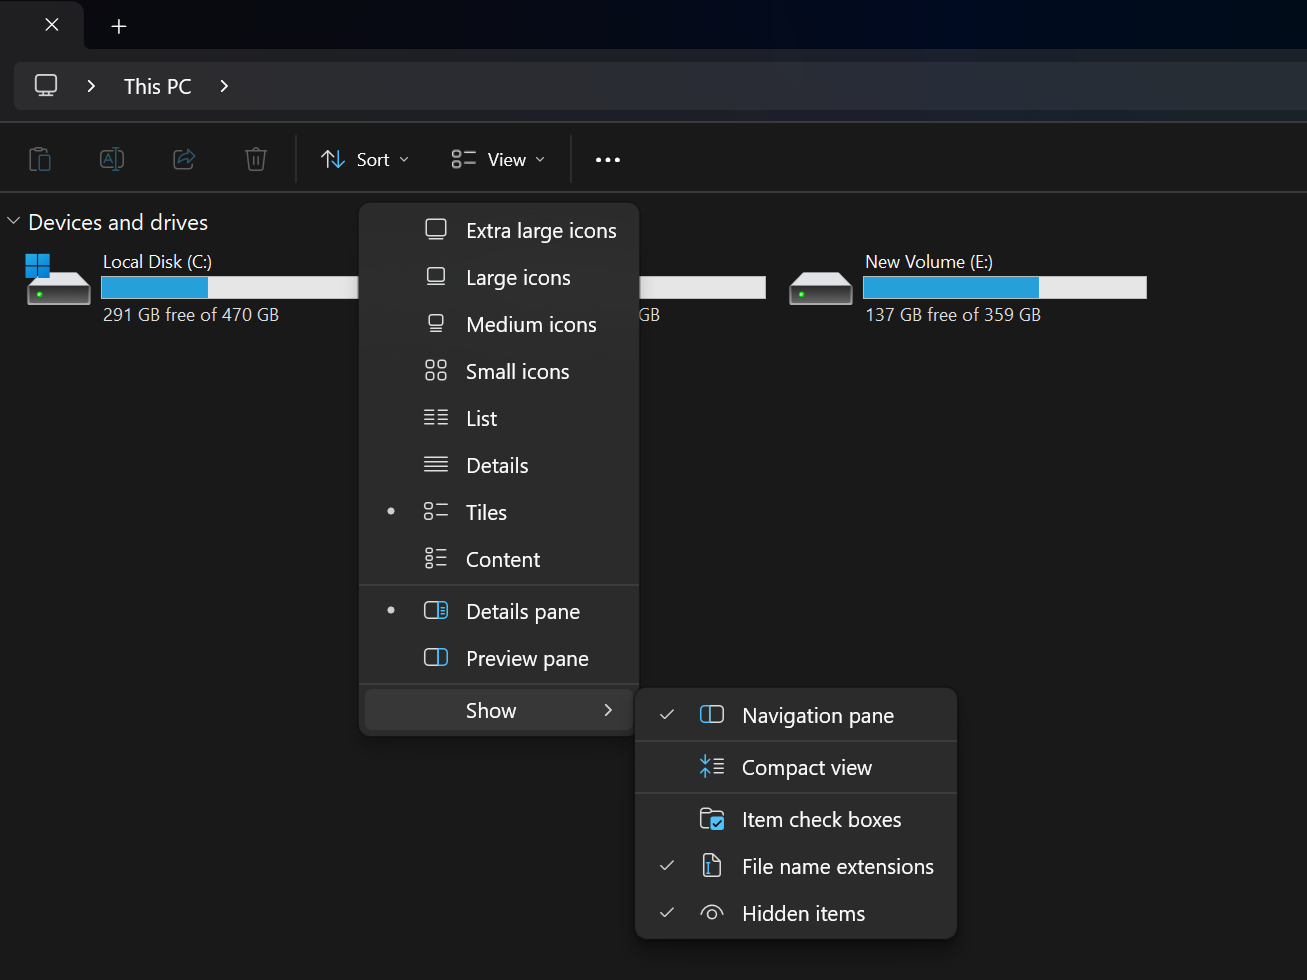
By default, Windows hides file extensions, which plays right into hackers’ hands. However, you can adjust Windows settings to see each file extension. This simple change gives you a necessary layer of protection against disguised malware.
You should be wary of executable files (.exe, .bat, .cmd, .vbs, .js, .wsf, and .scr) from unknown sources. These file types can run code on your computer without much restriction. So, spot and avoid these malicious EXE files to save yourself from trouble. Moreover, documents with macros (.docm, .xlsm) can also contain malicious code.
Pay special attention to double extensions like “invoice.pdf.exe” or “movie.mp4.scr” which try to hide their true nature. The second extension reveals what the file really is, regardless of the icon displayed.
4
Use Online Virus Scanning Services
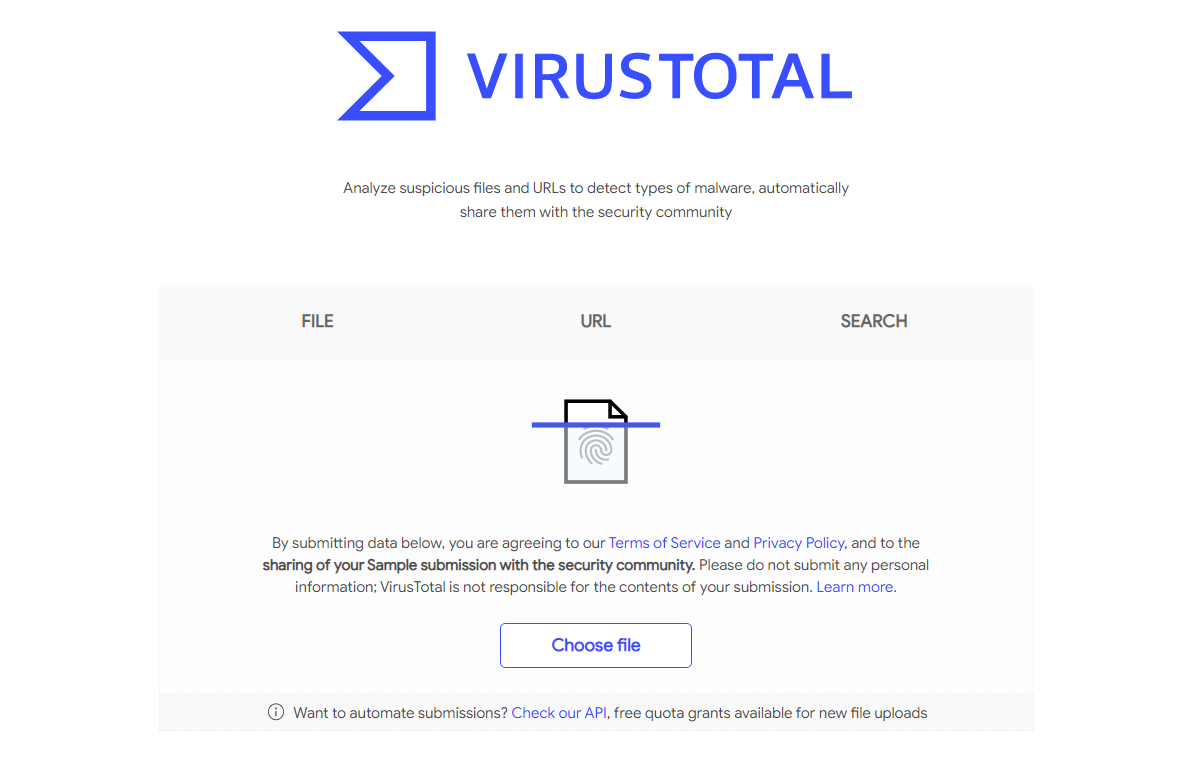
If you’re still not sure about a file, get a second opinion. Online virus scanning tools like VirusTotal analyze your suspicious files using dozens of antivirus engines simultaneously, which is more convenient than relying on a single scanner.
Using VirusTotal and similar tools is straightforward: upload the questionable file to the website and wait for results. VirusTotal shows how many of its 70+ security engines flagged your file as suspicious. This collective approach drastically reduces the chance of malware slipping through undetected.
These online scanners are handy as they work regardless of your operating system. They’re quite useful for those strange file types your antivirus might not be optimized to detect. Just remember that files you upload to these services are typically stored on their servers, so avoid sending sensitive personal documents.
3
Check Digital Signatures and File Hashes
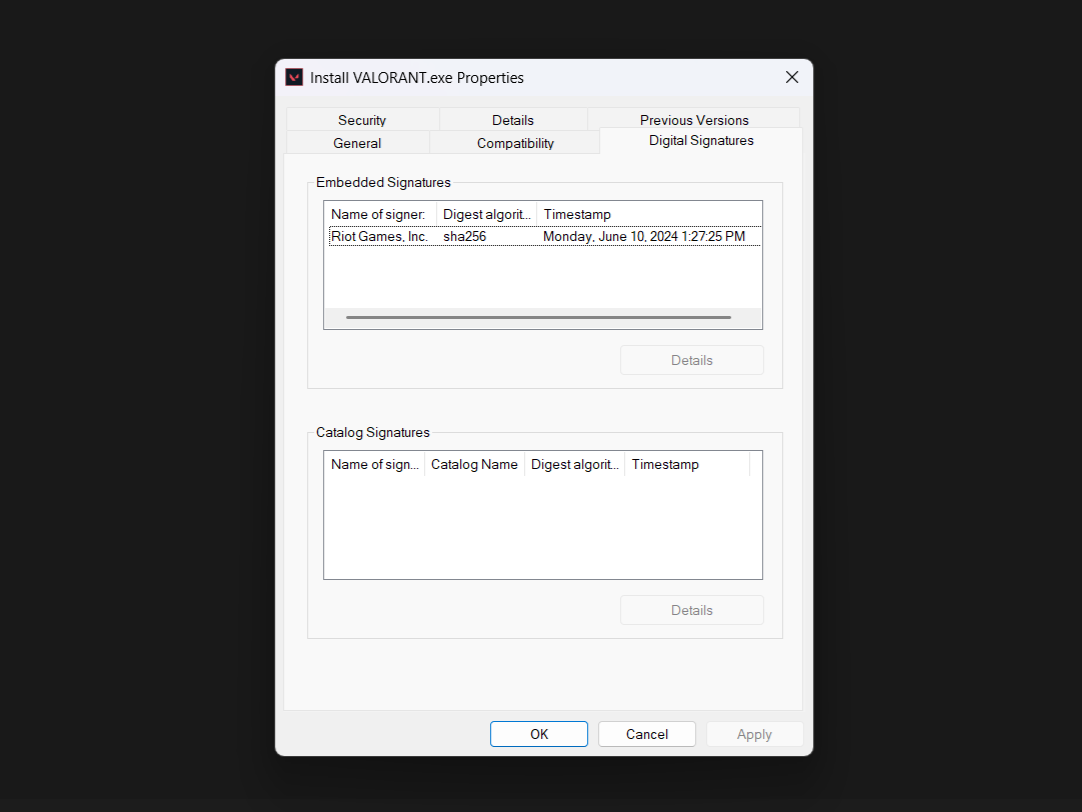
Legitimate software companies digitally sign their files, which verifies their authenticity. If a file’s digital signatures are missing or show an unknown publisher, that’s a red flag worth investigating. Luckily, we can check a file’s digital signatures in Windows. To do so, right-click any downloaded program, select Properties, and then check the Digital Signatures tab.
File hashes are also a useful security check. It works as a unique identifier for files, similar to DNA. Developers often publish the hash value alongside their download links when downloading software from official sources. By comparing the published hash with your downloaded file’s hash, you can verify that nothing has changed during download.

Related
Hashing vs. Encryption: What’s the Difference?
You’ve probably heard of hashing. And you’re using encryption right now. But are hashing and encryption the same thing? What do they mean?
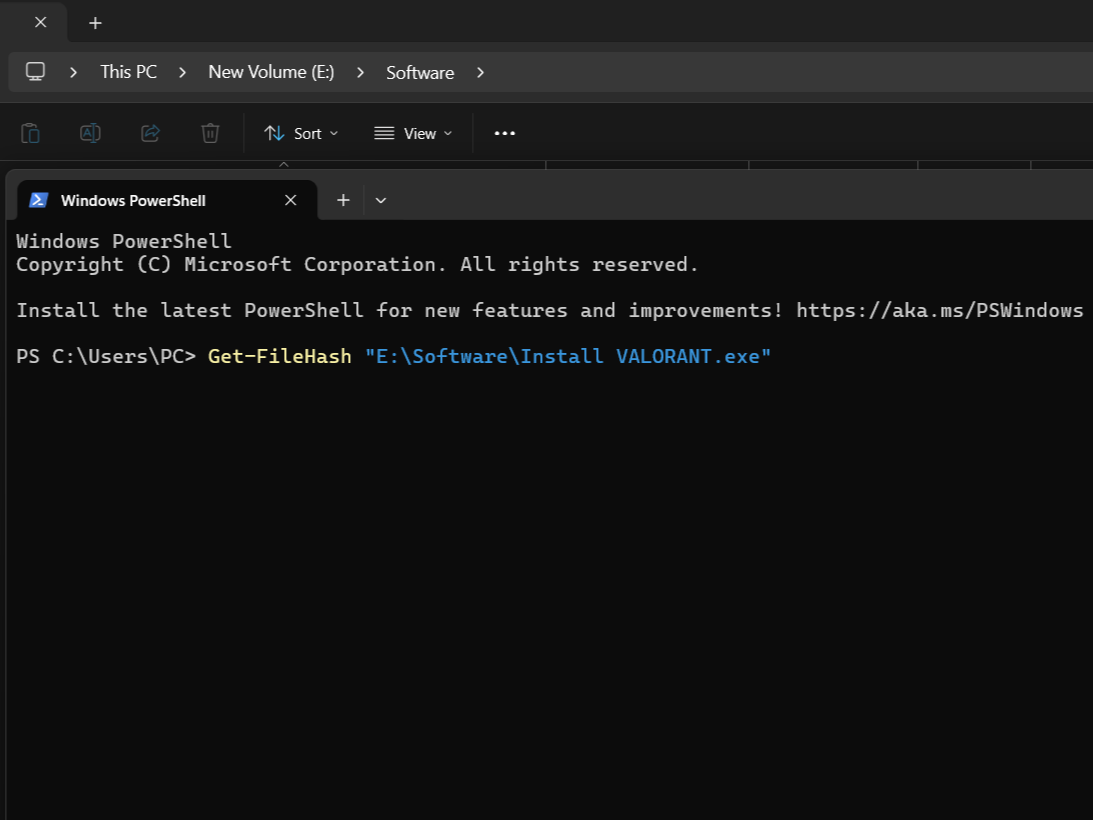
Generating a file hash in Windows is easier than it sounds.
- Input Windows PowerShell in the Start menu search bar and open the Best Match.
- In PowerShell, type Get-FileHash, hit space, followed by the file path, and press Enter. You can copy the file path from the Windows File Explorer address bar.
Compare this output to the developer’s published hash—they should match exactly. This verification step is important for software updates and security tools, where even tiny modifications could indicate tampering.
2
Run Suspicious Files in a Sandbox Environment
Sometimes you come across files that seem suspicious, but you still need to open them. Rather than risking your main system, consider running them in a sandbox, a lightweight desktop environment designed for testing questionable software. If the file turns out to be malicious, the damage stays confined to the sandbox.
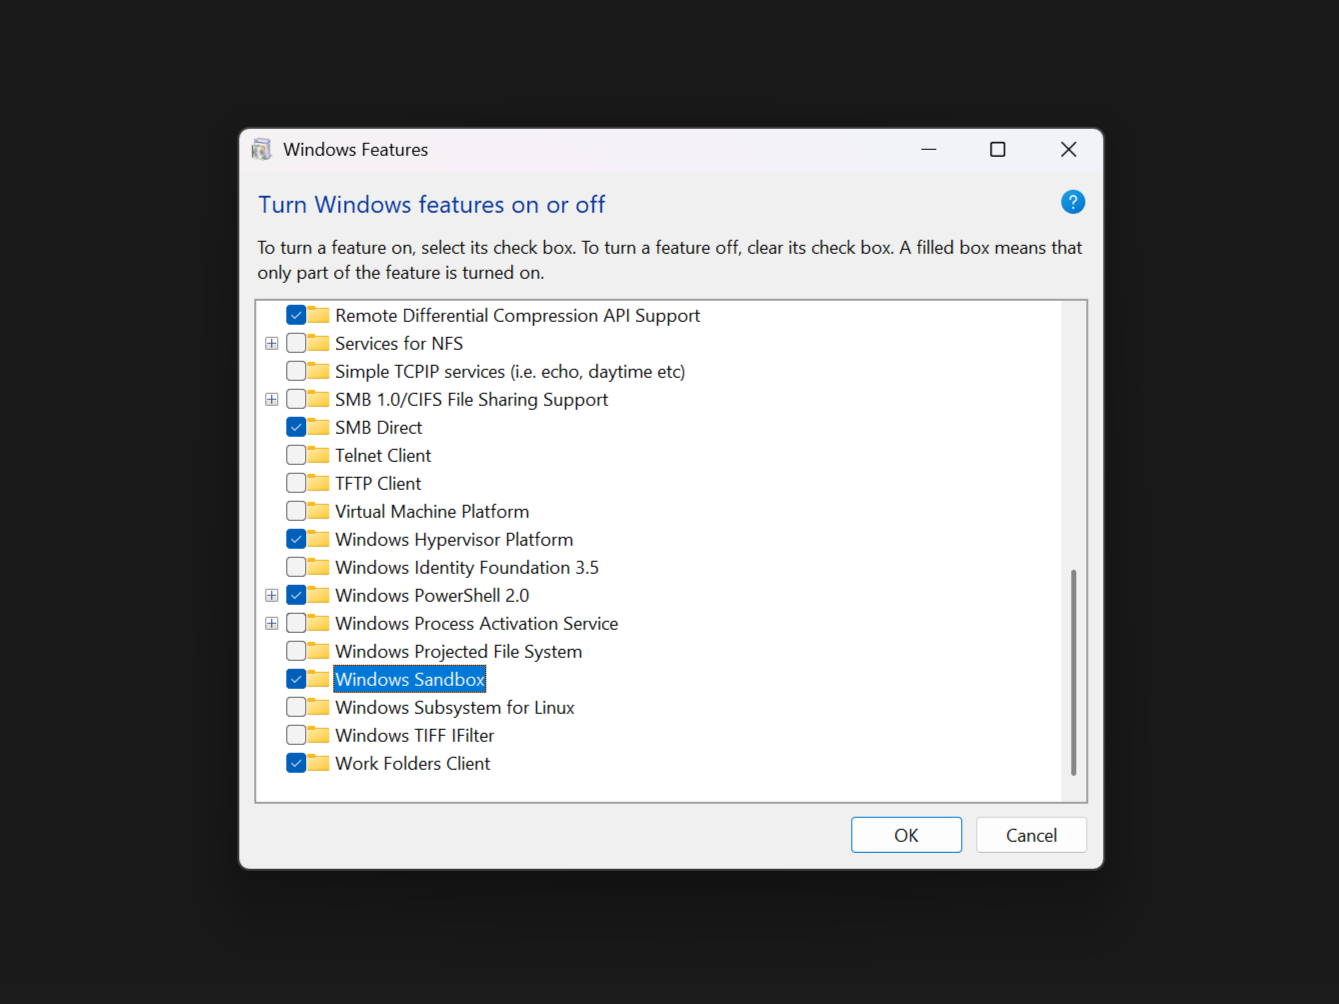
If you have Windows 10 or 11 Pro, you can directly access Windows Sandbox. It takes just a few minutes to enable and set up Windows Sandbox, which provides an instant safety net for testing suspicious downloads.
Don’t have Windows Pro? No problem, you can use free online sandboxing tools, like ANY.RUN and Hybrid Analysis. They let you upload files and watch them execute in a secure environment. Some can even generate reports showing exactly what the file tried to do—accessing networks, modifying registry keys, creating hidden files, etc.
Related
The Best Windows Sandbox Alternatives for Windows 11 Home
Don’t want to use Windows Sandbox? Or are you on Windows 11’s Home edition? Don’t worry; there are plenty of alternatives out there.
After testing, the entire environment disappears, taking any potential malware with it. If you frequently test unknown files, consider setting up a dedicated virtual machine that you can easily reset after each use.
1
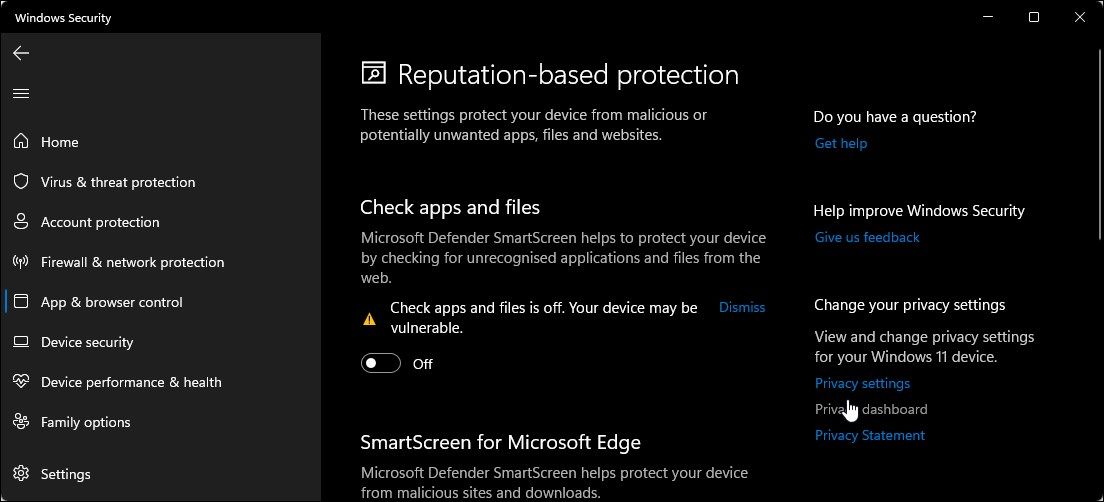
Don’t Disable Security Warnings or SmartScreen
We’ve all been there—you’re in a hurry to install something, and those annoying security warnings keep popping up. “Windows protected your PC.” “This file might be dangerous.” The temptation to click Run anyway or permanently disable these protections is strong, especially when you’re confident the file is safe.
However, these security warnings exist for a good reason, as Windows SmartScreen and similar protective features save systems from infection. In fact, they often catch malware that traditional antivirus programs miss because they analyze reputation and behavior patterns rather than just file signatures.
Instead of disabling these protections, take those warnings as an opportunity to double-check the file using the methods mentioned above. And remember: Legitimate software rarely triggers multiple security warnings. If you see several layers of alerts, that’s usually a strong indication that something isn’t right.




Leave a Comment
Your email address will not be published. Required fields are marked *