My work involves capturing and annotating multiple screenshots on my Mac every day. As such, I need a screenshot tool that can do both efficiently. Sure, macOS has a built-in offering that’s quite capable and supports annotation, but it falls short in many aspects.
This is where Shottr comes in. It’s quick and packs many advanced capturing and annotating capabilities I need for my workflow. Here are six reasons I use it—over the built-in screenshot tool—on my Mac.
Capturing what’s visible on the screen is easy, and most screenshot tools can do it just fine. However, there are situations where I need to capture content that extends beyond what’s visible on the screen. This could be a list of all the available settings in an app, chat logs, or a never-ending list of items on a website.
Shottr’s scrolling screenshot feature is a lifesaver in such situations. It lets you capture content that goes beyond what’s visible on the screen, so you don’t have to take the tedious route of capturing multiple screenshots and stitching them, as you’d have to with the native screenshot tool.
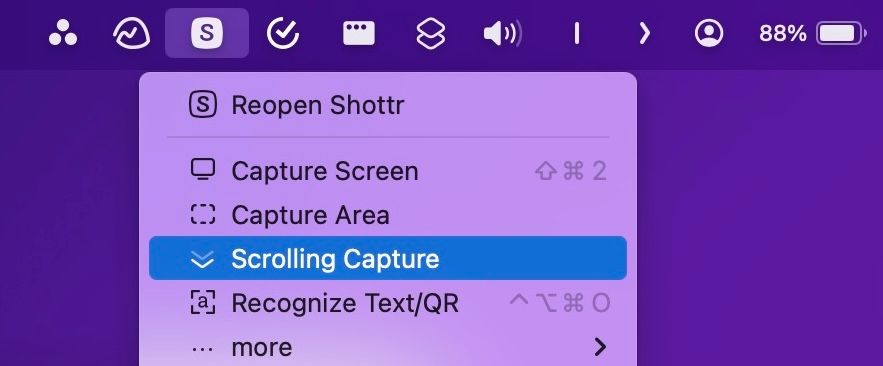
Taking a scrolling screenshot with Shottr is easy. With the subject you want to capture open on your screen, click the Shottr icon in the menu bar and select “Scrolling Capture.” Or use the keyboard shortcut if you’ve set one up.
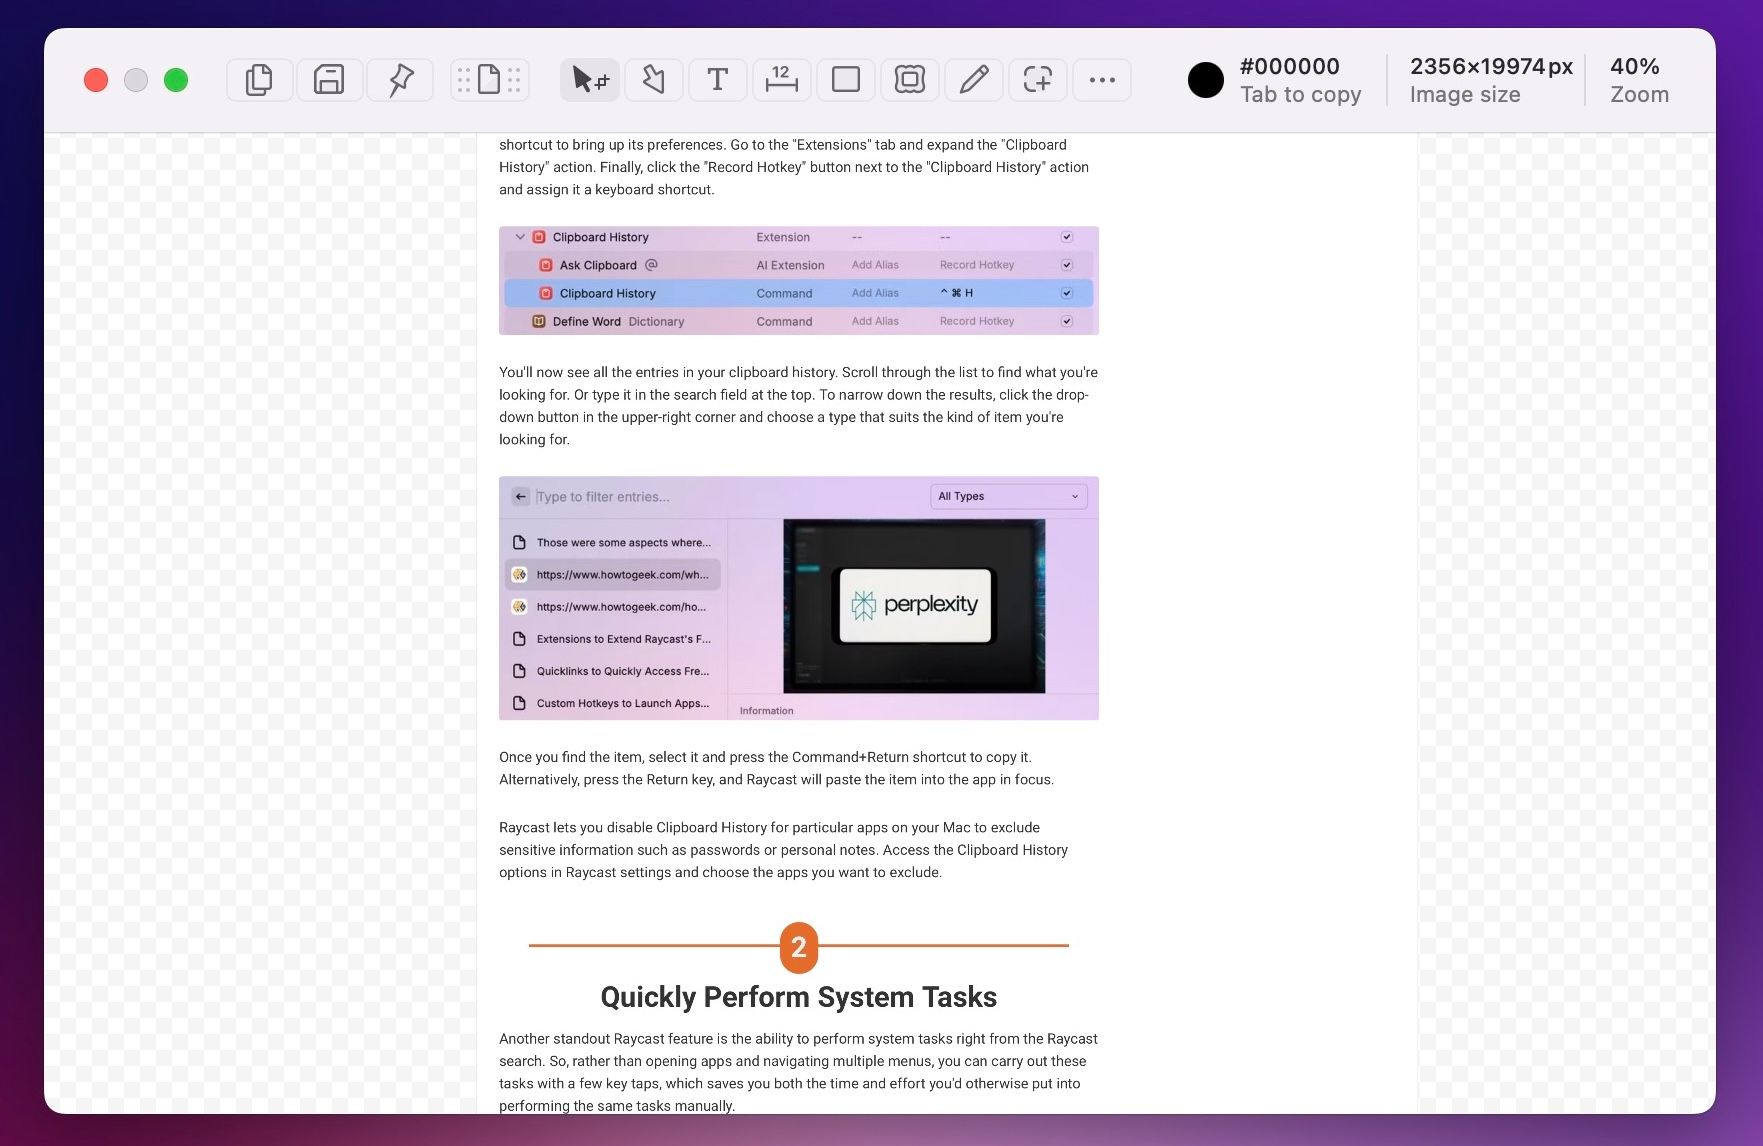
Then, mark the area on the screen that you want to capture, and Shottr will begin capturing it by scrolling all the way down to the bottom of the screen. You’ll see a preview once the screenshot is captured.
Related
How to Take a Full-Page Screenshot of a Website on an iPhone or iPad
Single-page screenshots are so last year. Let’s go the whole hog.
2
Smart Select Mode Makes for Precise Screenshot Capturing
Shottr offers various capture modes, including screen, app window, area, and more. You can choose between them based on your requirements. However, when you use the area mode—meant for freeform capturing—to take a screenshot of a specific area on the screen, you need to make manual adjustments to achieve balanced spacing around windows on all four sides. Failing to get it right means you’ll need to edit the screenshot later to adjust the padding.
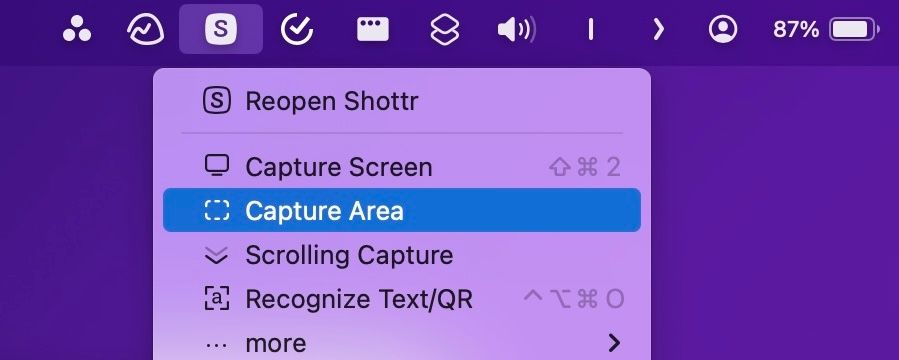
Thankfully, Shottr offers a Smart Select Mode, which offers precise control in freeform capturing, saving you the post-capture hassle. To use it, activate the Capture Area mode from the menu bar or keyboard shortcut if you’ve set one up.
Now, carefully select the border of the app window you want to capture. Once done, press the Option key on your Mac and drag the cursor outward or inward to increase or decrease the capture area, respectively. Shottr will adjust the area accordingly while ensuring balanced padding across all four sides.
Let go of the key and the selection, and Shottr will capture the screenshot and save it.
3
Shoot Delayed Screenshots with Ease
At times, I need to show the contents of a menu item or specific states of an app in my screenshots. While I can open the exact item I want to show in the screenshot and use the keyboard shortcut for macOS’ built-in screenshot tool or one of Shottr’s capture modes to capture it, in some cases, like when I want to show the window switcher, the items disappear as soon as I press the keys or, worse, the shortcut doesn’t capture the screenshot.
Shottr’s Delayed Screenshot feature comes to the rescue here. As the name implies, this feature delays the screenshot capture after you ask it to take one—by three seconds—so you can prepare the screen to show the elements you want to display.
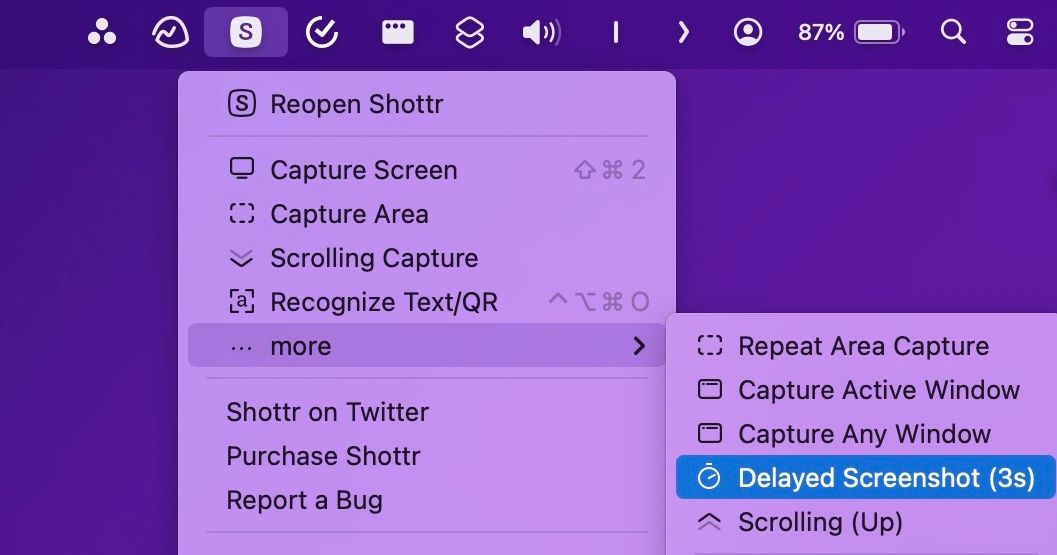
To take a delayed screenshot, click the Shottr icon in the menu bar, select “More,” and choose “Delayed Screenshot (3s)”.
Quickly prepare the elements you want to show in the screenshot, and Shottr will capture the screen after three seconds. Sadly, it doesn’t give you a countdown on the screen, so there’s no way to tell how many seconds have elapsed.
Another gripe I have with Shottr is that it doesn’t let you adjust the delay duration, nor does it allow you to set up a keyboard screenshot for the Delayed Screenshot mode, as you can do for other modes. As such, you need to time things well to get your desired items captured in the screenshot.
4
Shottr Has Multiple Window Background Options
With the Capture Active Window and Capture Any Window modes, Shottr screenshots the app window along with the background area. For this, its default behavior is to capture the wallpaper you’ve set on your desktop. However, if you don’t want to show your wallpaper in screenshots, you can change this behavior.
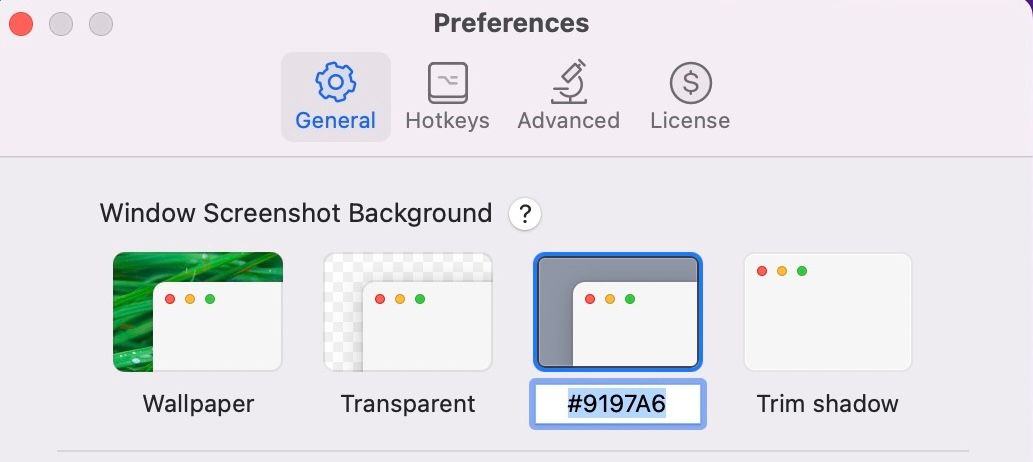
To do this, click the Shottr icon in the menu bar and select “Settings.” Be sure you’re on the “General” tab. Now, if you prefer a solid color, choose “Solid Color” under the “Window Screenshot Background” section and type your preferred color’s hexadecimal code. You can find hexadecimal codes for colors on the HTML Color Codes website.
Alternatively, if you plan to add a custom background to the screenshot post-capture, select the “Transparent” option. You can then open the screenshot in your preferred editing tool and apply a gradient background to it. Lastly, for situations when you don’t want any border around the captured window, use “Trim Shadow,” which removes padding around the captured area.
Capturing is just one part of the process; I also need to annotate and edit the captured screenshots to make them suitable for sharing. Shottr helps me do it effectively and efficiently, thanks to an extensive suite of editing tools.
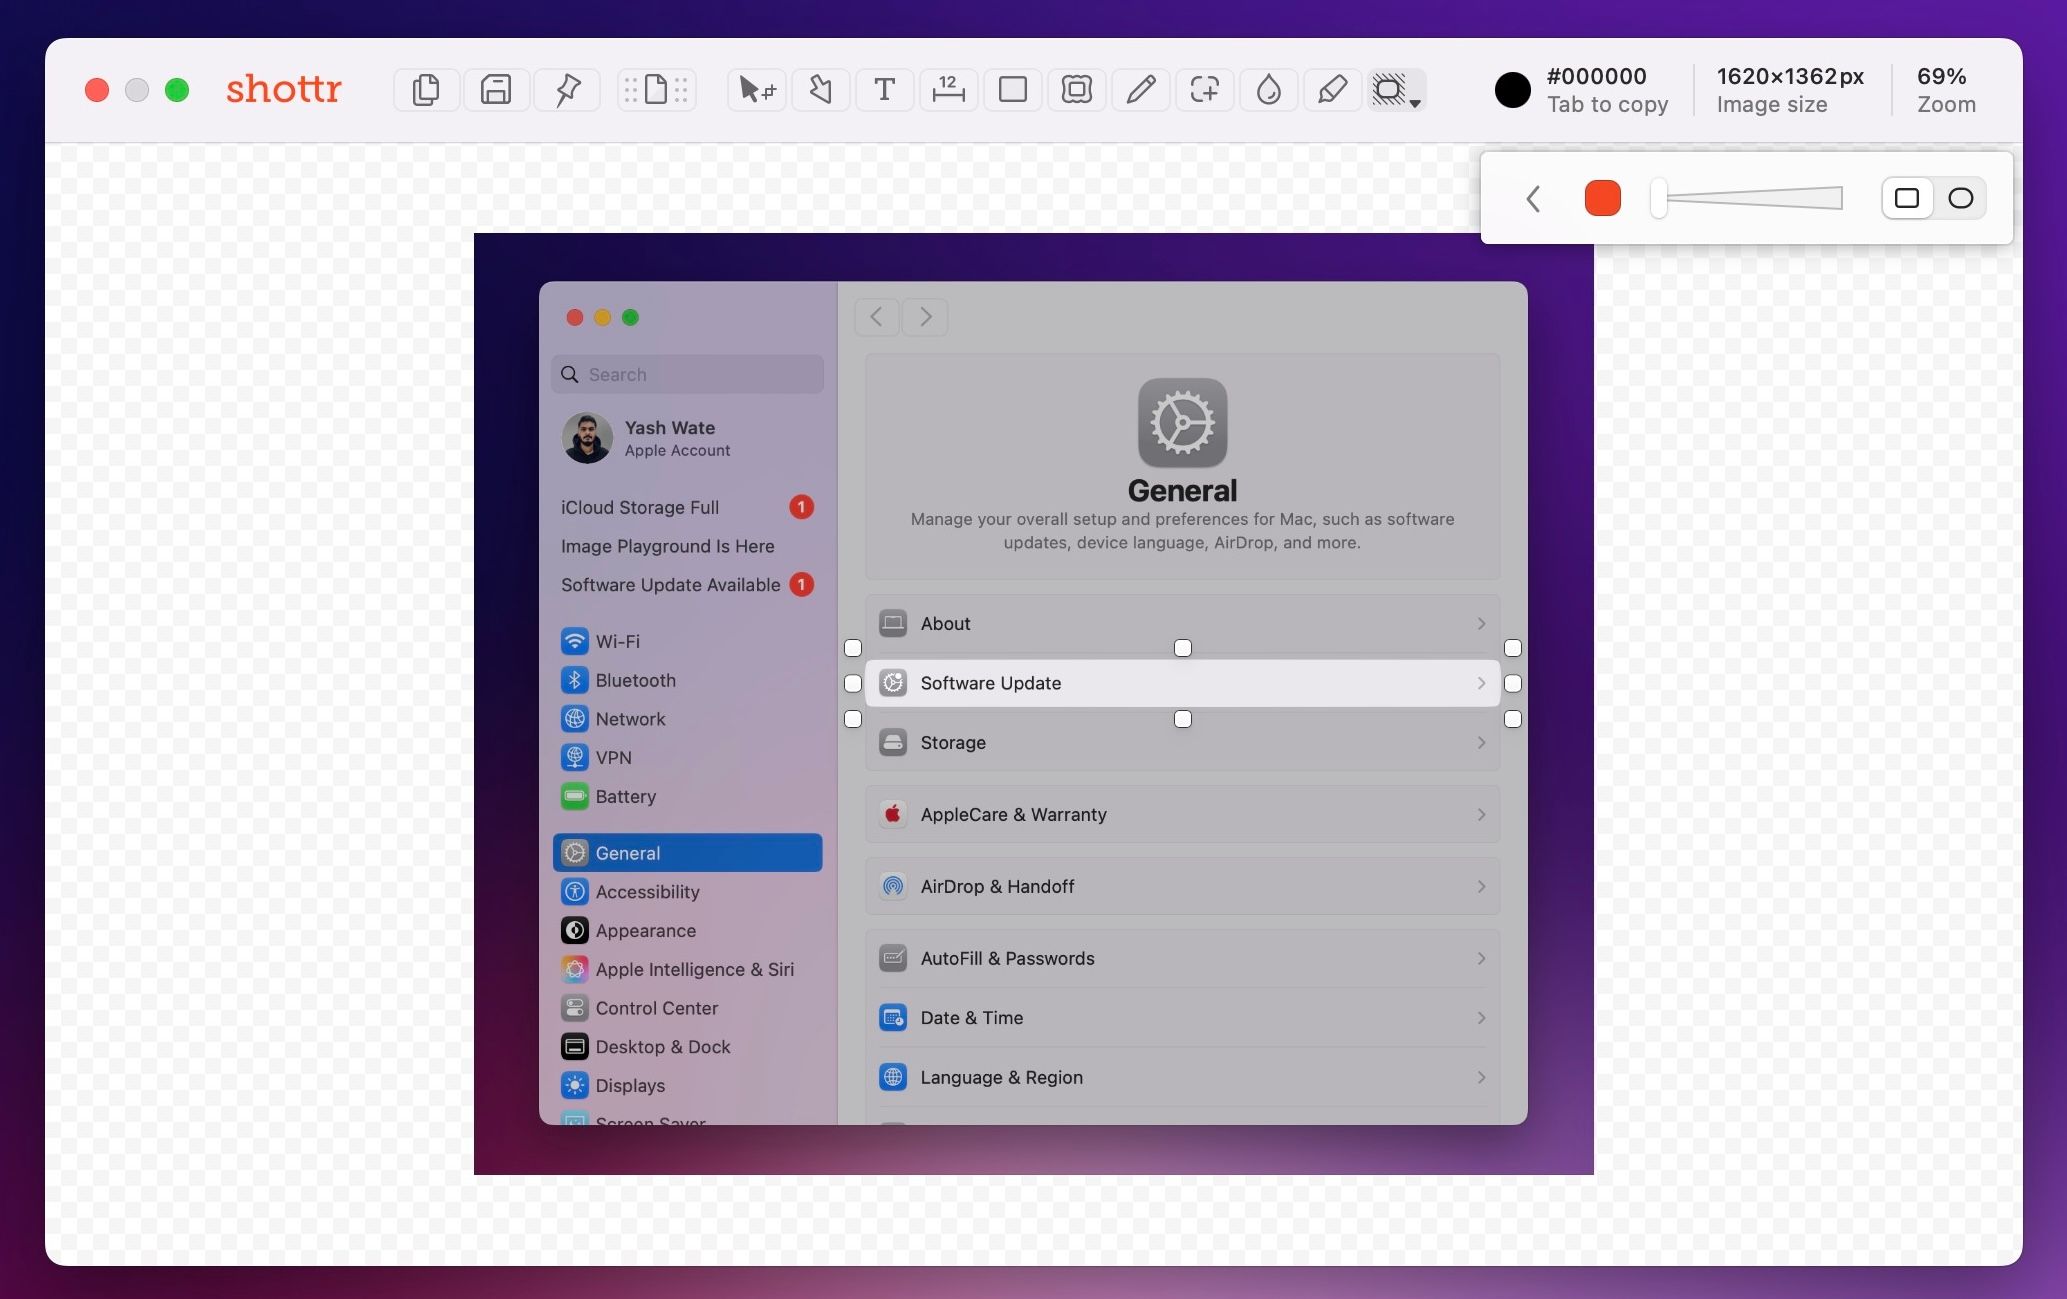
As soon as you take a screenshot, Shottr automatically opens it in the editor so you can start editing or annotating it right away. You can also open screenshots you captured previously with Shottr to make changes.
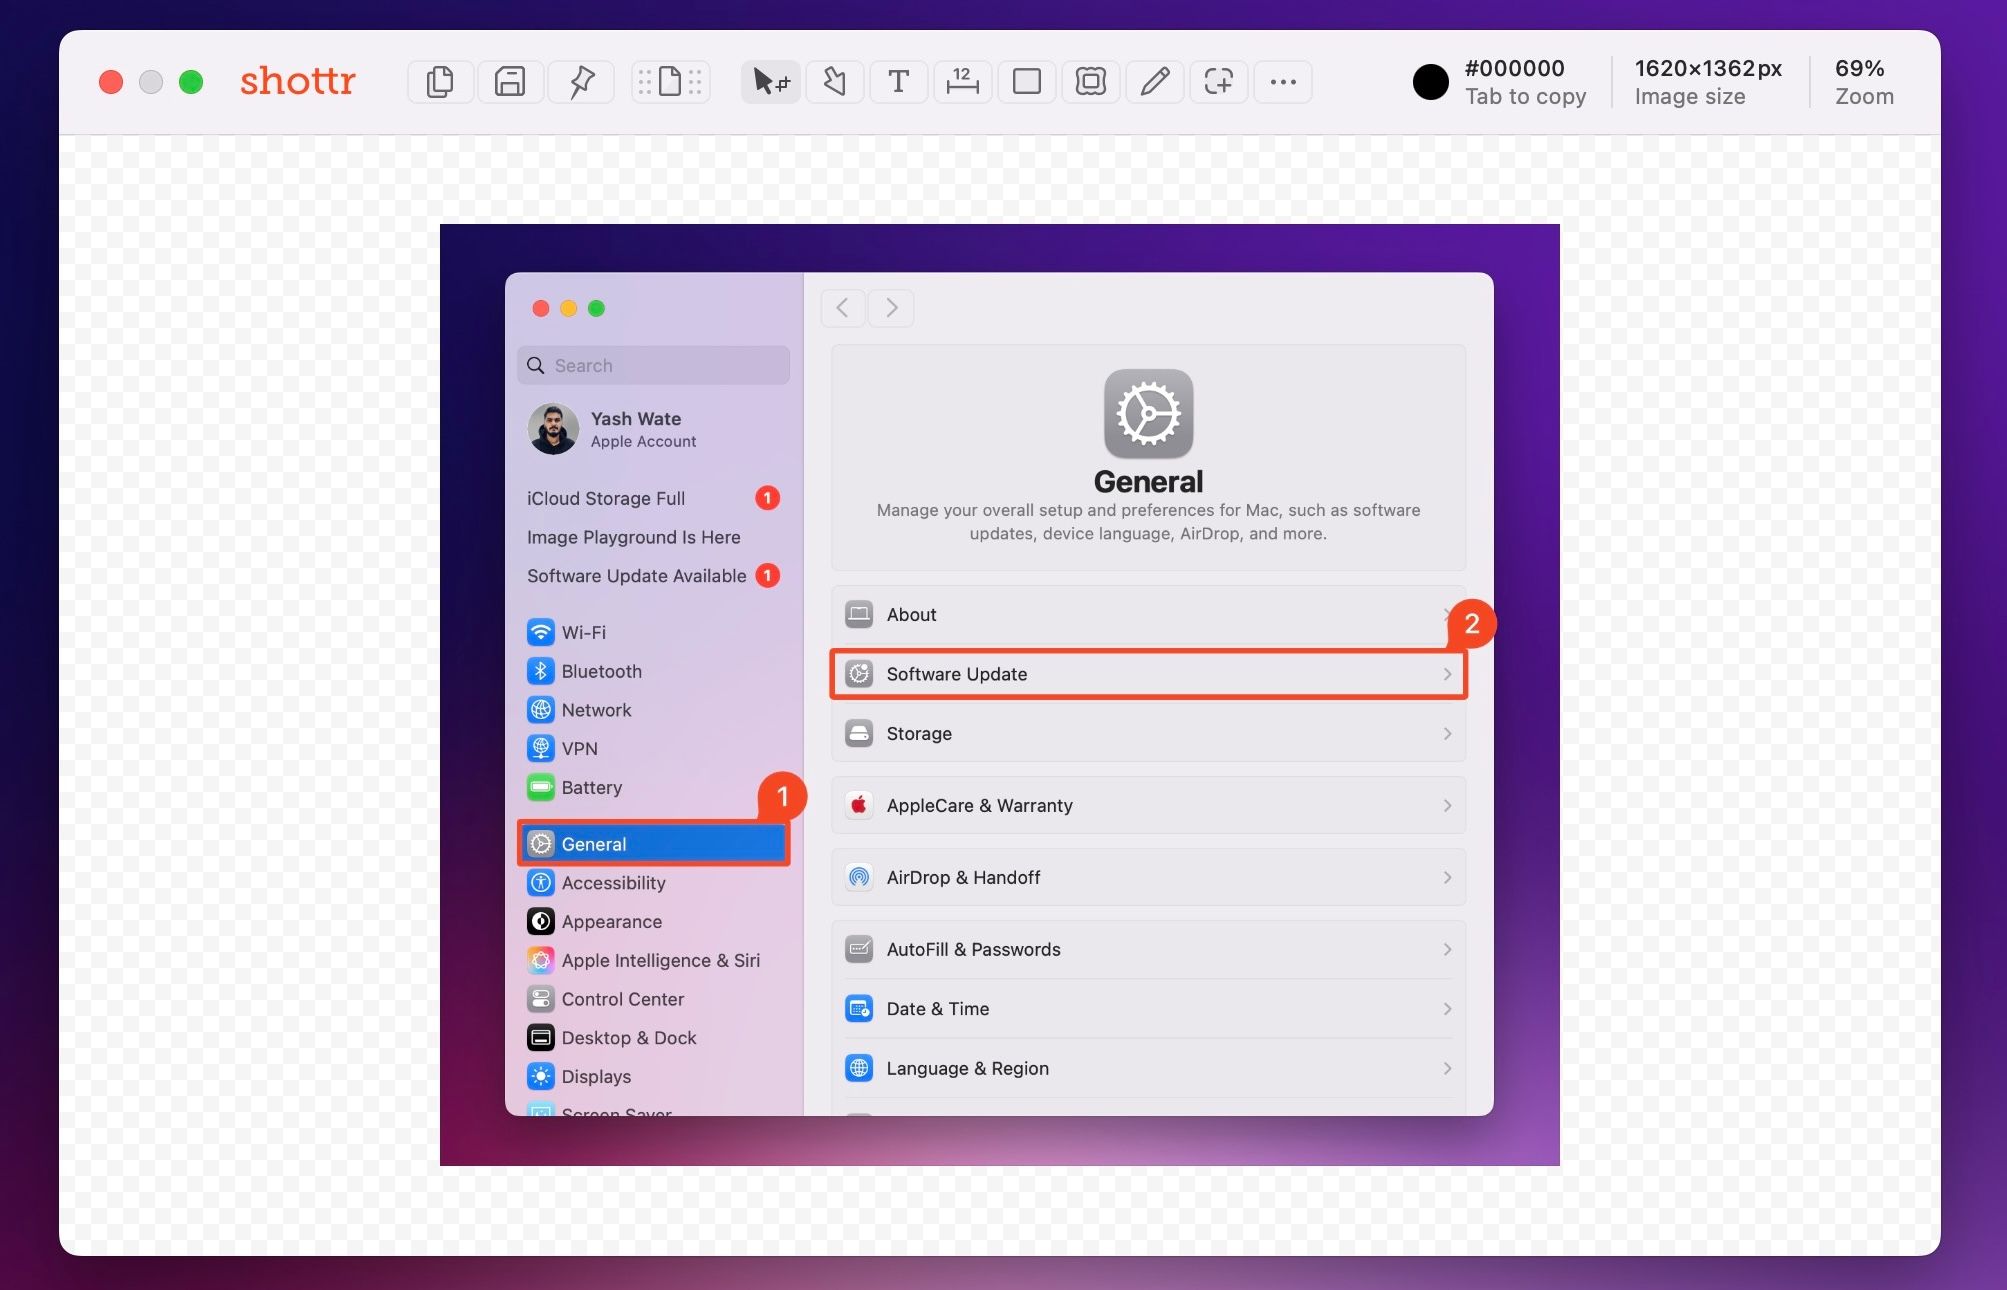
Once in the edit window, you can do a bunch of things, ranging from cropping and adding arrows or other shapes to highlighting text and adding text, among others. Spotlight and Counter are two of my favorite tools. With Spotlight, you can add a spotlight effect to focus on important elements on the screen.
On the other hand, Counter lets you add bubbled numbers next to elements in the screenshot, which is useful when you want to highlight instructions you want someone to follow.
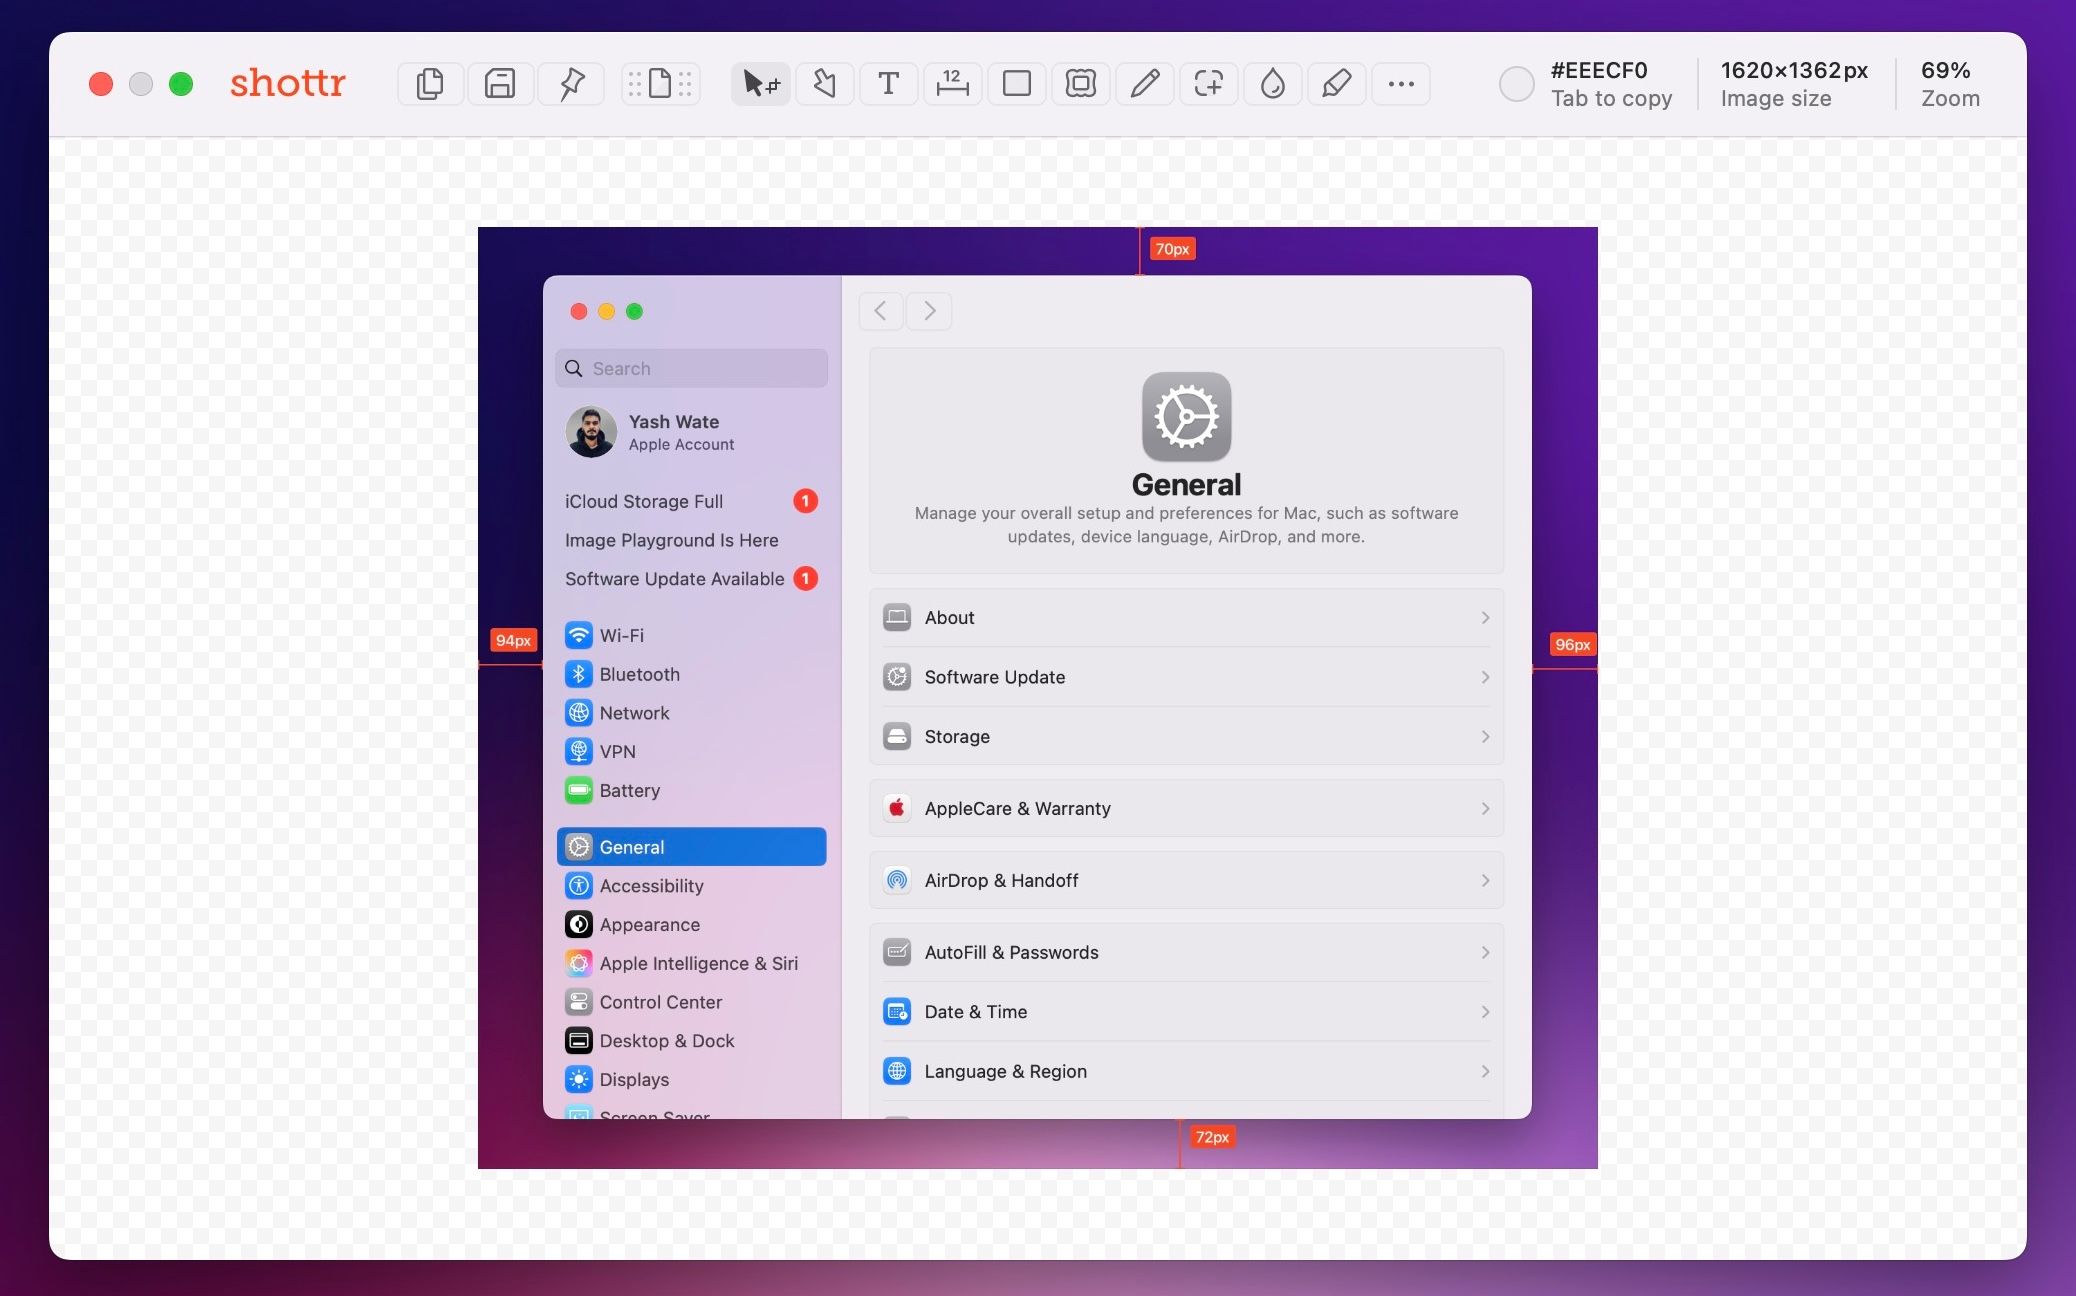
Another tool I really like is Ruler, which lets you check if the spacing around all four sides of a captured screenshot is uniform. While I use the Smart Select Mode to ensure balanced padding, there are times when things could go off by a few pixels. With Ruler, I can check this and use the Crop tool to fix the padding.
To use it, click the Ruler button (scale icon) at the top, then hover over the area while pressing 1 (for vertical measurement) or 2 (for horizontal measurement), and Shottr will show you the distance between two points. Click on the area to add the distance markings.
Some other useful tools available in the Shottr editor include “Drag and Drop Image” to drag and drop the captured screenshot into any app, Paste Image to insert an image from your clipboard, color picker to pick any color in the screenshot, and resizer to resize images per your needs.
6
Quickly Remove Objects and Blur Sensitive Information
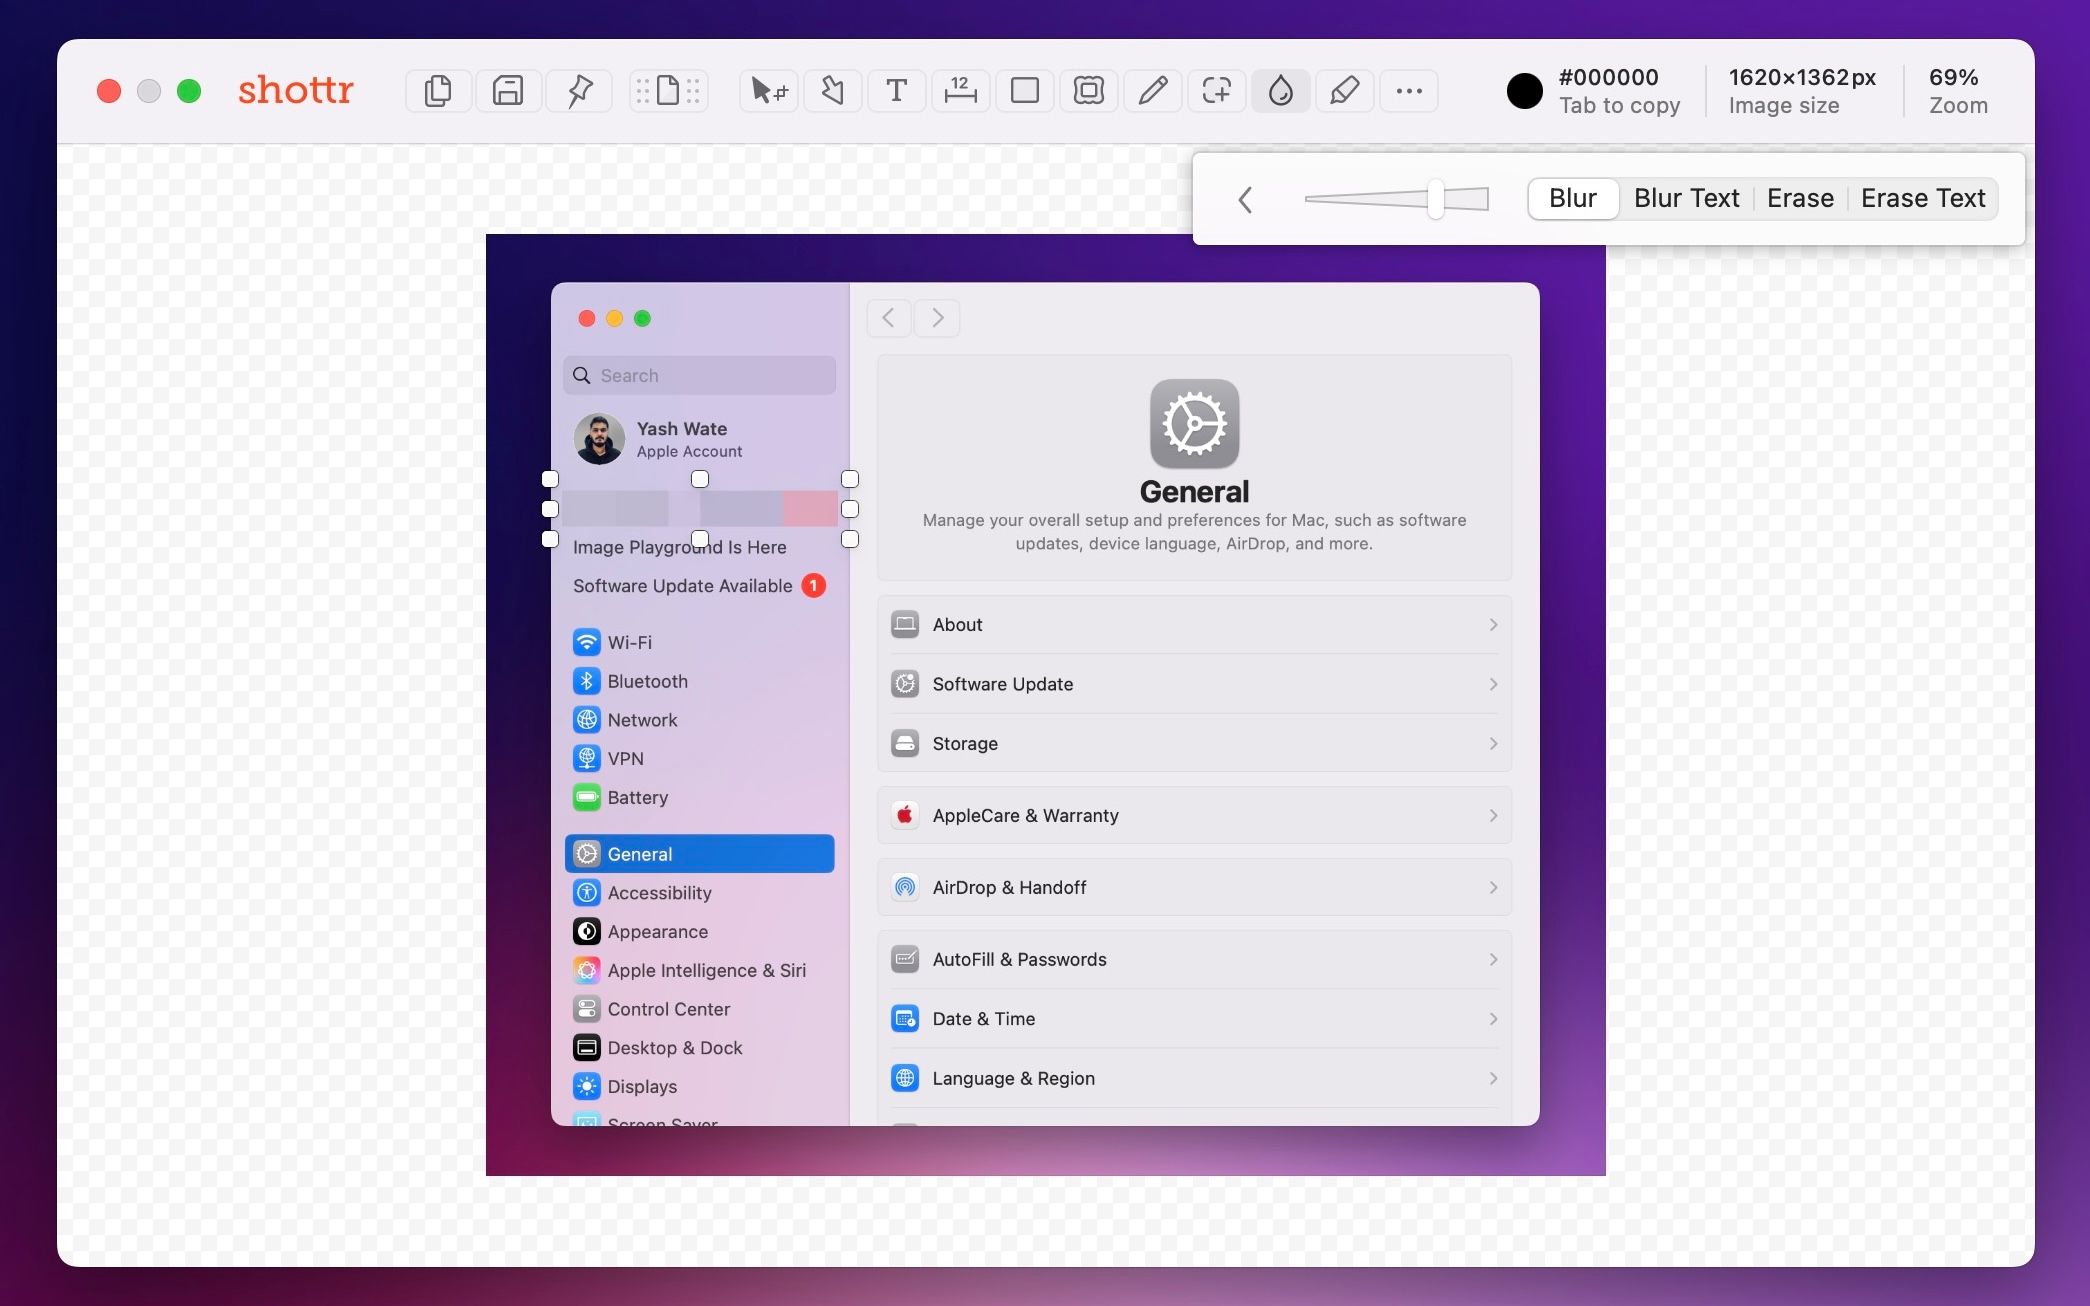
Last but not least, Shottr also lets you remove objects and blur sensitive information from your screenshots. So, if there’s a menu item or some personal information, like your email address or phone number, on your screen, which you don’t want to show in your screenshot, you can easily blur or remove it.
With the screenshot having the element you want to blur or remove open in the Shottr editor, click the Blur or Erase button (drop icon) in the top menu bar or press the B key on your keyboard. Now, select the area with the item you want to hide, and Shottr will apply a blur effect on top of it. You can adjust the blur strength using the slider in the pop-over menu.
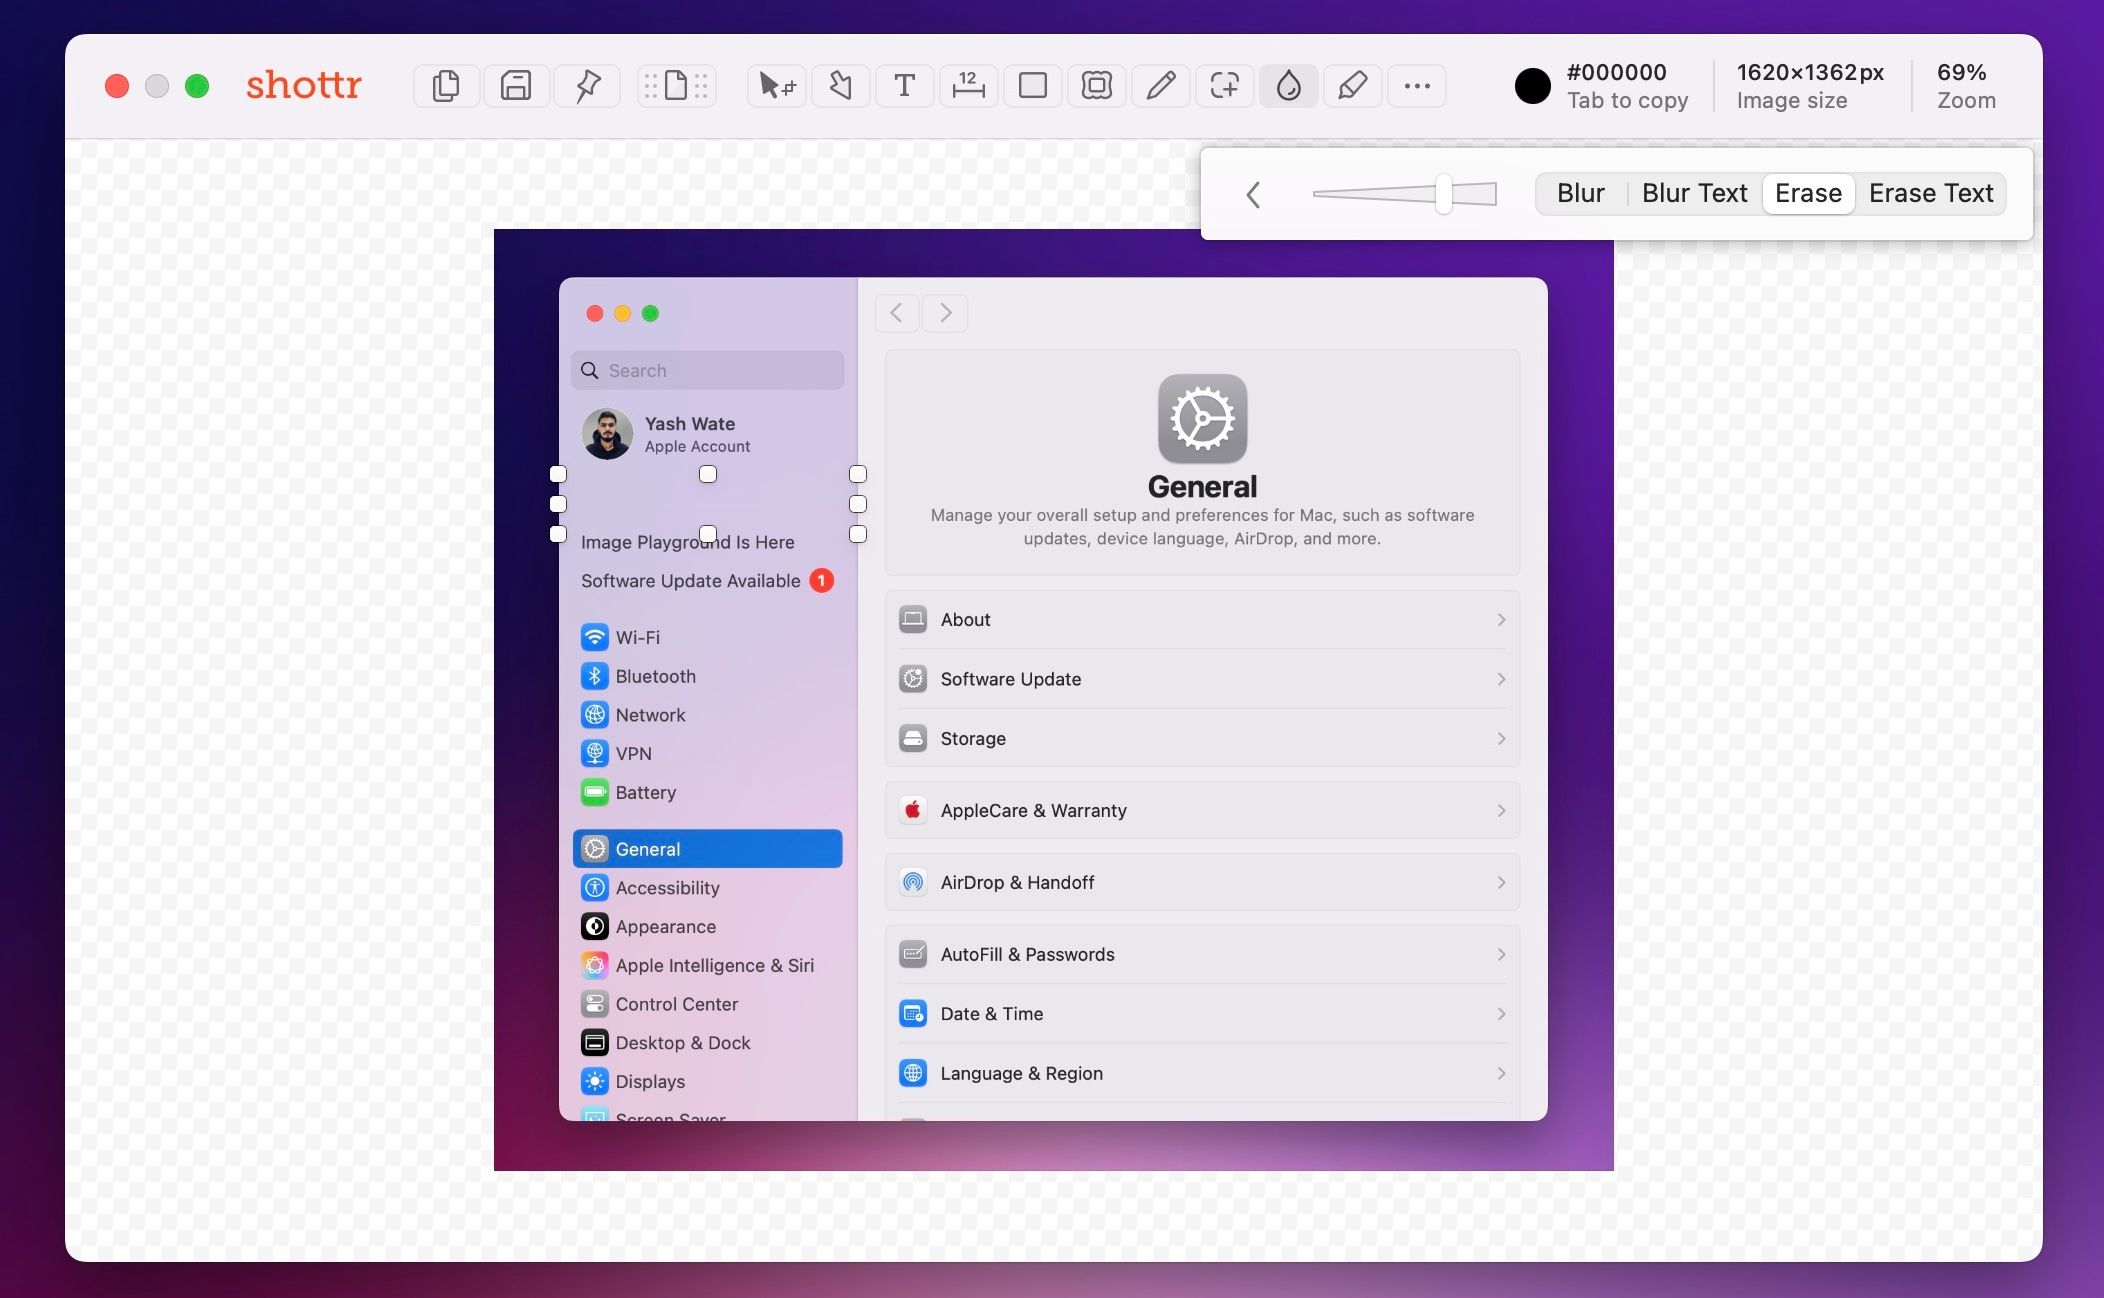
Alternatively, you can select the “Erase” option in the menu to erase the selected element instead of blurring it out.
You also have options like “Blur Text” and “Erase Text,” which blur and erase just the text, instead of the selected area.
Shottr eliminates reliance on third-party tools for almost all screenshot snapping and editing needs. The best part is that it’s quick at capturing and previewing screenshots, which is beneficial if your workflow requires taking a lot of screenshots every day.
The app is free, and you can access almost all its features without paying extra. However, if you need advanced features like gradient backdrops or the ability to take multiple screenshots at once, you can upgrade by paying a one-time upgrade fee.




Leave a Comment
Your email address will not be published. Required fields are marked *