Maximizing storage space helps your Windows PC run more efficiently and smoothly. It also gives you extra drive space for downloading and transferring important files to your computer. You can achieve this by adjusting a few simple settings.
Enable Storage Sense to Automatically Manage Drive Space
A lot of drive space can be lost to things like temporary files, old downloads, and forgotten items in the Recycle Bin. You can use a legacy tool like Disk Cleanup to remove them from your computer, but that can get tedious, and you might not always remember to do it. Alternatively, you can let Storage Sense do that for you automatically.
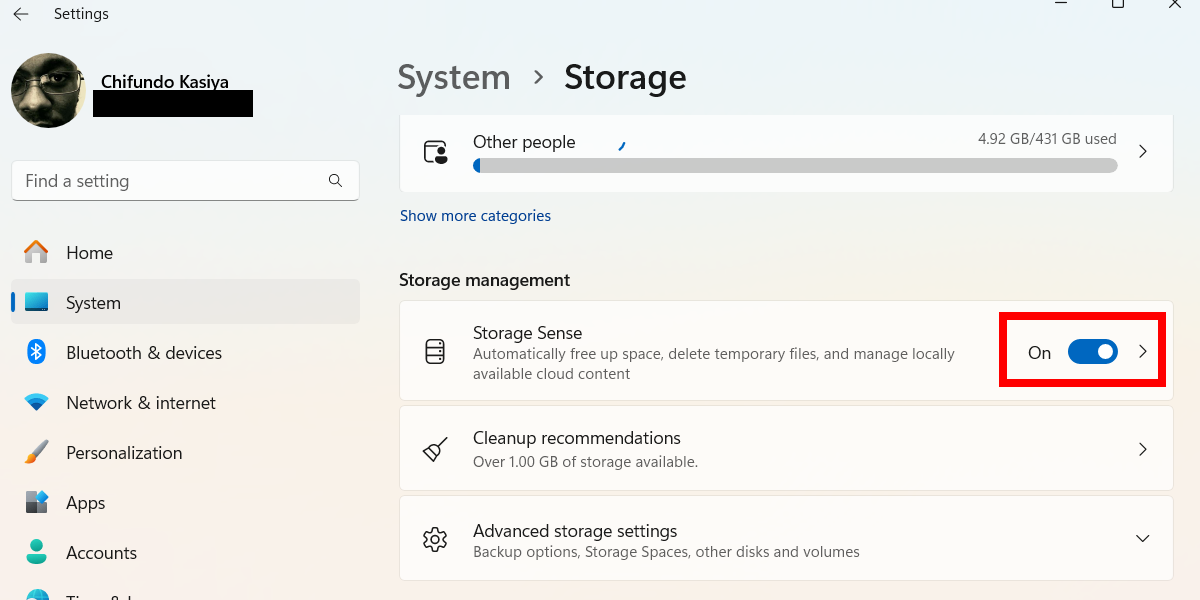
Storage Sense is enabled by default, but it always helps to check if it’s running. To do that, press Win+i to open the Settings app. Next, go to System > Storage and turn on the “Storage Sense” toggle (if it is off) in the Storage Management section.
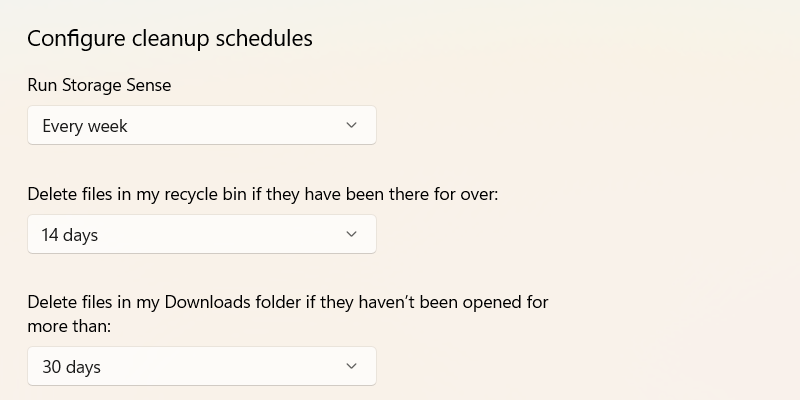
When you click the “Storage Sense” option (instead of the toggle), you will see options for configuring cleanup schedules. For instance, you can set Storage Sense to run every week instead of when the disk space is low. You can also set the frequency at which it deletes files in the Downloads folder and the Recycle Bin.

Related
3 Easy Ways to Find and Delete Old Files on Windows 11
Get rid of the unwanted old files from your PC using automatic or manual methods.
Change the Default Save Locations for Folders
Part of managing storage space is distributing it more efficiently, not just deleting things. For instance, if you would rather only keep important files on your C: drive, you might want to store downloads in the D: drive. Luckily, Windows allows you to switch the default save location of some items so that this process happens automatically.
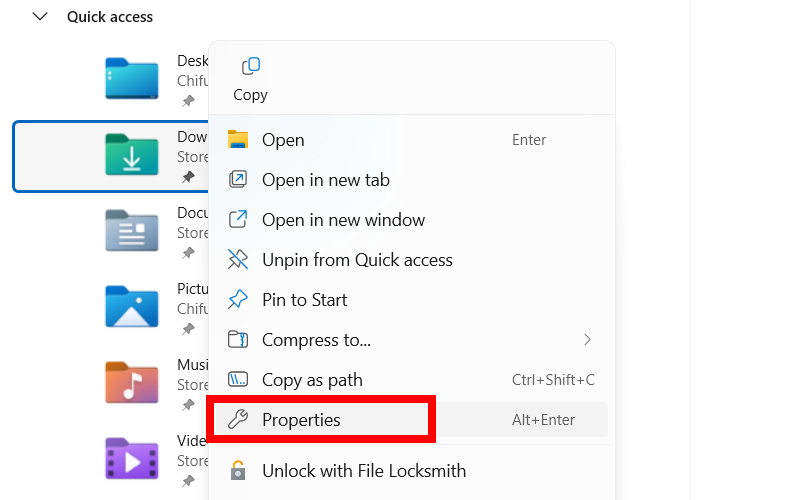
To do that, press Win+E to open File Explorer, right-click one of the folders in the Quick Access section (e.g., Downloads or Videos), and select the “Properties” option.
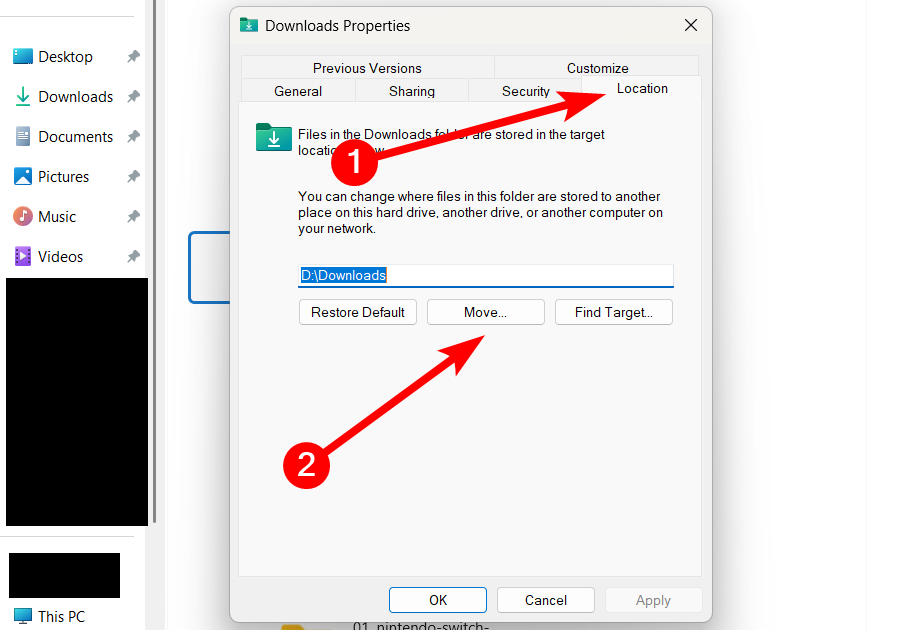
Select the “Location” tab and click the “Move” button.
Select a folder on the other drive or create one (preferably, one with the same name), and then click the “Apply” button. You will be asked if you want to move all files to the new location. Click “Yes” to confirm that you do.
From now on, all files that were meant to go to that location in the C: drive will go to the new folder on the other drive.
Disable Hibernation to Delete the Hibernation File
When was the last time you put your Windows computer in hibernation? If you can’t remember, then you should disable the hibernation feature. It’s a good idea because it will also delete the hibernation file (hiberfil.sys), which has been known to take up noticeable storage space.
To disable hibernation, open Command Prompt as an administrator. Then, type the following command and hit the Enter key:
powercfg -h off
You can always re-enable hibernation mode later, but keep in mind that this will bring back the hibernation file. You can do that using the following command:
powercfg -h on
Related
What Is the Windows Page File, and How Do You Configure It?
No, disabling it won’t speed up your PC.
Minimize the Size of System Restore
When you enable System Restore on your computer, it can take up to 10% of your storage space. Depending on the size of your drive, you might want to lower this. For instance, if it’s 256 GB, that’s 25.6 GB of storage space. Even half of that might be too much for a drive that small.
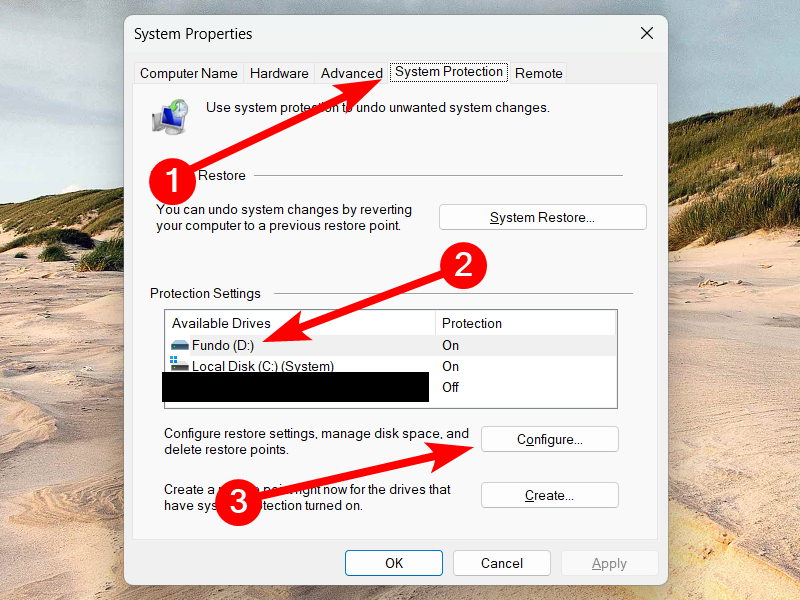
To reduce the size of System Restore, press Win+S to open Windows Search, type System Restore, and click “Create a Restore Point” in the search results. In the System Protection tab, select a drive with System Restore enabled and click the “Configure” button.
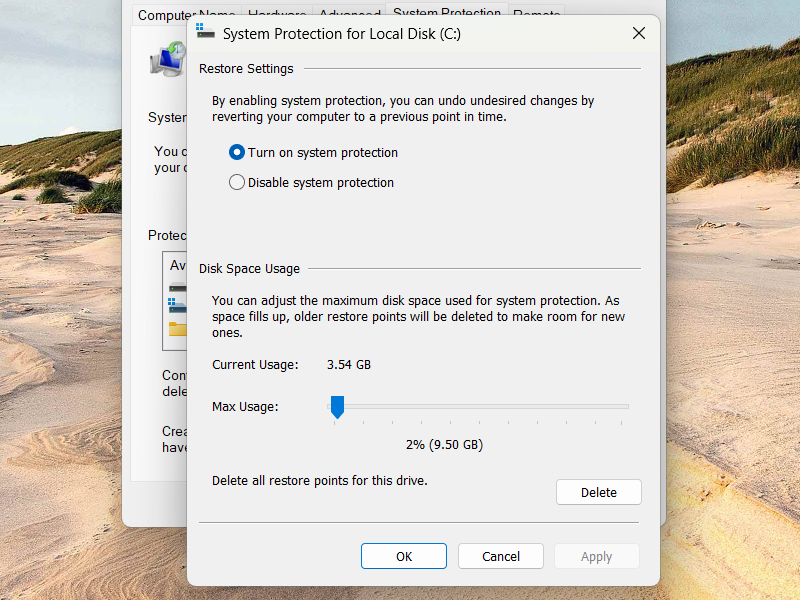
Drag the “Max Usage” slider to the left to reduce the drive space usage to about 1–2%.
Reduce the Size of the Operating System
If you have a very small hard drive, and I’m talking about something less than 128 GB, then every gigabyte counts. You can save at least 2–3 GB by enabling Compact OS on your Windows computer. This will compress Windows core files and use on-the-fly decompression to read them.
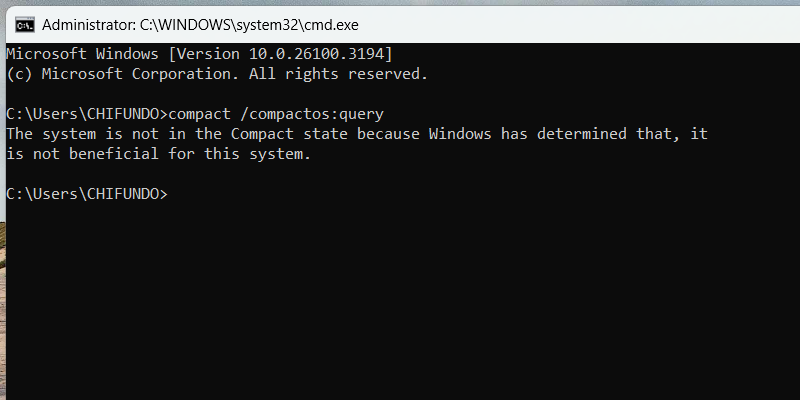
It could be that Windows has already enabled Compact OS, so it helps to check before proceeding. Windows will even tell you if your system will benefit from Compact OS. You can do that by opening Command Prompt as an administrator and running the following command:
compact /compactos:query
If Compact OS is disabled and Windows determines it could benefit from it, run the below command to enable it:
COMPACT.EXE /CompactOS:always
If you upgrade your storage later, check if Windows still recommends keeping Compact OS enabled. Should it determine it’s not needed, you can disable it with the following command:
COMPACT.EXE /CompactOS:never
Related
How to Enable and Use File Compression on NTFS Drives in Windows 11
Store more files on your system.
With these strategies in place, you’ll be able to maintain a Windows system that makes the most of your available storage. While maximizing your storage space with these tips, don’t forget the common space-saving tips on Windows. These include deleting large files, uninstalling unused programs, and moving files to cloud storage.




Leave a Comment
Your email address will not be published. Required fields are marked *