Gboard is fast, reliable, and packed with plenty of features. While you may already be using it on your Android phone, there are some lesser-known Gboard tricks you may not know about, but should absolutely check out.
1
Use Editing Mode to Navigate and Edit Text Faster
Navigating and editing text on Android phones can be challenging, especially when dealing with multi-line messages and lengthy documents. This is where Gboard’s editing mode comes in handy.
You can think of the editing mode as a dedicated window within Gboard. It comprises multiple keys for controlling the cursor and performing various text operations, giving you precise control over navigation and making editing faster.
To use the editing mode, bring up Gboard inside any app and tap the four-square icon in the upper-left corner. Tap the Text editing tile to go into edit mode. (You can drag the tile to the toolbar at the top of the keyboard for faster access.)
From here, you can use the arrow keys to navigate the text, the Select key (in conjunction with the arrow keys) to select text snippets, and the Copy and Paste keys to copy and paste text, respectively.
2
Use Text Shortcuts for Frequently Used Words or Phrases
If you type certain words, phrases, or text snippets on your phone frequently, Gboard lets you set up their shortcuts, making them easier to type. It works similarly to the text replacement feature on iPhones, and you can create as many custom text shortcuts as you want. You can even import or export them between devices.
To create a text shortcut, bring up Gboard, tap the four-square icon, and select Settings. Now, go to Dictionary > Personal Dictionary and select your phone’s default language. Tap the + icon in the top-right corner to create a new text shortcut. Type the word or phrase you’re creating a shortcut for in the Type a word field.
Similarly, type the shortcut or trigger text in the Optional shortcut field. Hit the checkmark button on the keyboard to save the text shortcut.
Once set up, using the text shortcut is easy. Just type the shortcut in a text field, and you’ll see its expanded version in the suggestion strip at the top of your keyboard. Tap it, and Gboard will replace the shortcut with the expanded version.
3
Translate Text as You Type It
Gboard’s multilingual typing feature enables you to type text in multiple languages. But what if you need to communicate in a language that you can’t type fluently? Sure, you can use Google Translate or a third-party translation app to translate text, but it would involve a lot of copy-pasting and app-switching.
Gboard’s Google Translate integration saves you this hassle by letting you translate text as you type it. To use it, bring up Gboard. Then, hit the four-square icon and tap the Translate button. Ensure the first language bubble is set to Detect language and the second to your preferred output language.
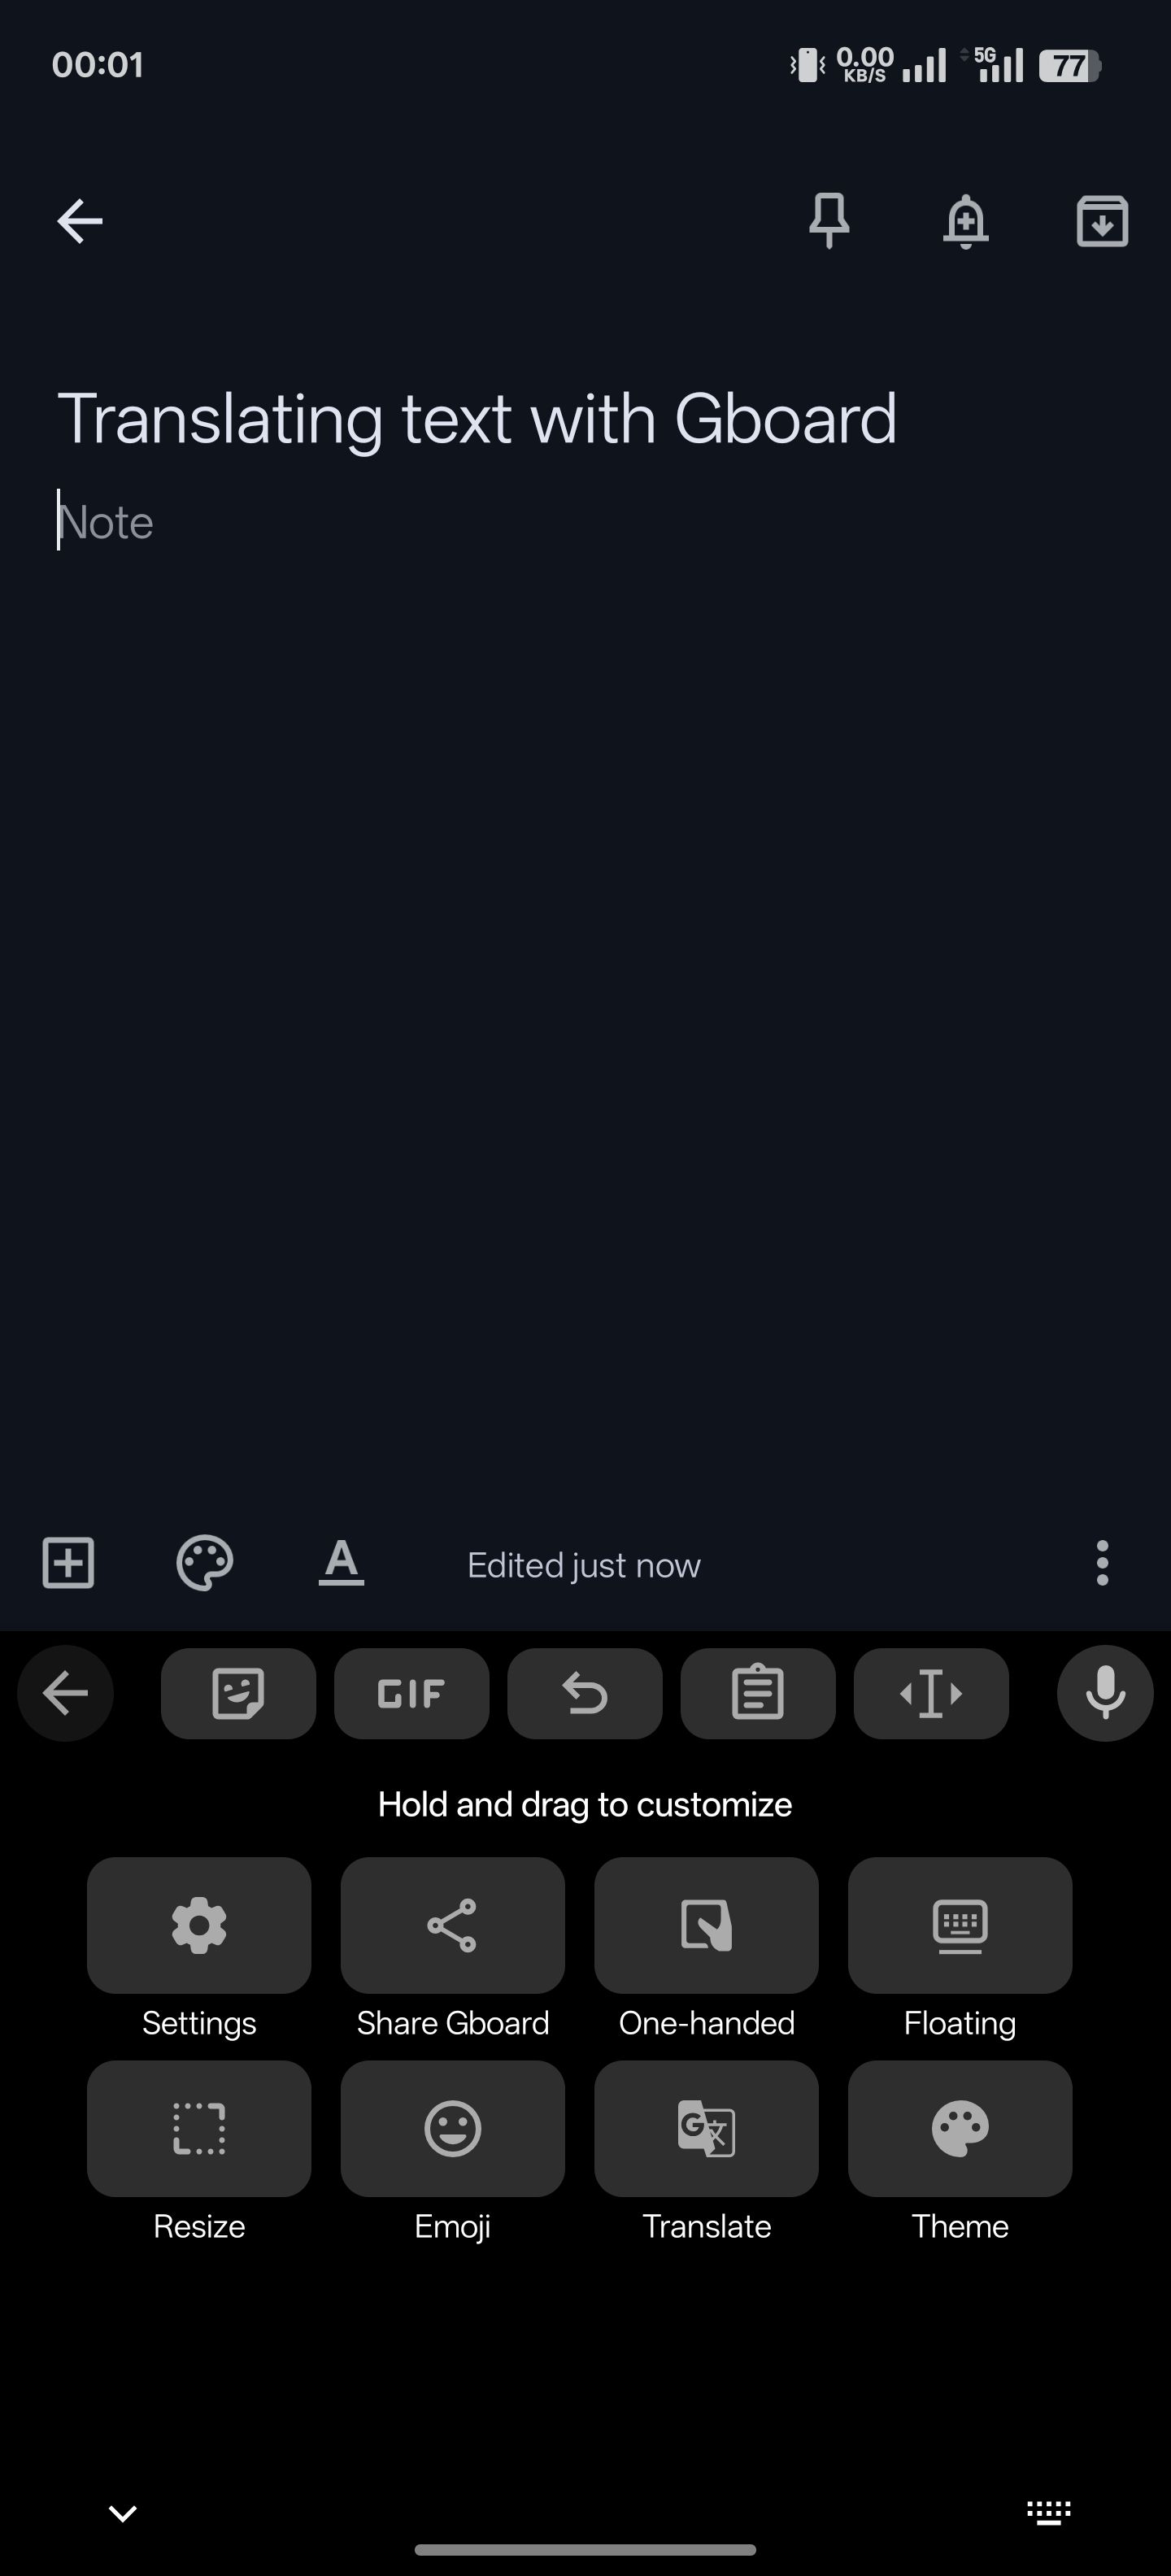
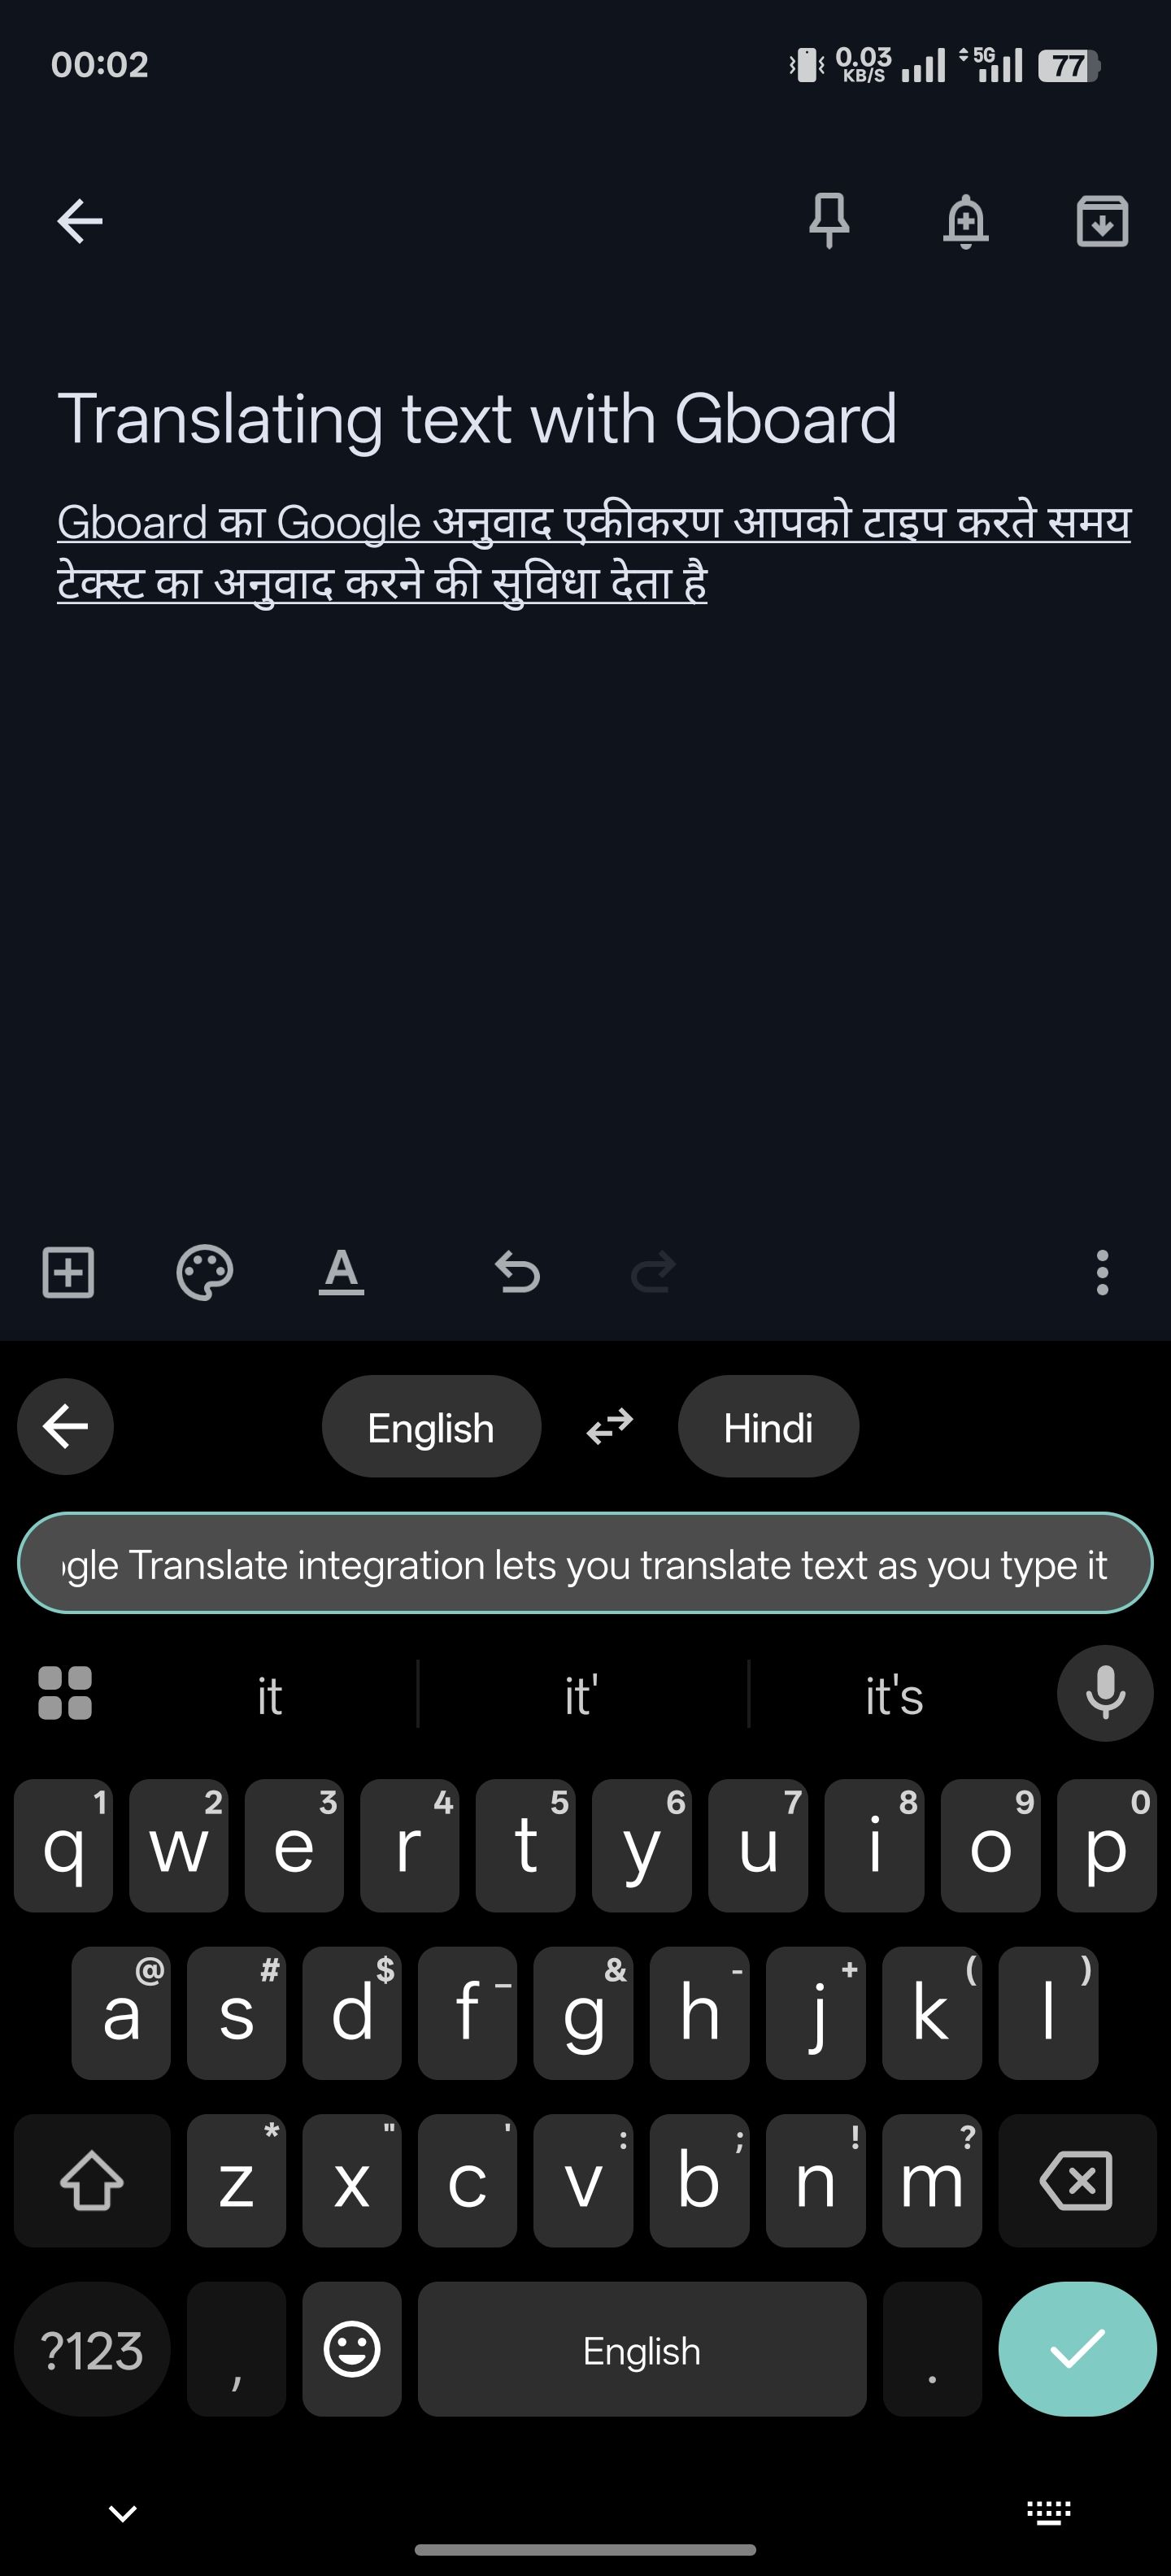
Now, start typing the text, and Gboard will translate the text and enter the translated version in the text field. Hit the checkmark button to start a new line.
4
Use the Shift Key to Quickly Switch Between Text Cases
The shift key (upward-pointing arrow) in Gboard toggles the caps lock on or off, so you can type text in your preferred case style. However, it’s easy to forget to toggle the caps lock before typing your text.
In such a situation, rather than deleting the text and typing it again in the correct case style, you can simply transform its style. To do so, tap and hold the text whose case style you want to change to select it. Then, tap the shift key on your keyboard to cycle through uppercase, lowercase, and startcase (first letter of all words capitalized) styles.
5
Share Your Most Recent Screenshot on the Fly
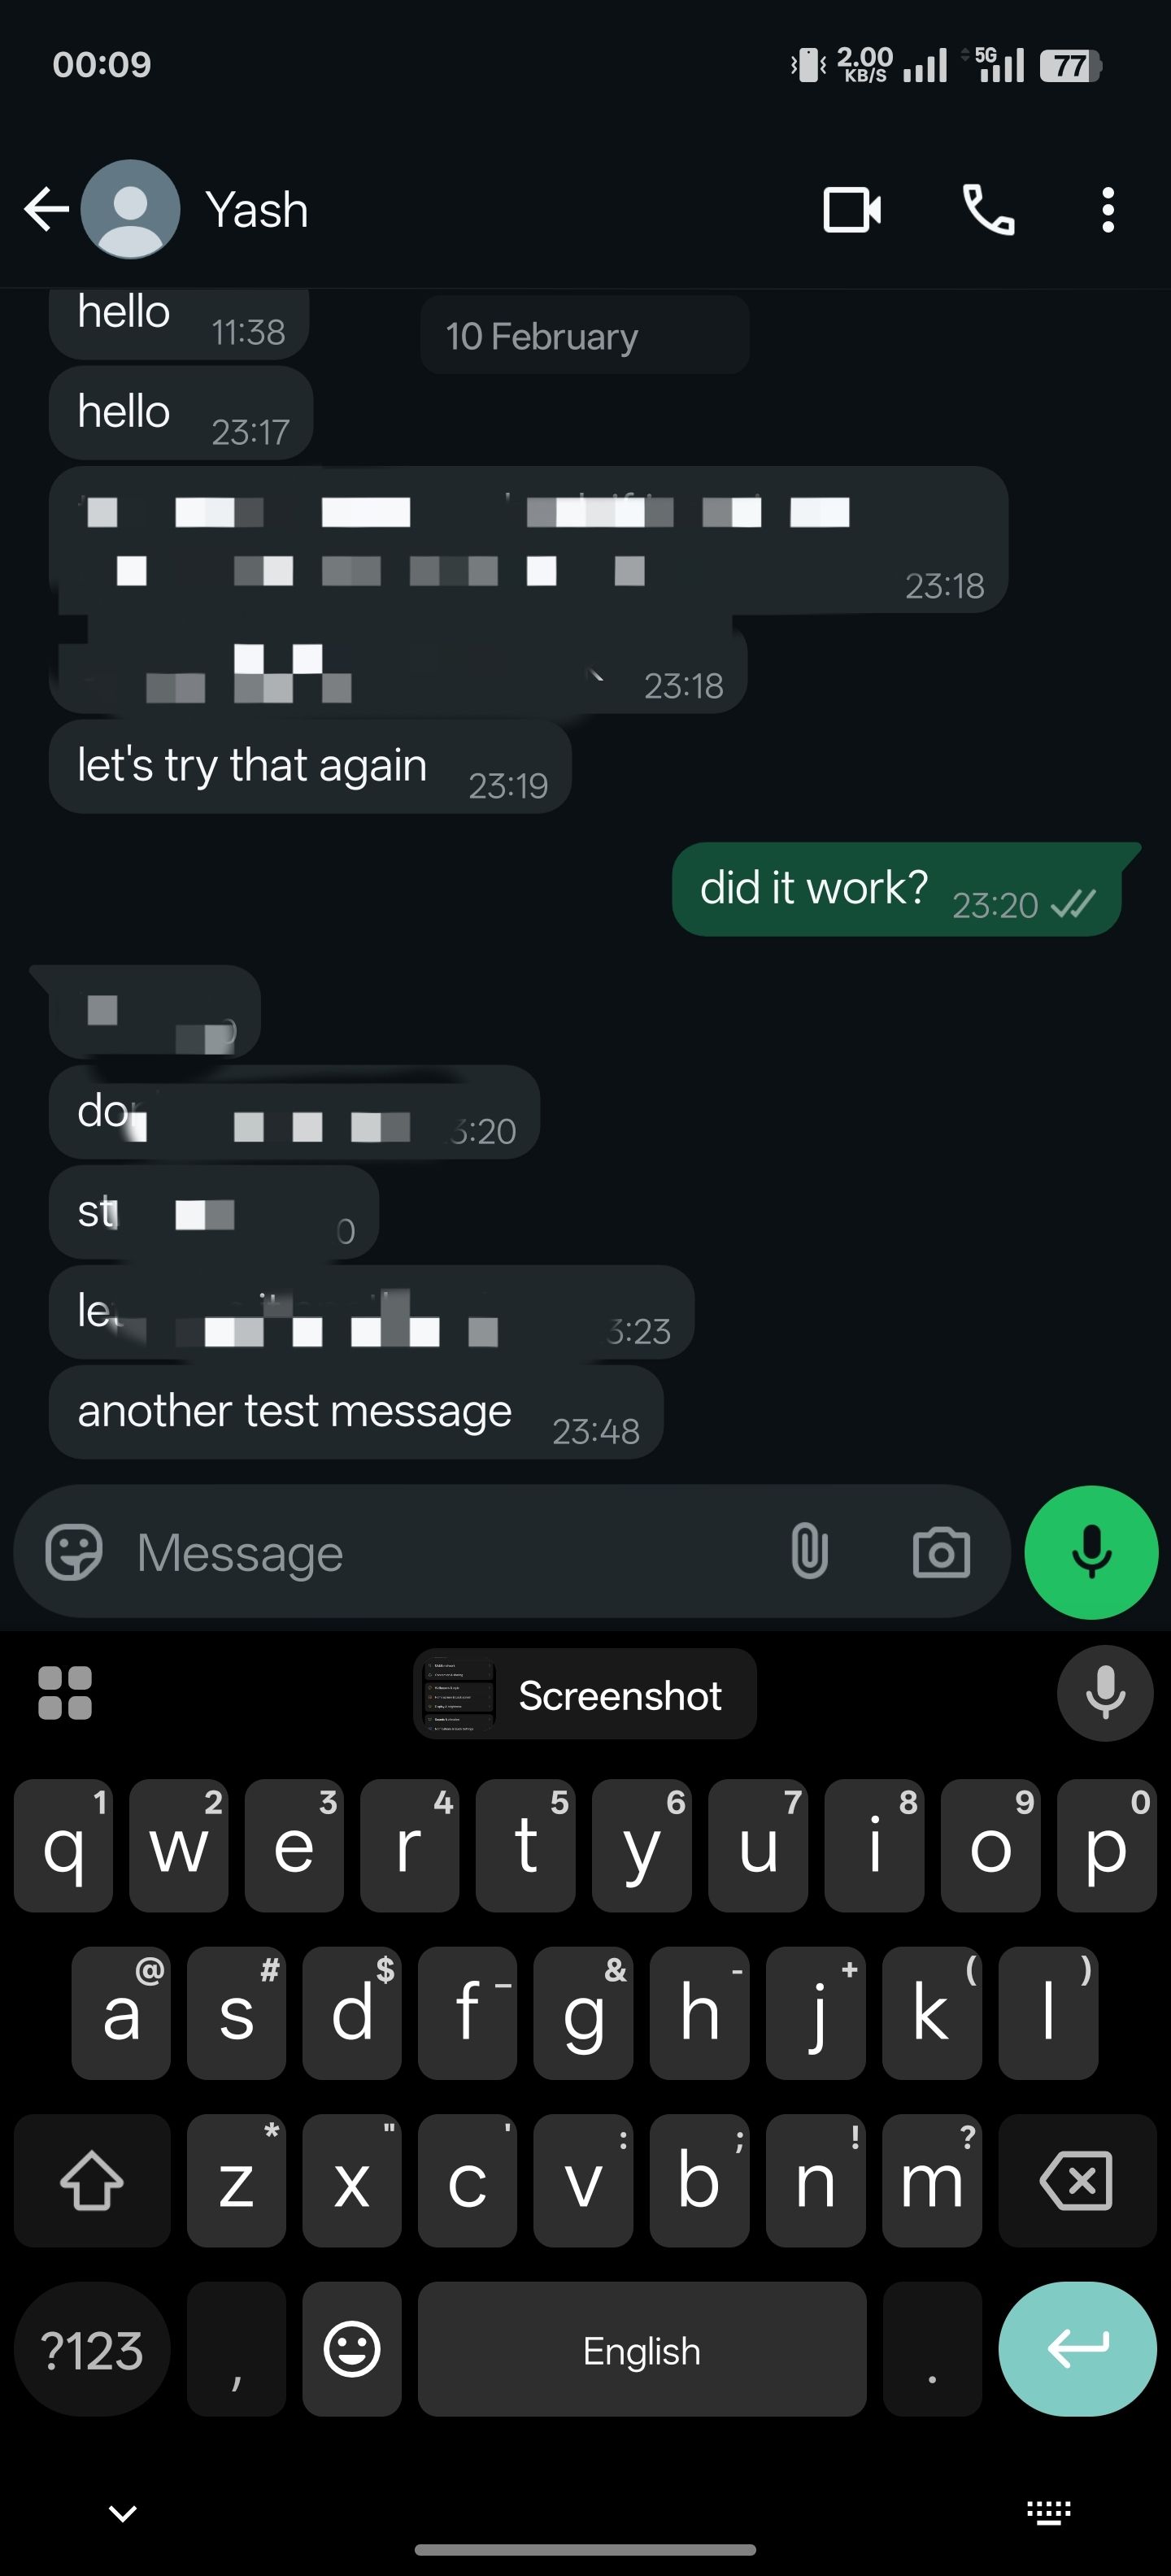
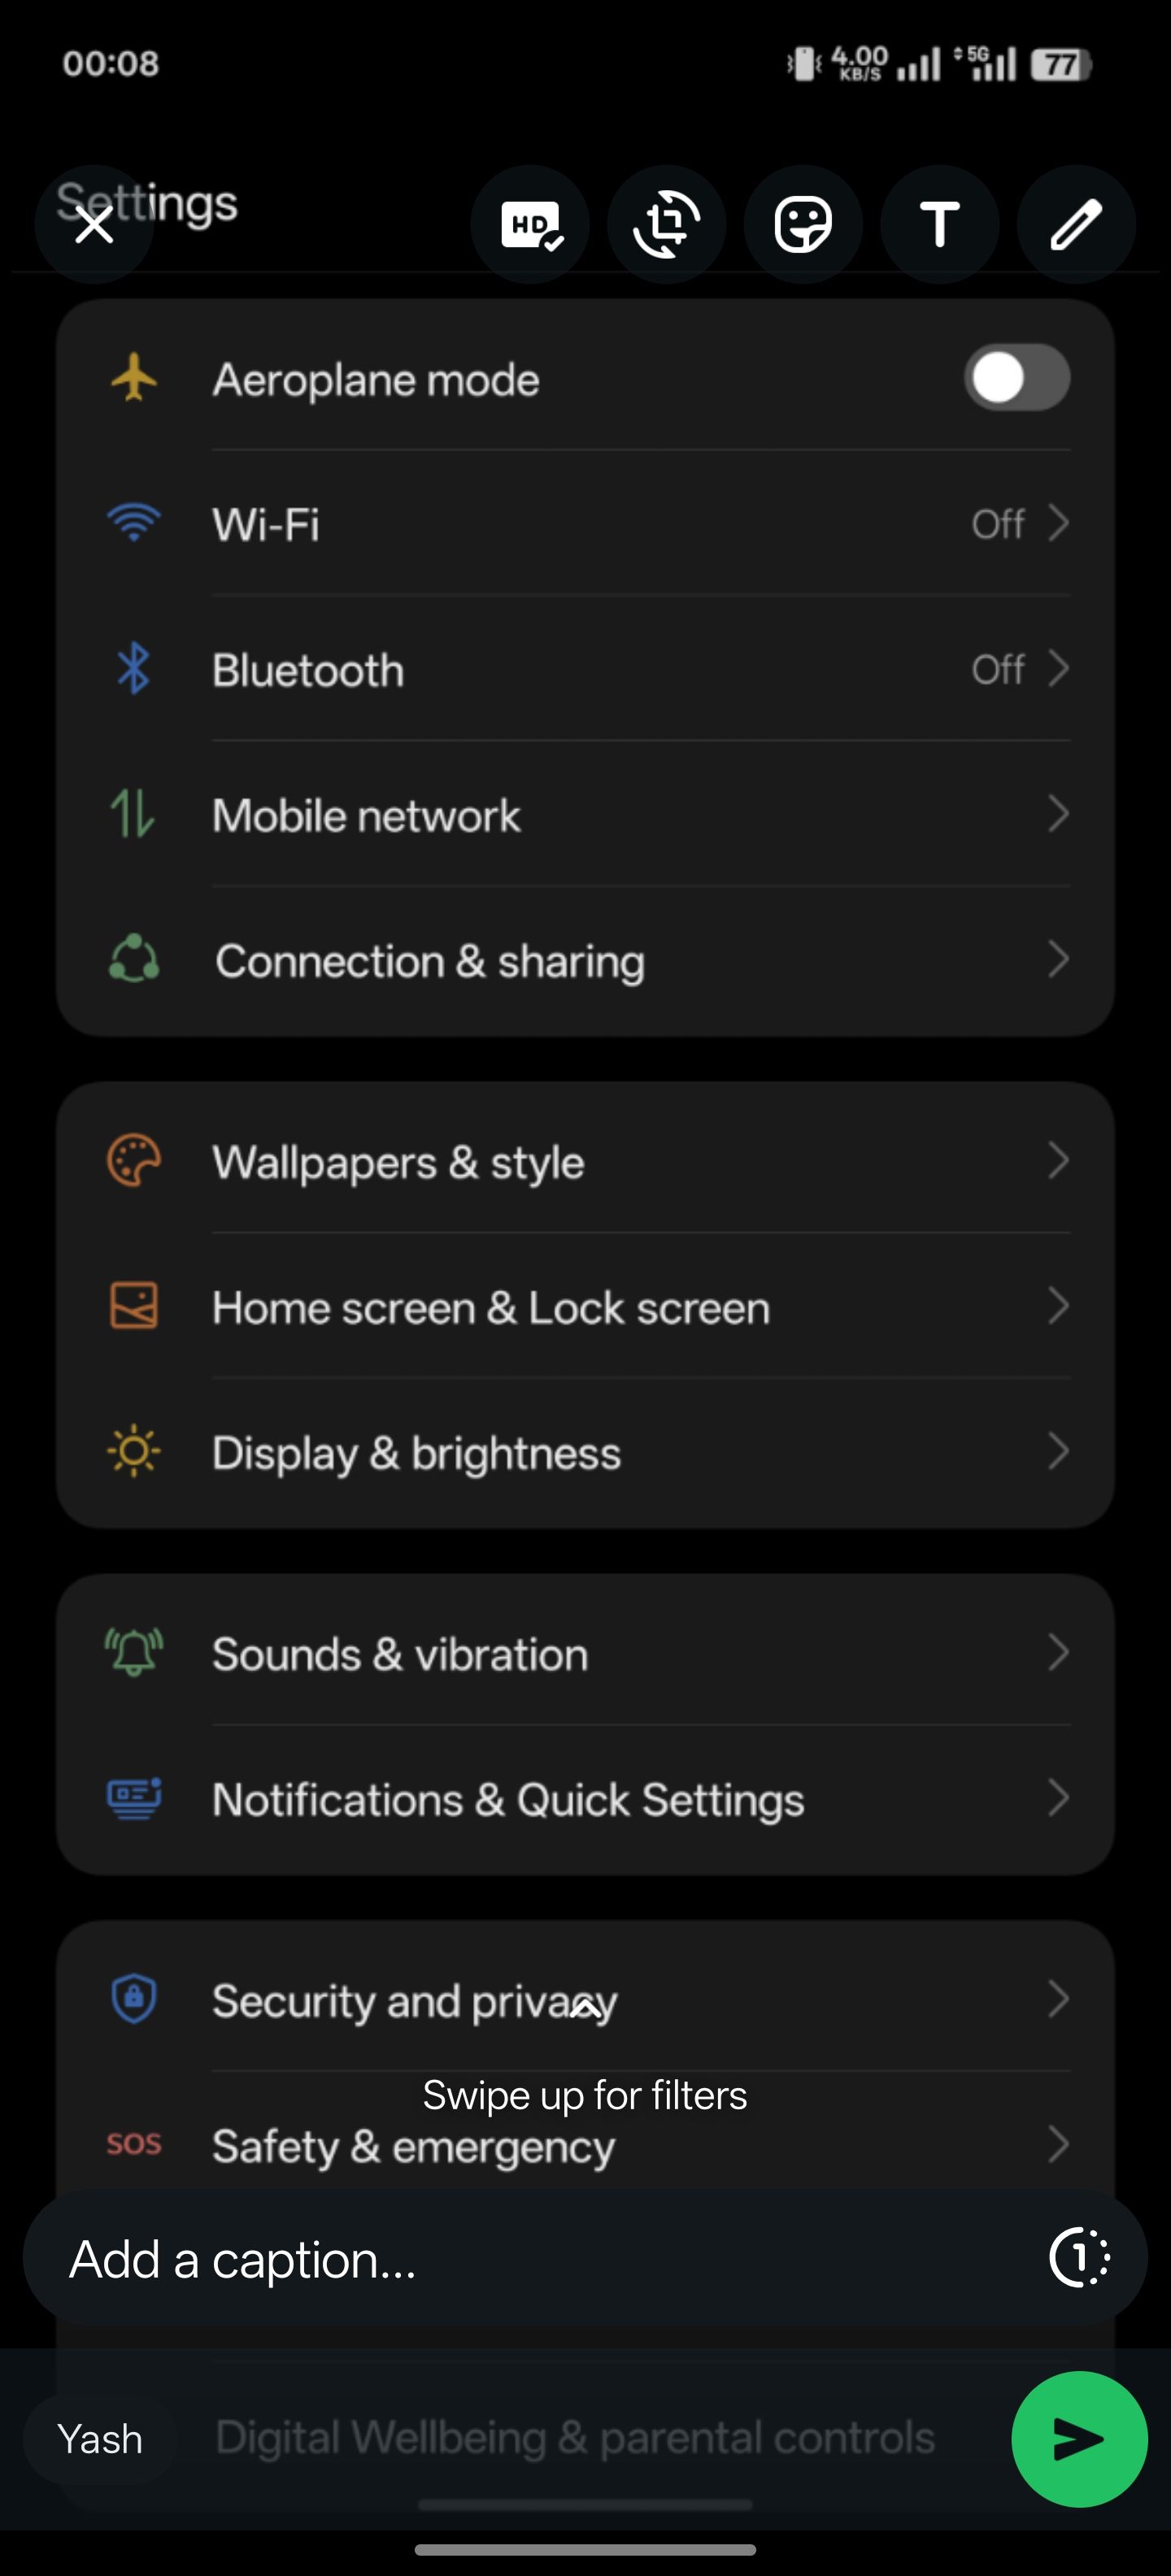
When you want to share a screenshot you just took, you’d typically tap the attachment icon in an app and select the screenshot from your gallery. But with Gboard, you can save the extra taps and share your most recent screenshot quickly.
All you need to do is tell Gboard to save screenshots to your clipboard. To do this, head into Gboard settings and select Clipboard. Toggle on the Save recent screenshots in clipboard option.
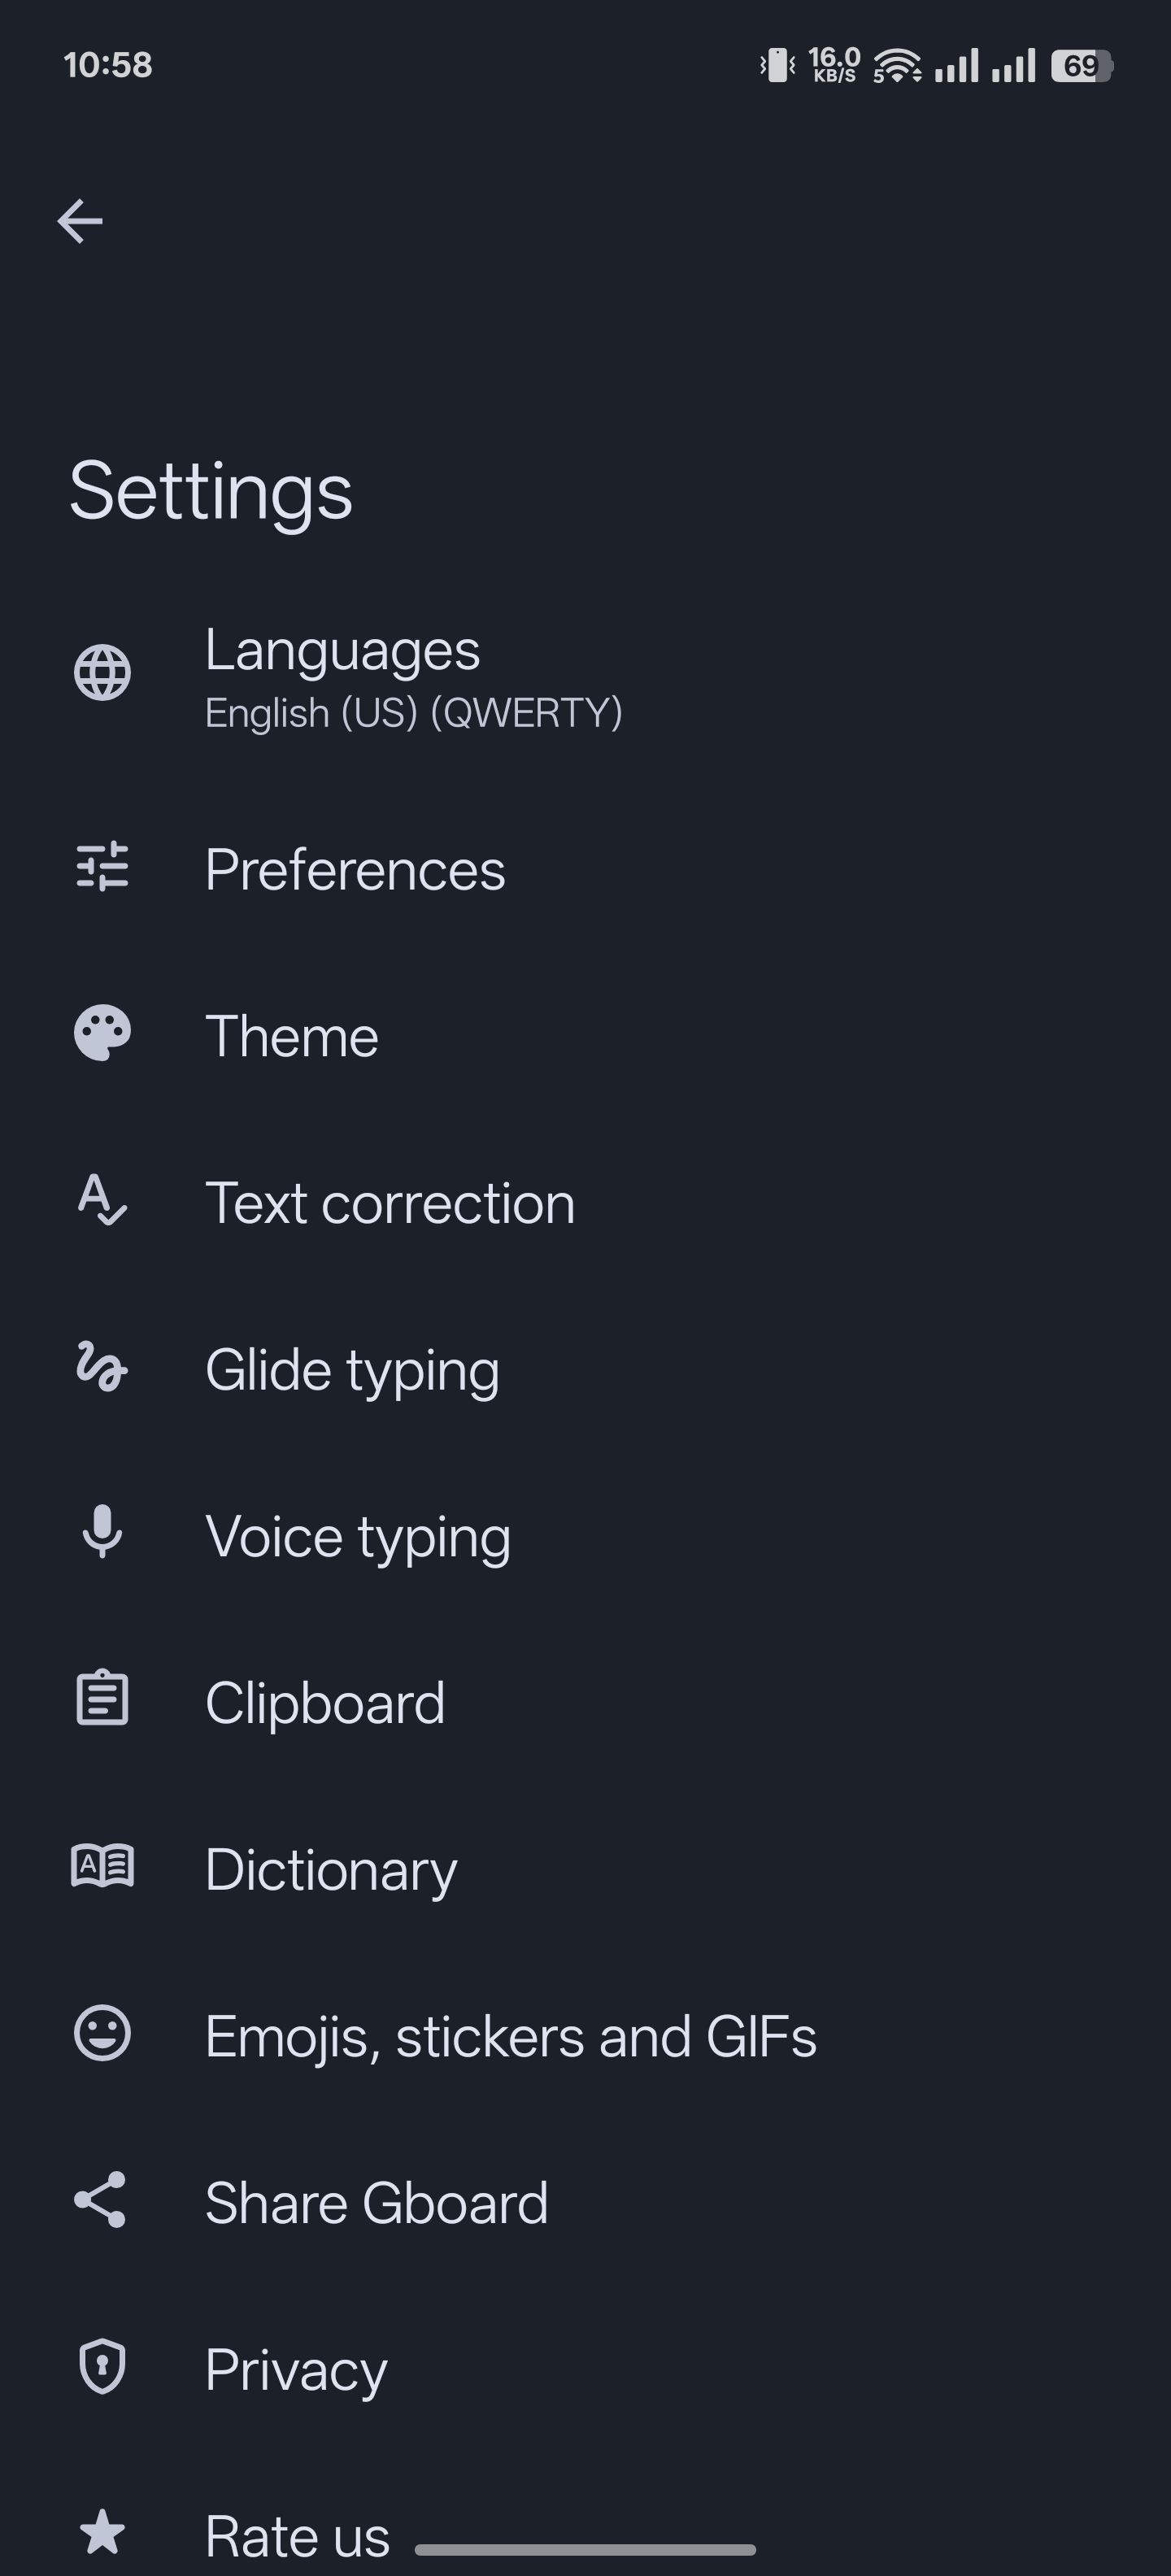
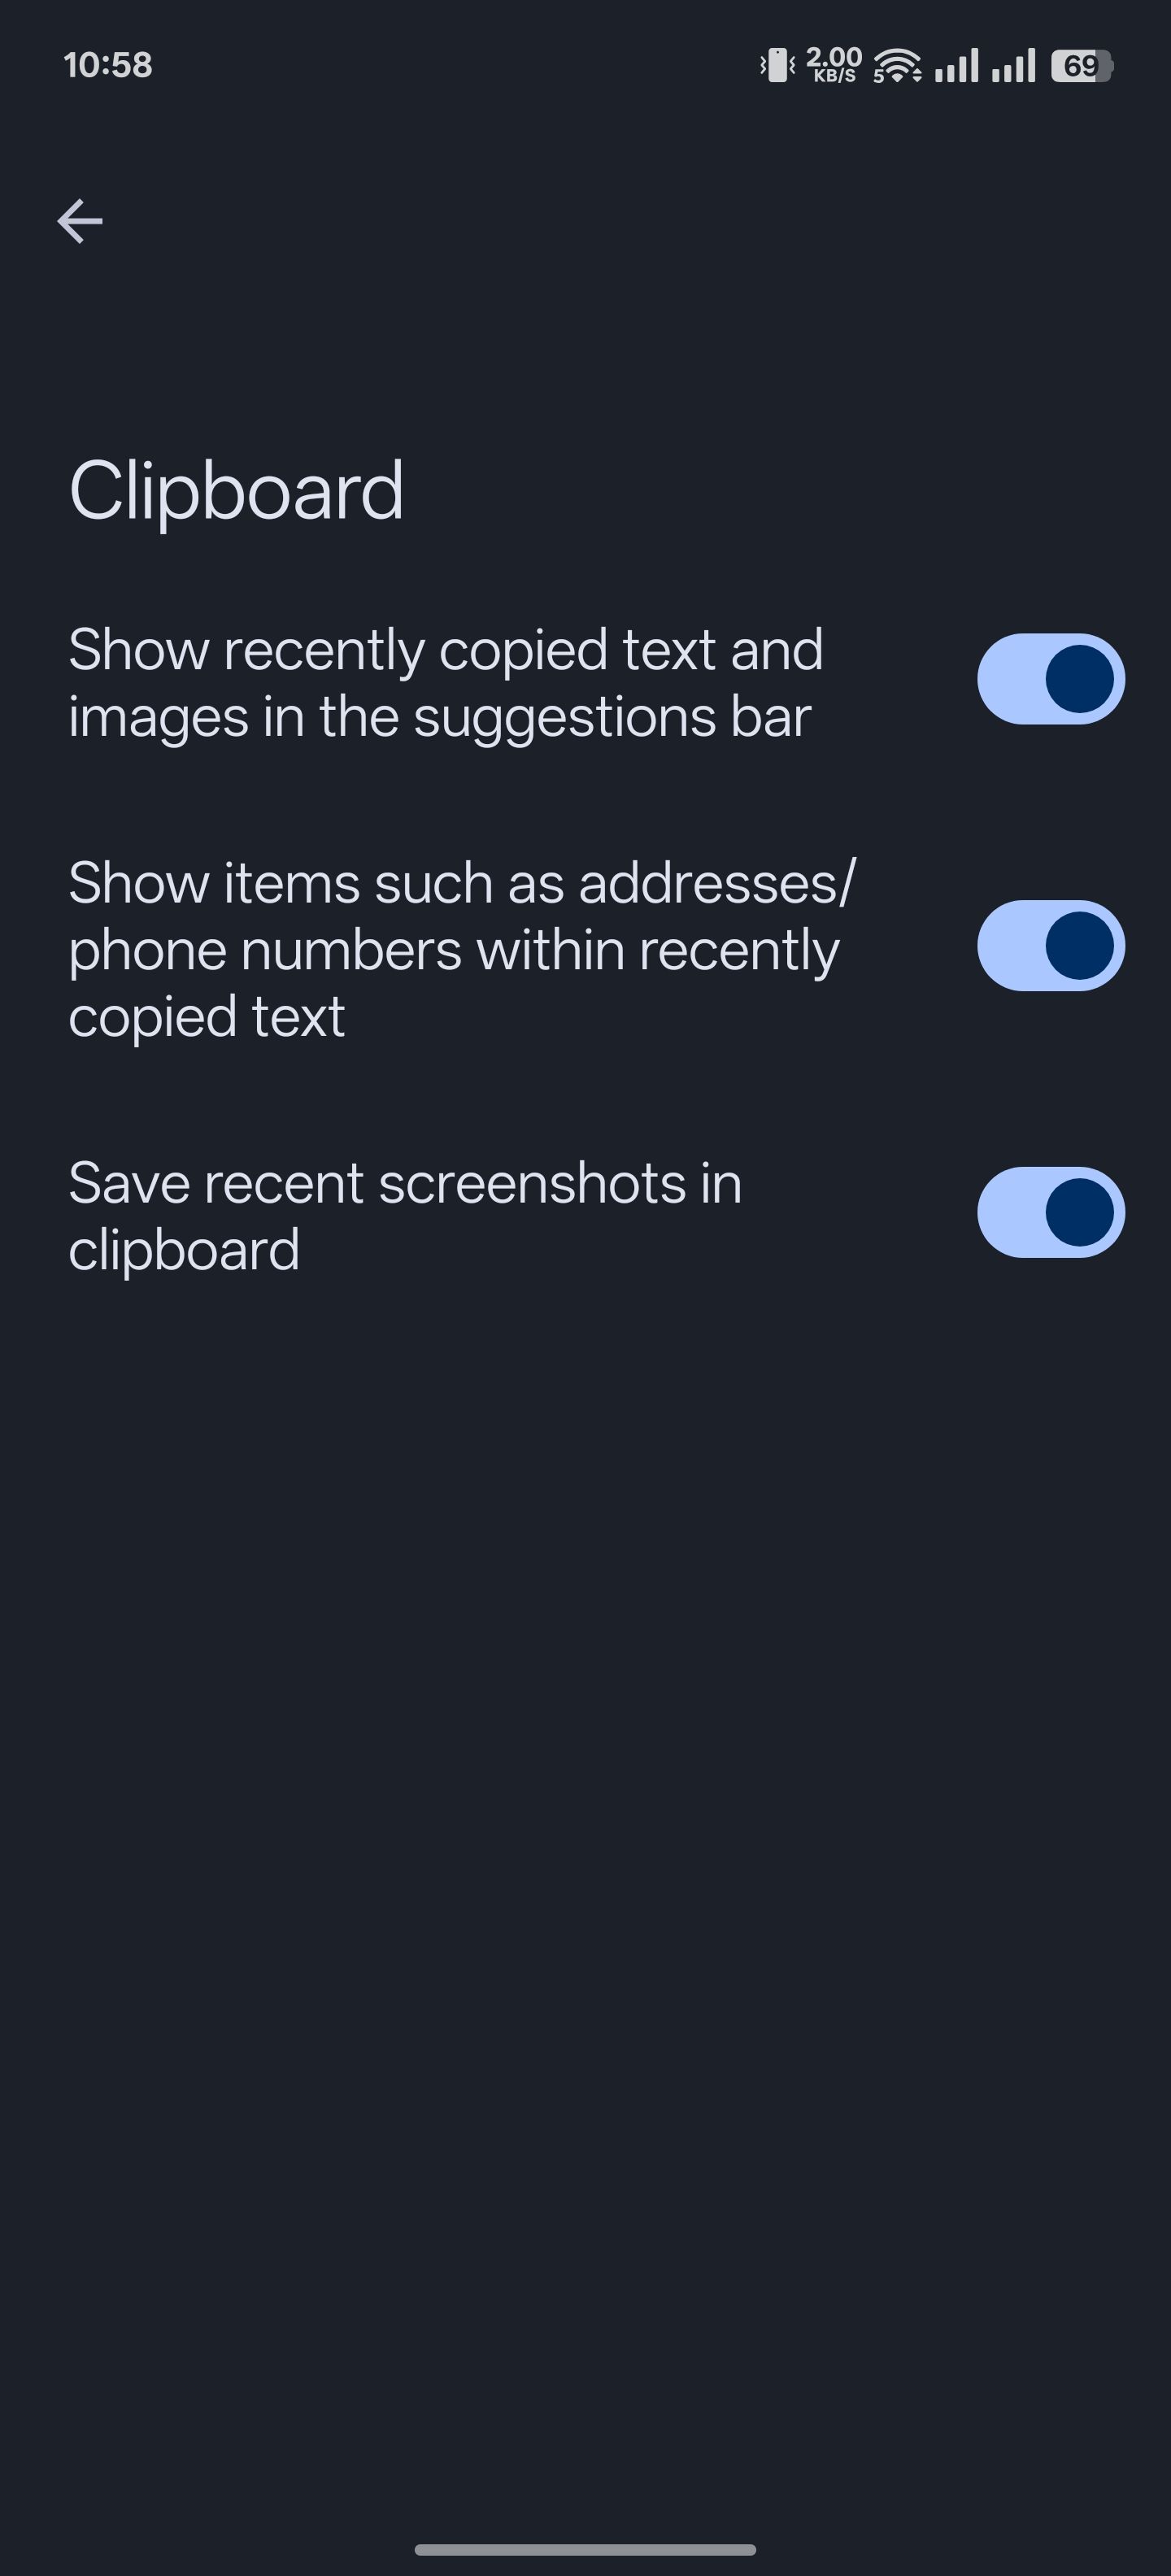
Once done, any time you take a screenshot, it’ll be saved to your clipboard. You can then bring up Gboard, and it’ll show you the screenshot’s thumbnail in the toolbar at the top. Tap the thumbnail to preview it. You can even edit it if the app supports it. Hit the send key to send the screenshot.
These tips will help you get more out of Gboard on your Android phone. While you explore them, you should also turn on some Gboard settings to improve your typing experience.
Gboard isn’t a great keyboard just for Android phones; it also works well on iPhones. In fact, I’ve replaced the default keyboard on my iPhone with Gboard, thanks to some of the features it offers.


Leave a Comment
Your email address will not be published. Required fields are marked *