Constant buffering on a movie night takes me out of immersion and ruins the overall experience. After dealing with buffer rings for quite some time now, I’ve finally decided to make a few simple changes—and my TV hasn’t buffered since.
1
Set TV With Priority Access on Router
These days, it’s common for a home network to support dozens of devices at once. Phones, laptops, tablets, game consoles, and smart devices are all online, all the time, and they’re all competing for the same network bandwidth. This is one of the most common causes why your smart TV ends up buffering despite having an adequate internet speed plan from your ISP.
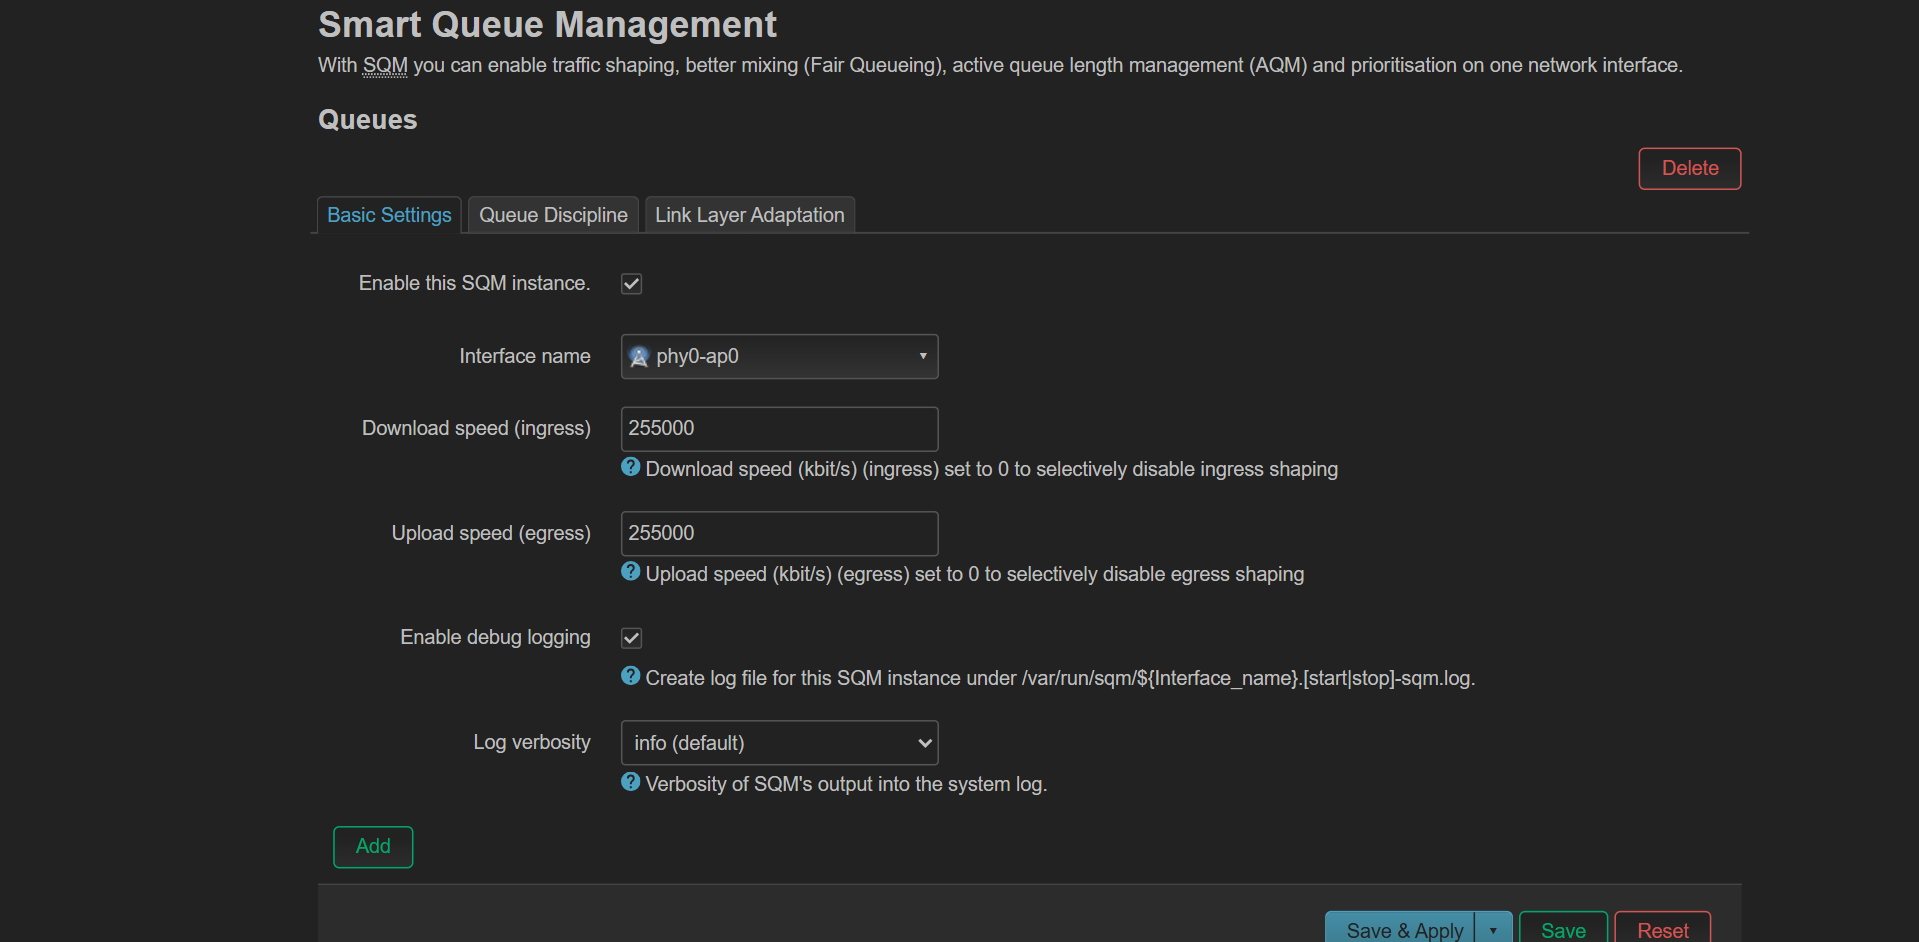
The QoS (Quality of Service) panel was one of the first things I set up to improve my network’s traffic. This tool doesn’t necessarily speed up your internet, but it does help you manage which devices get priority access to your network. This means that if you set your TV as a high-priority device, the router makes sure it gets the bandwidth it needs for smooth streaming, even if other devices are downloading large files or running video calls at the same time.
QoS can be found on your router’s admin page (typically something like 192.169.100.1 or 192.168.1.1). Depending on your router, the QoS panel may be labeled differently. My router calls it SQM (Smart Queue Management), while others may refer to it as Traffic Shaping or Bandwidth Control. In general, a QoS panel will ask for an IP Range, Priority, and Upstream and Downstream.
To use QoS, I’ve had to manually set static IP addresses for multiple of my devices, including my smart TV. I then set my smart TV’s IP address as priority “1” or high. After saving the settings and restarting the router, I noticed that my smart TV is now playing at full resolution even at peak hours.
2
Optimize Stream Quality Settings
Just because your TV or streaming app offers 4K Ultra HD doesn’t mean your internet or your smart TV can handle it. If your network can’t deliver enough bandwidth, you’ll end up with buffering and stuttering instead of smooth playback. It’s also worth checking your TV’s specs: if it can’t display true 4K HDR, you’re wasting bandwidth if you’ve set your stream quality to max.
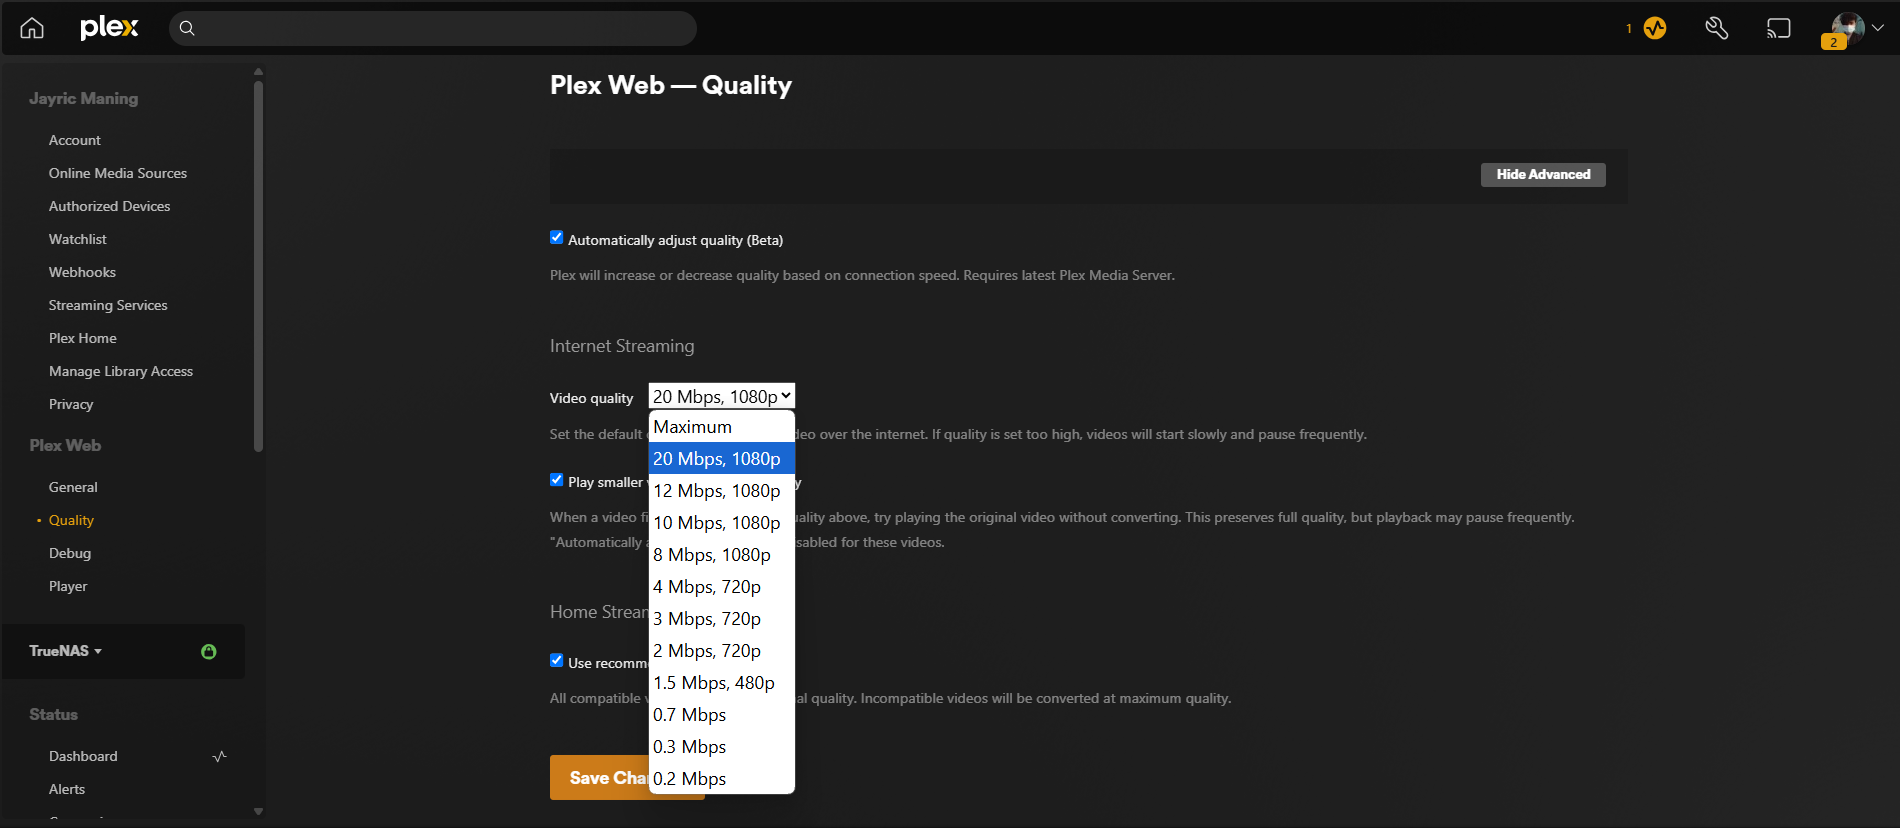
Since I mainly use Plex and YouTube Premium for streaming, I focused on adjusting the quality settings in these apps. For Plex, I opened the app’s settings and enabled Automatically Adjust Quality. This feature lets Plex start playback at your preferred settings and then automatically adjust the video quality based on your current connection speed.
4K live streams are becoming more common, but that doesn’t always mean they’re the best choice. If your network can’t handle 4K streams at low latencies, it’s often better to set your quality to QHD (1440p) or HD (1080p). For live content, a bit of delay might be acceptable, but when the stream starts lagging by several seconds or more, lowering the resolution can make a big difference. Smooth, timely playback at a slightly lower resolution beats a 4K stream that’s always freezing or lagging behind.
Lowering stream quality isn’t just about smoother playbacks—it’s also about keeping live streams responsive and in sync. I would rather have uninterrupted streams at a lower resolution than struggling to watch 4K content that constantly buffers or stutters.
3
Switch Wi-Fi Frequency Band
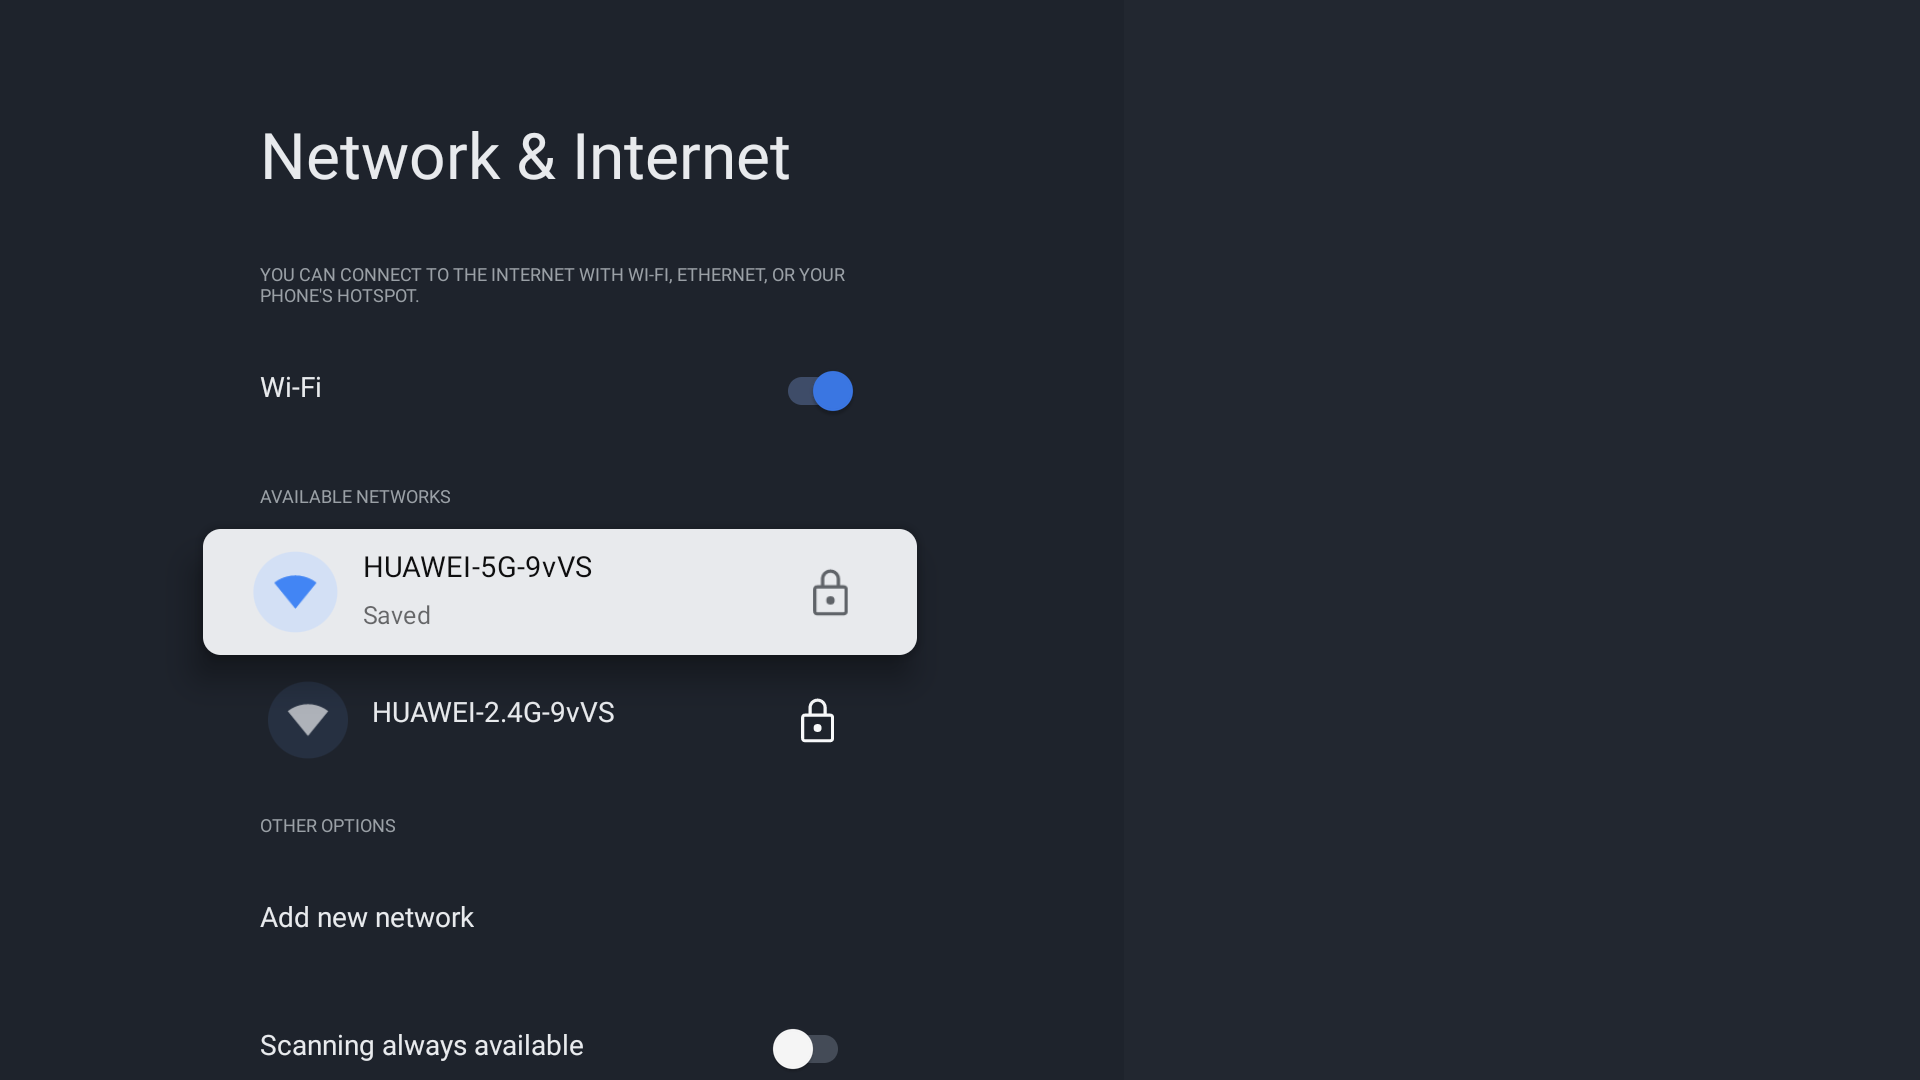
There are different ways you can prioritize your streaming device on Wi-Fi. One of the easiest ways is to switch your connection from the 2.4GHz to the 5 GHz frequency band. A 2.4GHz band offers longer range but provides a slower connection, while a 5GHz band is faster but has shorter range.
Since my smart TV sits in the same room as my router, I switched it to the 5GHz band. This allows my device to load streams faster without worrying about signal strength. If your TV is farther away or separated by a few walls, you may want to place your Wi-Fi access point closer or get a Wi-Fi repeater or even a mesh system to fully cover your space with the faster 5GHz band.
4
Clear the TV and App Cache
Smart TVs are basically small computers with big screens, and like any computer, they collect digital clutter over time. This clutter is called cache, and it can slow your TV’s processor, which can lead to buffering.
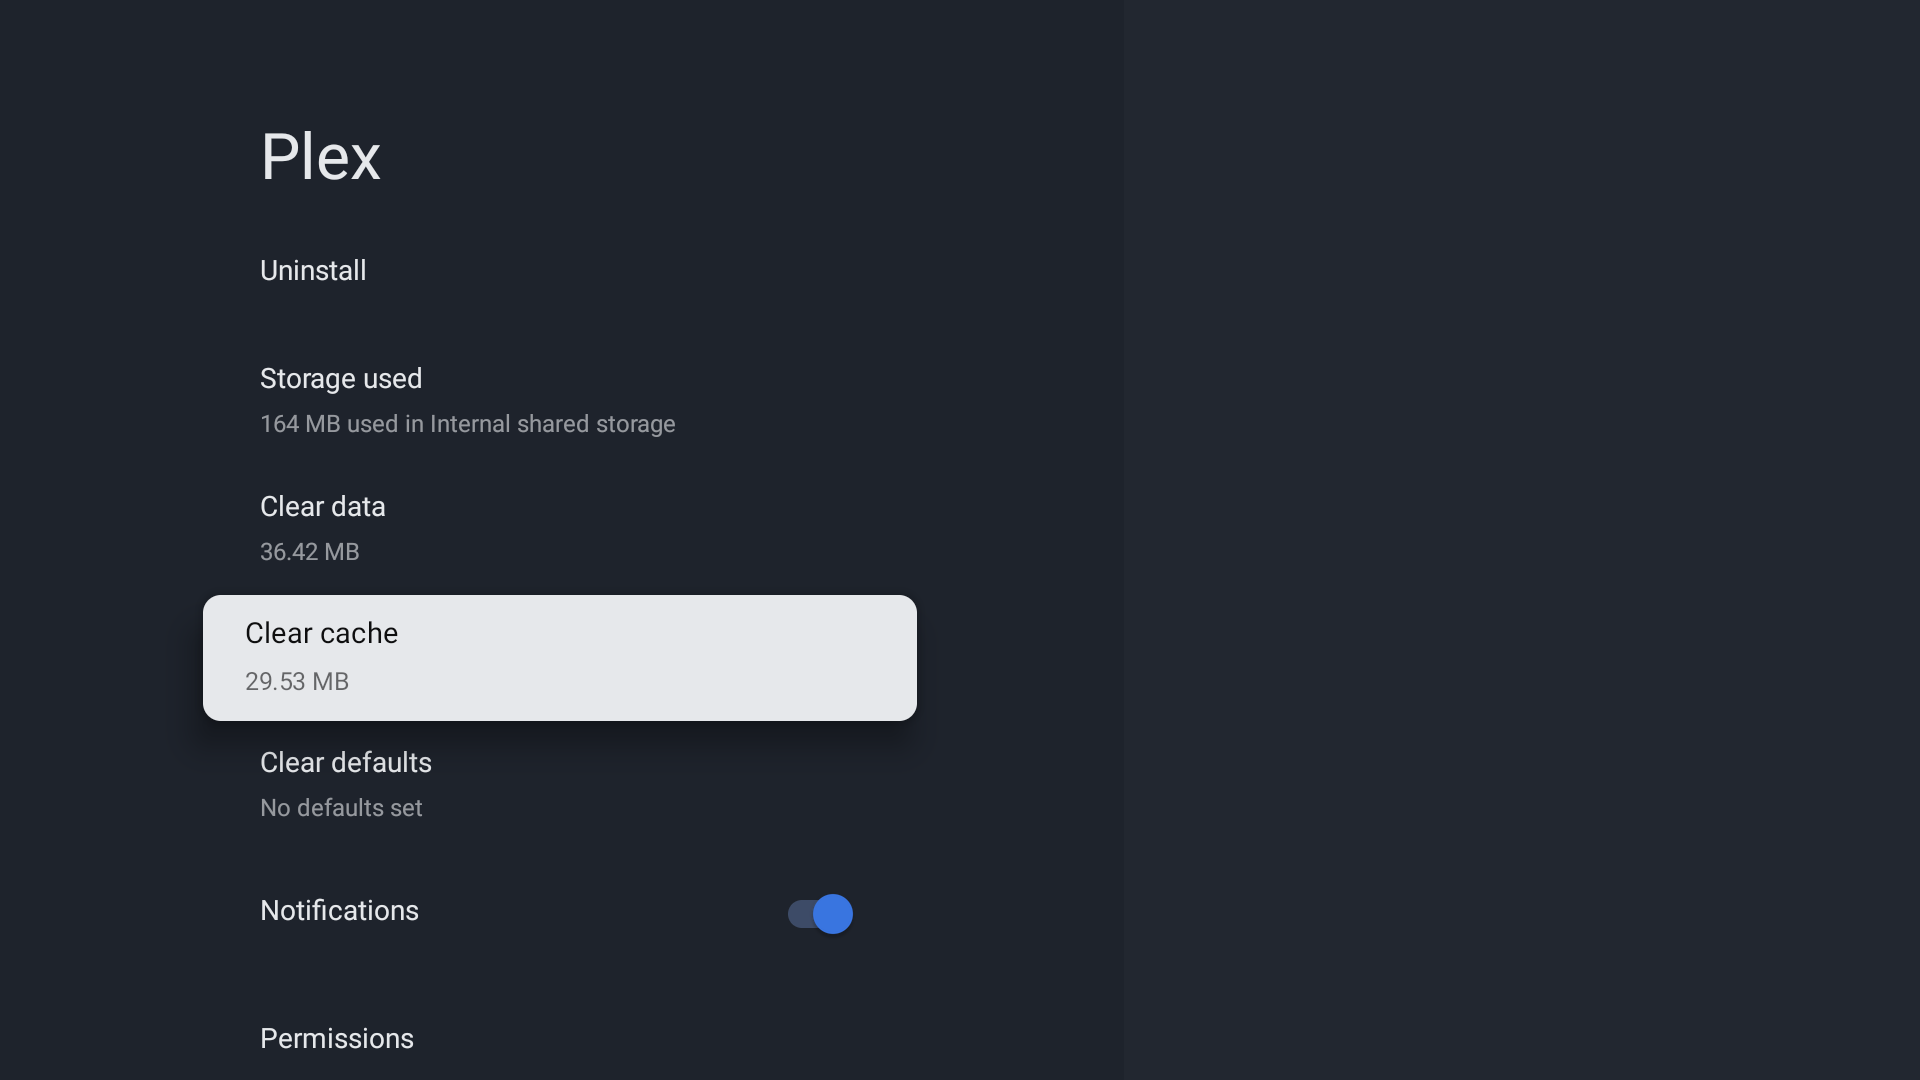
I make it a habit to clear the cache on my TV and streaming apps every month or so. On most TVs, you’ll find this option in the Settings menu under Apps or Applications. Select the app, hit Clear Cache, and you’re done. If your TV doesn’t offer this, uninstalling and reinstalling apps works just as well.
Clearing the cache on older TVs, or any unit with fewer hardware resources, really makes a difference in terms of performance and the overall experience.
5
Change DNS Settings
DNS (Domain Name System) servers are responsible for translating domain names, such as makeuseof.com, into the IP addresses your smart TV uses to connect to streaming services. By default, most TVs use the DNS servers provided by your internet service provider (ISP), but these aren’t always the fastest or most reliable options. Slow or overloaded DNS servers can introduce delays when your TV tries to access streaming apps, resulting in longer load times and more frequent buffering.
You can switch your device’s DNS to a public server. Google DNS (8.8.8.8 and 8.8.4.4) or Cloudflare DNS (1.1.1.1 and 1.0.0.1) are both great choices. To do this, I went to my TV’s network settings, chose Manual DNS, and entered the numbers.
If your TV doesn’t allow you to change DNS settings directly, you can also set custom DNS servers on your router. This way, every device on your home network will use the new DNS servers automatically. Just keep in mind that some ISP-provided routers may restrict access to DNS settings; in these cases, consider adding your own router for more control.
6
Adjust Playback Buffer Settings
Not every TV or app has this option, but if yours does, it’s worth tweaking. Playback buffer settings control how much video your TV preloads content before it starts playing. By increasing the buffer, you give your TV a longer time to load new content, which lessens buffer time while you watch a movie.
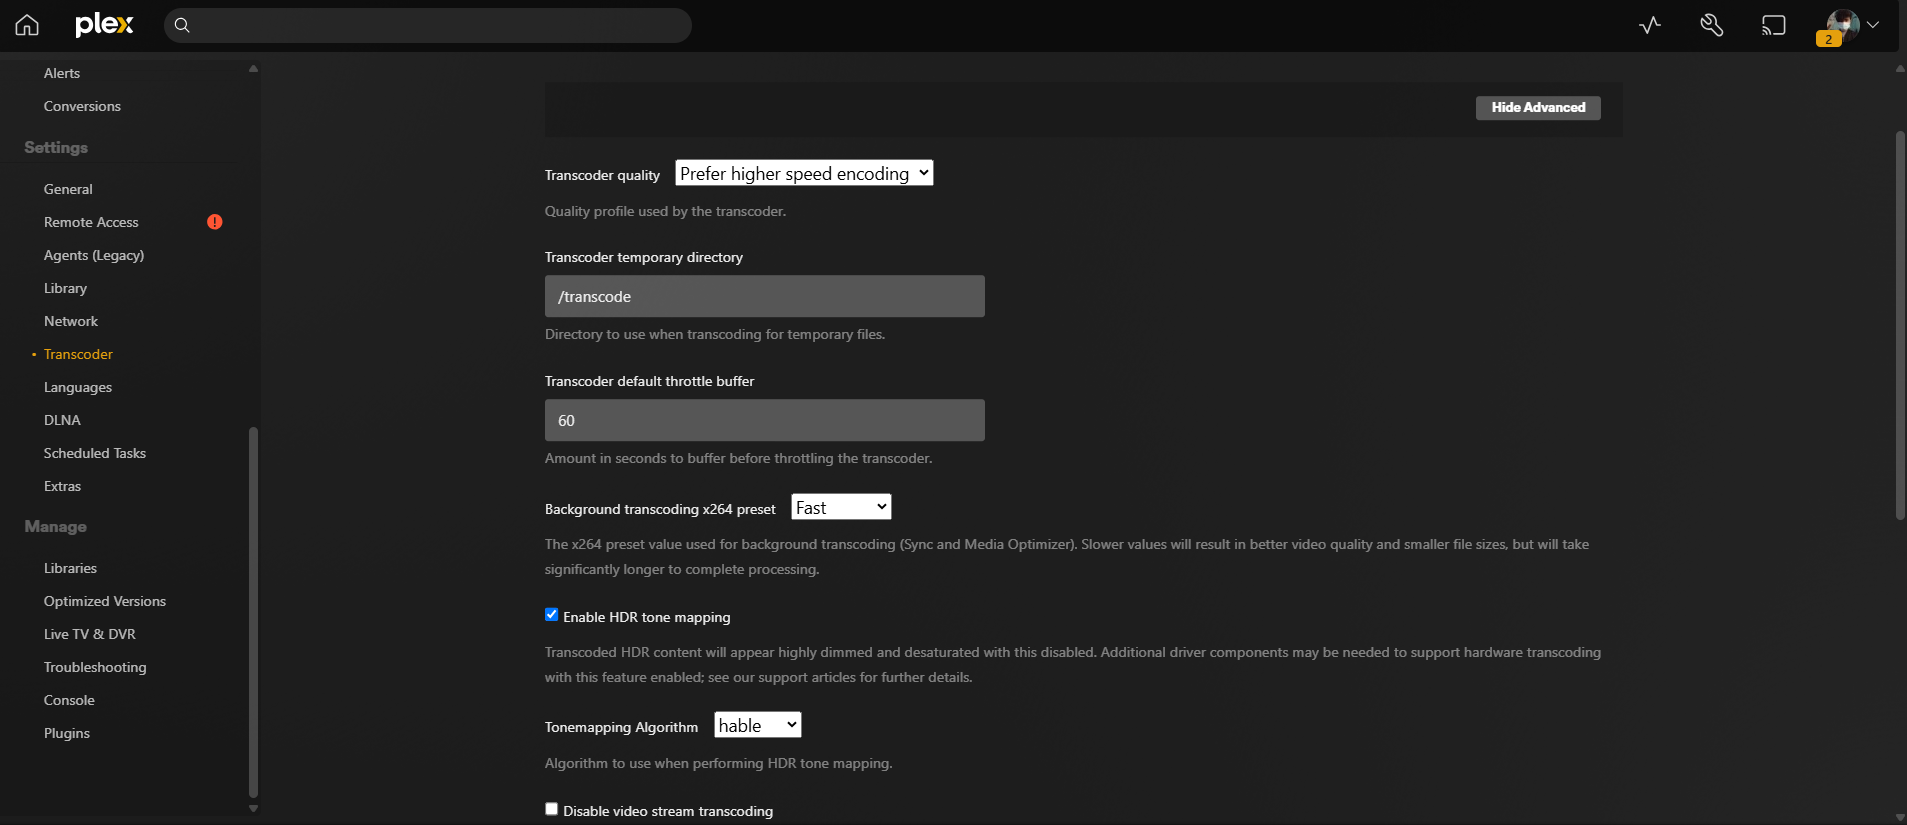
Since I’m hosting my own server, I needed to adjust the transcode buffer, which is essentially a playback buffer on the server side. I’ve set the buffer quality to Fast and the buffer size to 60 seconds, providing a minute’s worth of preloaded content. This setup helps prevent 4K content from stuttering during movie playback. Although it slightly increases the initial loading time, I’ve found that my smart TV experiences smoother playback throughout the entire movie.
Buffering used to be a constant headache while I watched movies on my smart TV, but with a few adjustments and a better understanding of how my network and apps work, streaming finally feels a lot smoother. If you’re still seeing those ring buffers on your screen, try making some of these changes on your device and see the difference for yourself.




:max_bytes(150000):strip_icc()/twoku-twtich-roku-app-2053432b763a40d788ef726974d9ed2a.png?w=1174&resize=1174,862&ssl=1)

Leave a Comment
Your email address will not be published. Required fields are marked *