Great photos aren’t just about pointing and shooting. If you own a Samsung phone, you’ve got a hidden treasure trove of camera tricks waiting to unlock your creativity.
7
Use Shot Suggestions for Better Framing
Shot Suggestions is a smart AI tool that acts like a built-in photography guide. It analyzes your scene in real-time using object and scene recognition, and then suggests the best way to frame your photo.
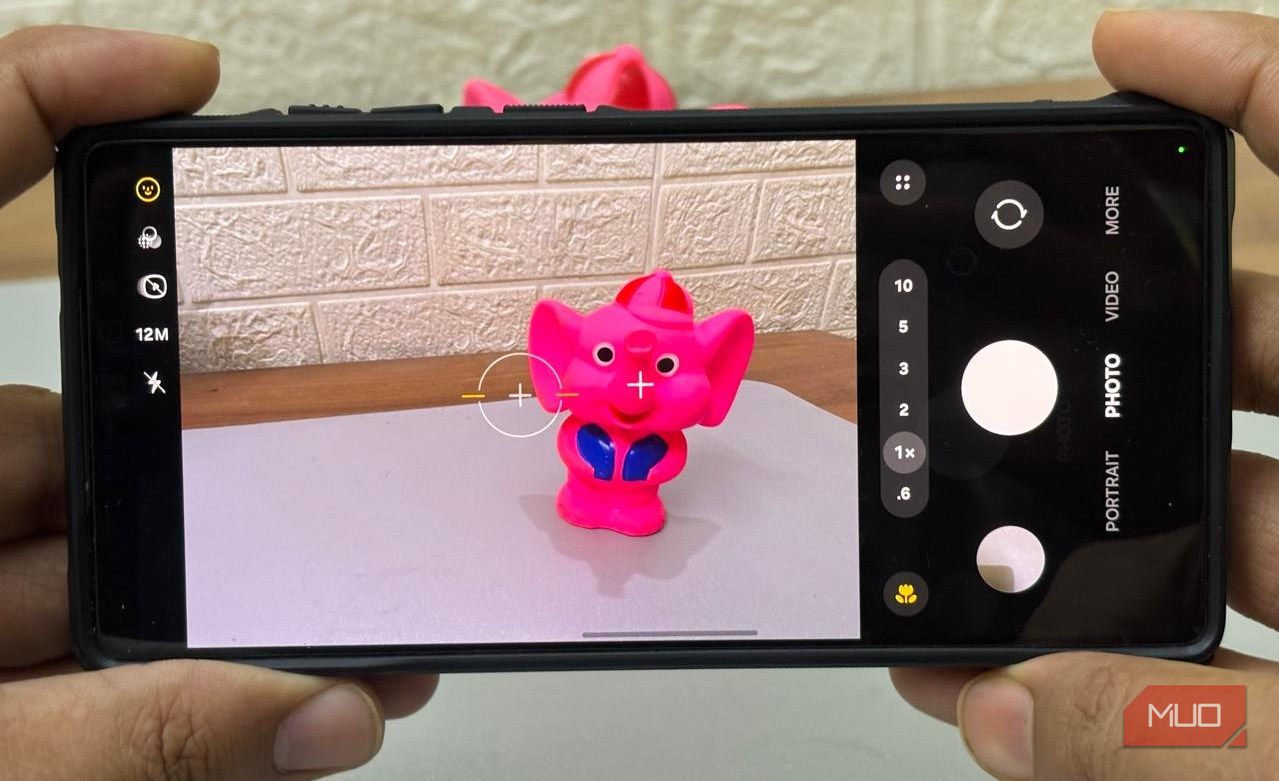
As you aim your camera, a small target appears on the screen, guiding you to tilt or adjust your angle, so your photo looks more balanced, professional, and visually appealing. The target moves as you reposition your camera, and when everything lines up correctly, it turns yellow to confirm you’ve found the ideal composition.
To use this feature, open the Camera app and tap on the settings icon. In the Settings menu, find Shot Suggestions and toggle it on.
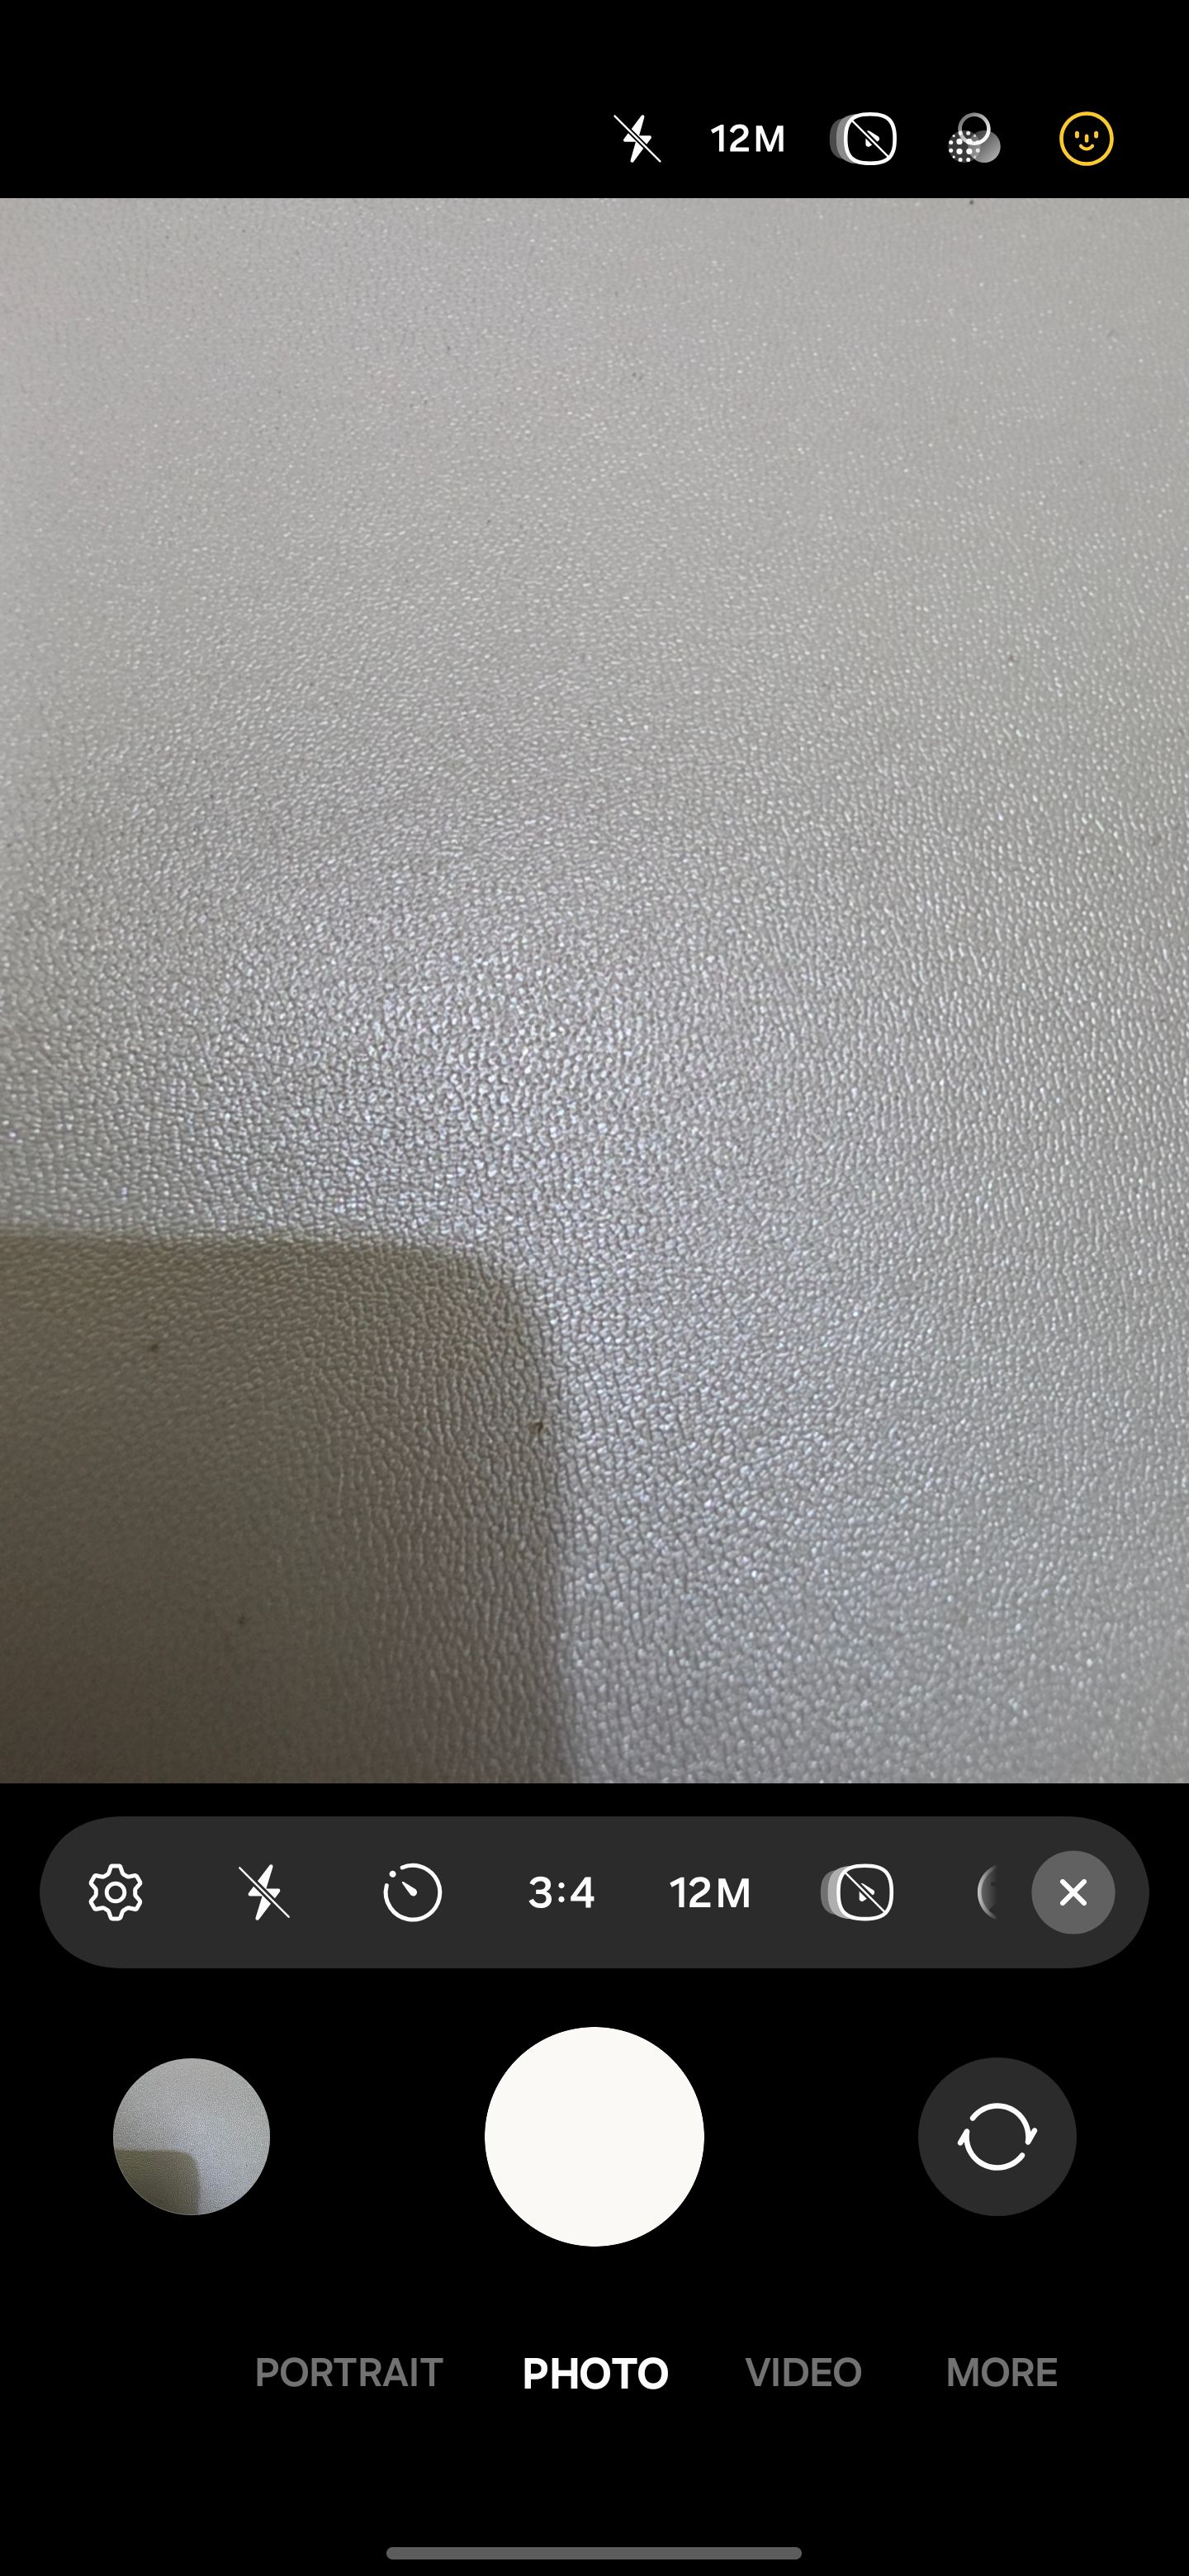
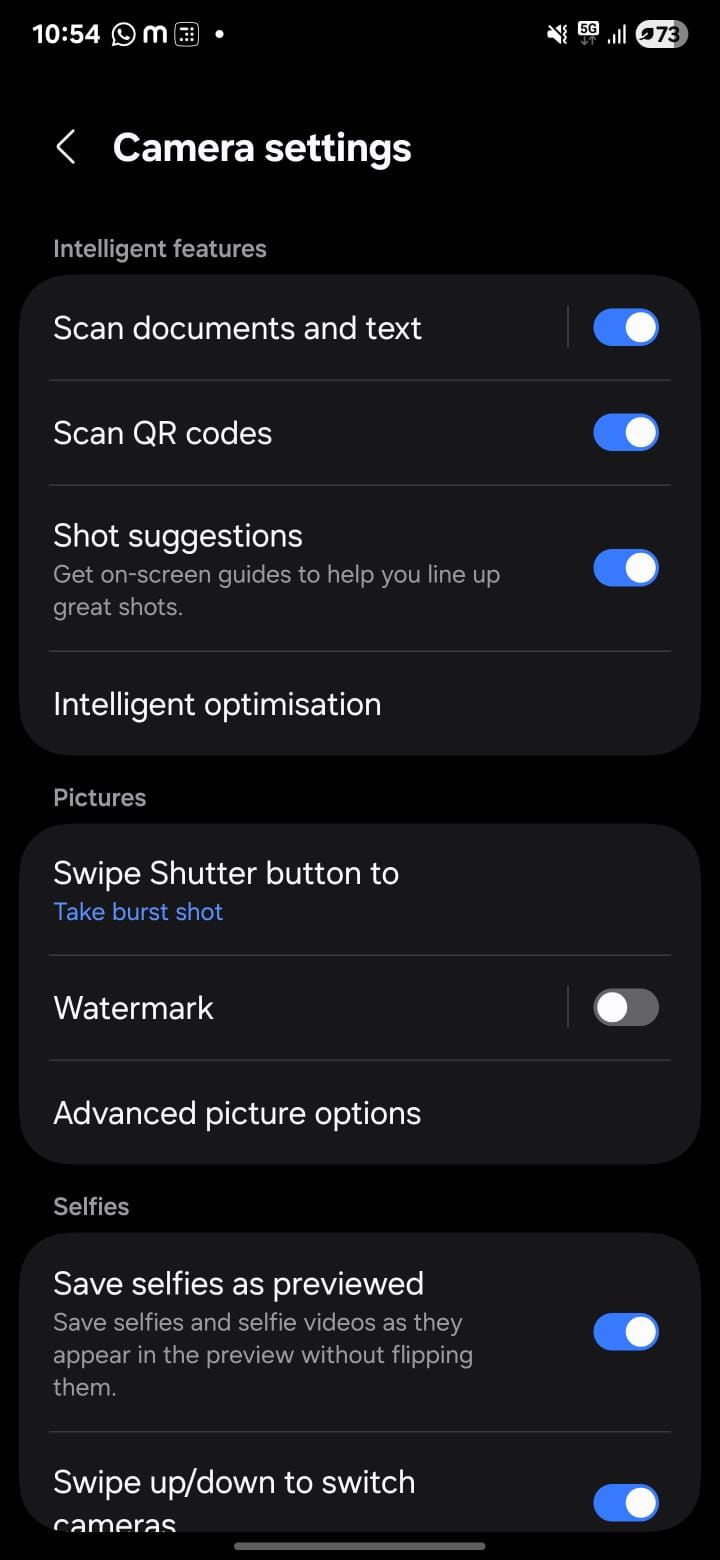
Once activated, it works automatically every time you open the camera. When you point at a subject, you’ll see a small circle or target on the screen that helps you find the best framing.
If your phone isn’t aligned correctly, the target will guide you to adjust or tilt until it turns yellow. And when it does, tap the shutter button to snap the shot. This way, Shot Suggestions takes the guesswork out of photography, and you don’t have to be a pro to capture amazing pictures.
6
Turn on Grid Lines for Perfect Composition
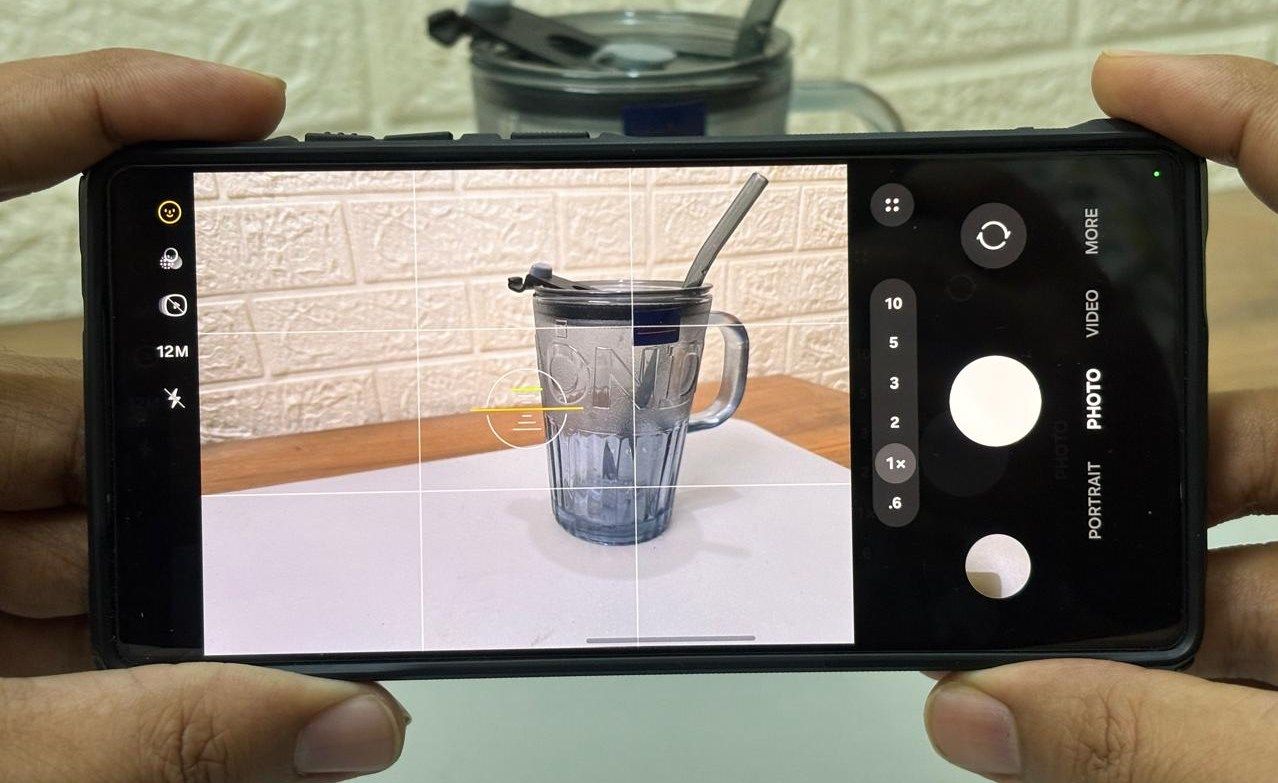
Another feature you can use to improve your photography skills is Grid Lines. Just turn them on in your camera settings, and they will divide your screen into nine equal rectangles with two horizontal and two vertical lines. These lines are not just for esthetics; they act as a visual guide to help you apply the Rule of Thirds, one of the most fundamental principles in photography.
The Rule of Thirds suggests positioning your subject along grid lines or at their intersection points. This technique creates a more visually balanced composition rather than centering everything directly in the frame. It also incorporates negative space (or white space), which gives your pictures more depth and impact.
To turn on Grid Lines, open the Camera app and tap the settings icon. In the Settings menu, scroll down to the General section and tap on Composition Guide. From here, you can choose Grid lines and level to enable both the grid and the horizon level, or select Grid lines only if you prefer to use just the grid.
Once enabled, a grid will appear on your camera screen, dividing the frame into nine equal parts. The spots where the lines cross are natural points of interest that grab attention in a photo. Try placing your subject at one of these points to create a more balanced and eye-catching shot.
5
Enhance Colors With Scene Optimizer
After framing your shot with grid lines, you can further enhance its appearance with the Scene Optimizer. This feature uses artificial intelligence to analyze the scene and adjust camera settings accordingly. It brightens up dark scenes, makes food look delicious, and brings life to landscapes.
The Scene Optimizer also fine-tunes brightness, contrast, and sharpness automatically. For example, when photographing a sunset, the camera boosts warm tones to highlight the oranges and pinks in the sky. Similarly, snapping your pet highlights details, like the texture of their fur and the spark in their eyes. It works great even in low light, reducing noise and brightening shadows, so nighttime shots look sharper and clearer.
To use Scene Optimizer, open the Camera app and tap on the settings icon. In the Settings menu, tap Intelligent optimisation, and then toggle Scene optimiser on.
A newer Samsung mobile phone may already have Scene Optimizer enabled. It recognizes 30 different scenes, including landscapes, food, flowers, birds, and even text.
4
Remaster Pictures to Improve Quality
Sometimes a photo doesn’t turn out the way you hoped. Maybe the lighting’s off, the subject’s a bit blurry, or something just feels off. The remaster tool on your Samsung phone can help you fix those moments with a single tap.
This feature uses artificial intelligence to analyze your photo and make thoughtful adjustments to improve exposure, reduce noise, and bring back natural color. It can also correct issues like poor lighting, low resolution, or subtle blurriness, giving your photos a clearer, more polished look without changing the heart of the image.
To use the remaster tool, open the photo you want to enhance in your Samsung gallery app. Then swipe up on the image to reveal edit suggestions and select Remaster from the top menu.
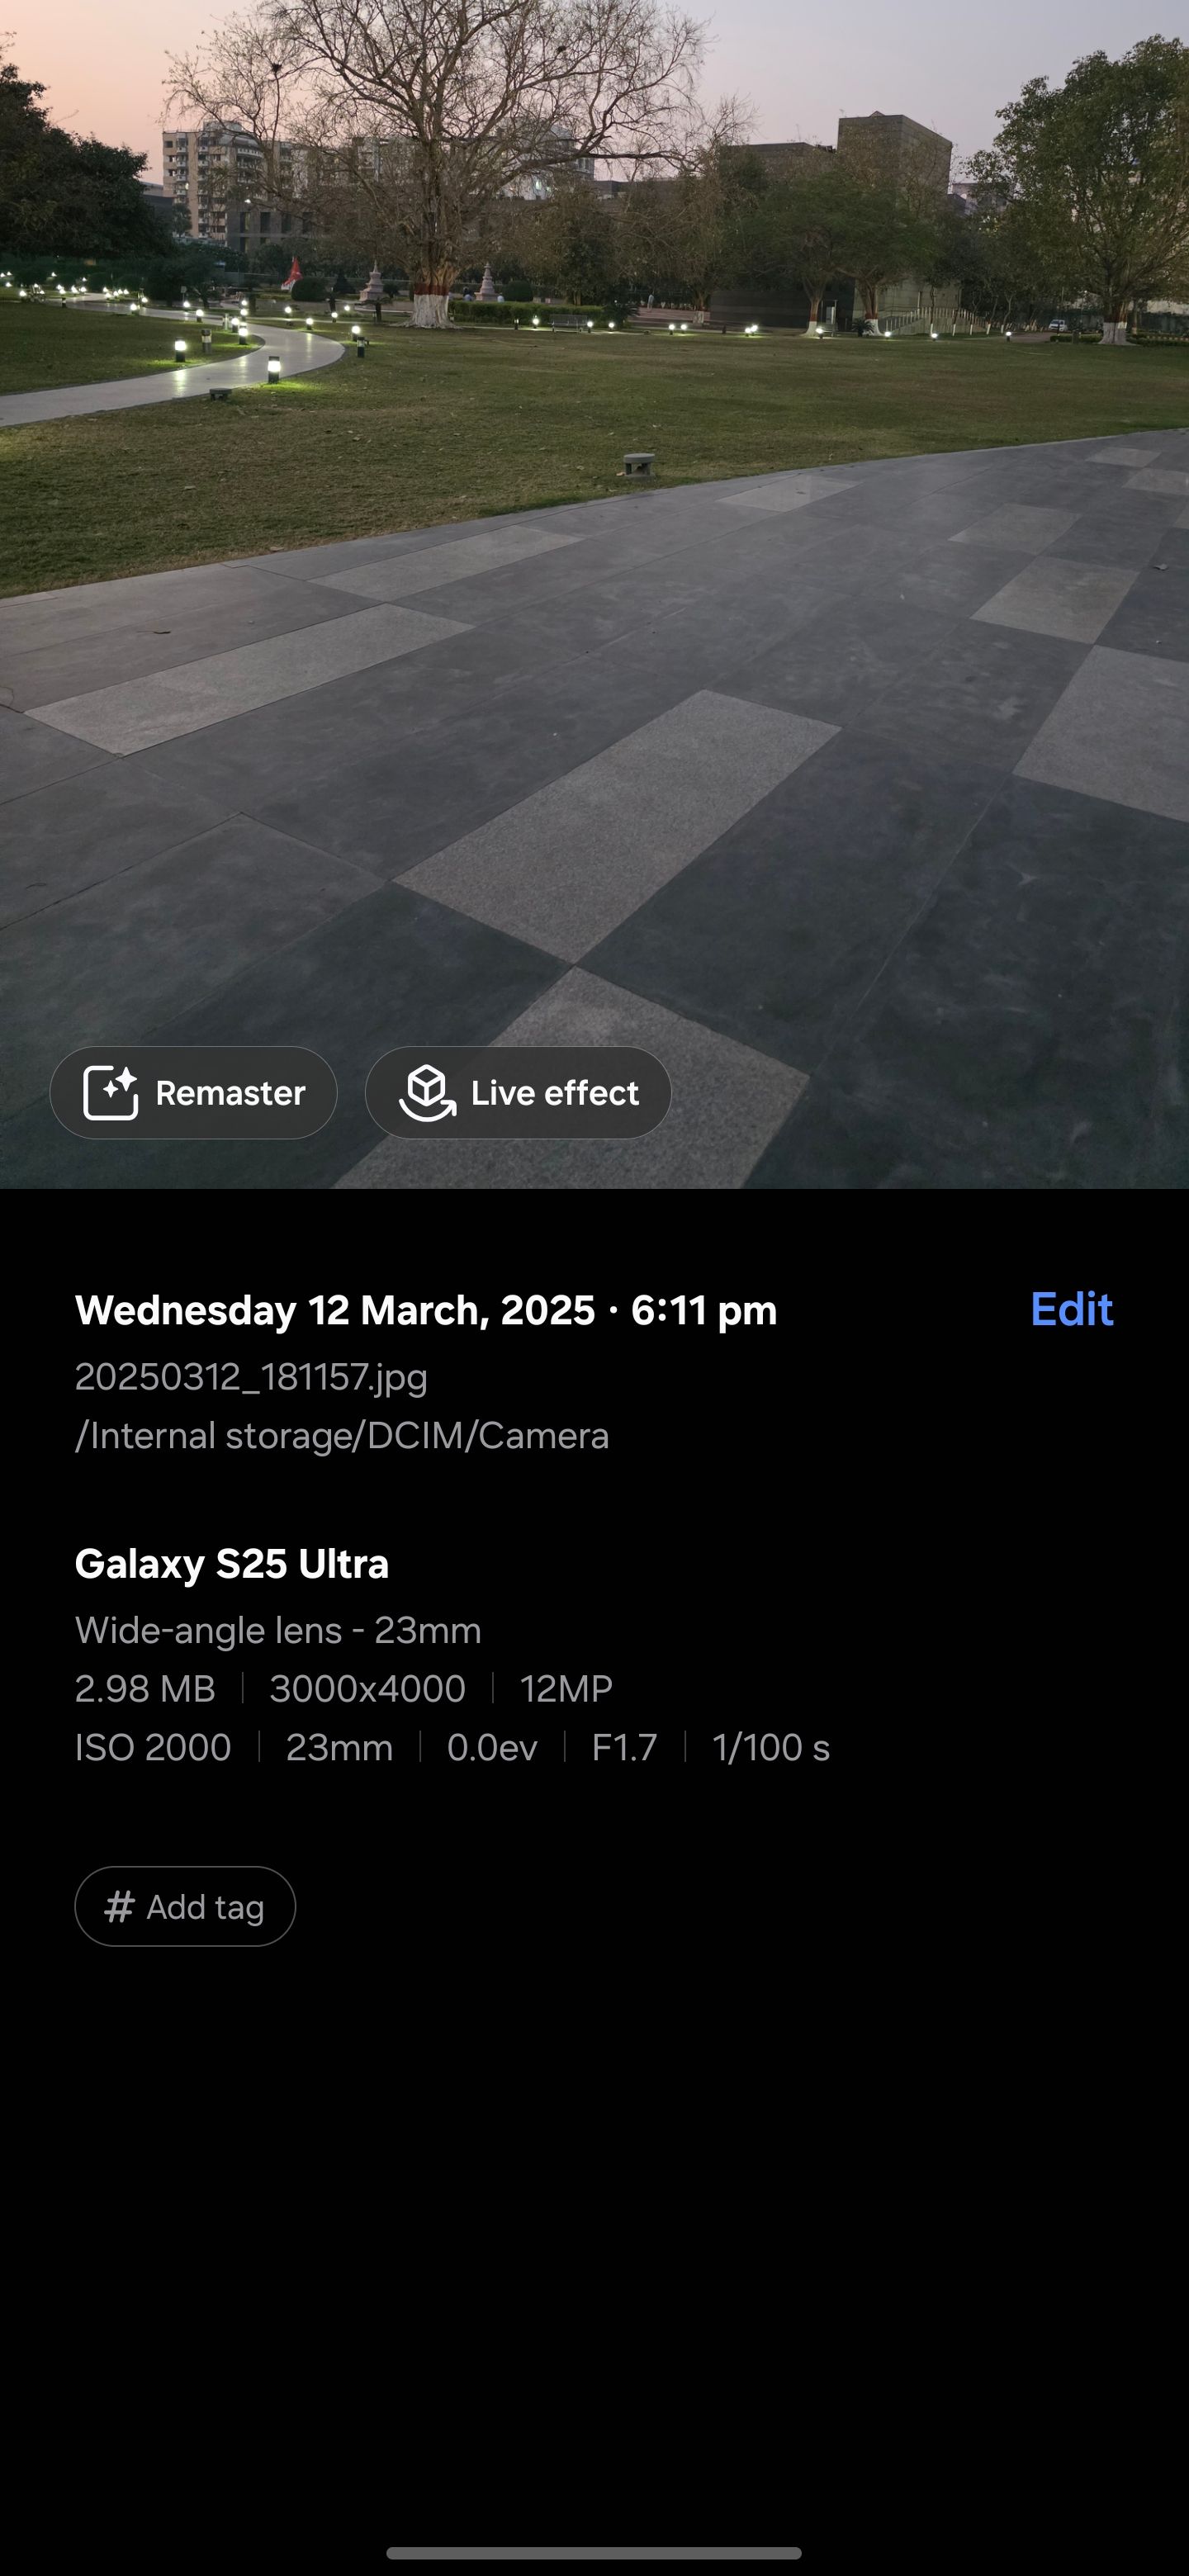
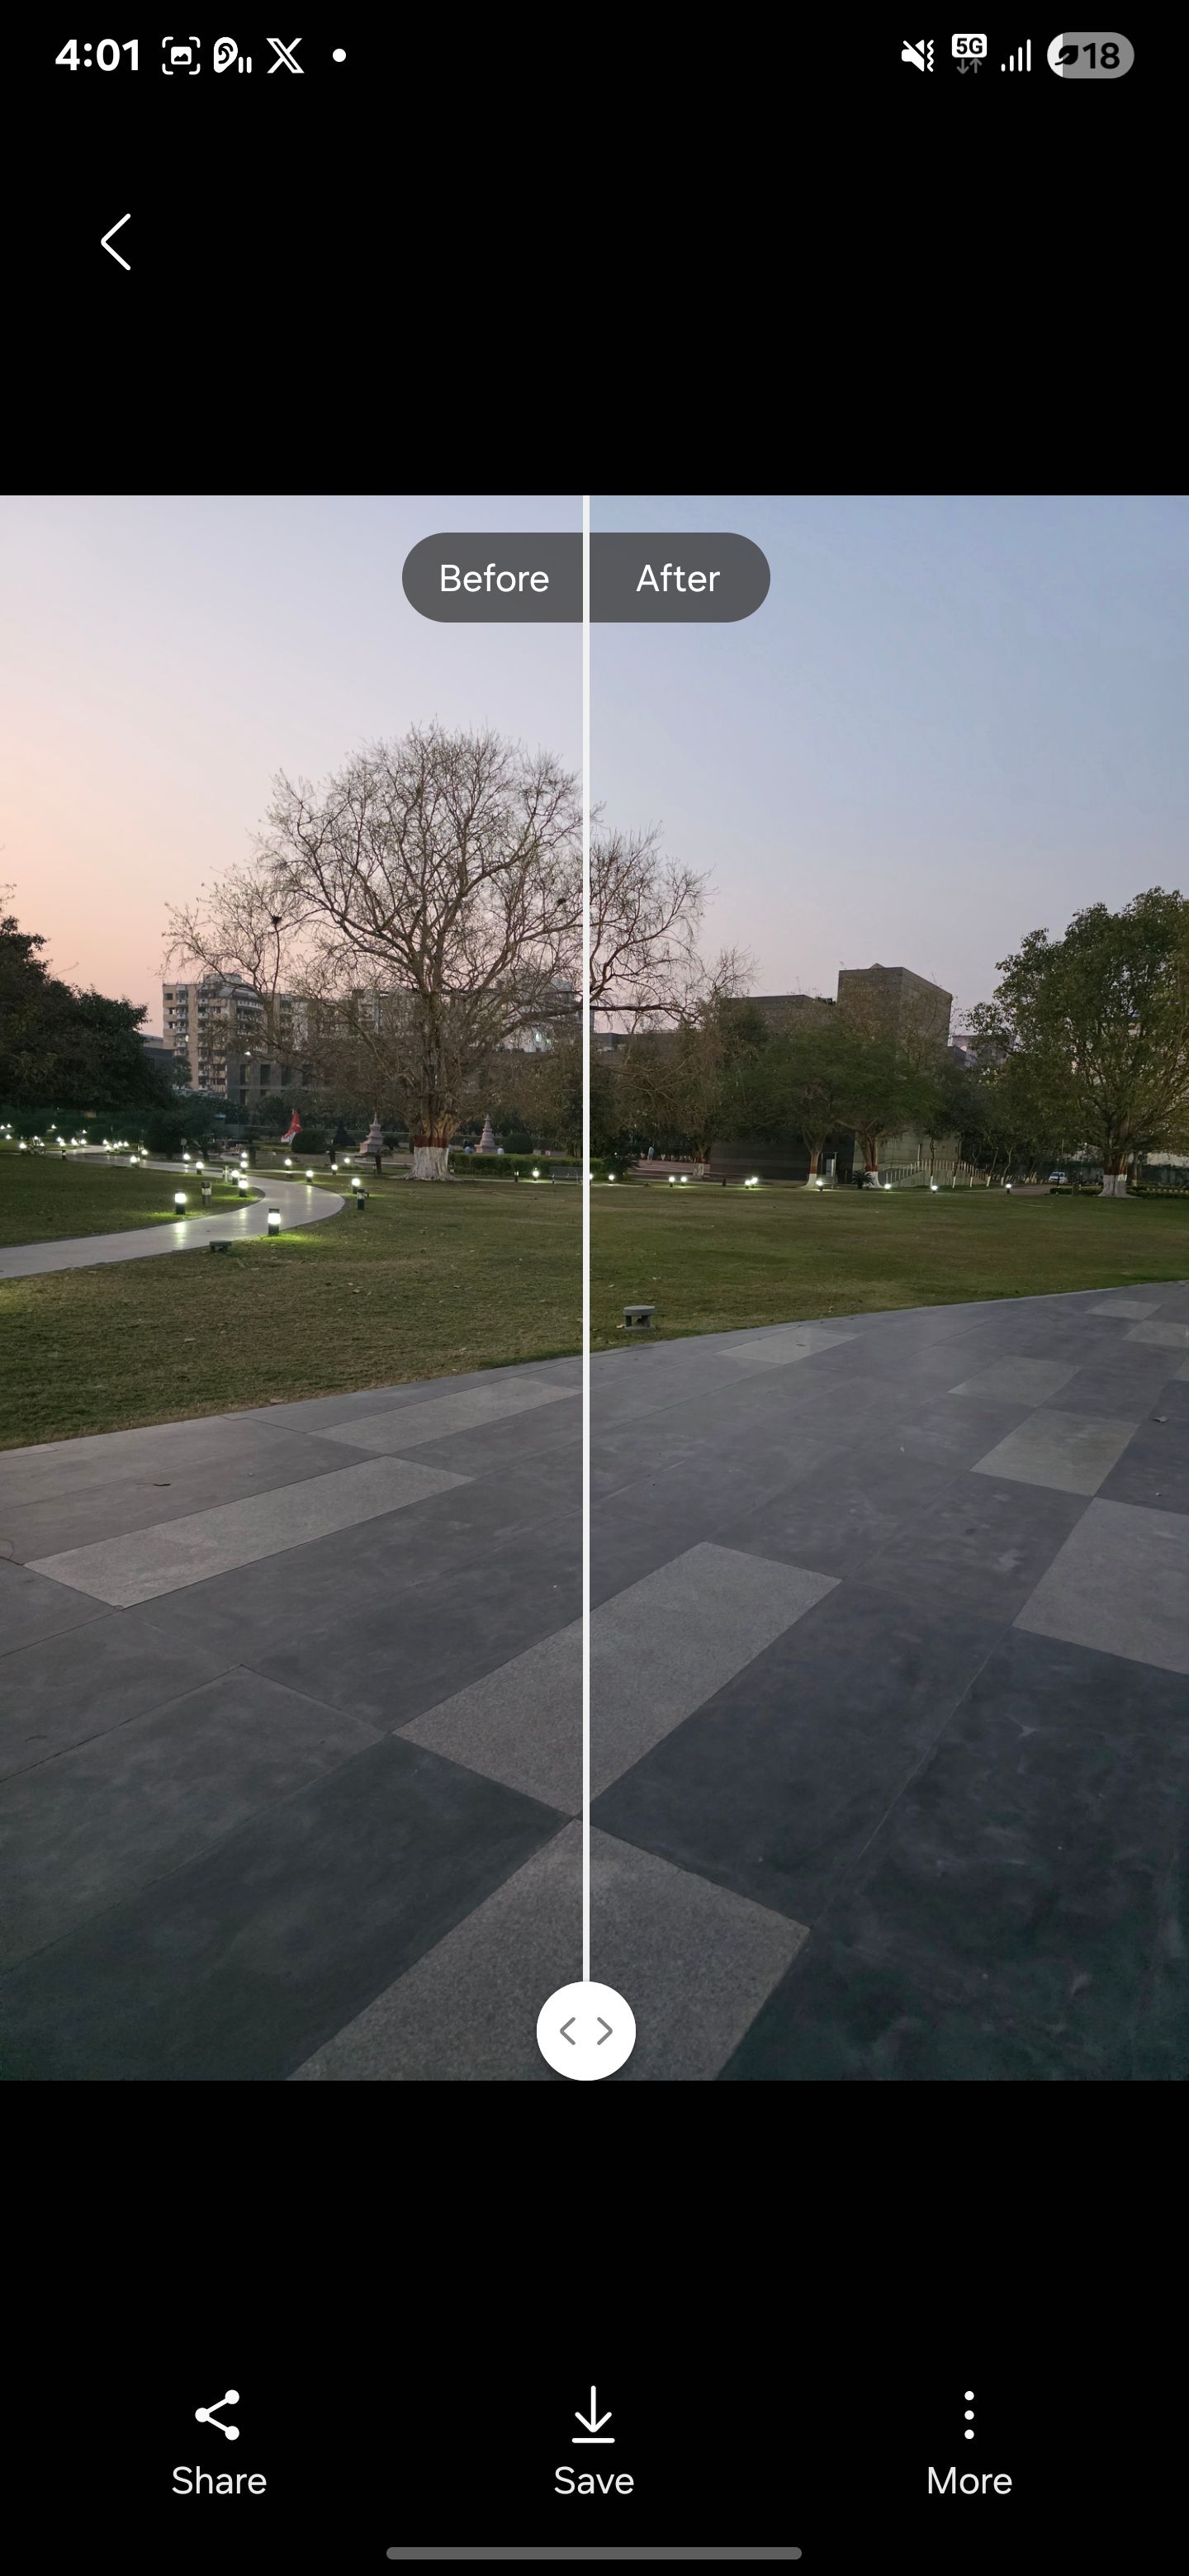
On older devices, you may tap the three-dot menu and choose Remaster picture from the list of options.
The phone will process the image and show you the before and after versions. You can drag the slider to see the difference, and if you like the result, tap Save to keep the changes. This feature is especially useful for fixing blurry pics or ones with bad lighting.
3
Pro Mode for Advanced Photography
If you’re an experienced photographer or simply want more creative control, Pro Mode is worth exploring. It gives you access to manual settings similar to those on a DSLR.
With Pro Mode, you can adjust shutter speed, ISO, white balance, and focus to match your vision. It’s a great way to experiment and fine-tune your camera to suit both your style and lighting conditions. For instance, in low light, you can slow down the shutter speed or raise the ISO to brighten up the image.
Unlike auto mode, which makes those decisions for you, Pro Mode hands you full control. This level of manual access is typically found on DSLRs and high-end smartphones, although many mid-range phones now include it as well.
To start using PRO Mode, open the Camera app and hit the More button on the bottom right. Then, just select PRO to jump into Pro Mode. From here, you can adjust settings such as ISO, shutter speed, white balance, and exposure compensation.
Experiment with different settings to see their effects on your photos. For example, you might first see a slider for ISO, which determines how sensitive the camera’s sensor is to light. A lower ISO makes images darker, while a higher ISO makes them brighter. However, be careful not to set it too high; it could add grain or noise to your photos.
Next, you’ll see a shutter speed setting, which controls how long the camera’s shutter stays open to let in light. A fast shutter speed freezes motion for sharper photos, while a slower speed creates effects like light trails or motion blur. However, remember that long shutter speeds may result in camera shake, so use a tripod or stabilize your camera.
2
Shoot in RAW With Expert RAW
RAW mode is a photography format that captures everything your camera sensor sees. It’s popular with professionals because it provides full control over image quality and simplifies editing. Unlike JPEG, which compresses and loses some data to save space, RAW files preserve all the detail. This results in better image quality, improved dynamic range, and more accurate colors.
To use this feature, open the Camera app on your Samsung Galaxy phone, head to More > EXPERT RAW, and download it from the Galaxy App Store. Once set up, you’ll see an interface similar to Pro Mode, where you can manually control ISO, shutter speed, white balance, and virtual aperture.
After capturing a RAW photo, you can open it in a photo editing app like Adobe Lightroom or Snapseed. Since the file contains unprocessed image data, you can tweak things like lifting shadows, recovering blown highlights, or correcting white balance without degrading quality. This makes RAW ideal for photographers who want to shape the final image exactly as they envisioned it, rather than relying on the camera’s default processing.
RAW isn’t for everyone…
RAW Editing Is a Waste of Time and Storage for Most People: Here’s Why
Unless you’re a pro, RAW editing is overkill for most shots.
1
Edit With Galaxy Enhance-X
Samsung already gives you a taste of smart editing with its Edit Suggestions feature, but if you’re after more control and advanced enhancements, Galaxy Enhance-X takes it even further.
Unlike Edit Suggestions, Galaxy Enhance-X isn’t preinstalled; you must download it separately from the Galaxy Store. Once installed, it unlocks a full suite of AI-powered tools that can fix blur, remove noise, eliminate reflections, upscale low-resolution photos, and much more. It feels like a more advanced and flexible version of Edit Suggestions, letting you fine-tune your photos exactly how you like, rather than relying on automatic editing.
To get started, download and install the app from the Galaxy Store. Once installed, open it and allow the necessary permissions to access your photos. You can then select any image from your gallery and choose from a wide range of enhancement tools to apply.
Before saving, the app displays a before-and-after preview, allowing you to slide the bar and review the changes in real-time. If you’re happy with the result, tap the thumbs-up icon, then select Done > Save. You can also share your enhanced image directly to social media or messaging apps from within the app.
Related
This Is Why I Choose Galaxy AI Over Gemini
Galaxy AI is based on Gemini, but Samsung does it better.
These are some features I’ve tried that have really improved my smartphone photography. But there are tons of other tricks and tools on the Samsung Galaxy to explore. Just mess around with the settings, experiment with lighting, angles, and subjects, and find out what works best for you.




Leave a Comment
Your email address will not be published. Required fields are marked *