SmartScreen is designed to automatically block suspicious files, but it often flags genuine downloads as malicious. Here’s how you can disable Windows Defender SmartScreen on Windows 11 to download and run apps.
How Does Windows SmartScreen Filter Work?
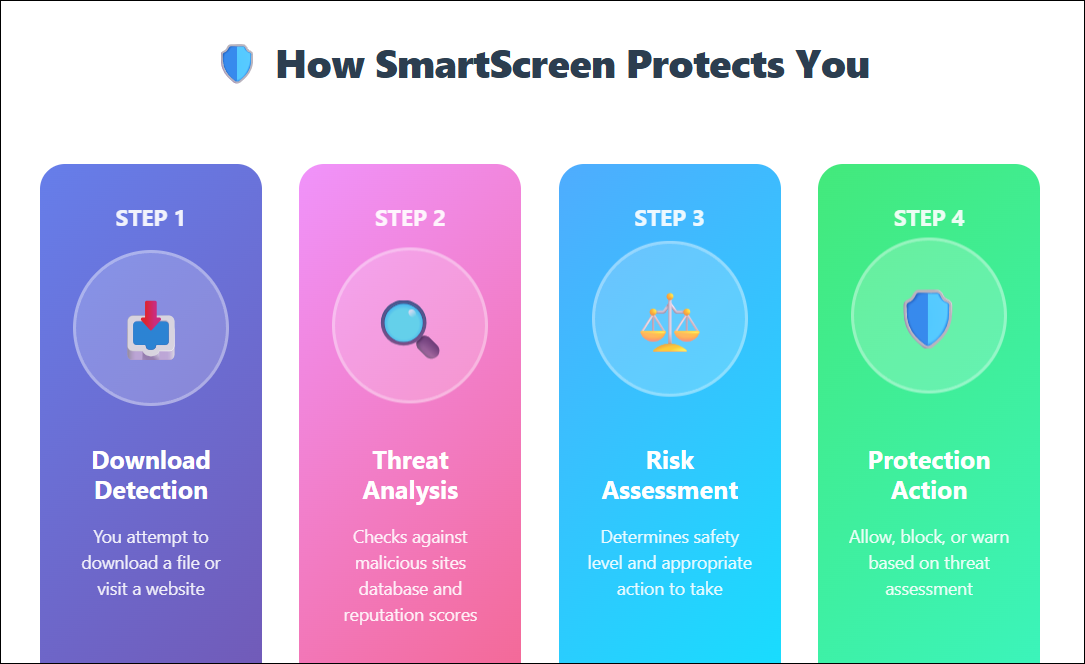
SmartScreen relies on reputation-based protection to protect your device from malicious or potentially unwanted apps and websites. When enabled, SmartScreen screens your downloads against known suspicious sites and developers. If a match is found, it blocks the download or site access and warns the user about the action taken.
You can configure it to block unrecognized apps and files from the web. It also provides additional reputation-based protection for Microsoft Store apps and can block third-party applications with low reputation scores that are known to cause unexpected behavior.
However, reputation screening can sometimes block apps, even if they come from trusted sources. If you trust the app, you can temporarily turn off the SmartScreen Filter to install and run it, then turn it back on in the Windows Security settings.
Turn Off SmartScreen Using the Windows Security App
The easiest way to turn off SmartScreen is by using the Windows Security app. Let’s see how to do it:
- Click Start, type Windows Security and open the app from the search results.
- Open the App & browser control tab in the left pane.
- Click on Reputation-based protection settings under Reputation-based protection.
- Here, you’ll find four different SmartScreen filters you can individually enable or disable. If you want to turn off the filter for files and executables, turn off Check apps and files and Potentially unwanted app blocking filters. The other two filters are for Microsoft Edge and Microsoft Store apps.
- If you want to turn off SmartScreen completely, disable all four filters.
If you are unable to open the Windows Security app, refer to our troubleshooting guide to fix a blank Windows security screen. If any of the SmartScreen filters are grayed out with the message “this setting is managed by your administrator,” you’ll need your administrator to make the changes for you.
Disable SmartScreen for Microsoft Edge
Microsoft Edge has a built-in option to enable and disable Microsoft Defender SmartScreen. Here’s how to access it:
- In Microsoft Edge, click the three-dots menu icon in the top right corner and choose Settings.
- Open the Privacy, search, and services tab in the left pane.
- Then click the Security option.
- Toggle the switch for Microsoft Defender SmartScreen to turn it off. This will disable the Block potentially unwanted apps option as well.
- If you choose to enable SmartScreen again, you must manually enable the Block potentially unwanted apps feature.
How to Enable or Disable SmartScreen Using Registry Editor
You can also turn the Windows Defender SmartScreen on or off using the Registry Editor. This method is useful if you can’t access it from the Settings app.
Note that incorrect modification to the registry entries can cause system malfunction. Therefore, create a restore point before proceeding with the steps below.
- Press Win + R to open Run.
- Type regedit and click OK to open the Registry Editor. Click Yes if prompted by UAC to grant administrative privilege.
-
In the Registry Editor, navigate to the following location:
HKEY_LOCAL_MACHINE\SOFTWARE\Policies\Microsoft\Windows\System
- In the right pane, locate the EnableSmartScreen filter value. If the value is not present, you will need to create it manually.
- To create a new value, right-click the System key and select New > DWORD (32-bit) Value.
- Rename the value as EnableSmartScreen.
- Next, right-click the EnableSmartScreen value and select Modify.
- Type 0 in the Value data field and click OK to save the changes.
- To enable the SmartScreen filter, type 1 in the Value data field and click OK.
- Close the Registry Editor and restart your PC to apply the changes.
You can further tweak the registry to create a new String Value to set the blocking level to Warn or Block. Using Warn will show a SmartScreen warning with an option to proceed. In contrast, the Block option will show a warning and block the app from running on your computer. Here’s how to do it:
- Right-click the System subkey and select New > String Value. Rename the value as ShellSmartScreenLevel. Next, right-click ShellSmartScreenLevel and select Modify.
- Type Warn or Block depending on what you want the SmartScreen Level to do. Click OK to save the changes and close the Registry Editor.
How to Turn the SmartScreen Filter On or Off Using the Group Policy Editor
If you want to manage the SmartScreen filter for multiple computers in your organization, you can use the Group Policy Editor to centrally configure, enable, or disable SmartScreen settings, ensuring consistent security policies across all managed systems.
To configure the SmartScreen filter using GPEdit:
- Press Win + R to open Run.
- Type gpedit.msc and click OK to open the Group Policy Editor.
-
Next, navigate to the following location in Group Policy Editor:
Computer Configuration > Administrative Templates > Windows Components > File Explorer. - In the right pane, right-click Configure Windows Defender SmartScreen policy and select Edit.
- To disable SmartScreen, select Disabled.
- If you want to enable SmartScreen, select Not Configured or Enabled.
- Click Apply and OK to save the changes.
- Close Group Policy Editor and restart your PC.
SmartScreen provides essential protection against malicious downloads and phishing sites. As such, you should always be sure to turn on SmartScreen after installing the app to continue to receive real-time reputation-based protection from bad apps.


Leave a Comment
Your email address will not be published. Required fields are marked *