I would love to clean-install Windows after every major update, except I don’t want to spend hours reinstalling all my apps. Turns out, Windows 10 and 11 include a command-line tool that handles app installation—and it’s surprisingly simple to use.
Why Should You Use WinGet to Install and Manage Apps
When you get a new PC or reinstall Windows, the first thing you do is open Edge—not to browse the web, but to download Chrome. It’s such a universal experience that it’s become a joke. But with the command line function WinGet, you don’t even need to open Edge for that anymore. As we’ll see, all you need to do is type a simple line of text.

Related
4 Microsoft Edge Features I Wish Google Chrome Had
Chrome is great, but I don’t always want to download extensions to get useful functionality I can find elsewhere.
Of course, Chrome is just the beginning. Setting up a new PC means visiting dozens of websites, downloading each installer separately, and clicking through setup wizard after setup wizard. It’s tedious and takes forever.
Windows Package Manager, or WinGet, changes all that. It comes built into Windows 10 and 11 and lets you install most software with a single command. Unlike sketchy download sites or installer bundles, WinGet pulls software directly from official sources, so you get clean, legitimate versions every time. Installing an app update is just as simple: one command updates all your programs in bulk.

Related
Your New Windows PC Is Already Sluggish—Here’s the First Thing to Do
Tired of your new Windows PC feeling so slow? Try debloating it.
It gets even better if you’re the family tech support. WinGet works perfectly over remote connections, so when you’re helping someone through Remote Desktop or TeamViewer, you can install apps without wrestling with download pop-ups or browser warnings that often break over remote sessions.
How to Use WinGet to Quickly Install Any App
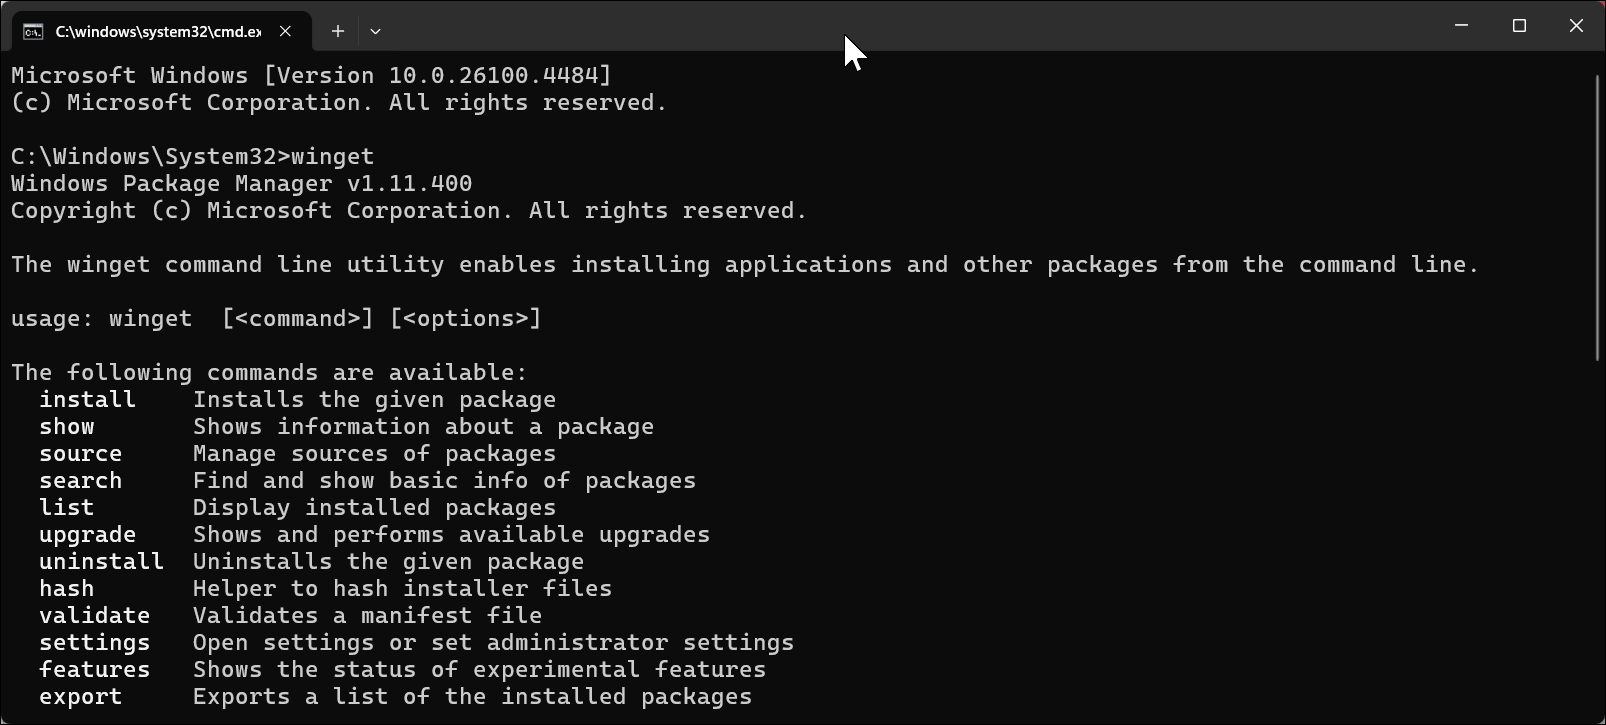
Getting started with Winget is easy. First, check if you have the Windows Package Manager installed by opening Command Prompt as an administrator. Press the Windows key, type cmd, and select Run as administrator. Running with elevated permissions is important; it prevents each app installer from triggering its own UAC prompt, making the installation process much smoother.
In the window that appears, type winget and press Enter. If you see a list of commands, you’re good to go. If not, you’ll need to install App Installer from the Microsoft Store, which comes bundled with WinGet. If you prefer, you can instead install WinGet from its GitHub repository.
Let’s see how it works by installing Google Chrome. Type:
winget install Google.Chrome
That’s it. WinGet finds Chrome, downloads it from Google’s servers, and installs it automatically without clicking through Google’s website or any installer. The same works for practically any popular program:
winget install Mozilla.Firefox
winget install 7zip.7zip
winget install Discord.Discord
winget install OBS.OBSStudio
But how do you know the exact name to use? Thankfully, WinGet has a search feature. For instance, if you are not sure what to type for ShareX, here’s how you can search for it:
winget search "ShareX"
The above command shows you all matching programs with their exact IDs. You’ll see something like ShareX.ShareX, which is what you need to use with the install command.
Here’s a handy trick: you can use the –silent flag to skip any installer pop-ups completely:
winget install Spotify.Spotify --silent
Want to see what’s already installed on your computer? Type:
winget list
This shows every program WinGet knows about. To update everything at once, simply run:
winget upgrade --all
The above command checks every program for updates and installs them. It’s a better way to deal with consistent update notifications for multiple programs.
How to Bulk Install Apps Using WinGet + Winstall
While WinGet is certainly impressive, you have to type each app name individually or create a packages.json script for batch installs. That’s where Winstall comes in—a free website that creates custom WinGet scripts to batch install all your apps at once.
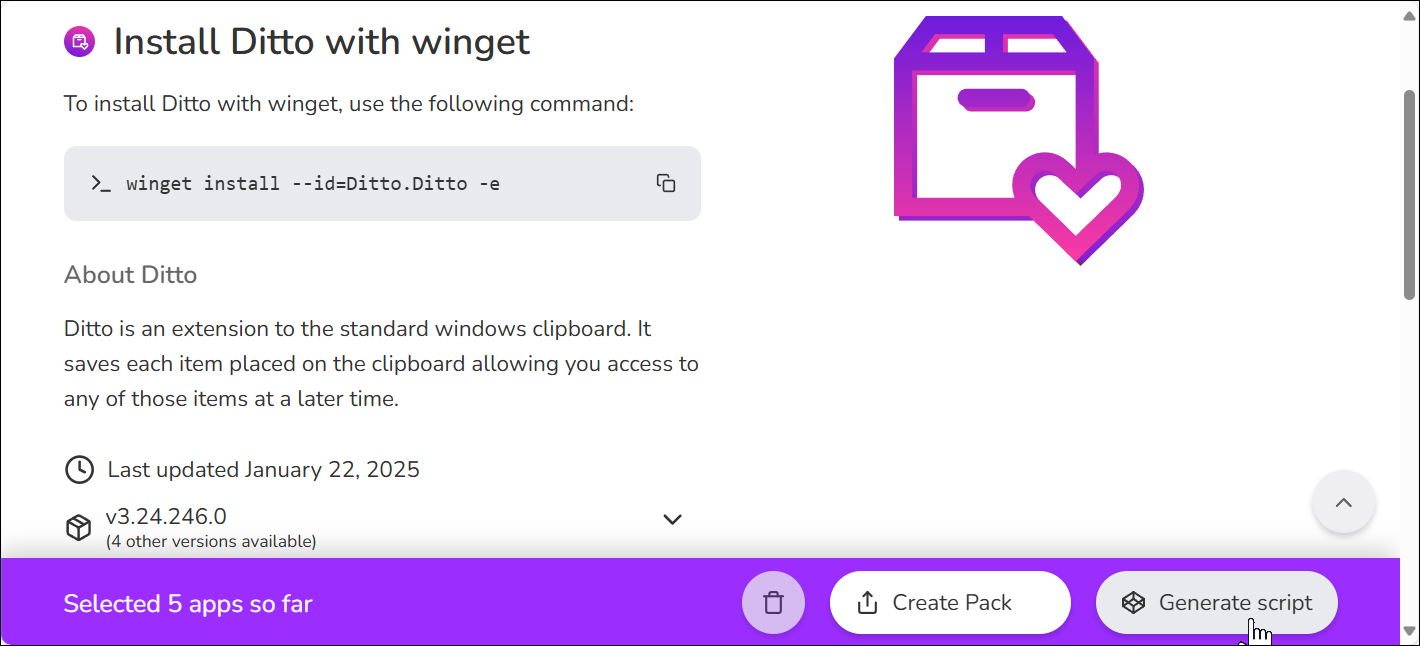
Head to winstall.app in your browser. You’ll see a grid of popular programs. Click on any programs you want—let’s say Chrome, Discord, Steam, VLC, and Notepad++. Each click adds that program to your pack. If you can’t find something, use the search bar at the top to find any app in WinGet’s repository. When you’re done, click Generate Script at the bottom.
Winstall creates a batch file with all your selections. It looks something like this (with the “-e” flag forcing an exact match):
winget install --id=Google.Chrome -e
winget install --id=Discord.Discord -e
winget install --id=Valve.Steam -e
winget install --id=VideoLAN.VLC -e
winget install --id=Notepad++.Notepad++ -e
Click the Download .bat button to save the file. If you get a security warning, click Keep Anyway to proceed. Once done, right-click it and select Run as administrator. Now sit back and watch as Windows installs everything automatically.
For even more convenience, you can save your favorite program list as a text file. Then whenever you need to set up a new computer, just run that same script. It’s like having a personal installer that sets up your computer exactly how you like it, every time.
WinGet might feel intimidating if you’re not used to command lines, but it’s more straightforward than traditional installers. You don’t need to remember complex commands; install, search, and upgrade cover 90% of what you’ll ever need. Keep a simple text file with your favorite WinGet commands, and you’ll never have to scramble to find download links again.


Leave a Comment
Your email address will not be published. Required fields are marked *