I have a habit of catching up on social media updates, checking the news, and reading newsletters in bed before going to sleep. However, using an iPhone at night with the lights turned down often feels uncomfortable and leaves my eyes strained.
Hence, I changed the following settings on my iPhone to make it comfortable to use at night and I’d recommend you do the same.
1
Use Dark Mode to Reduce Glare
Using an iPhone set to Light Mode in a dark environment exposes eyes to high brightness and glare, causing discomfort. It also emits more blue light, which can disrupt the natural sleep cycle.
Switching to Dark Mode can significantly reduce eye strain and allow for a more comfortable experience, especially in low-light conditions. That’s because it minimizes glare and limits blue light exposure, which helps alleviate eye discomfort and reduces the risk of potential sleep disturbances.
You can turn on Dark Mode on your iPhone from the Control Center. Long tap the Brightness slider and tap “Dark Mode.”
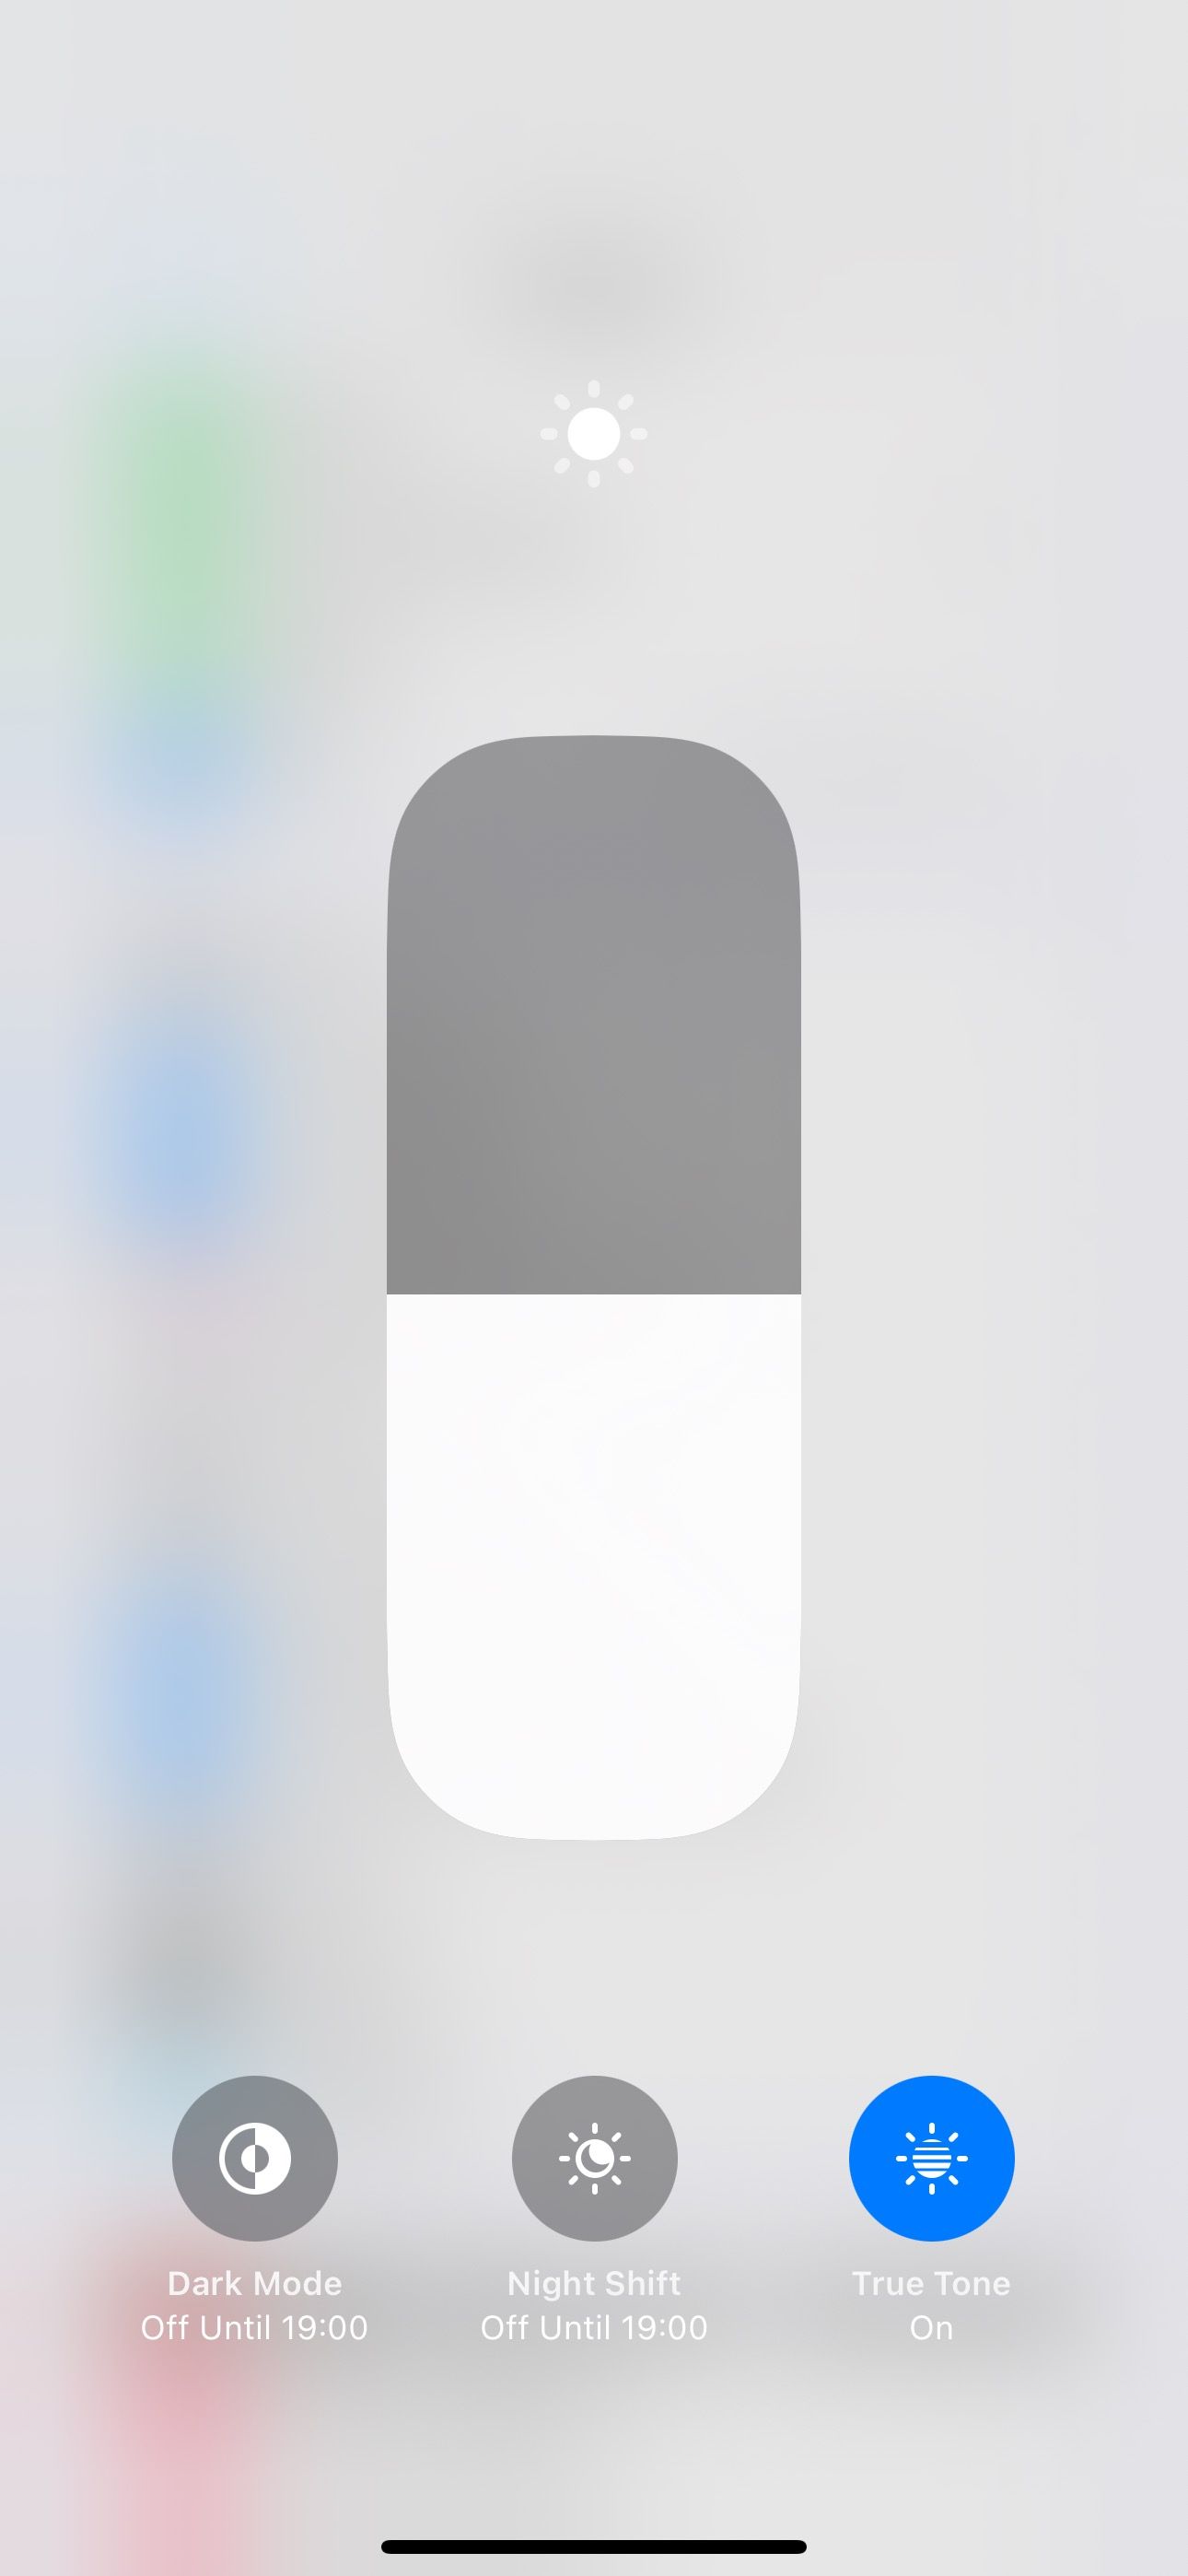
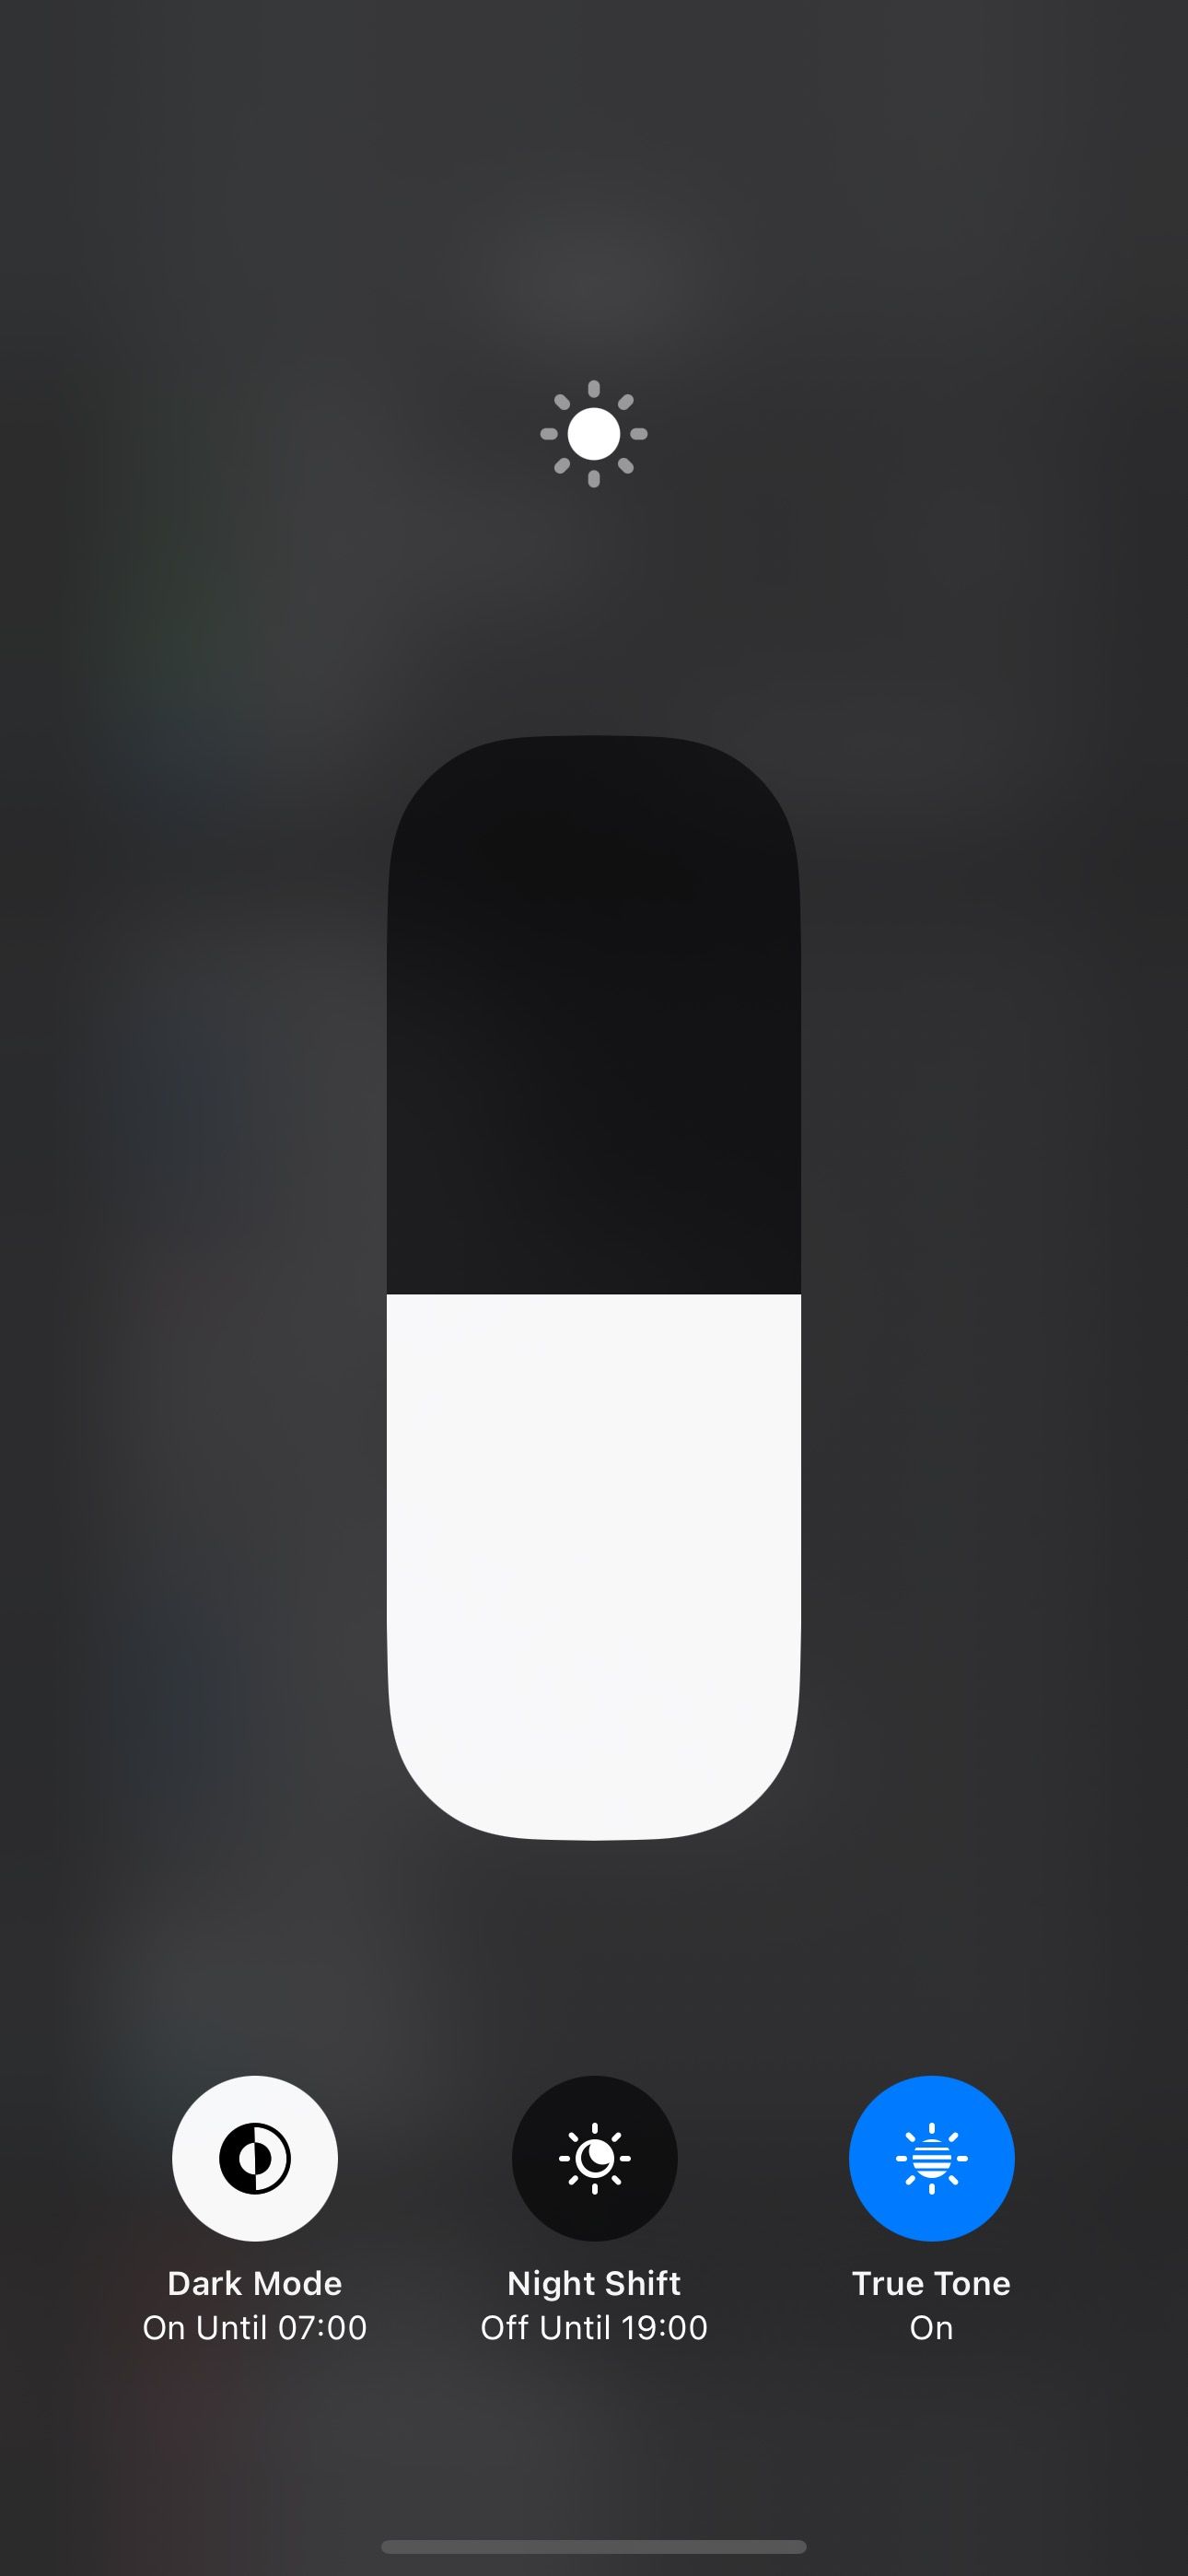
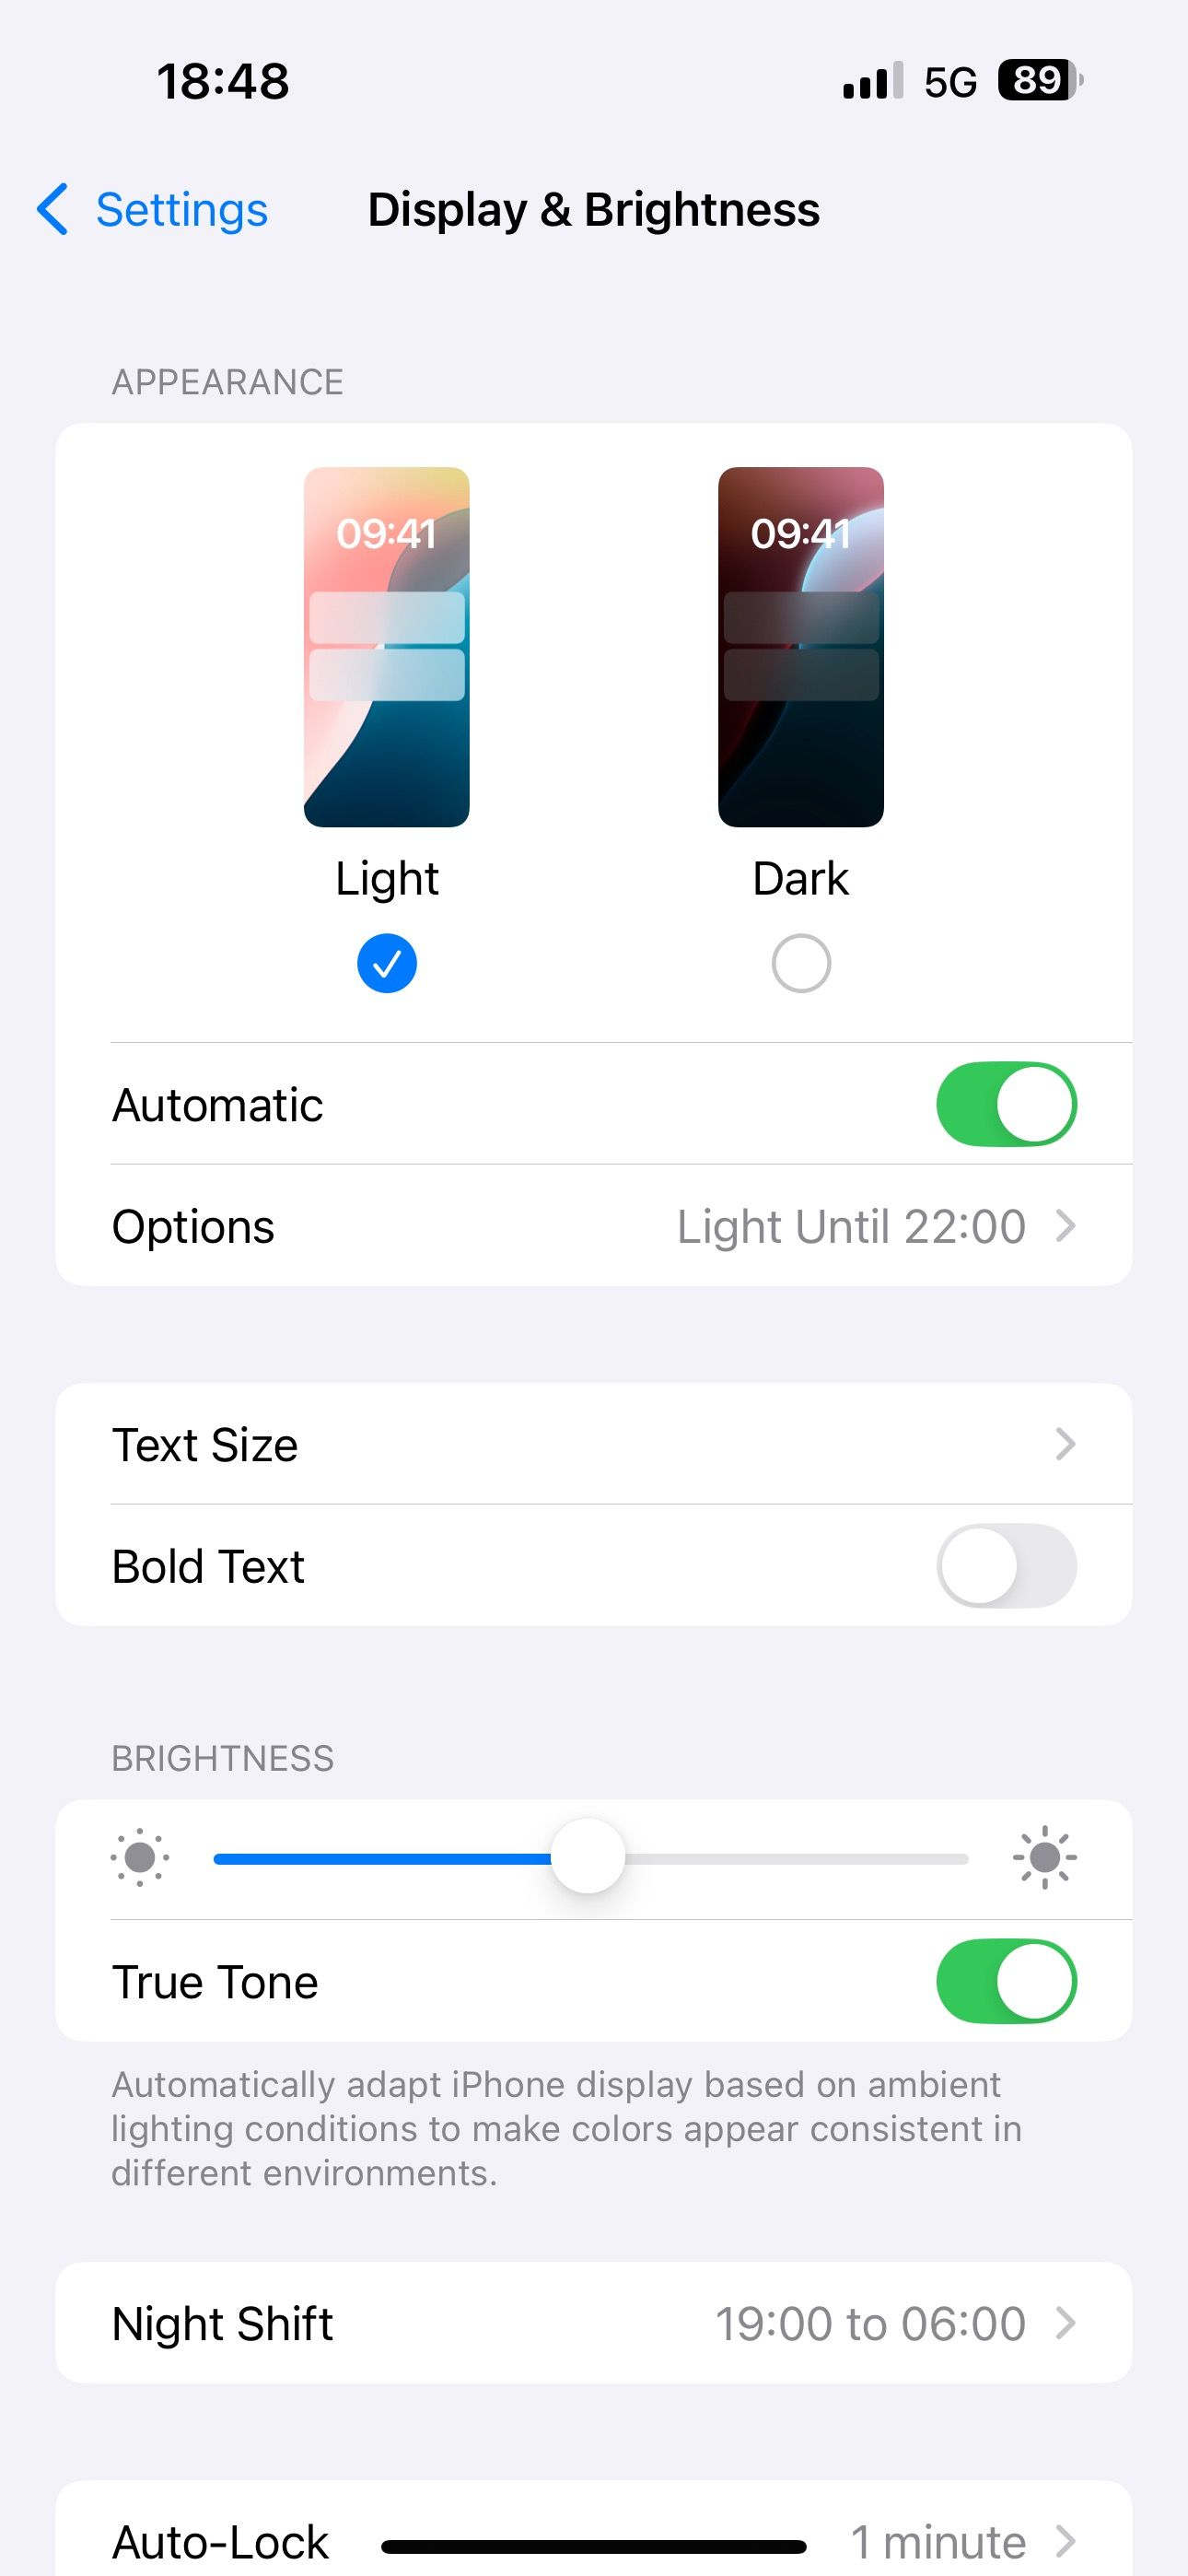
Alternatively, you can head into Settings > Display & Brightness and select the radio button below “Dark.”
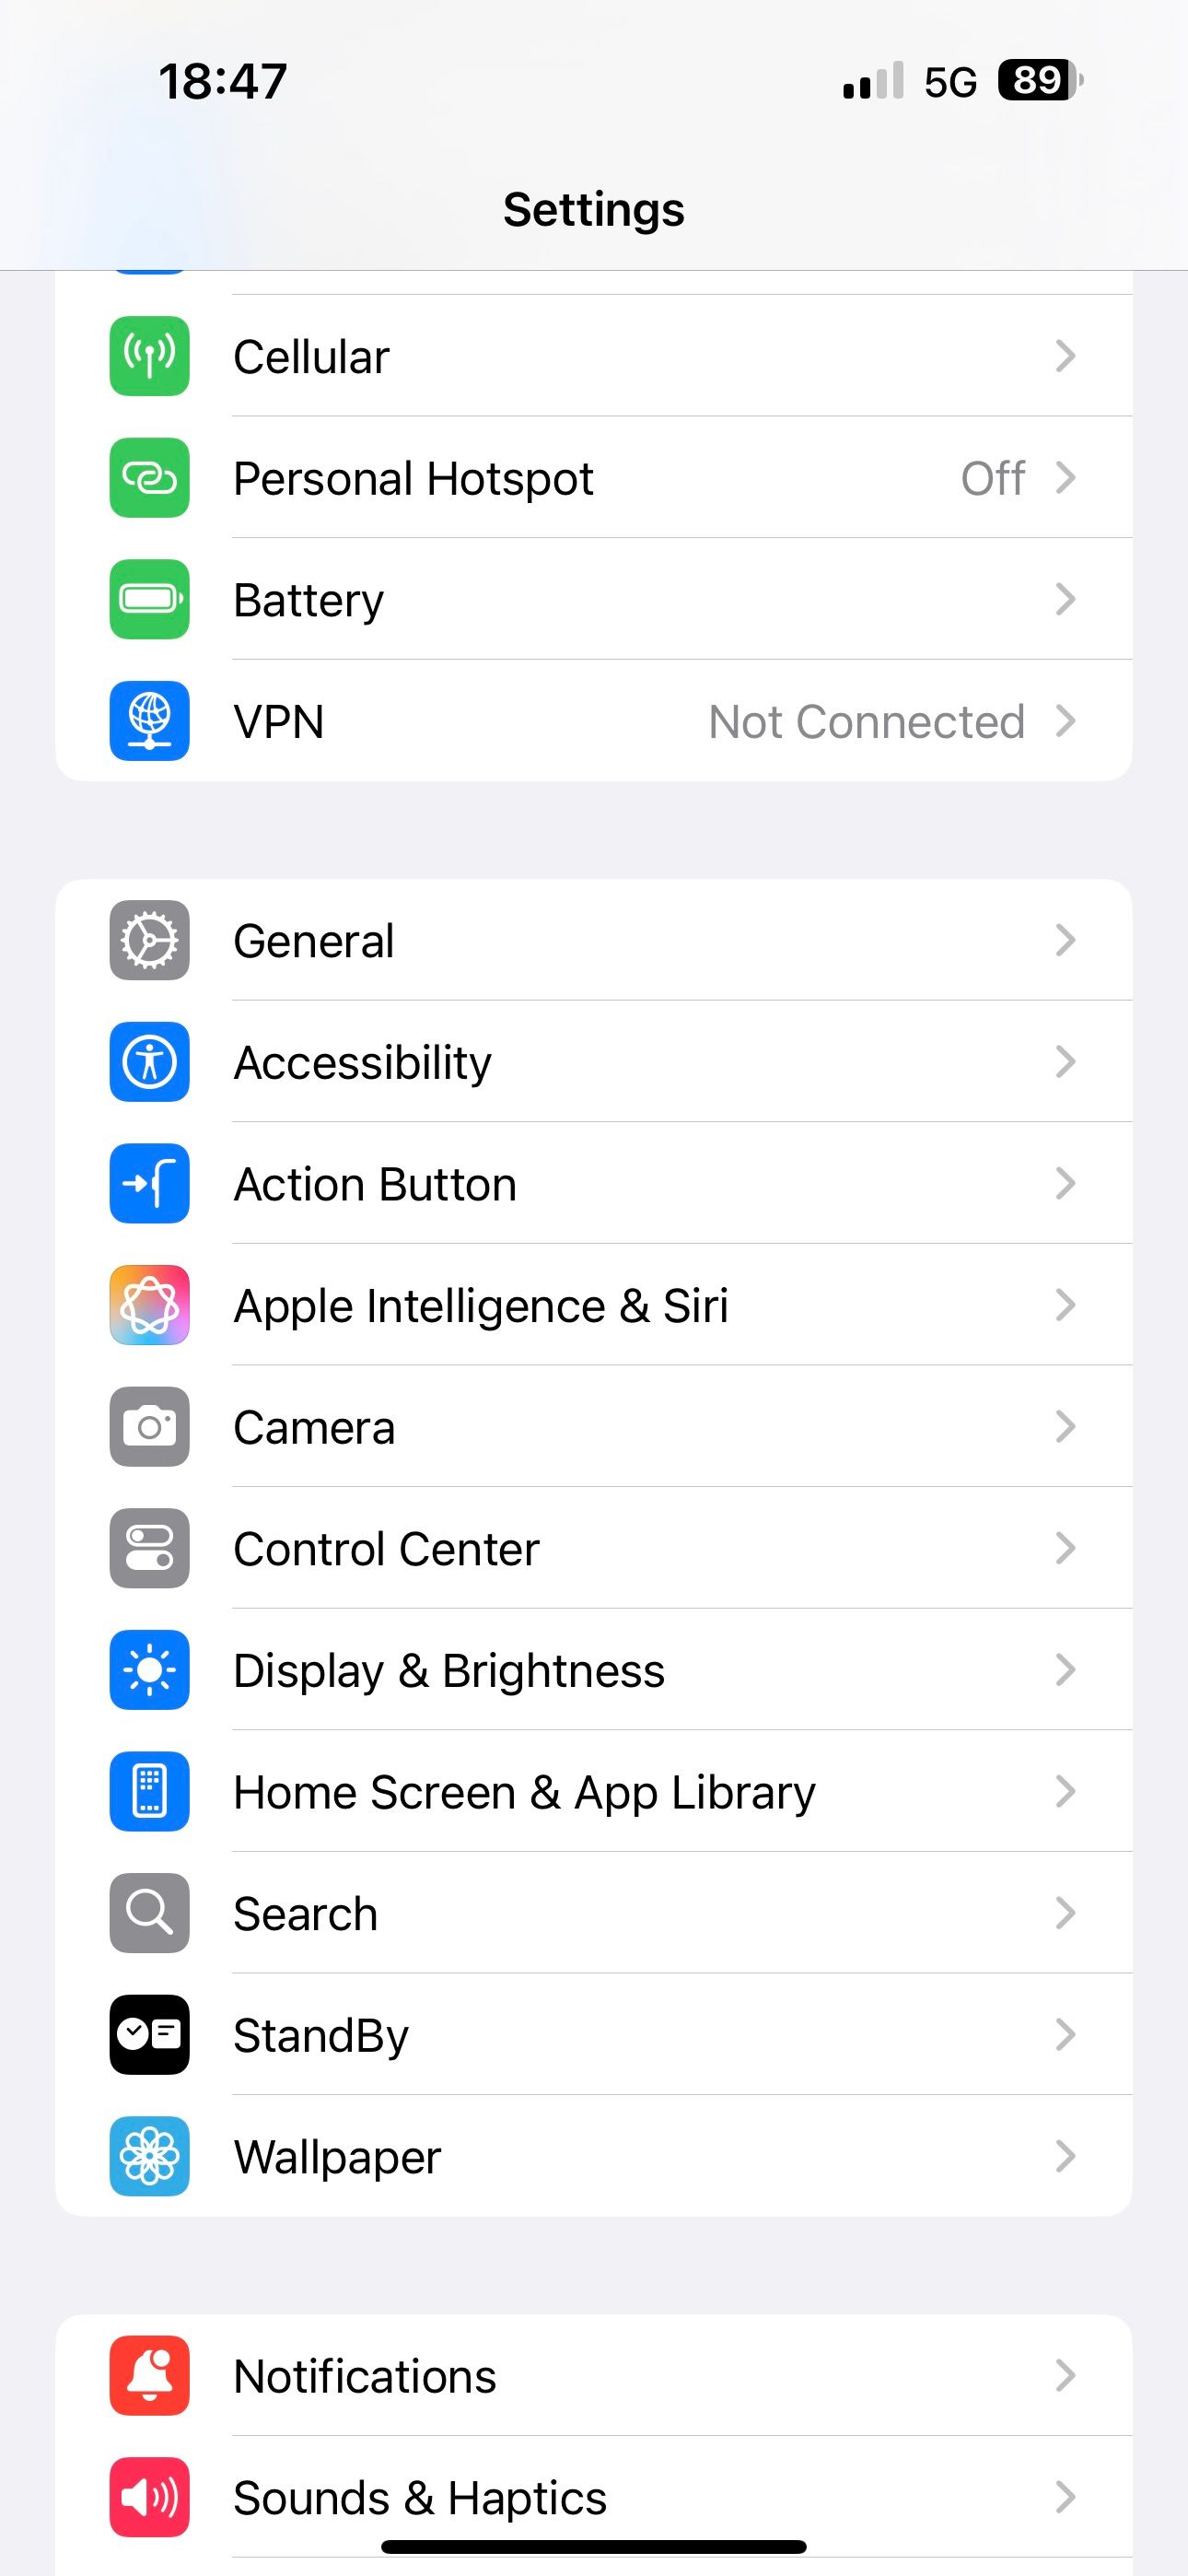
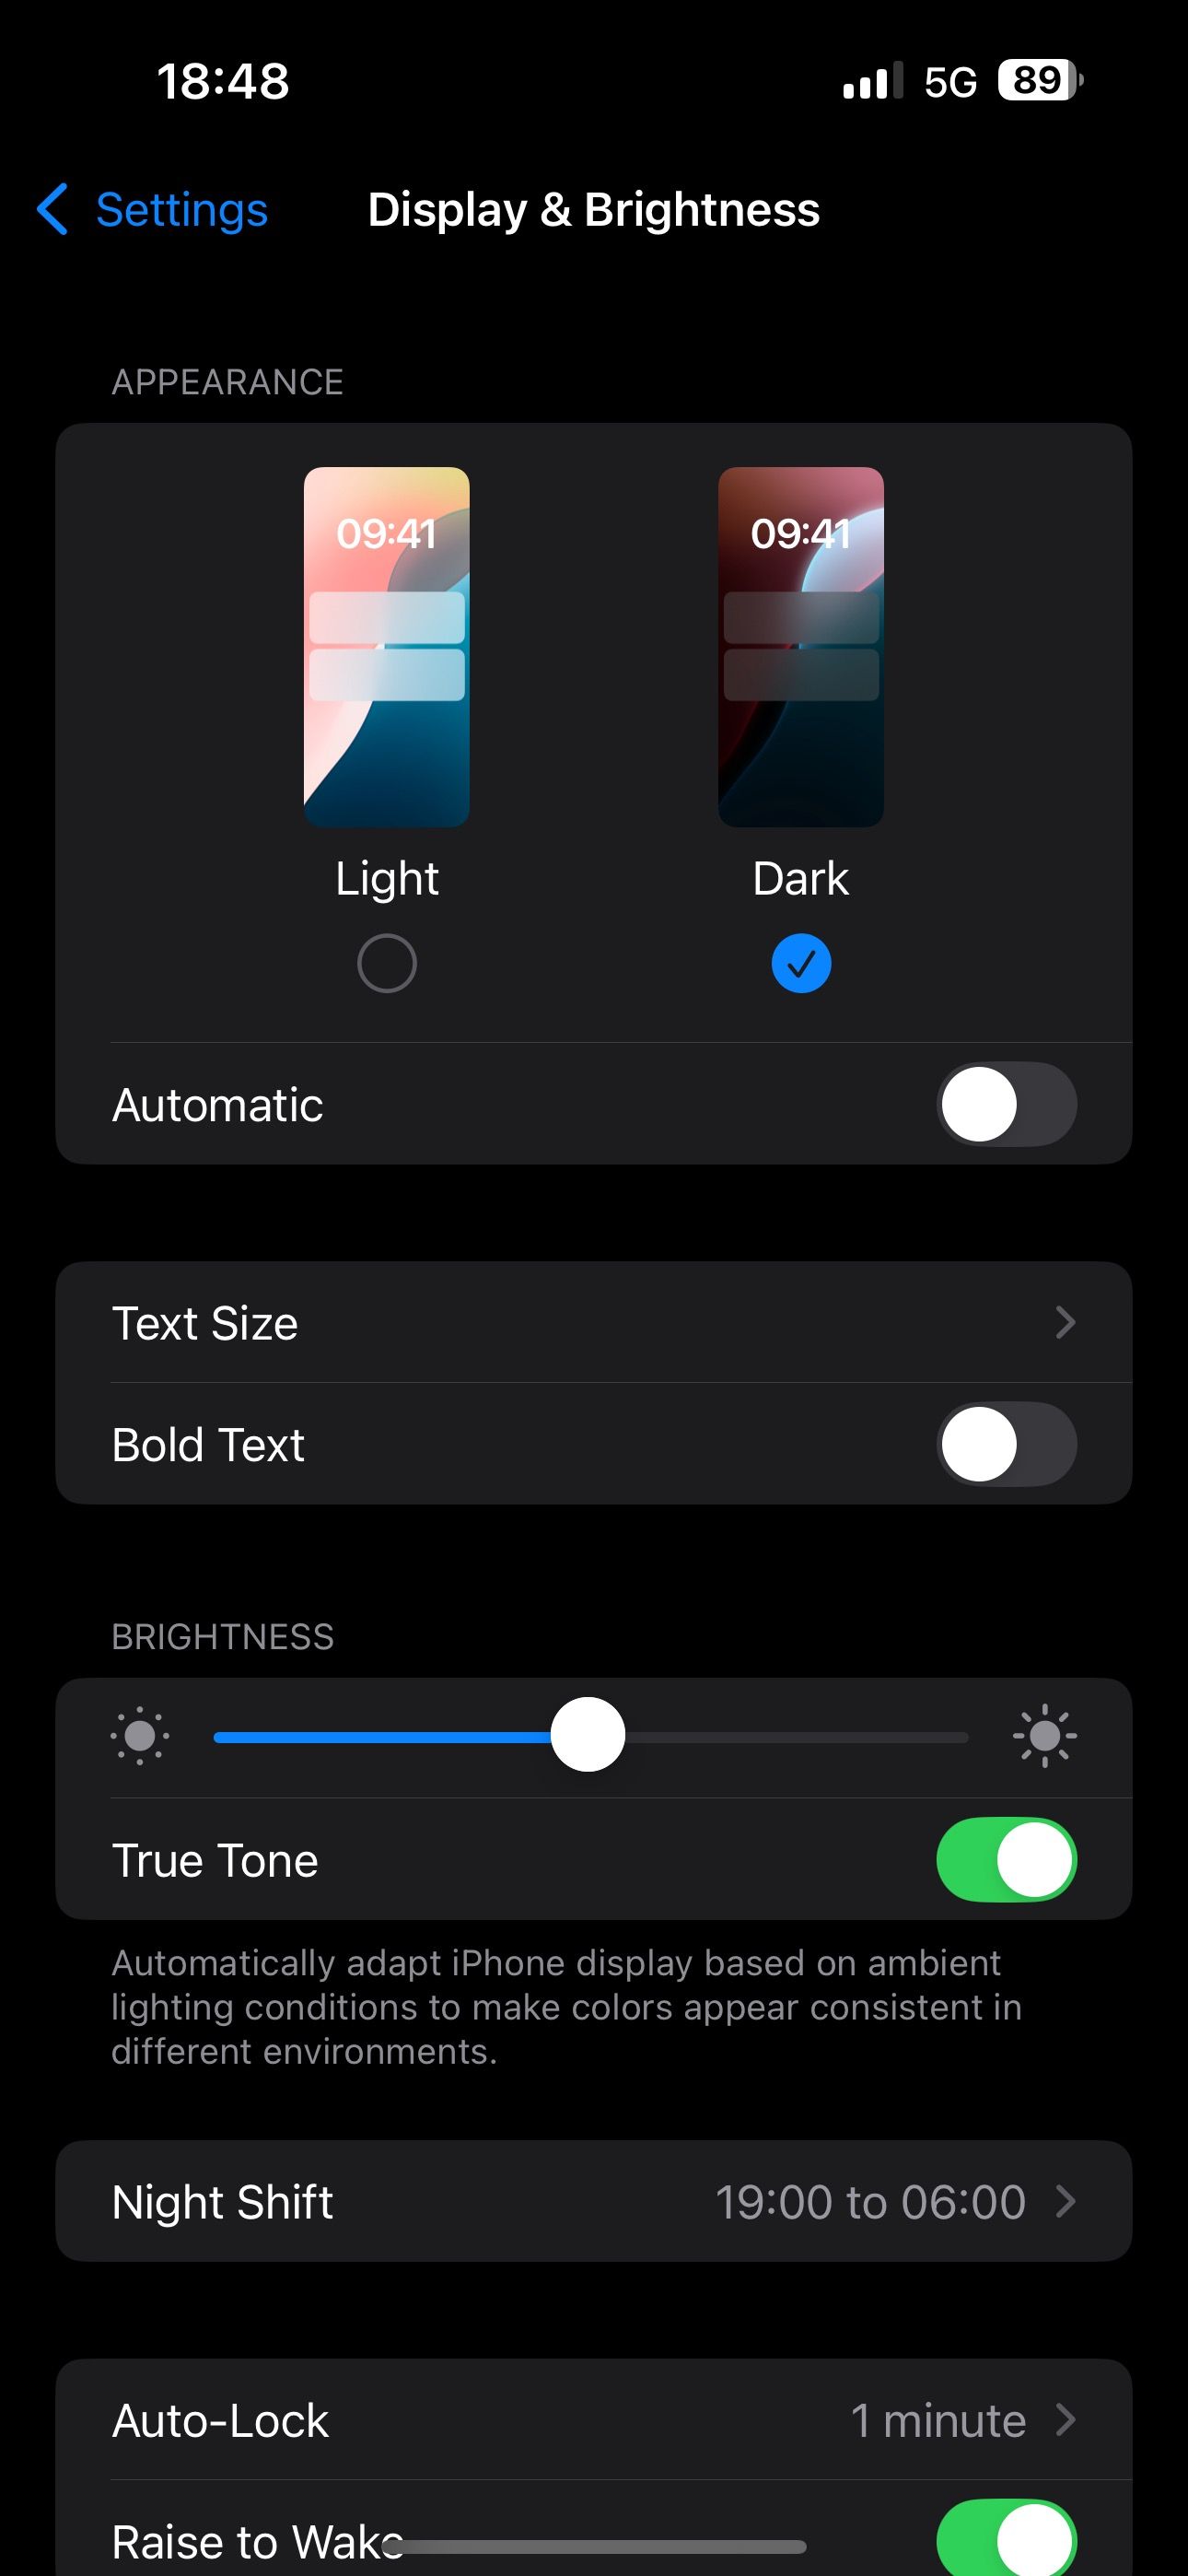
I’ve set my iPhone to toggle Dark Mode on automatically, so I don’t have to do it myself. To do the same, head to Settings > Display & Brightness to toggle on the “Automatic” switch. Now, if you want to automatically enable Dark Mode on your iPhone at sunset, tap “Options” and select “Sunset to Sunrise.”
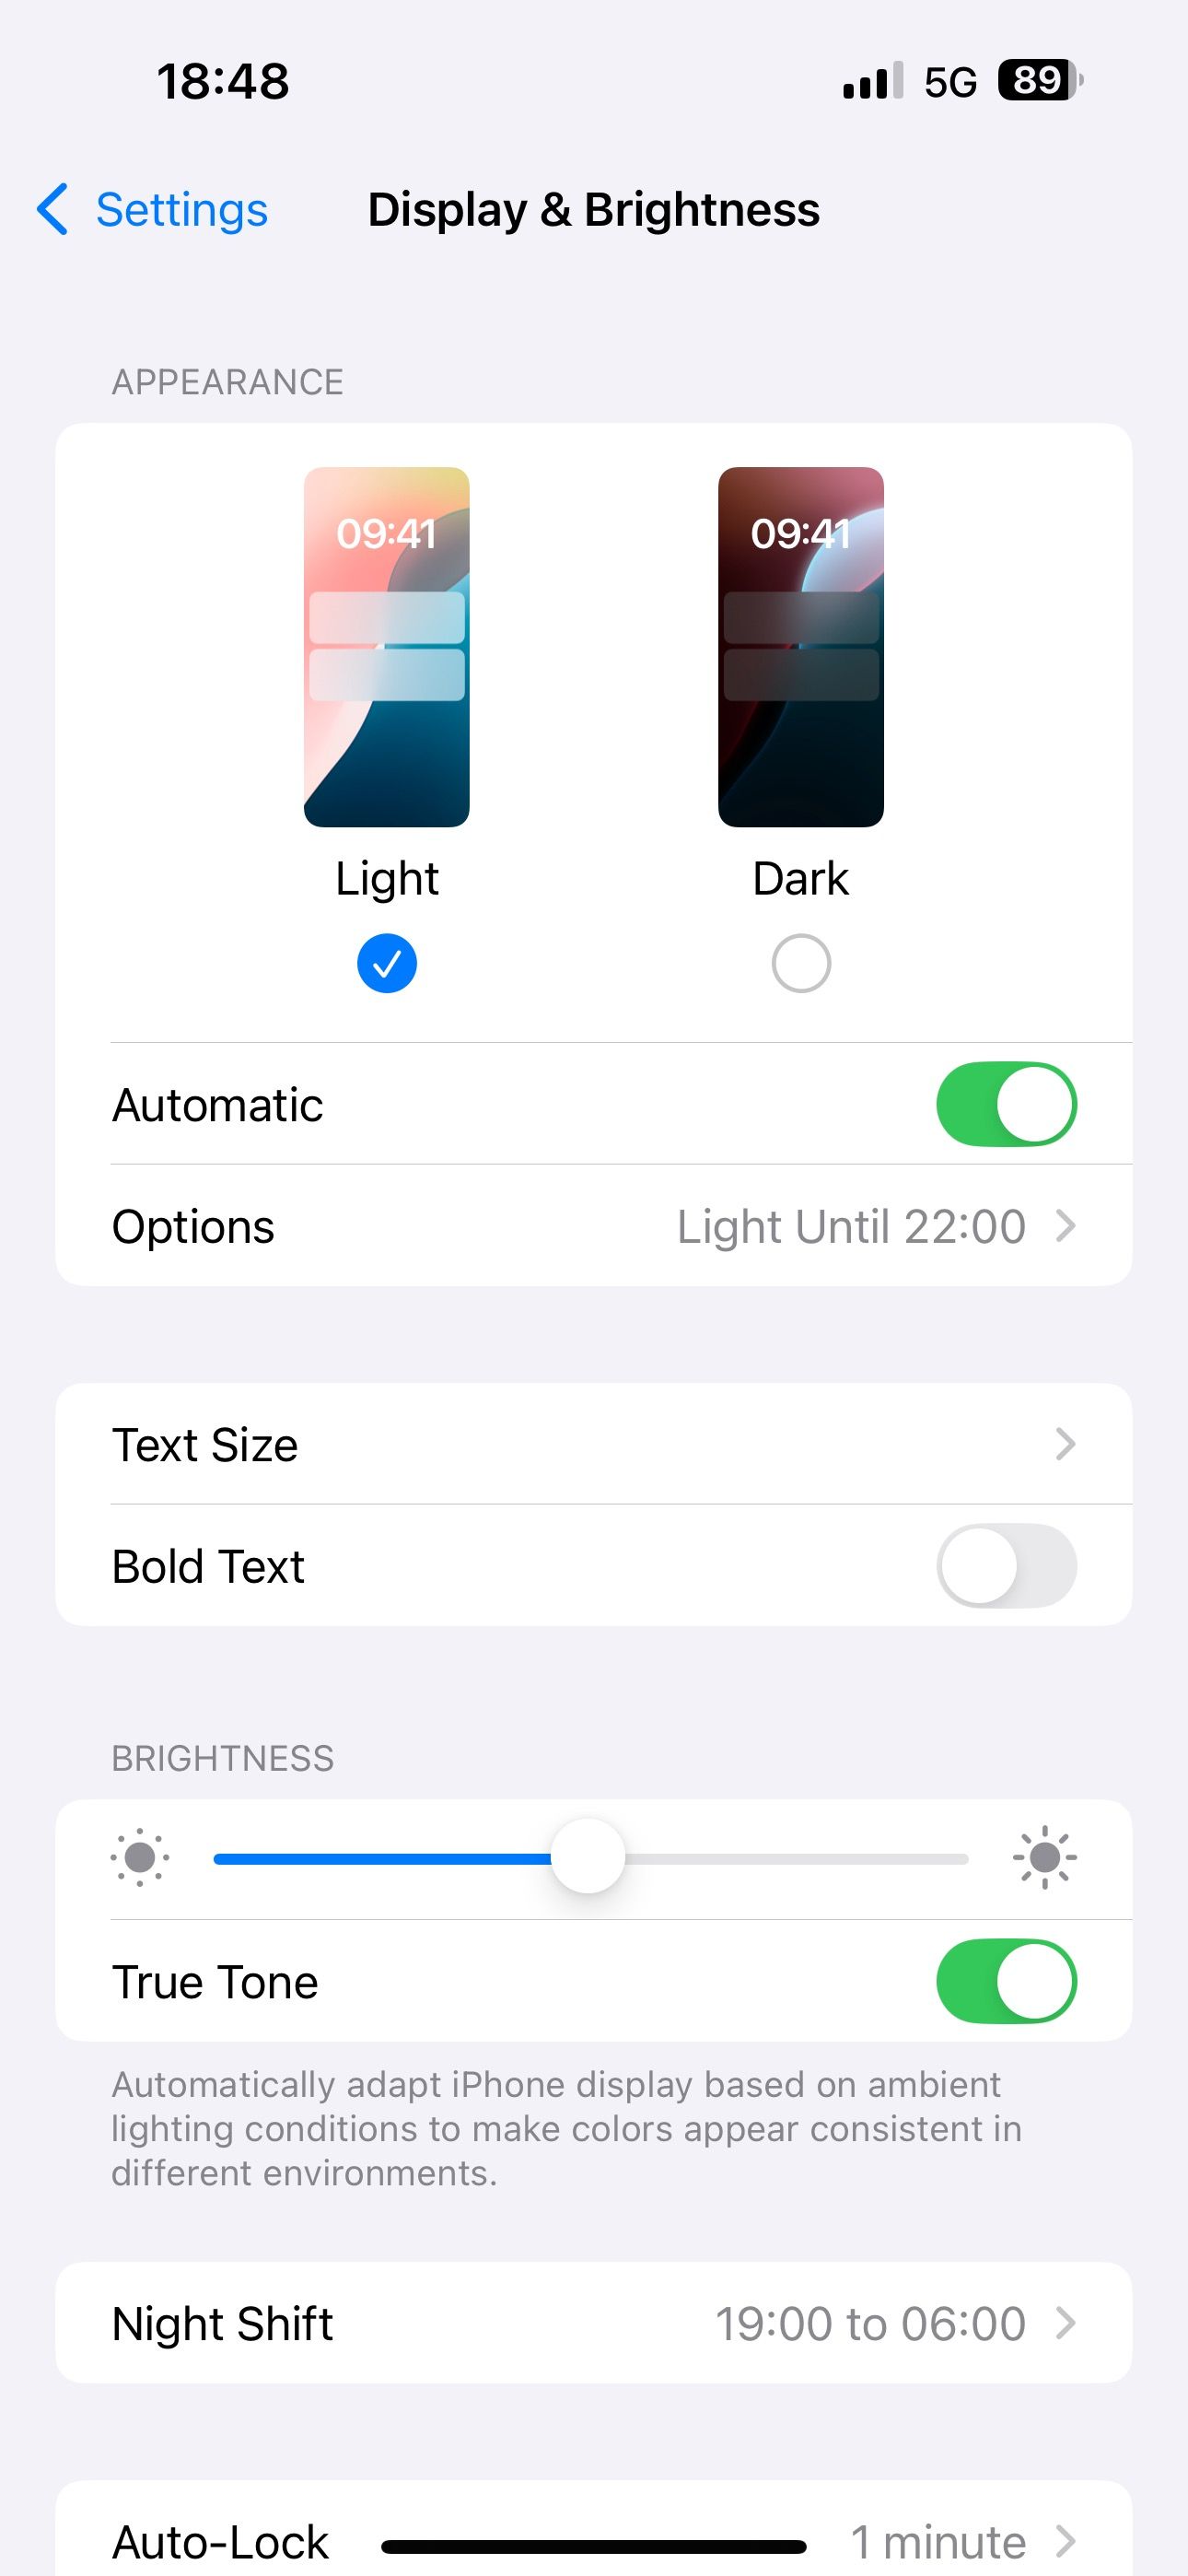
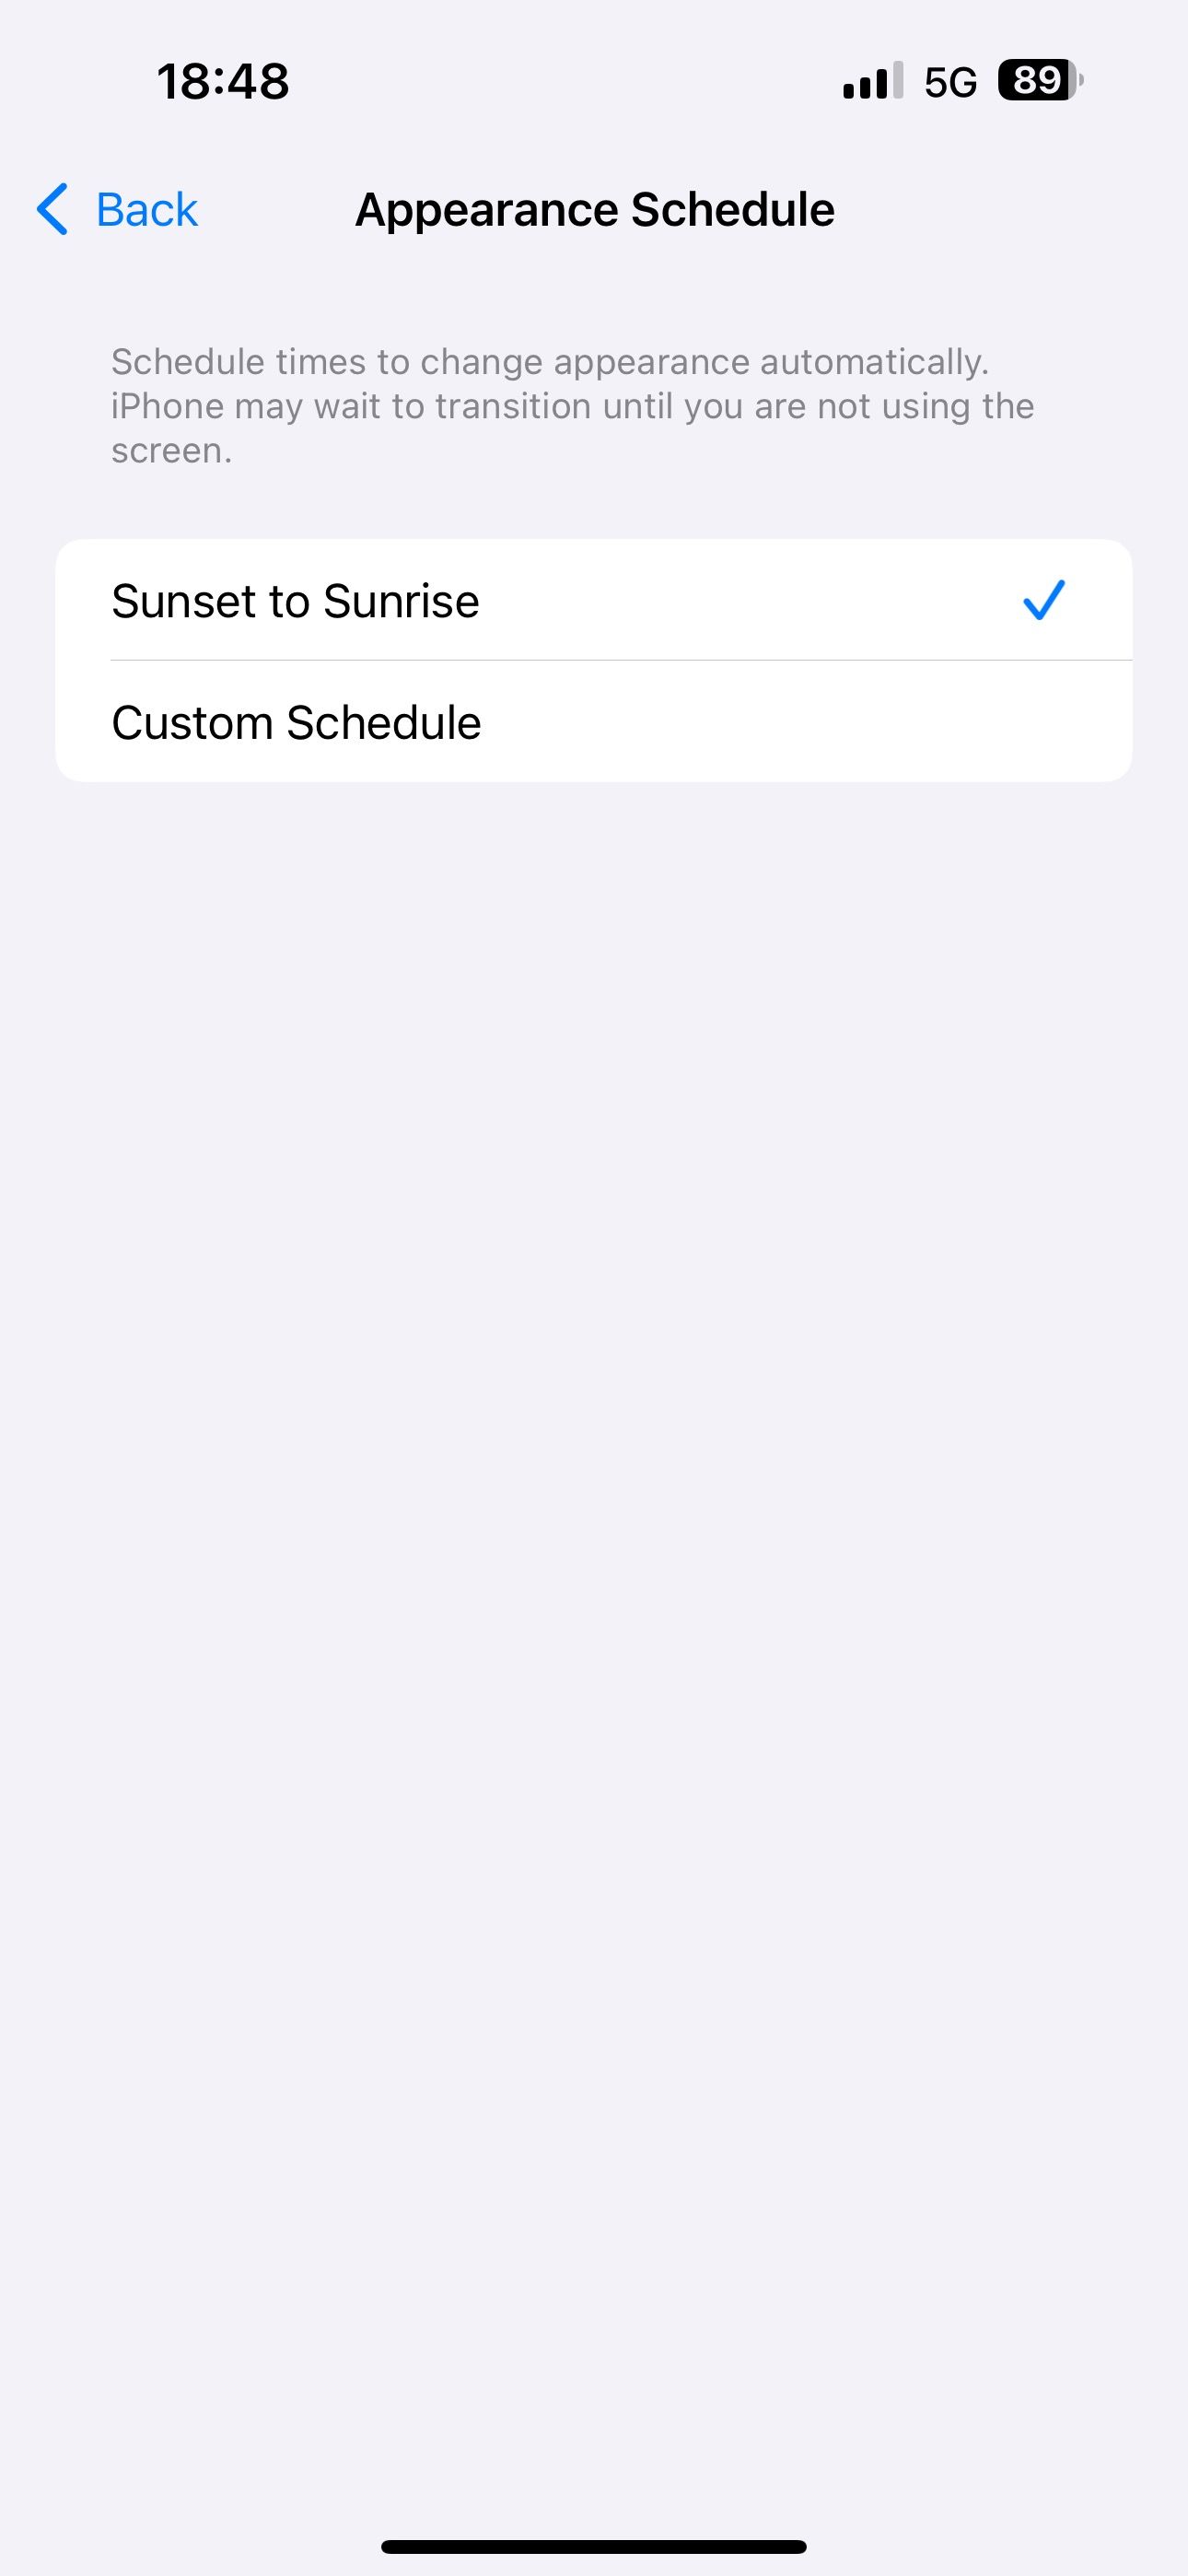
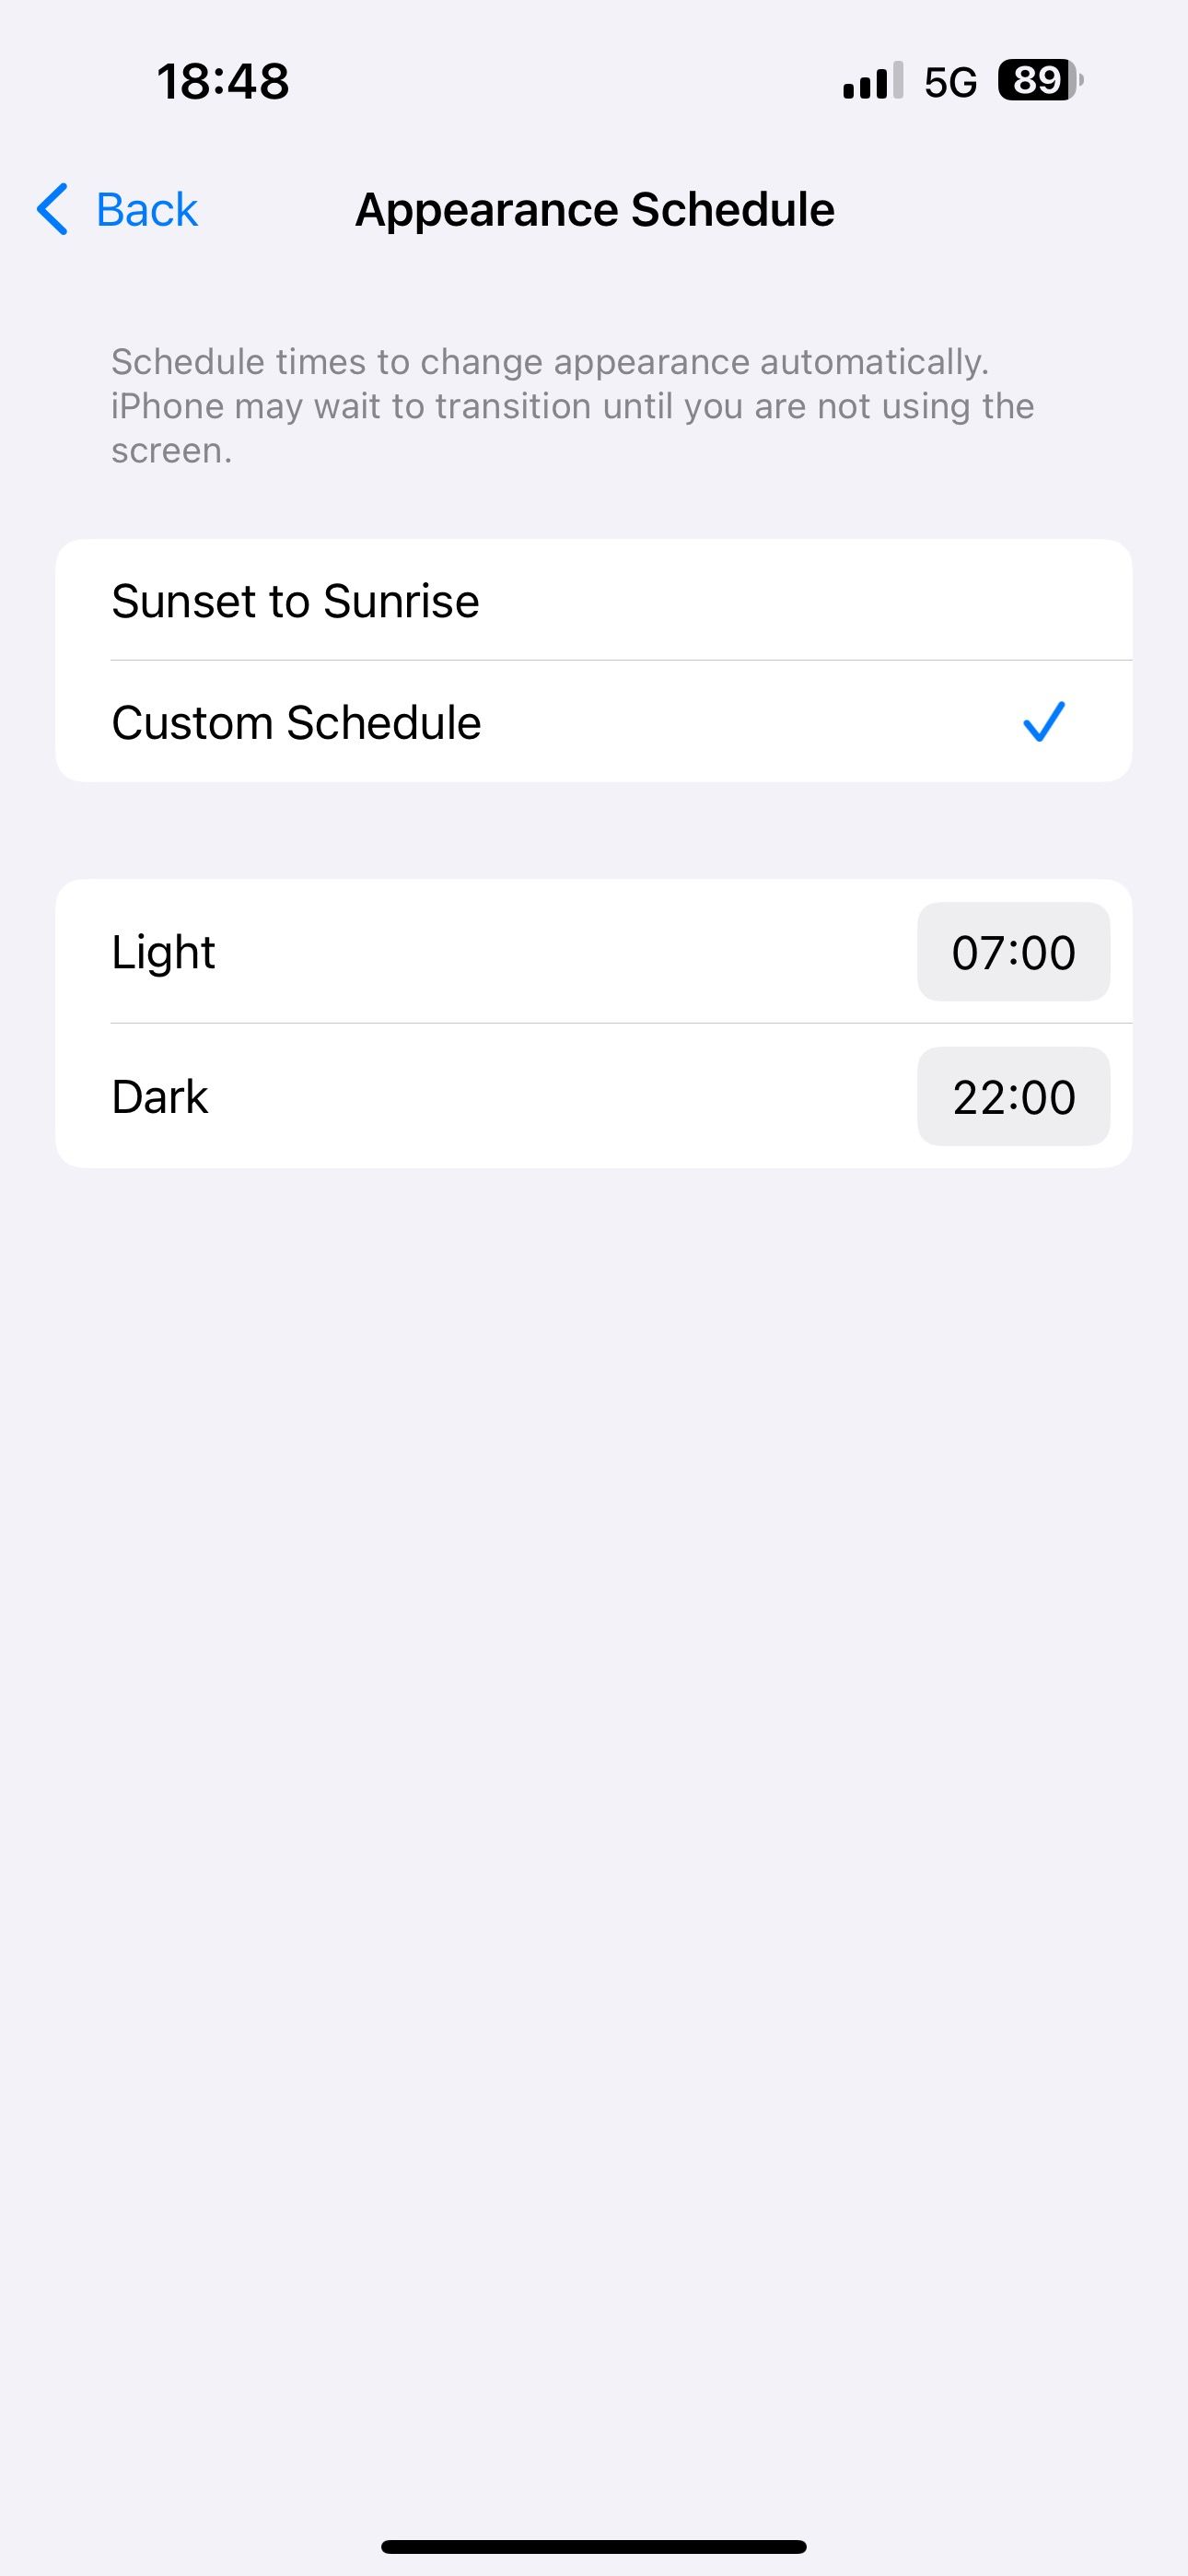
Alternatively, tap “Custom Schedule” and set a schedule for the Light and Dark modes, respectively, to switch between them at your preferred time.
You should also consider enabling the dark appearance on all the apps you use at night. Alternatively, you can set the app to follow system settings, so that it automatically switches the appearance based on your iPhone’s appearance settings.
Related
How to Enable Dark Mode by Tapping the Back of Your iPhone
With this handy tip, dark mode is just a few taps away.
2
Night Shift Limits Blue Light
Enabling Dark Mode on an iPhone can help reduce blue light exposure, but only to a limited extent. This is why I also enable Night Shift on my iPhone.
Night Shift is a display feature that significantly reduces blue light emission by shifting the screen’s colors to warmer tones, like yellows or reds, as soon as the Sun goes down. The increased yellow and red colors on the screen mimic sunset in a bid to improve your brain’s chances of releasing melatonin for better sleep.
To enable Night Shift on your iPhone, go to Settings > Display & Brightness and select “Night Shift.” Now, flip the “Manually Enable Until Tomorrow” toggle to enable Night Shift right away.
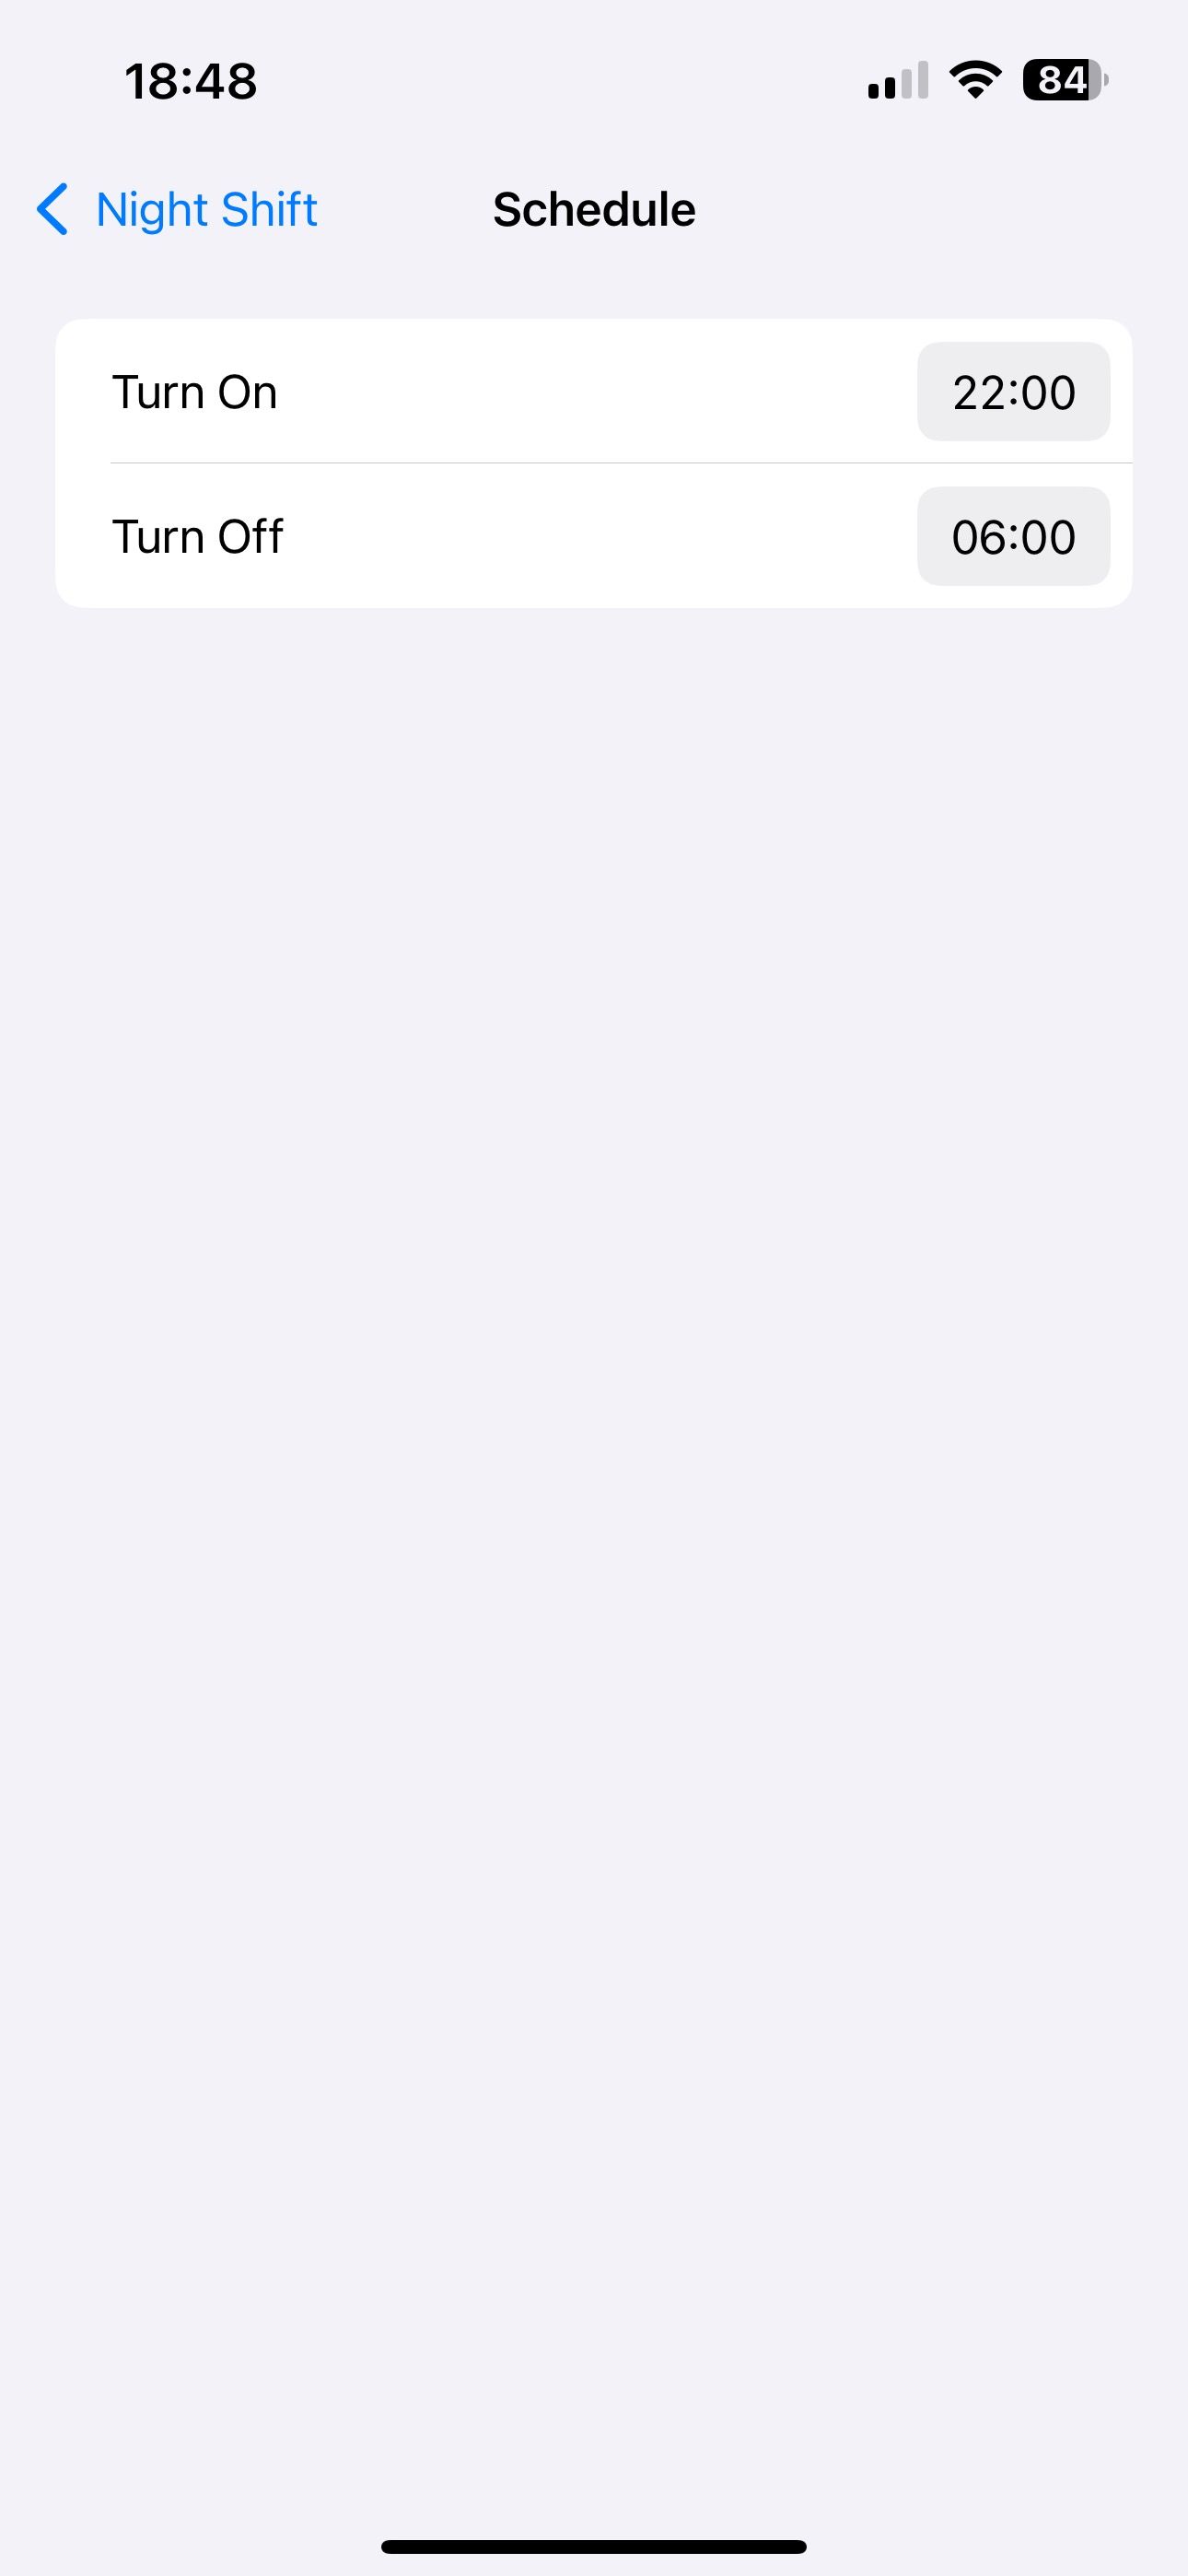
Alternatively, you can set a schedule to tell your iPhone to automatically toggle Night Shift on and off. To do this, toggle on the “Scheduled” option, tap on “From To” below, and set the “Turn On” and “Turn Off” times on the next screen.
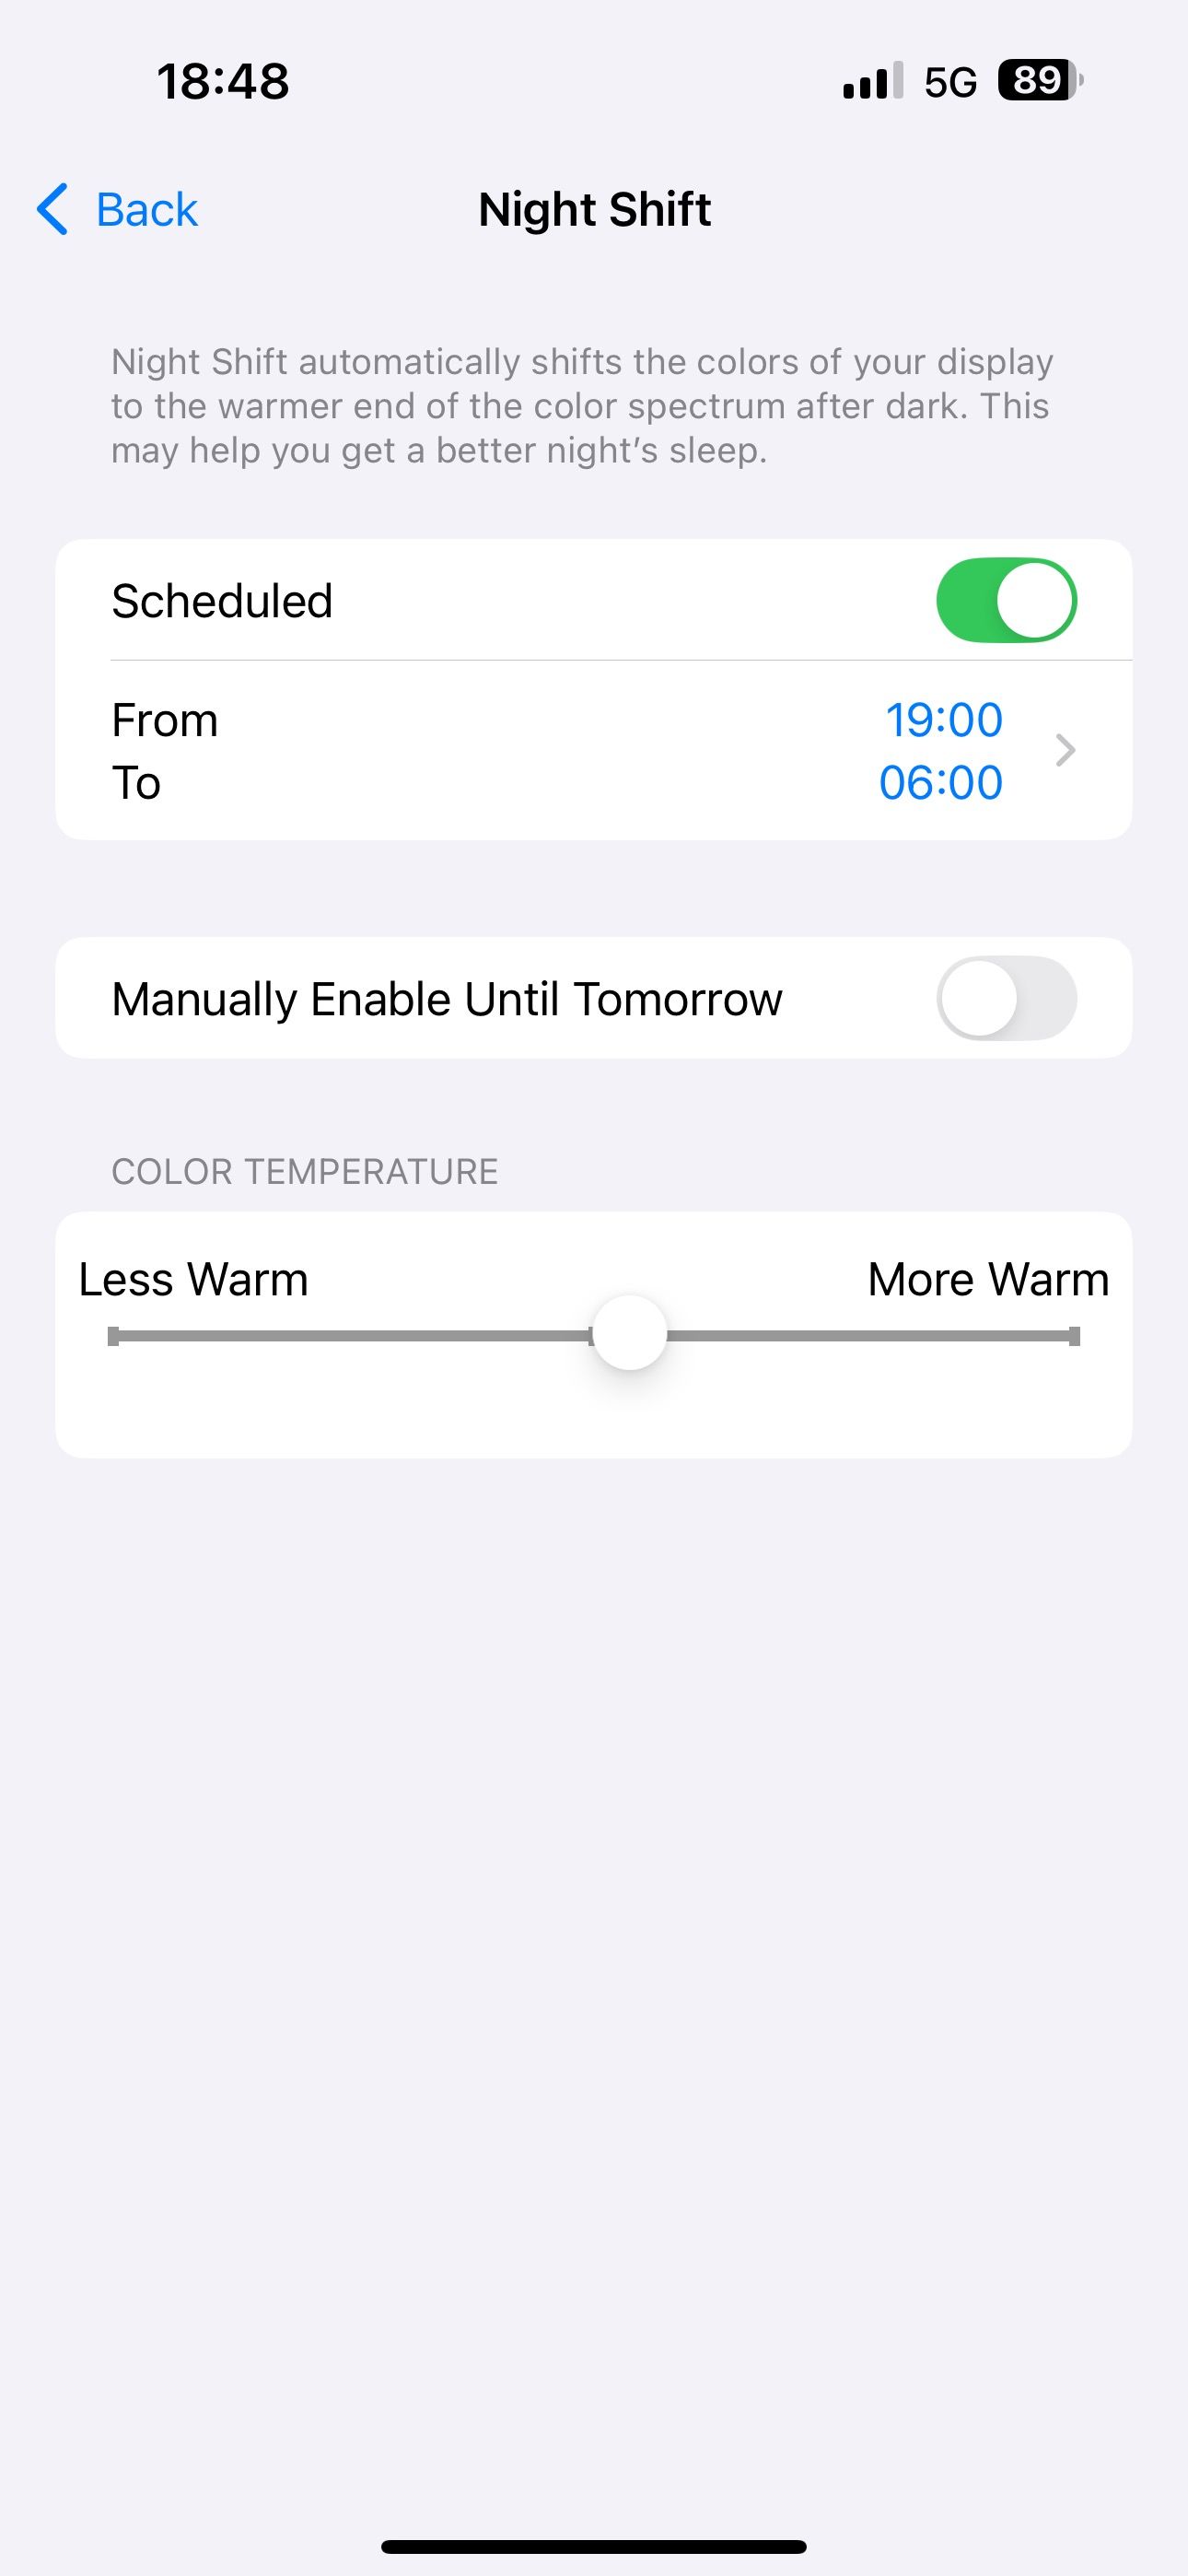
While here, you can also configure the color temperature to make the screen look less or more warm. Simply drag the Color Temperature slider at the bottom to the left or right to adjust the intensity.
3
Reduce White Point Tones Down Harsh Whites
Enabling Dark Mode and Night Shift can greatly reduce eye strain, but it doesn’t dim the intensity of bright colors and whites, causing them to still feel harsh at night. To this end, Apple offers the Reduce White Point setting, which allows you to make the screen appear dimmer to reduce eye strain further and create a more comfortable user experience in the dark.
If you have an iPhone 16, 16 Pro, or later (except for the iPhone 16e), your display goes as low as 1 nit in the dark to reduce eye strain. However, if you feel that isn’t enough or use one of the older iPhones, you can bring down the brightness by enabling and configuring Reduce White Point.
To enable it, go to Settings > Accessibility > Display & Text Size. Scroll down to the bottom and turn on the “Reduce White Point” option. The screen will go dim, and you’ll see a slider. Use it to adjust the intensity based on your preference.
Sadly, unlike the Dark Mode and Night Shift settings, Apple doesn’t offer an option to toggle the Reduce White Point setting per schedule automatically. We’ll look at how to do it with a workaround below.
4
Use the Shortcuts App to Easily Toggle All Nighttime Settings at Once
You can manually enable all three nighttime settings mentioned above or schedule two of them to trigger automatically. But there’s also a way to schedule the third one—Reduce White Point—too even though Apple doesn’t specifically support it.
You can do this with Shortcuts, one of the amazing pre-installed on your iPhone. With it, you can either create a shortcut to change all three settings that you can trigger manually or set up an automation that toggles on all three settings automatically when specific conditions are met.
Creating a shortcut that lets you toggle all three nighttime settings manually is easy. Open the Shortcuts app and hit the “+” button in the top-right corner. Tap the “Search Actions” search field on the overlay card, look up “Set Appearance,” and tap on it to add it to the action. Similarly, search and add the “Set Night Shift” and “Set White Point” actions.
Now, tap the “Turn” text on each of these actions and choose the “Toggle” option from the menu.
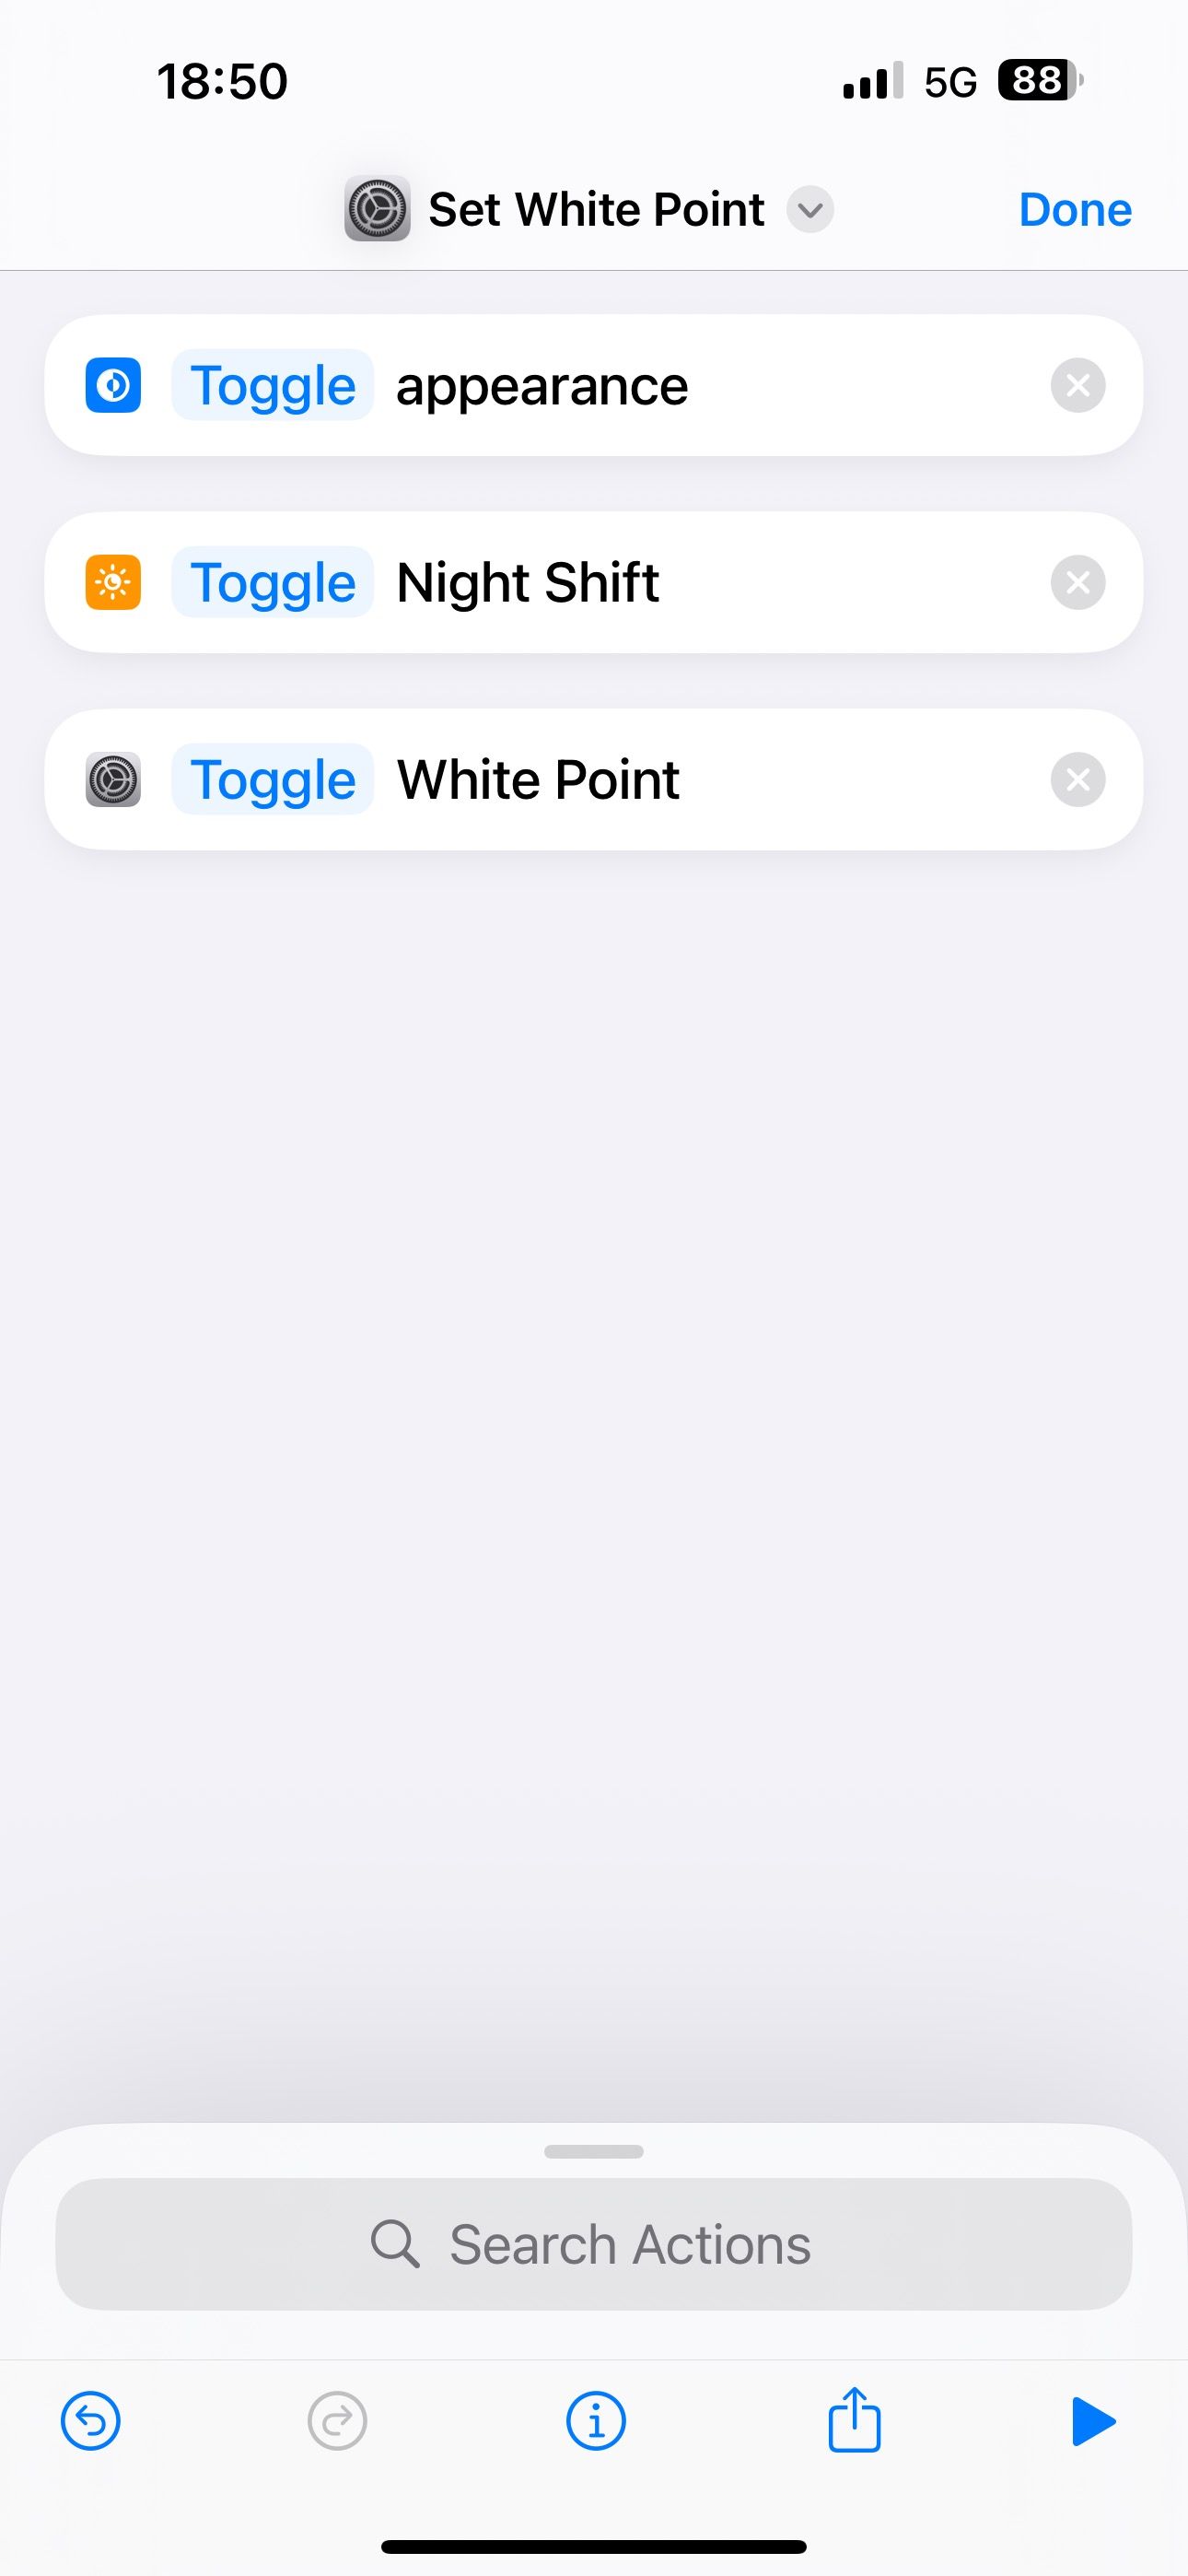
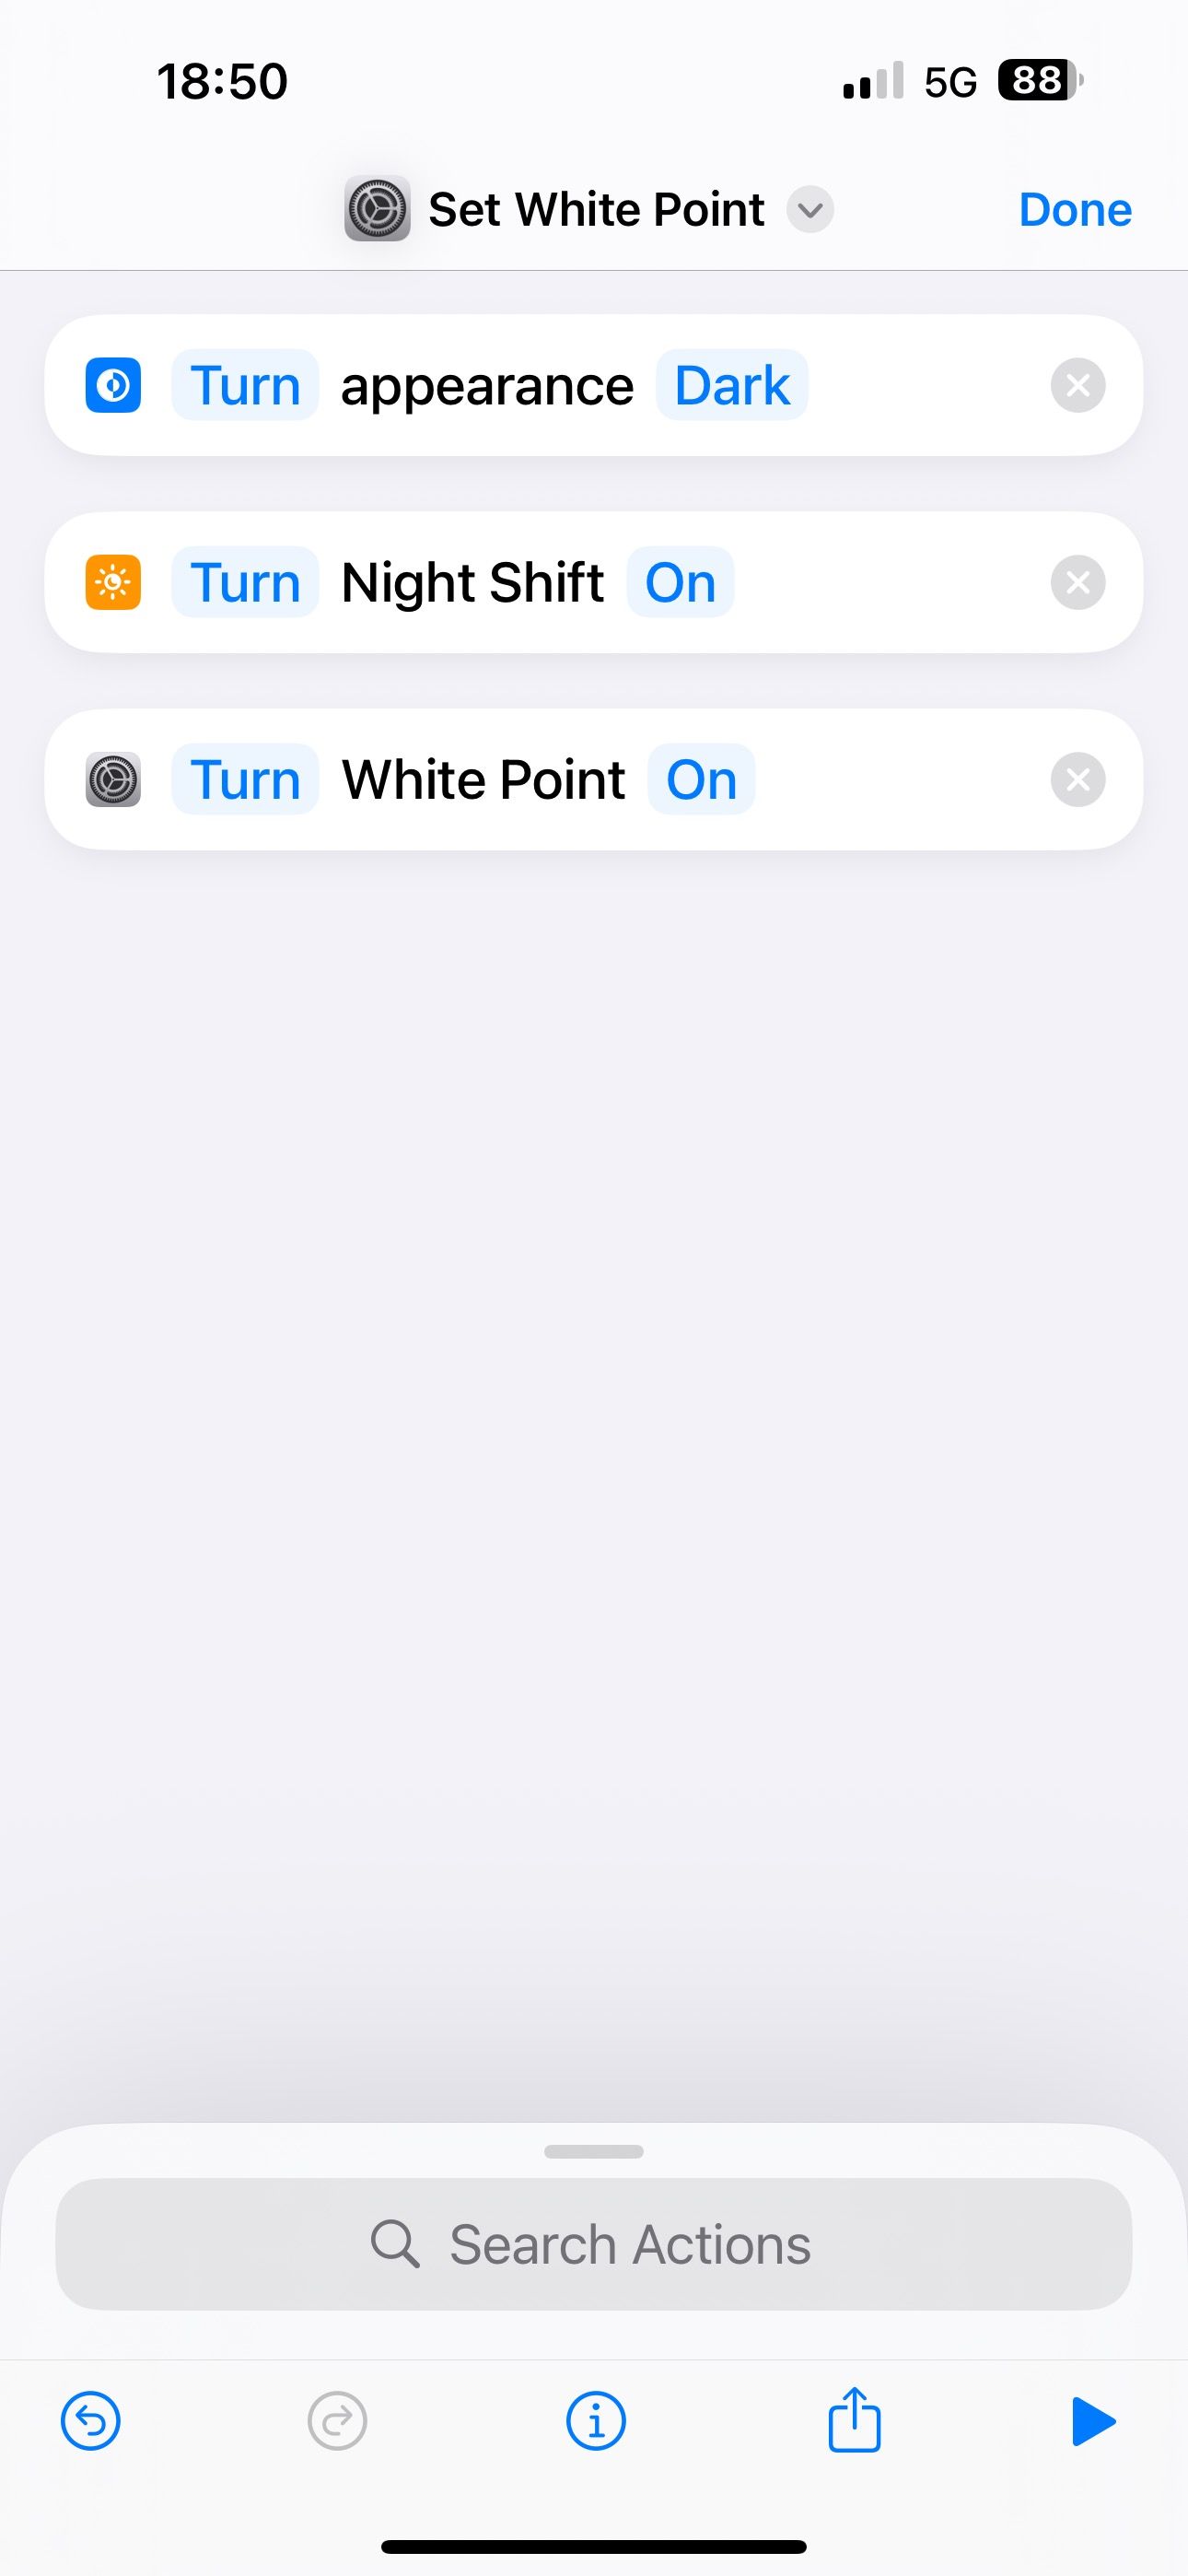
Shortcuts will now name this shortcut to one of the actions. You’ll see the name right at the top. Tap it, hit “Rename,” and type your preferred name. You can also choose an icon for the shortcut from here.
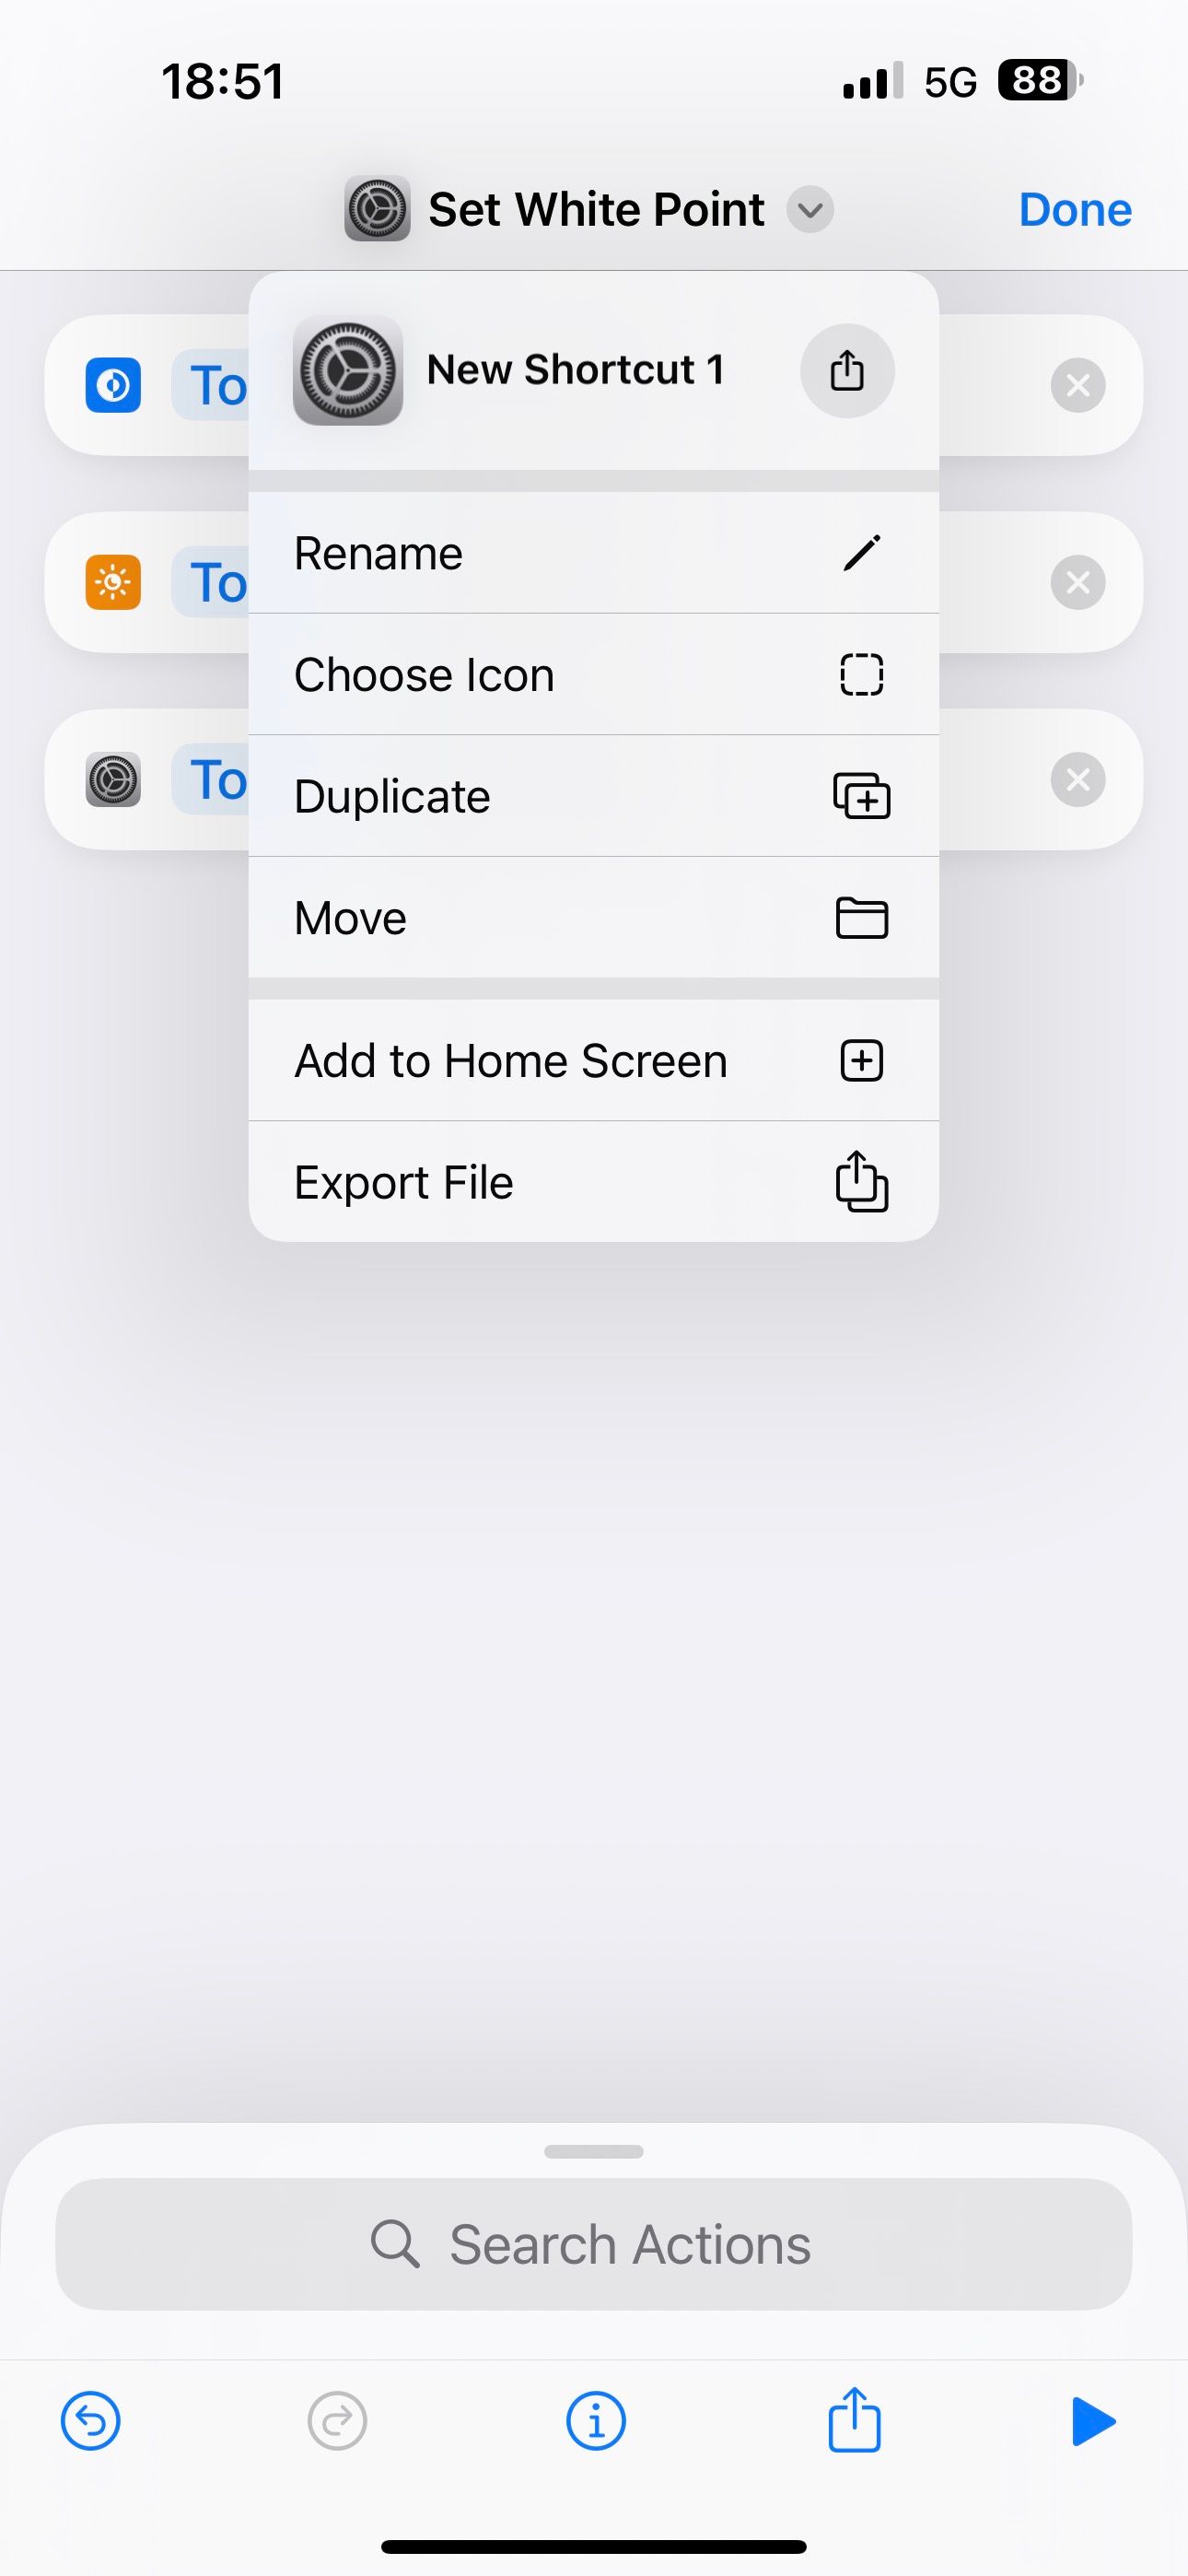
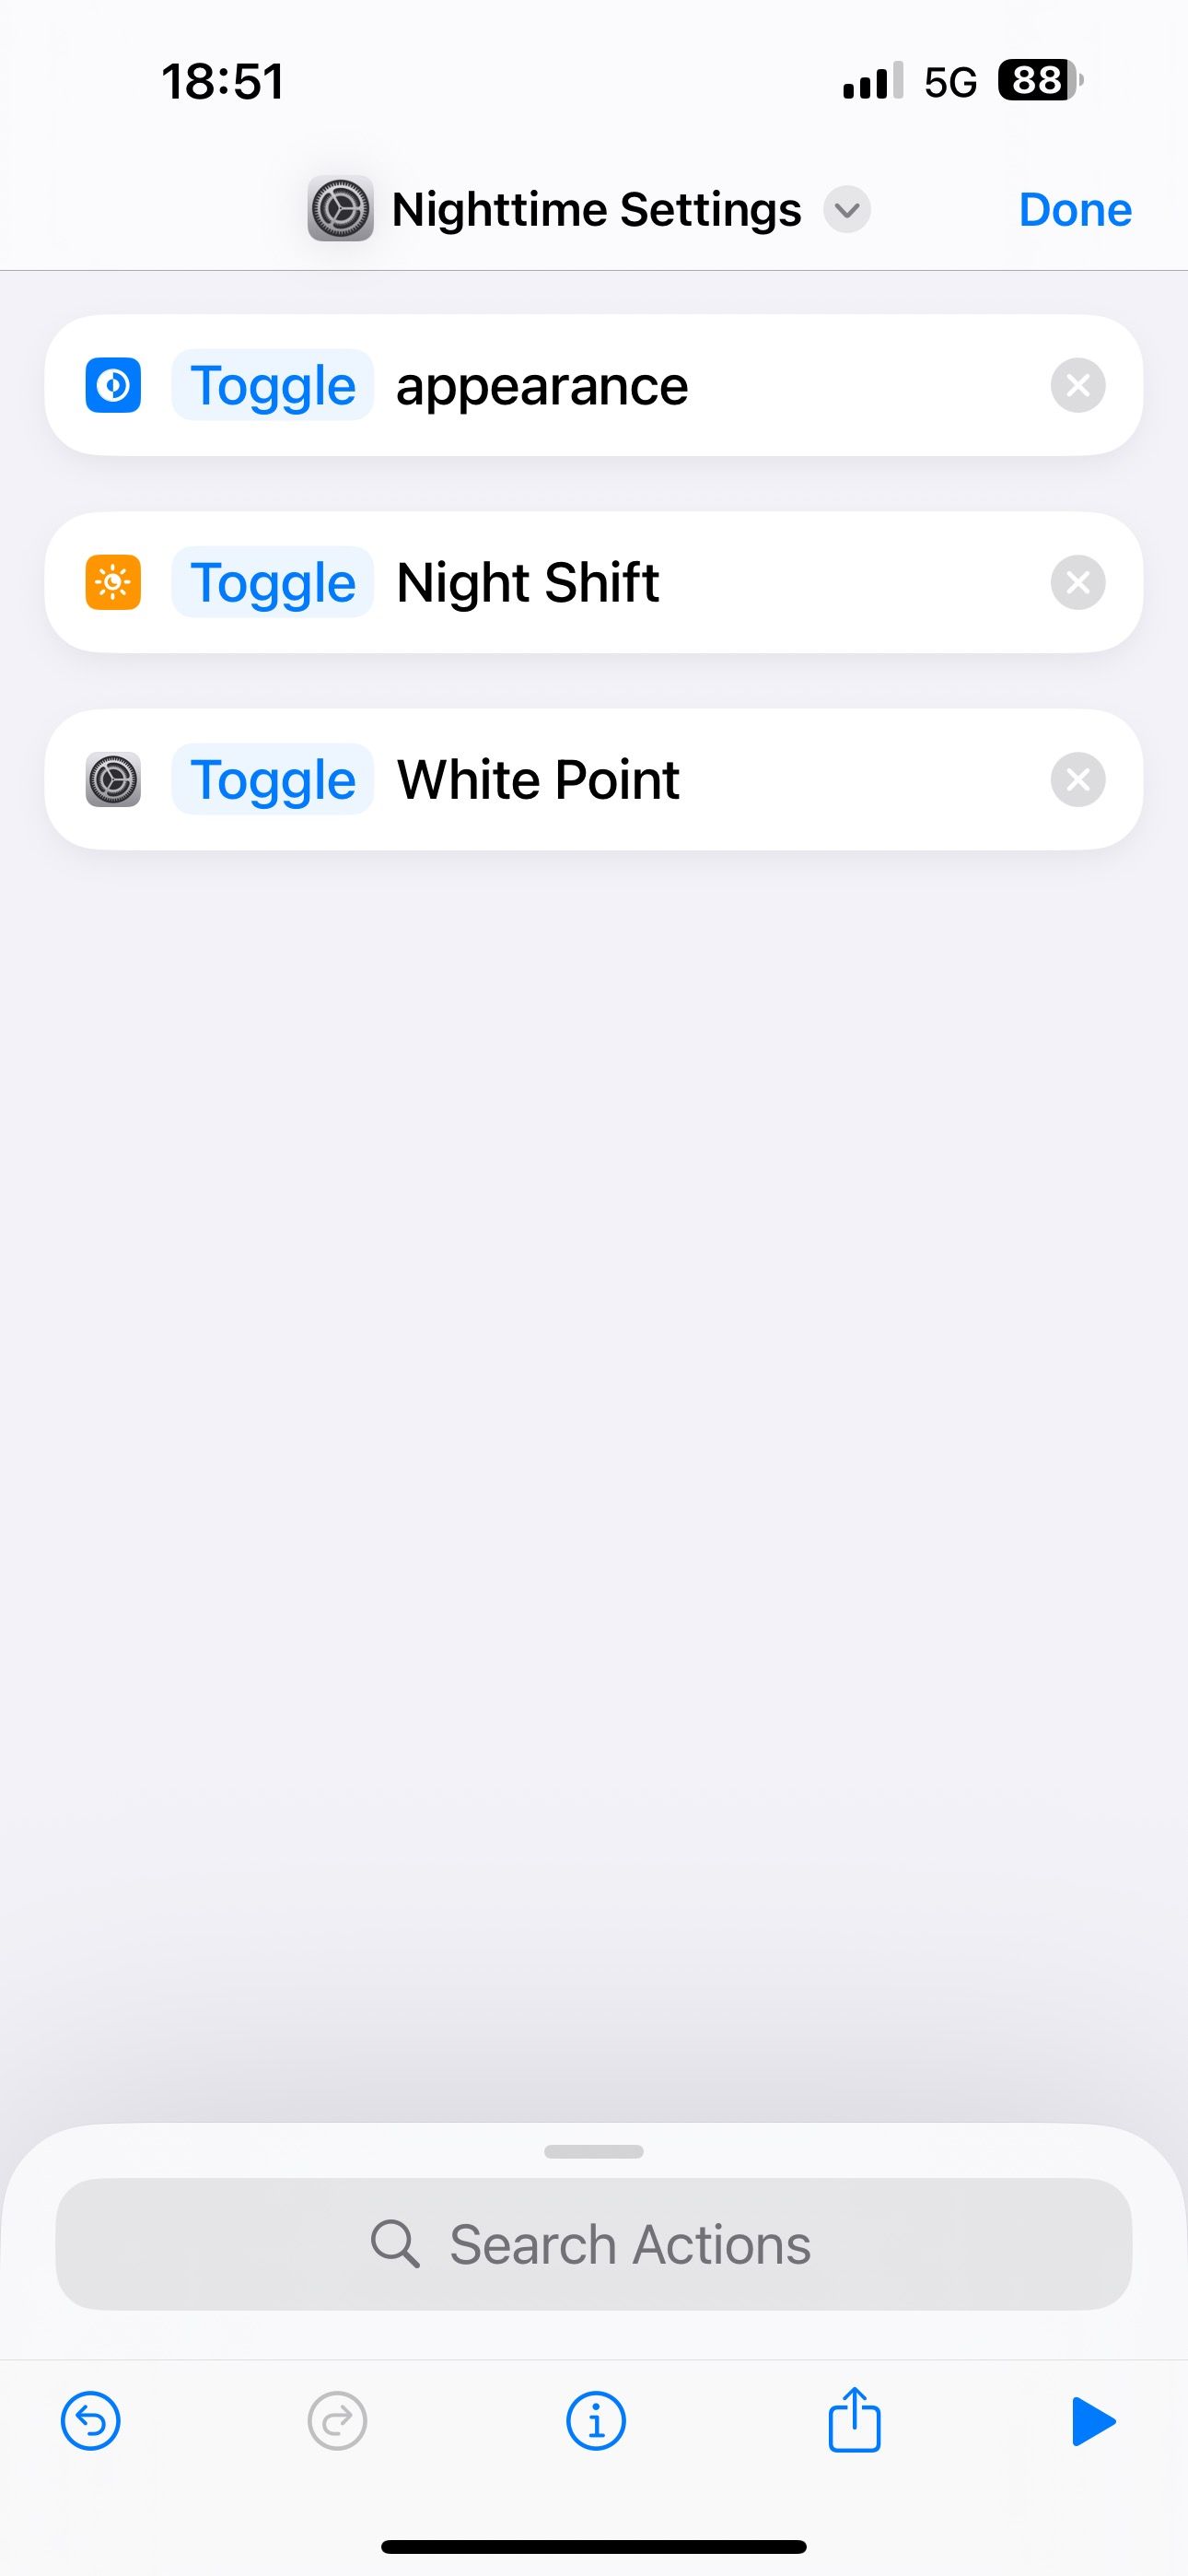
Once done, tap “Done” in the top-right corner. Your shortcut is now ready to use.
When you want to trigger it, you can head back to the Shortcuts app and tap it. Alternatively, you can trigger the shortcut from your iPhone’s Home Screen. For this, add a widget for the Shortcuts app to your Home Screen and configure it with this shortcut. Then, tap the shortcut tile in the widget to run it.
While triggering a shortcut manually has its benefits, you can create a Shortcuts automation if you want the settings to be enabled at a specific time or when other conditions are met. I’ll demonstrate how to set up an automation to trigger at a specific time. We’ll need to create two automations for this: one to turn on the settings at night and the other to turn them off in the morning.
To create an automation, open the Shortcuts app and tap on the “Automation” tab. Hit “+” in the top-right corner to create a new automation. Next, select “Time of Day” and set the time of day when you want to turn on the settings. Set the “Repeat” frequency to Daily and check the “Run Immediately” option. Hit “Next.”
Now, tap on “New Blank Automation.” You can also create a shortcut separately, as shown above, and choose it here instead of creating a new automation. Here, find and add the “Set Appearance,” “Set Night Shift,” and “Set White Point” actions. Make sure they look like “Turn Appearance Dark,” “Turn Night Shift On,” and “Turn White Point On.” Hit “Done.”
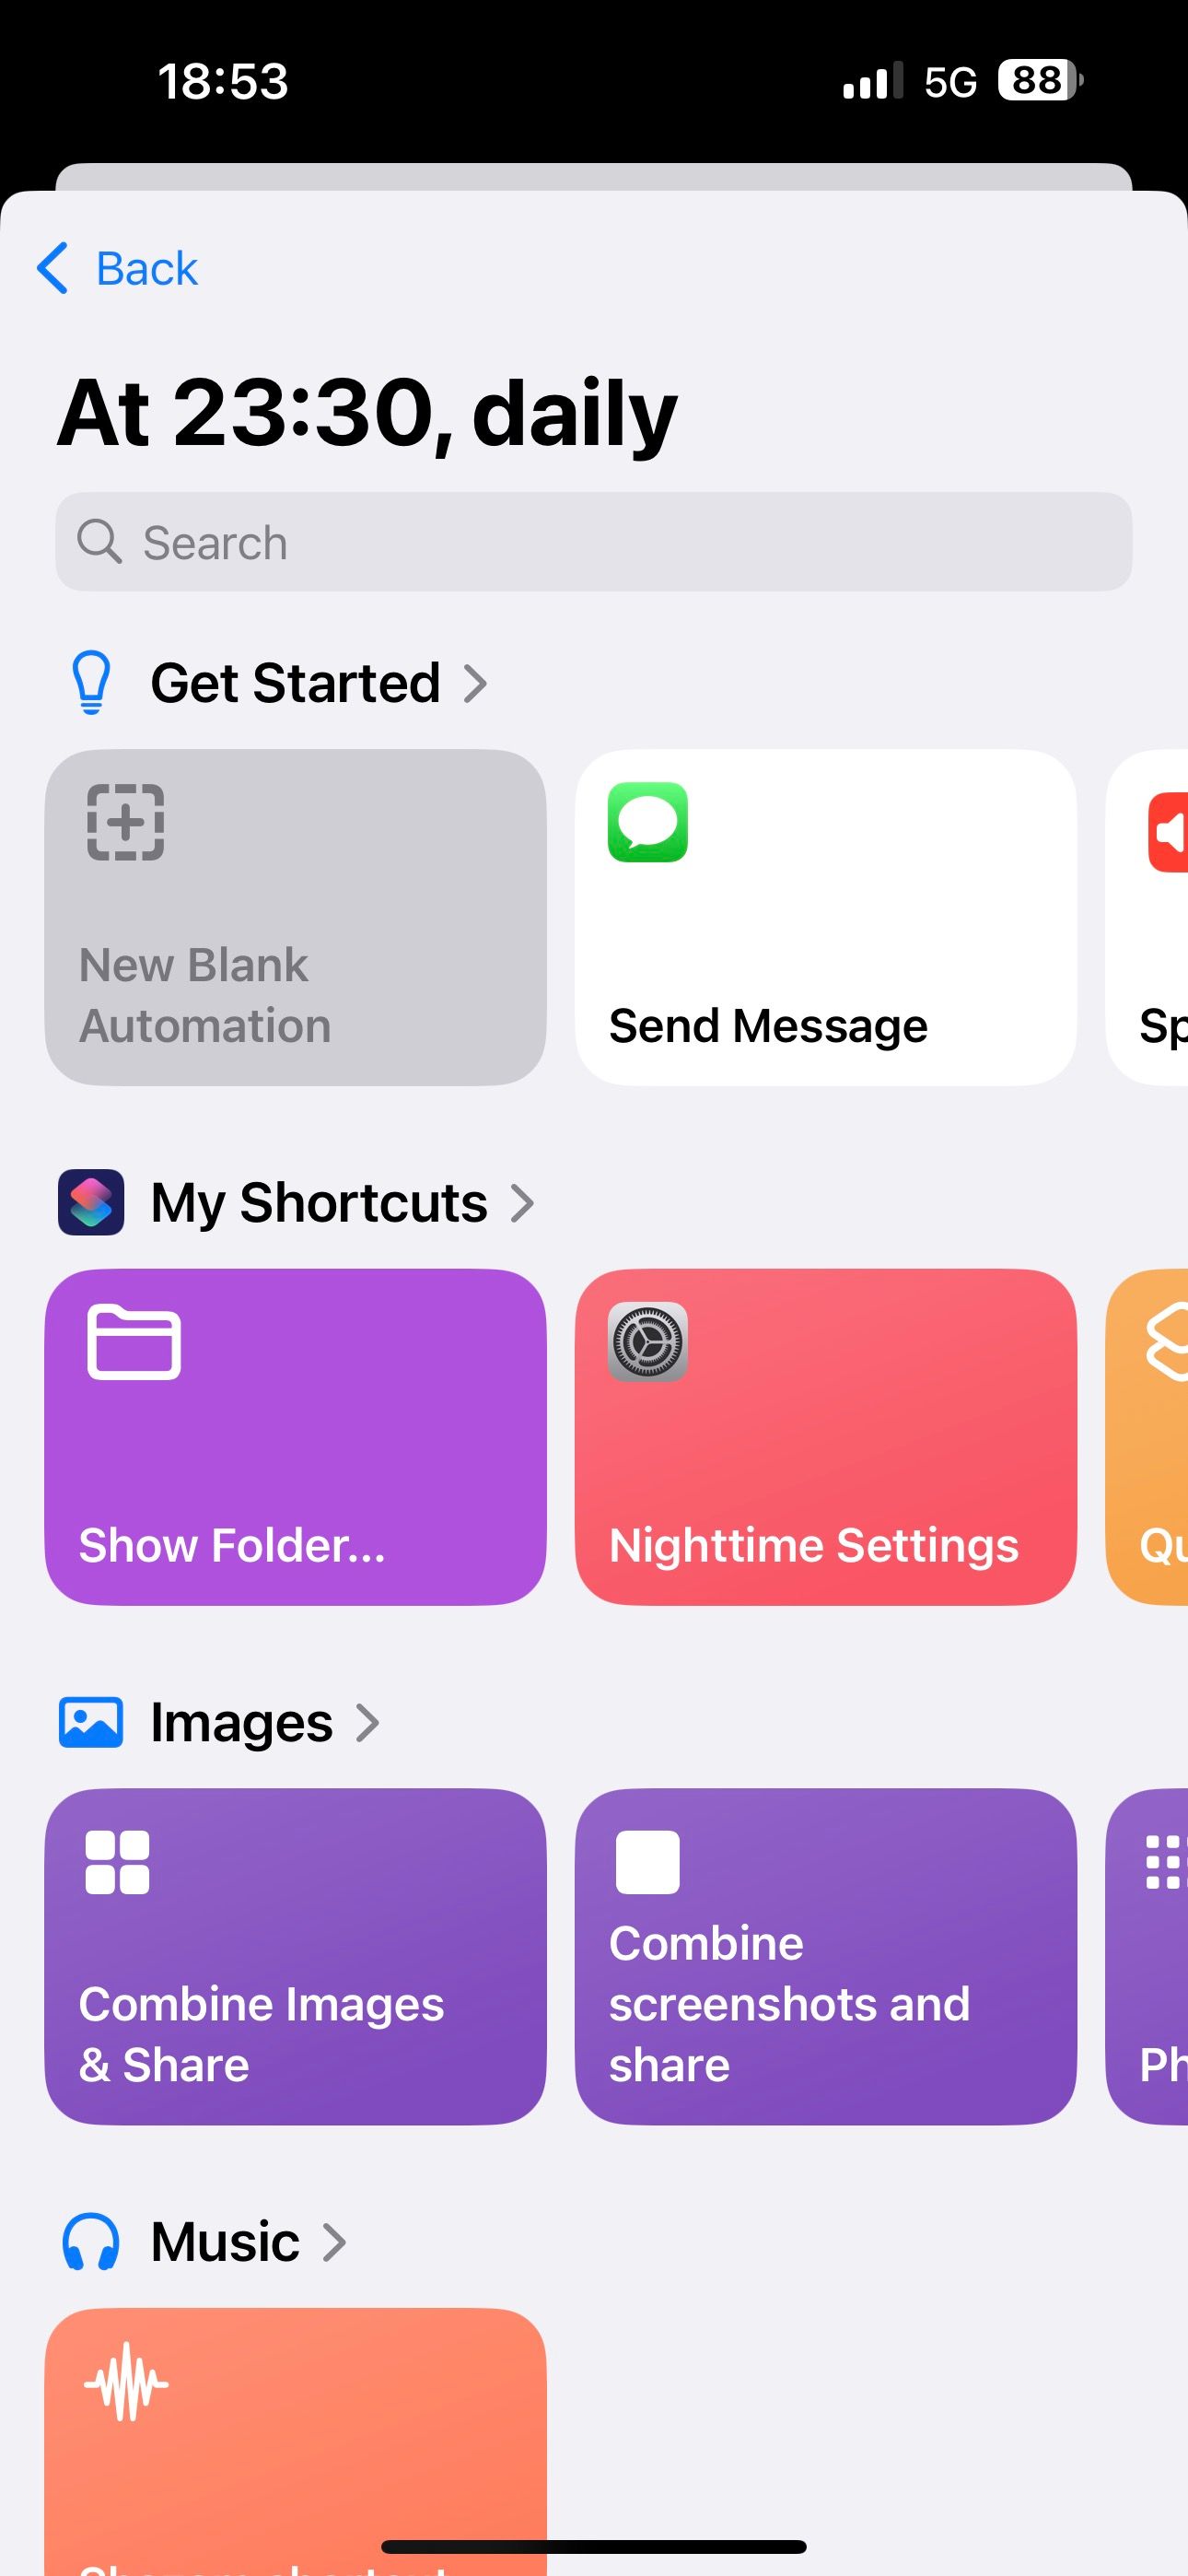
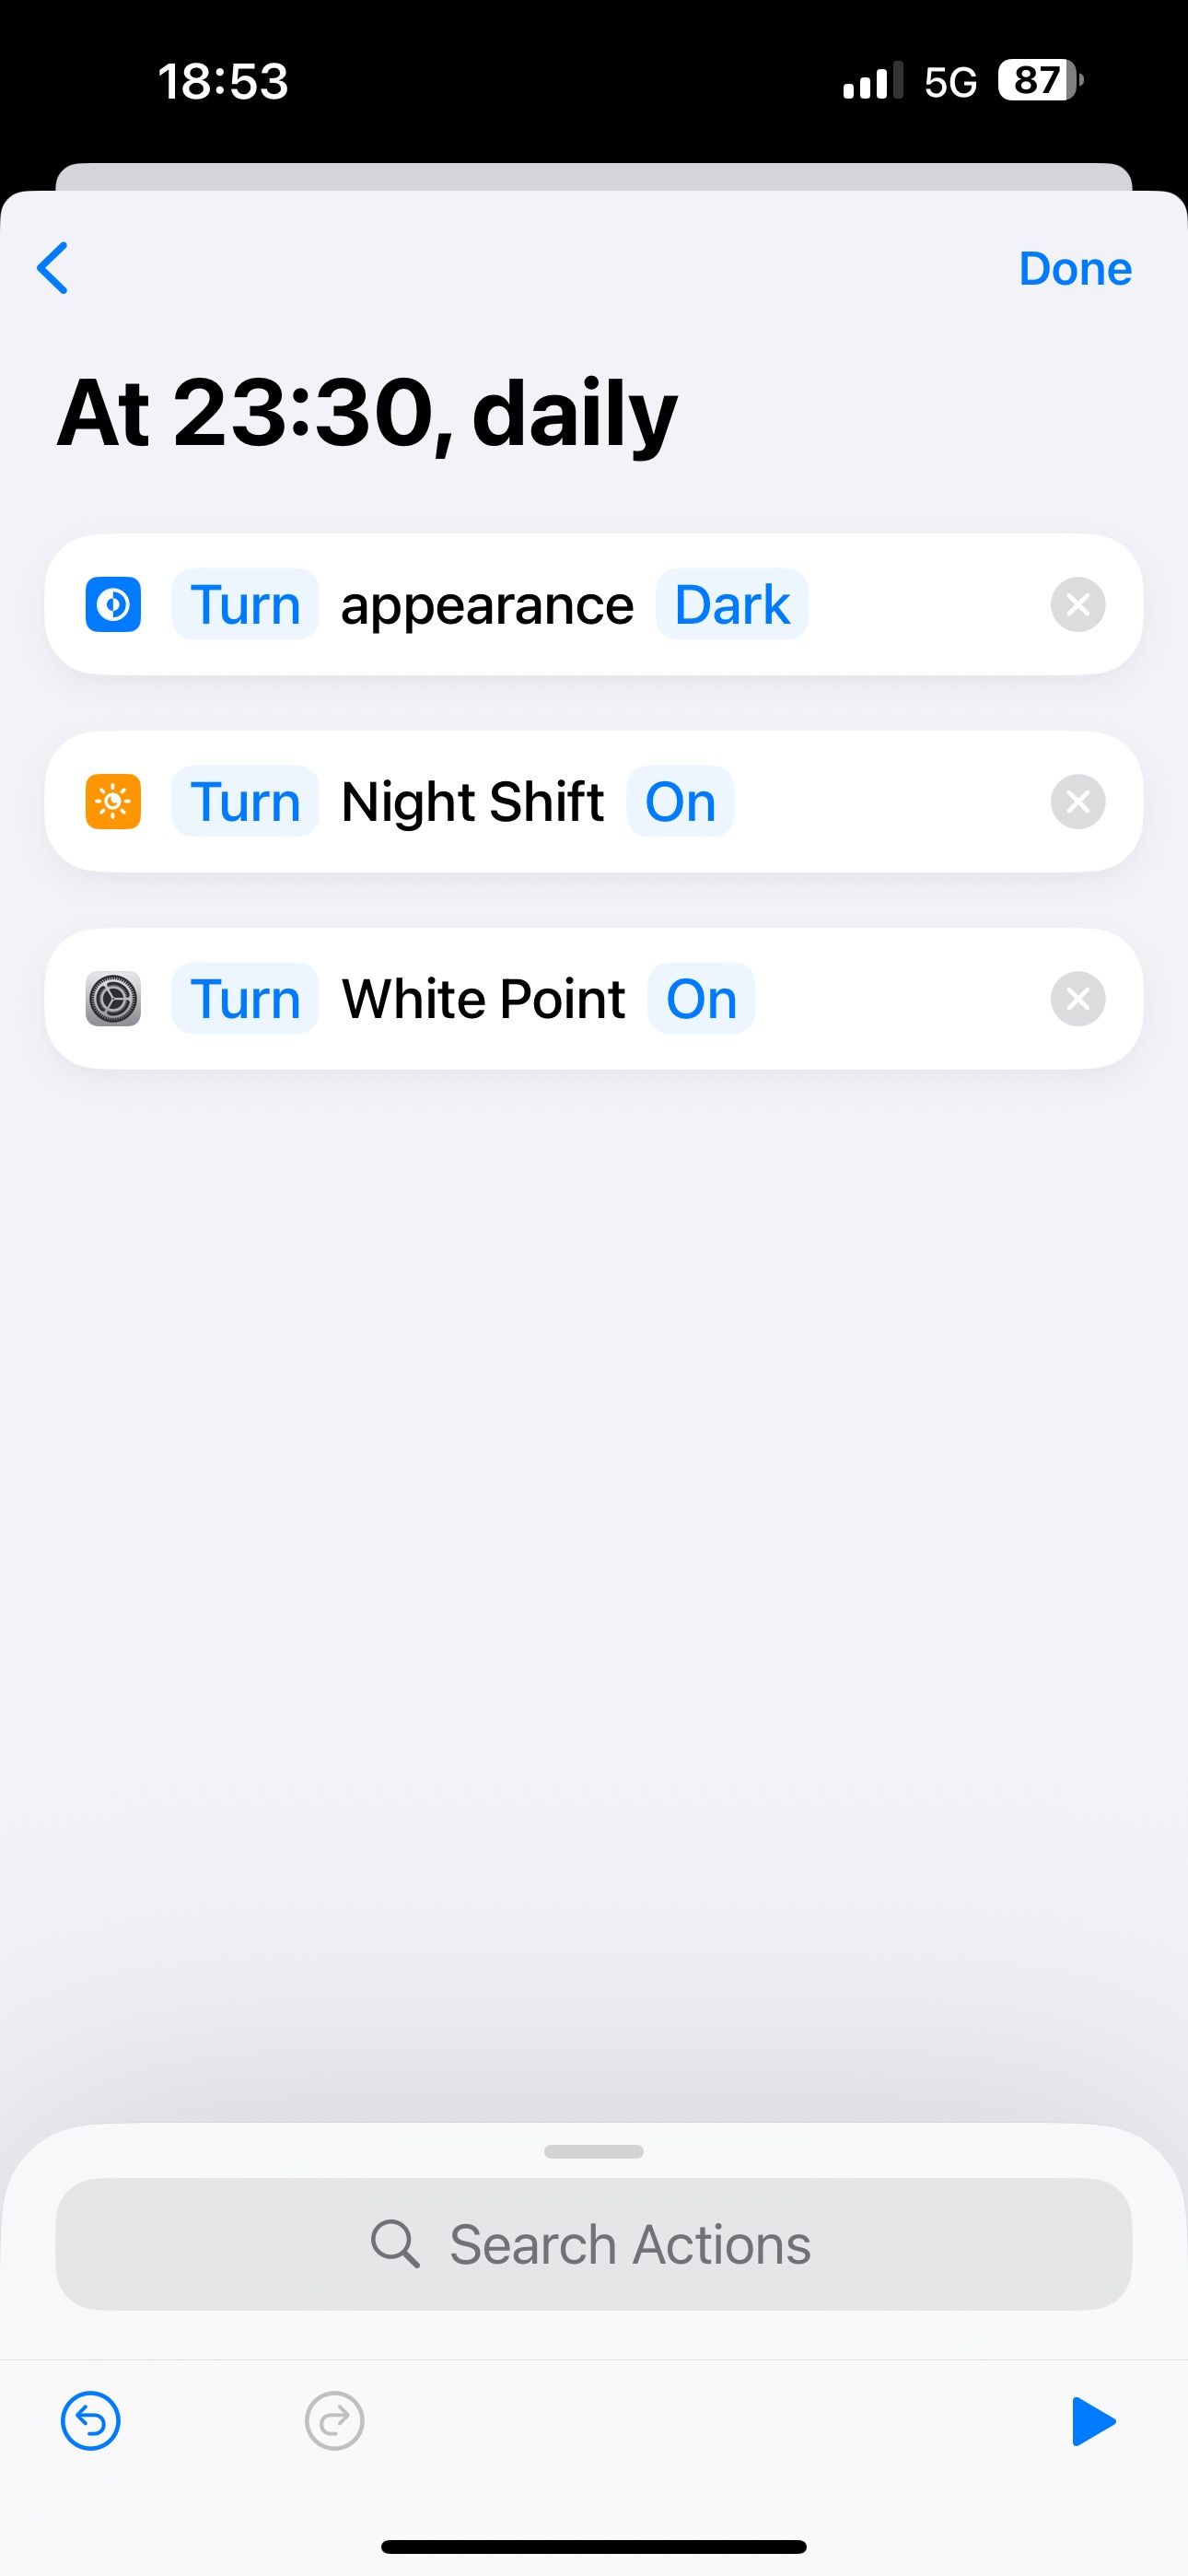
Once done, create another automation that does the opposite. For this, set the time to the time of day when you want the nighttime settings to be turned off. The actions should look like “Turn Appearance Light,” “Turn Night Shift Off,” and “Turn White Point Off.”
You can customize this to your liking, for example if you’re already using Apple’s automatic switching for Night Shift and Dark Mode, you can simply opt to enable Reduce White Point between certain hours instead.
Enabling these settings is an effective way to improve the nighttime usability of your iPhone. Some people recommend enabling the Grayscale Color Filter instead of changing these settings as an easier way to tone down the harsh intensity of the display at night. However, I avoid using this feature, as it compromises the overall visual experience. You can use it if you just read books at night, but it’s not ideal for other activities.


Leave a Comment
Your email address will not be published. Required fields are marked *