The Best Free Roku Channels You Haven’t Tried Yet

The Best Free Roku Channels You Haven’t Tried Yet

The Roku Channel Store’s vast selection of apps makes it easy to watch just about anything online. While many users stick to popular options like Netflix, Hulu, and Amazon Prime Video, there’s a wealth of hidden gems worth exploring, including apps for weather and art. Below is a curated list of lesser-known Roku channels to check out.

Tubi (pronounced too-bee) is one of the best free Roku channels. It’s an ad-supported channel with an extensive library of free movies from MGM, Paramount, and Lionsgate, and an extensive library of TV shows.

Tubi’s offerings are divided into genres such as action films, comedy, documentary, drama, horror, foreign movies, movies for kids, and more. Two great categories are Not on Netflix and Highly Rated on Rotten Tomatoes. It also includes original programming.

The Tubi onscreen menu looks similar to a Netflix menu, including a “continue watching” option that allows you to pick up where you left off if your viewing is interrupted.

Tubi doesn’t offer a huge selection of 4K videos, but there is a lot of great content that is worth watching that you may have missed or is an old favorite.

Put a little more art in your life with Artcast. This Roku Channel is both a screensaver and an art gallery. For $2.99 per month (following the 7-day free trial), you’ll access over 100,000 works of art.

Artcast galleries are auto-looped, so once started, you don’t have to return later and restart playback. However, if using Artcast Lite, ads are displayed before the galleries play. Also, when selecting a different gallery to display on Artcast Lite, you must wait for another set of commercials to play. Each photo or painting is displayed for 60 seconds.

Some of the Gallery categories for both Artcast Lite and Artcast Premium include:

  • Classical Art
  • Contemporary Art
  • Nature and Scenic
  • Travel and Culture


Pluto TV Menu–Roku Channel Version.

Pluto TV provides free news, sports, TV shows, music, and movies. Like a cable or satellite menu, you scroll through the categories and select what you want to see or hear (no need to install additional apps). This style of browsing makes this one of the best free Roku channels for anyone who is used to cable TV.

Channel categories include News, Sports (including boxing and wrestling), Comedy, Geek/Gaming, Life/Style, and Music and Radio. There is even a 4K channel (provided you have a compatible Roku device and TV).

Since many selections are live (the onscreen guide is set to your local time), programs or music may already be in progress. However, the on-demand movie offerings start when selected.

Since the selections and movies are free, most of them feature ads.

Roku offers its own channel in addition to the thousands of others available through the store. The Roku Channel has an exciting mix of content that provides users with a more compact version of what Roku offers without having to go from app to app to find what they may want to watch. Both free and paid content are provided. 

If you are a fan of cult-status B-movies and old TV shows, Shout! TV is a free, ad-supported channel you can add via the Roku Channel Store.

Shout! TV has an extensive film and TV show library to draw from, including action, adventure, comedy, cult, documentary, drama, horror, martial arts, music, westerns, and more.

Watch classic episodes of MS3TK (Mystery Science Theater 3000) and films from the legendary work of Roger Corman.

If you are a Power Rangers fan, check out some episodes of Super Sentai — the original Japanese version of the series (subtitled in English).

You can also watch great classic stand-up comedy from Steve Martin and classic variety TV replays from The Glen Campbell Goodtime Hour and The Red Skelton Show.

Shout! TV also has an original series, Backlot, featuring some great behind-the-scenes info on select classic cult films and TV shows.

If you are a fan of suspense, thrillers, and horror, you must check out Shudder. With films ranging from Bram Stoker’s Dracula to the Texas Chainsaw Massacre, there are enough thrills and chills to keep you on the edge of your seat.

In addition to movies, we’ve seen classic series, such as Tales from the Darkside, and original series, such as Born to Kill and Black Lake. Some great podcasts explore film-related topics, such as Inside the Exorcist.

Shudder’s collections include Alien Encounters, A Woman’s Touch, Gross Anatomy, Folk Horror, and others.

You can experience Shudder free for seven days, after which you can cancel or stay on board with a monthly or yearly membership.

If you are an anime fan, you should check out Crunchyroll, which can be downloaded for free. Once installed, you can watch their basic service for free or go for one of the premium plans.

The Fan plan allows you to watch a limited selection of anime and live-action content (labeled as drama) with periodic commercials.

The Mega Fan option provides ad-free access to Crunchyroll’s entire film and TV library and new episodes of select Japanese anime and TV shows just minutes after they air on Japanese TV.

Ultimate Fan takes it up a notch with discounts on products sold on the Crunchyroll Store and VIP access to Japanese anime creators who attend fan conventions.

If you are unsure which viewing option is right for you, take advantage of the free trial. The free, ad-supported, limited-access option might be acceptable if you are only an occasional viewer.

Are you tired of cable news channels that are more opinion and gossip than actual news? If so, add Scripps News (formerly Newsy) to the Roku Channel list.

Scripps News covers stories from around the World in short, easy-to-understand videos that tell the story with necessary context and analysis without debating talking heads or pontificating by a biased host.

News stories are posted around the clock in the following categories: Top Stories, Live Stream, World, Business, U.S. News, Politics, Sci/Health, Entertainment, Tech, and Sports.

Scripps News is free to install and watch; no subscription or pay-per-view fee. However, there are occasional ads.

If you are fascinated with science but don’t understand it all, Curiosity Stream offers content that will amaze and inform you.

Curiosity Stream offers much of their content in 4K. If you don’t have a 4K-enabled Roku or TV (or fast enough broadband speed), you can still watch in HD.

Although you can install the app for free on your Roku device via the store to view content, there is a $4.99 monthly subscription fee (following a free 7-day trial period).

Curiosity Stream has exclusive series and films you can search by topic or name (such as a noted scientist, astronaut, or historical artist).

You may think that Curiosity Stream isn’t that different from the National Geographic or Discovery Channel. However, it eliminates some of the “pop” or “sensationalized” content sometimes shown on those channels and is ad-free.

Do you spend all day watching streaming videos in front of your computer or TV? Take a break and pick up an outdoor habit like gardening.

Check out Garden TV in the Roku Channel Store before you start. Once installed, check out everything you need to know to plant flowers, trees, lawns, and vegetables by watching the available instructional videos.

The Garden TV Channel is free, but an ad is shown before each video.

Are you a weather junkie? If so, check out WeatherNation on your Roku. With WeatherNation, you can check out current conditions in your area and the weather in other locations provided by the National Weather Service.

Additional weather news stories give you more context and understanding of what is happening and why.

Hosted weather reports are presented by certified meteorologists. No comedy hosts here!

WeatherNation is free from the Channel Store, but does feature ads.

If you like travel and sports, Red Bull TV is an excellent channel to add to your Roku viewing experience. The focus is on extreme and adventure sports such as off-road biking and motoring, cliff diving, climbing, skiing, snowboarding, flying, surfing, and more.

Red Bull TV also includes music, dance, and culture categories that expose you to competitions and festivals from around the World.

In addition to recorded travel and events, you can access select live events and original series or watch something recorded that is currently being streamed.

Red Bull TV is more than just a regional sports channel or ESPN. It combines non-traditional sports and adventure, making for a great viewing experience that can be installed via the Channel Store.

Are you a fan of British TV shows? If so, then Acorn TV may be for you.

Acorn’s program library is extensive, featuring exclusives, mysteries, dramas, comedy, documentaries, feature films, and programs and movies from other select European countries with English Subtitles.

If you are addicted to the British TV programs you usually watch on PBS, take it up a notch and commit yourself to Acorn TV.

You can install Acorn TV for free via the Channel Store. After a free 7-day trial period, the subscription fee is $8.99 monthly, which is nearly half the price of Netflix’s cheapest ad-free plan.

7 Cool Things I Do With My Monitor’s USB Ports

7 Cool Things I Do With My Monitor’s USB Ports

Quick Links

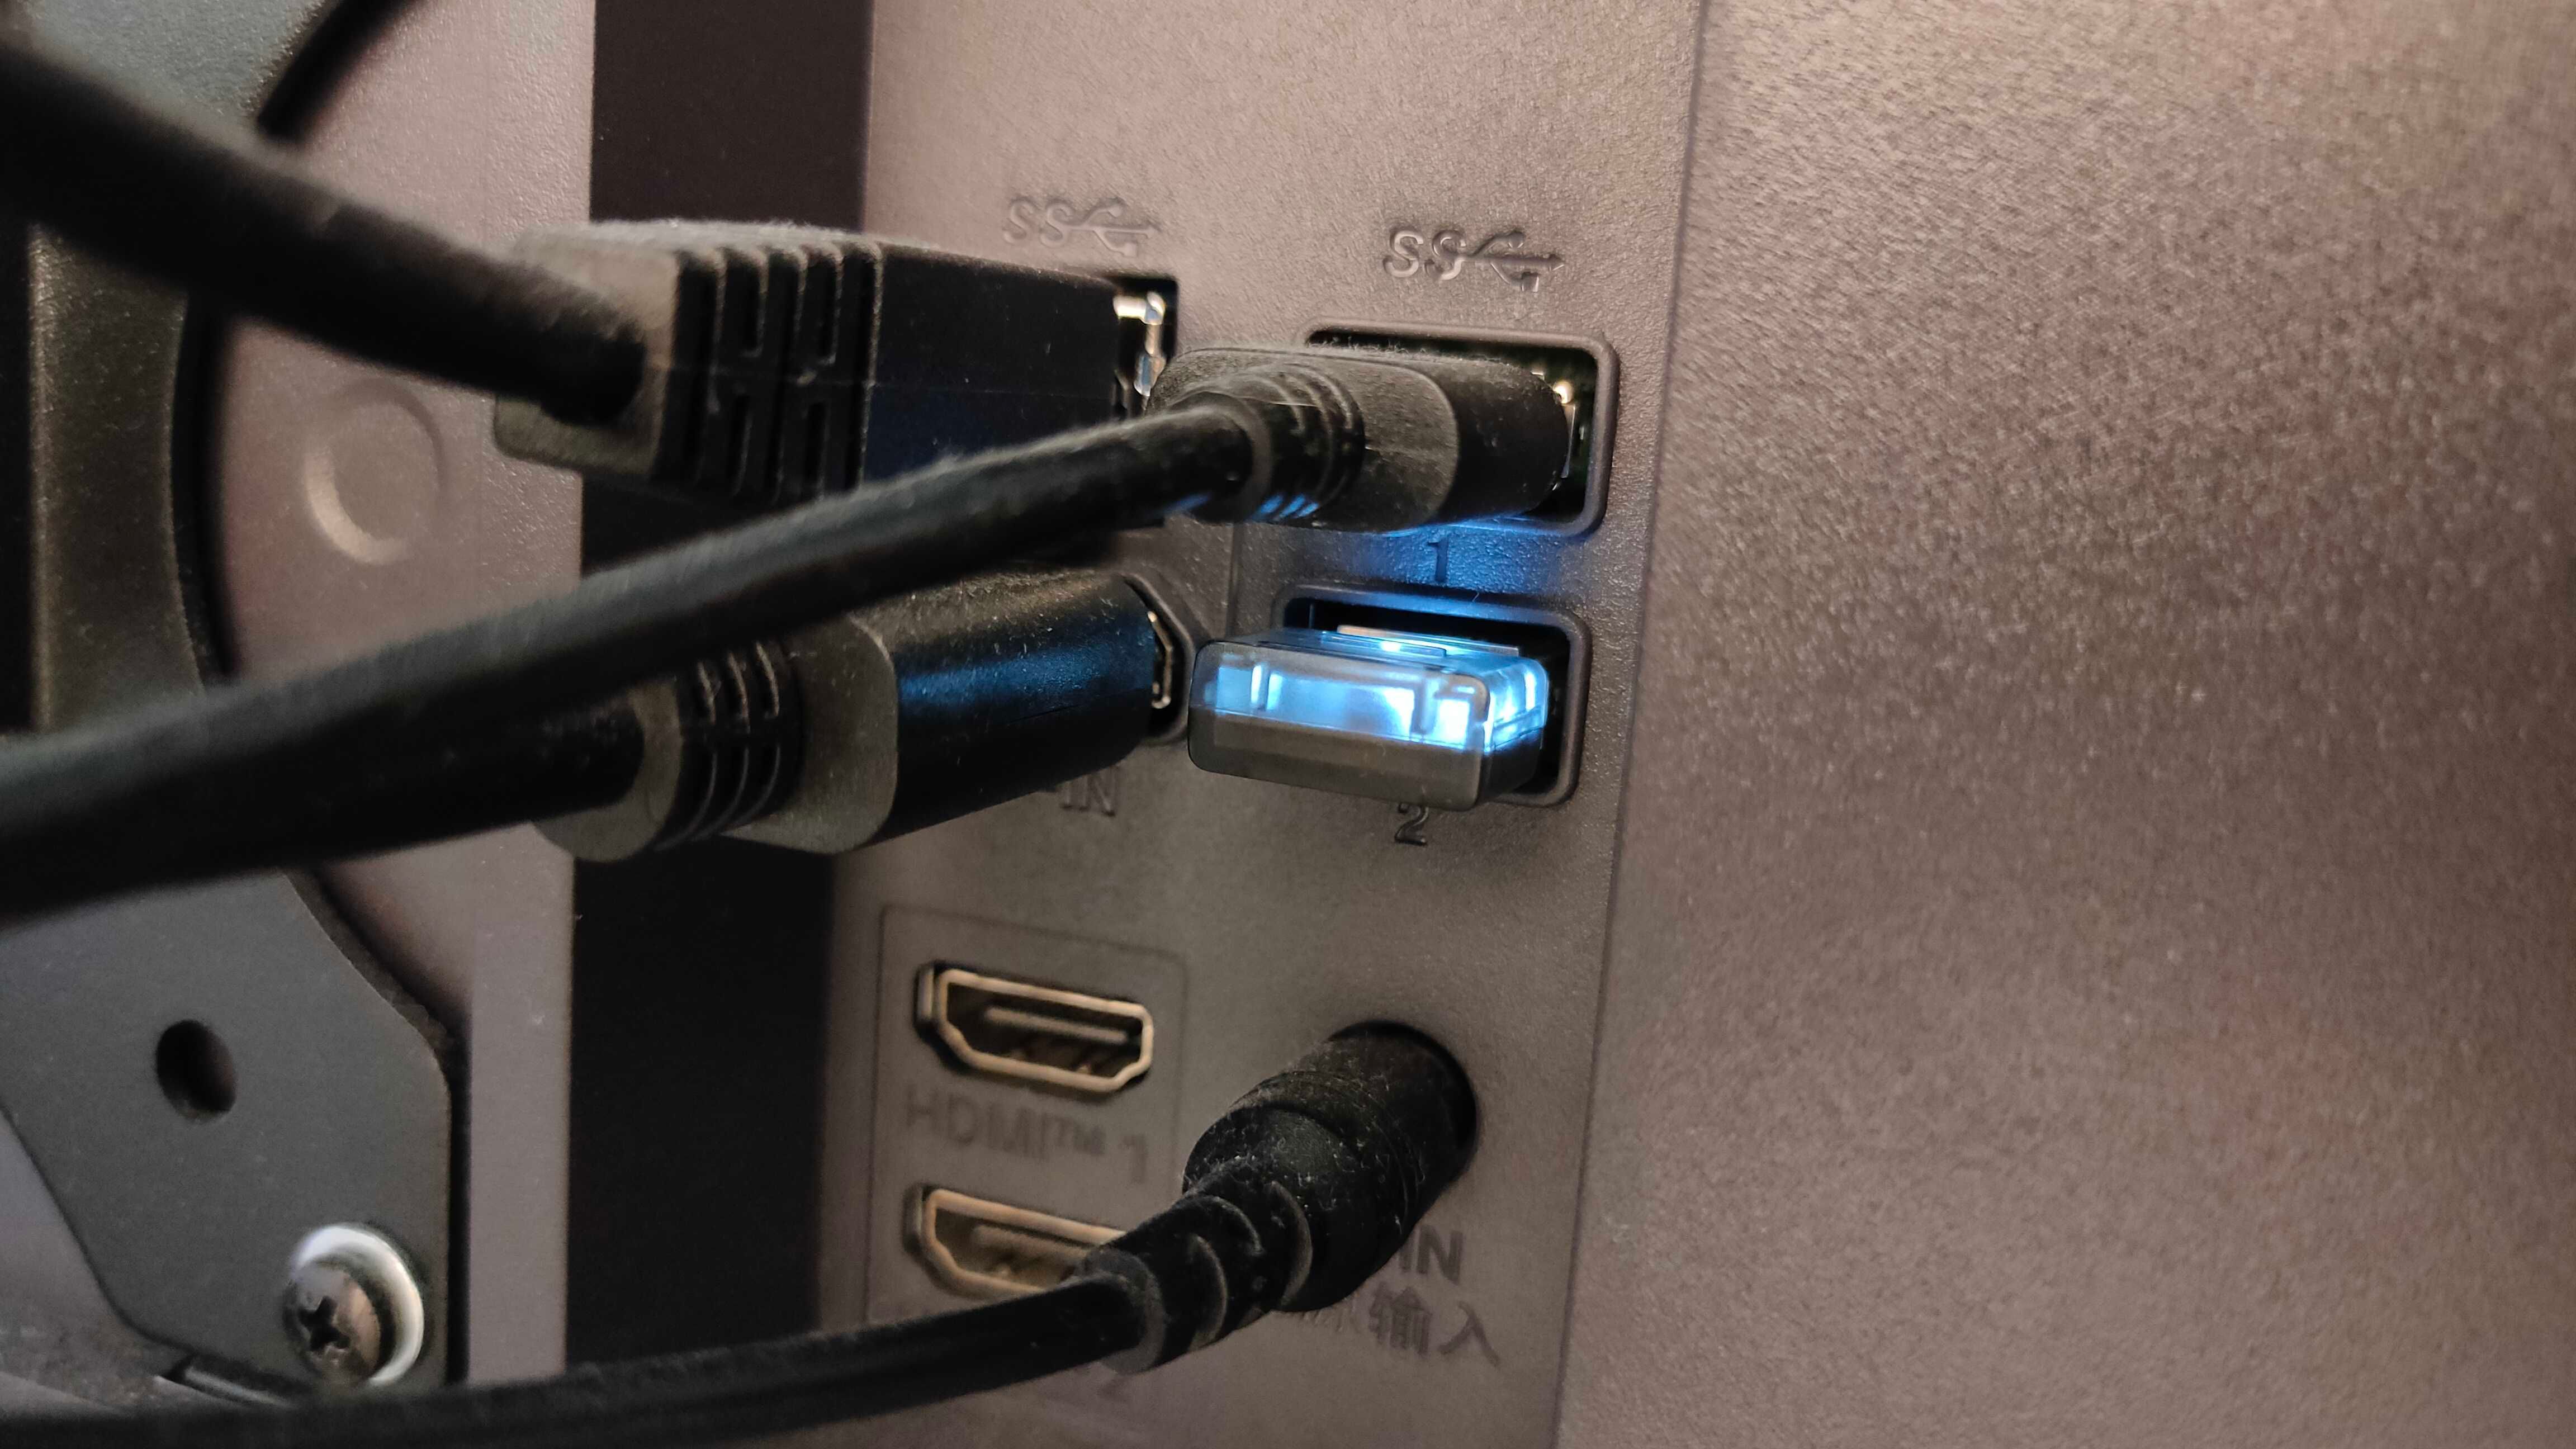
When it’s time for monitor shopping, one of the features I always look for is USB passthrough—built-in USB ports that relay data and power back to the PC through a single connection. It’s a small but incredibly convenient feature that essentially turns the monitor into a mini USB hub. Since my PC’s back and front USB ports are essentially permanently occupied, having these extra USB ports in such a convenient spot is quite handy.

The result is a cleaner, more functional desk setup with USB ports exactly where I need them. The ports eliminate the need for an external hub, saving desk space while keeping everything within easy reach. By the end of this article, you’ll probably wonder why you haven’t been using them all along.

1

Power My Desk Lamps

A pink smart lamp glowing on a desk.

Ismar Hrnjicevic / How-To Geek

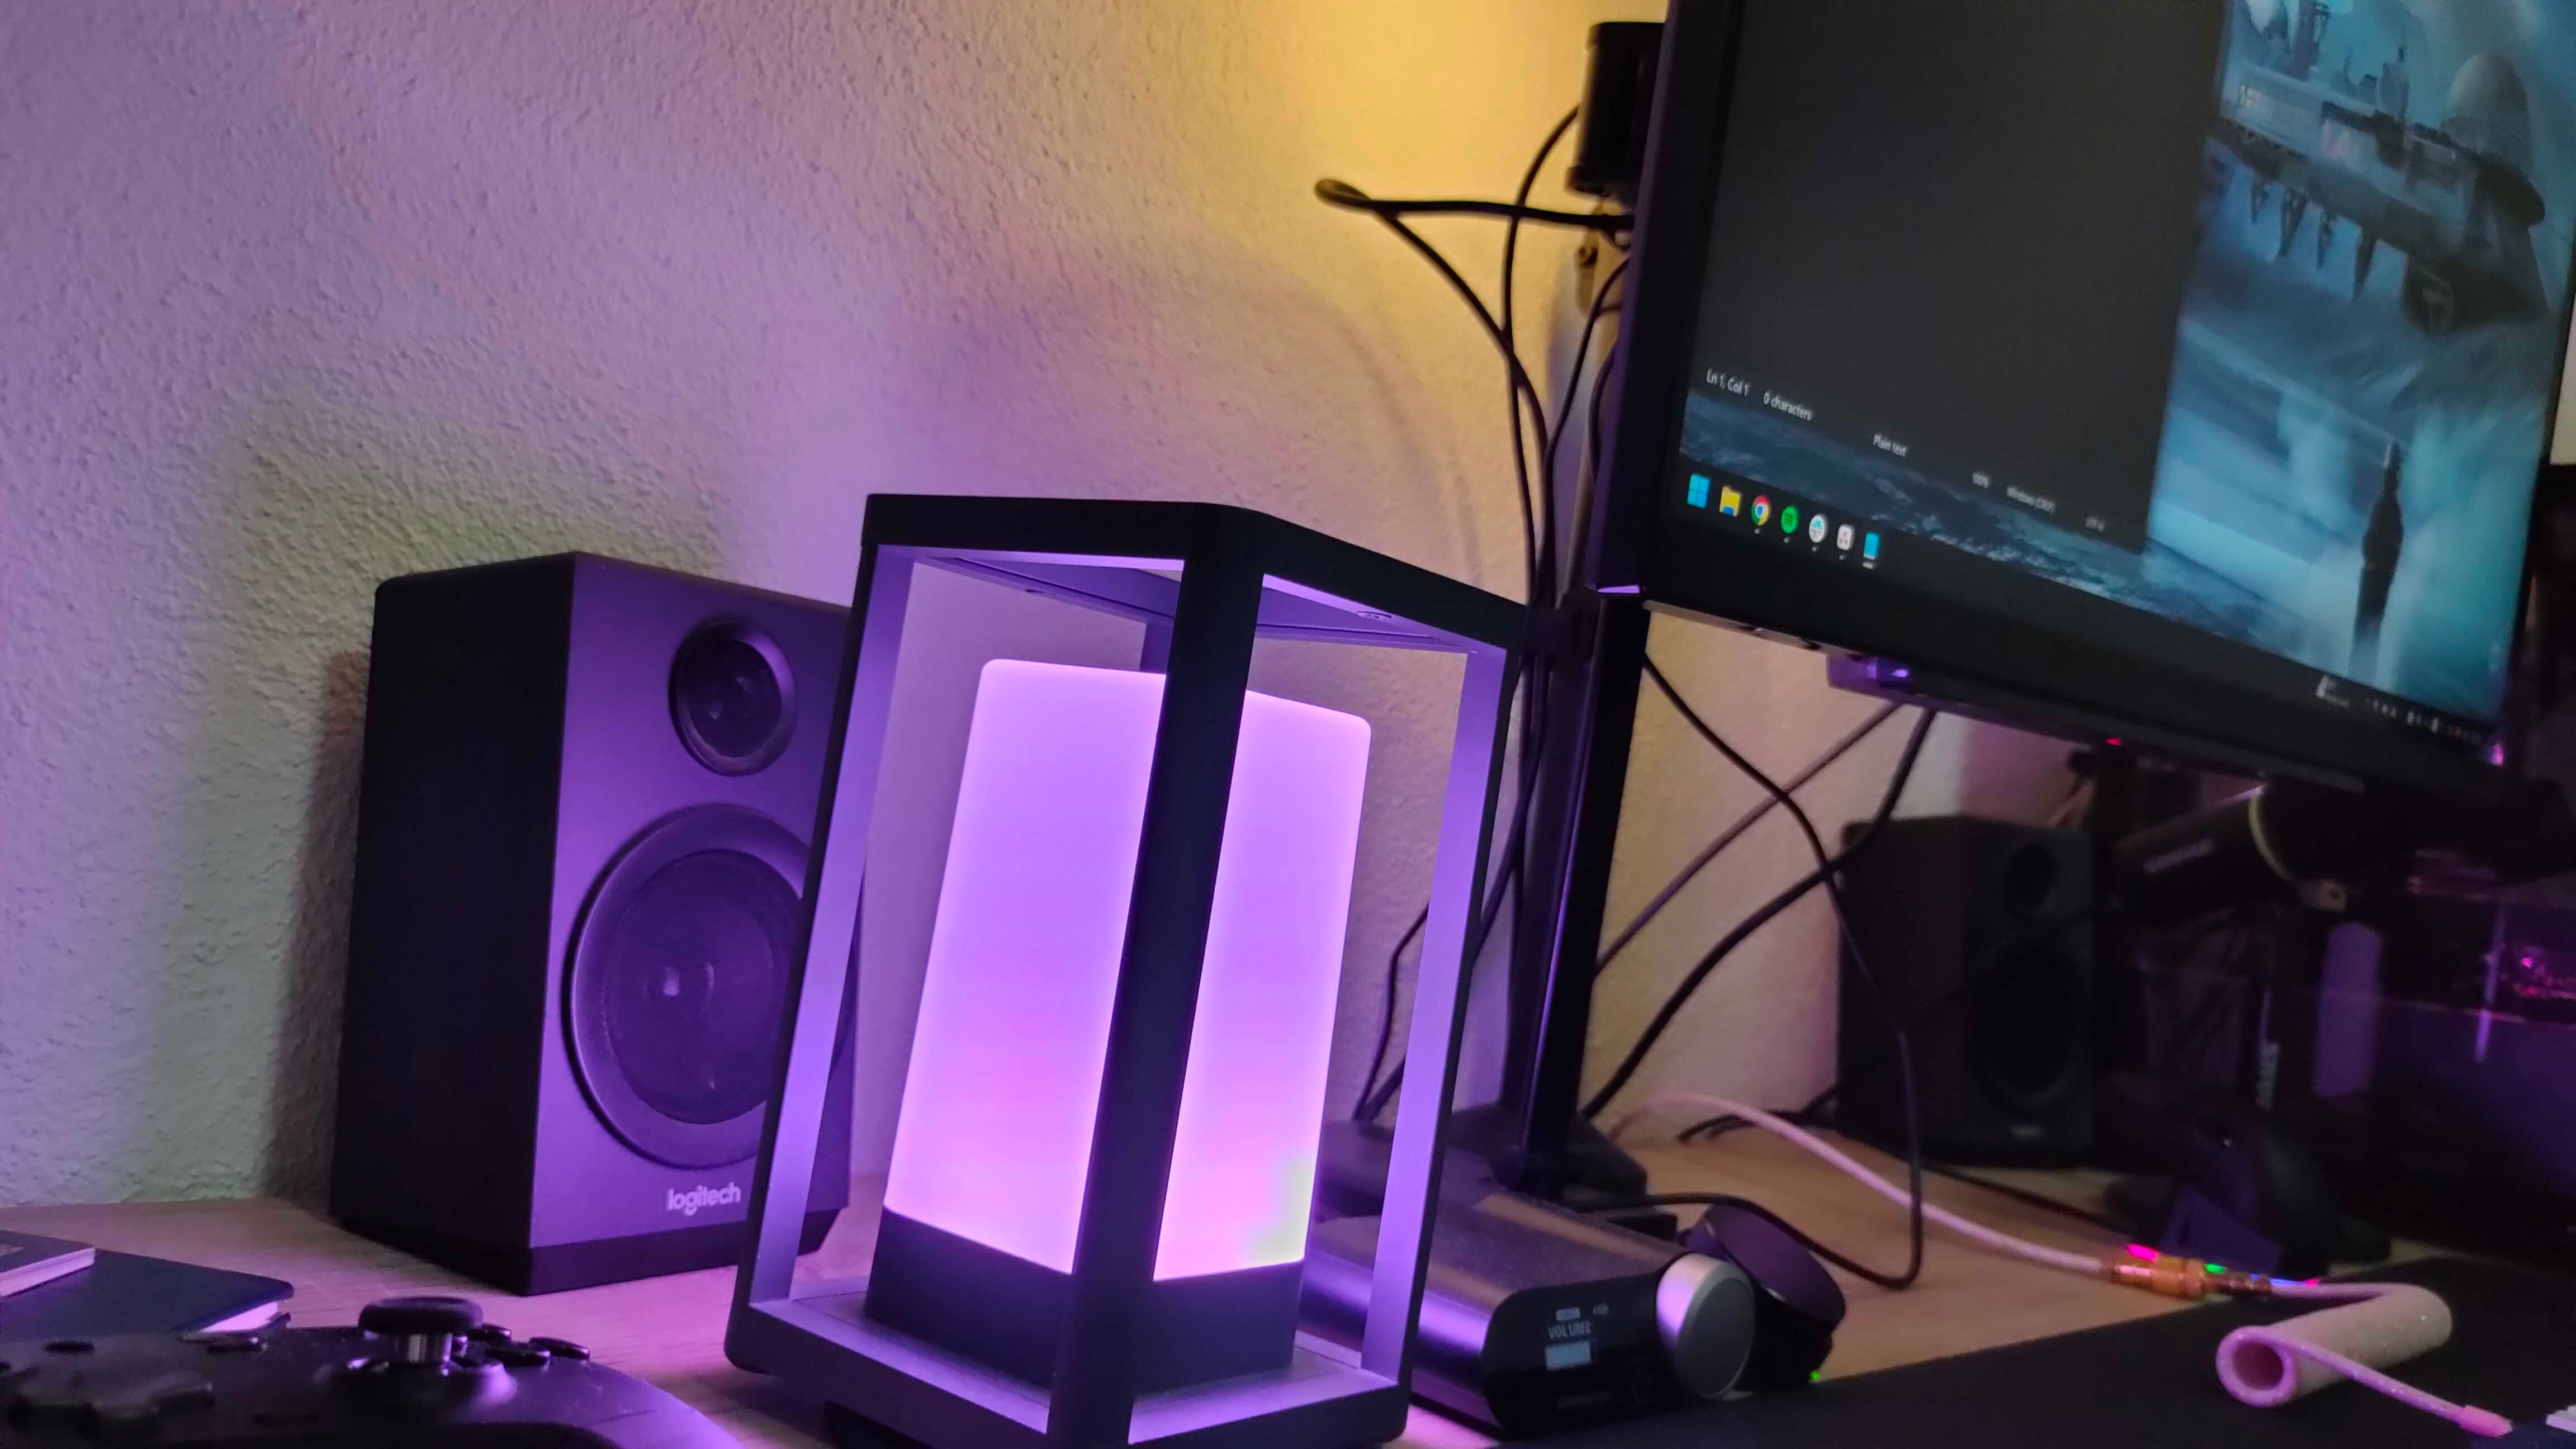
The most common setup I use with my LG 27GR83Q-B’s USB ports involves two USB-A to USB-C cables plugged into the ports, each connected to one of my two desk lamps. Conveniently, both lamps have an extra USB-A port I can use for other devices, which I’ll get to shortly.

Thanks to the relatively short cables, this convenient setup keeps my desk clutter-free while still providing quick access to multiple USB-C ports whenever I need to plug something in.

If you don’t already have a desk lamp at your PC setup, stop reading and get one immediately (but please come back and finish the article afterward).

I only started using lamps about a year ago, and they’ve completely transformed my late-night gaming and work sessions.

1:55

Related

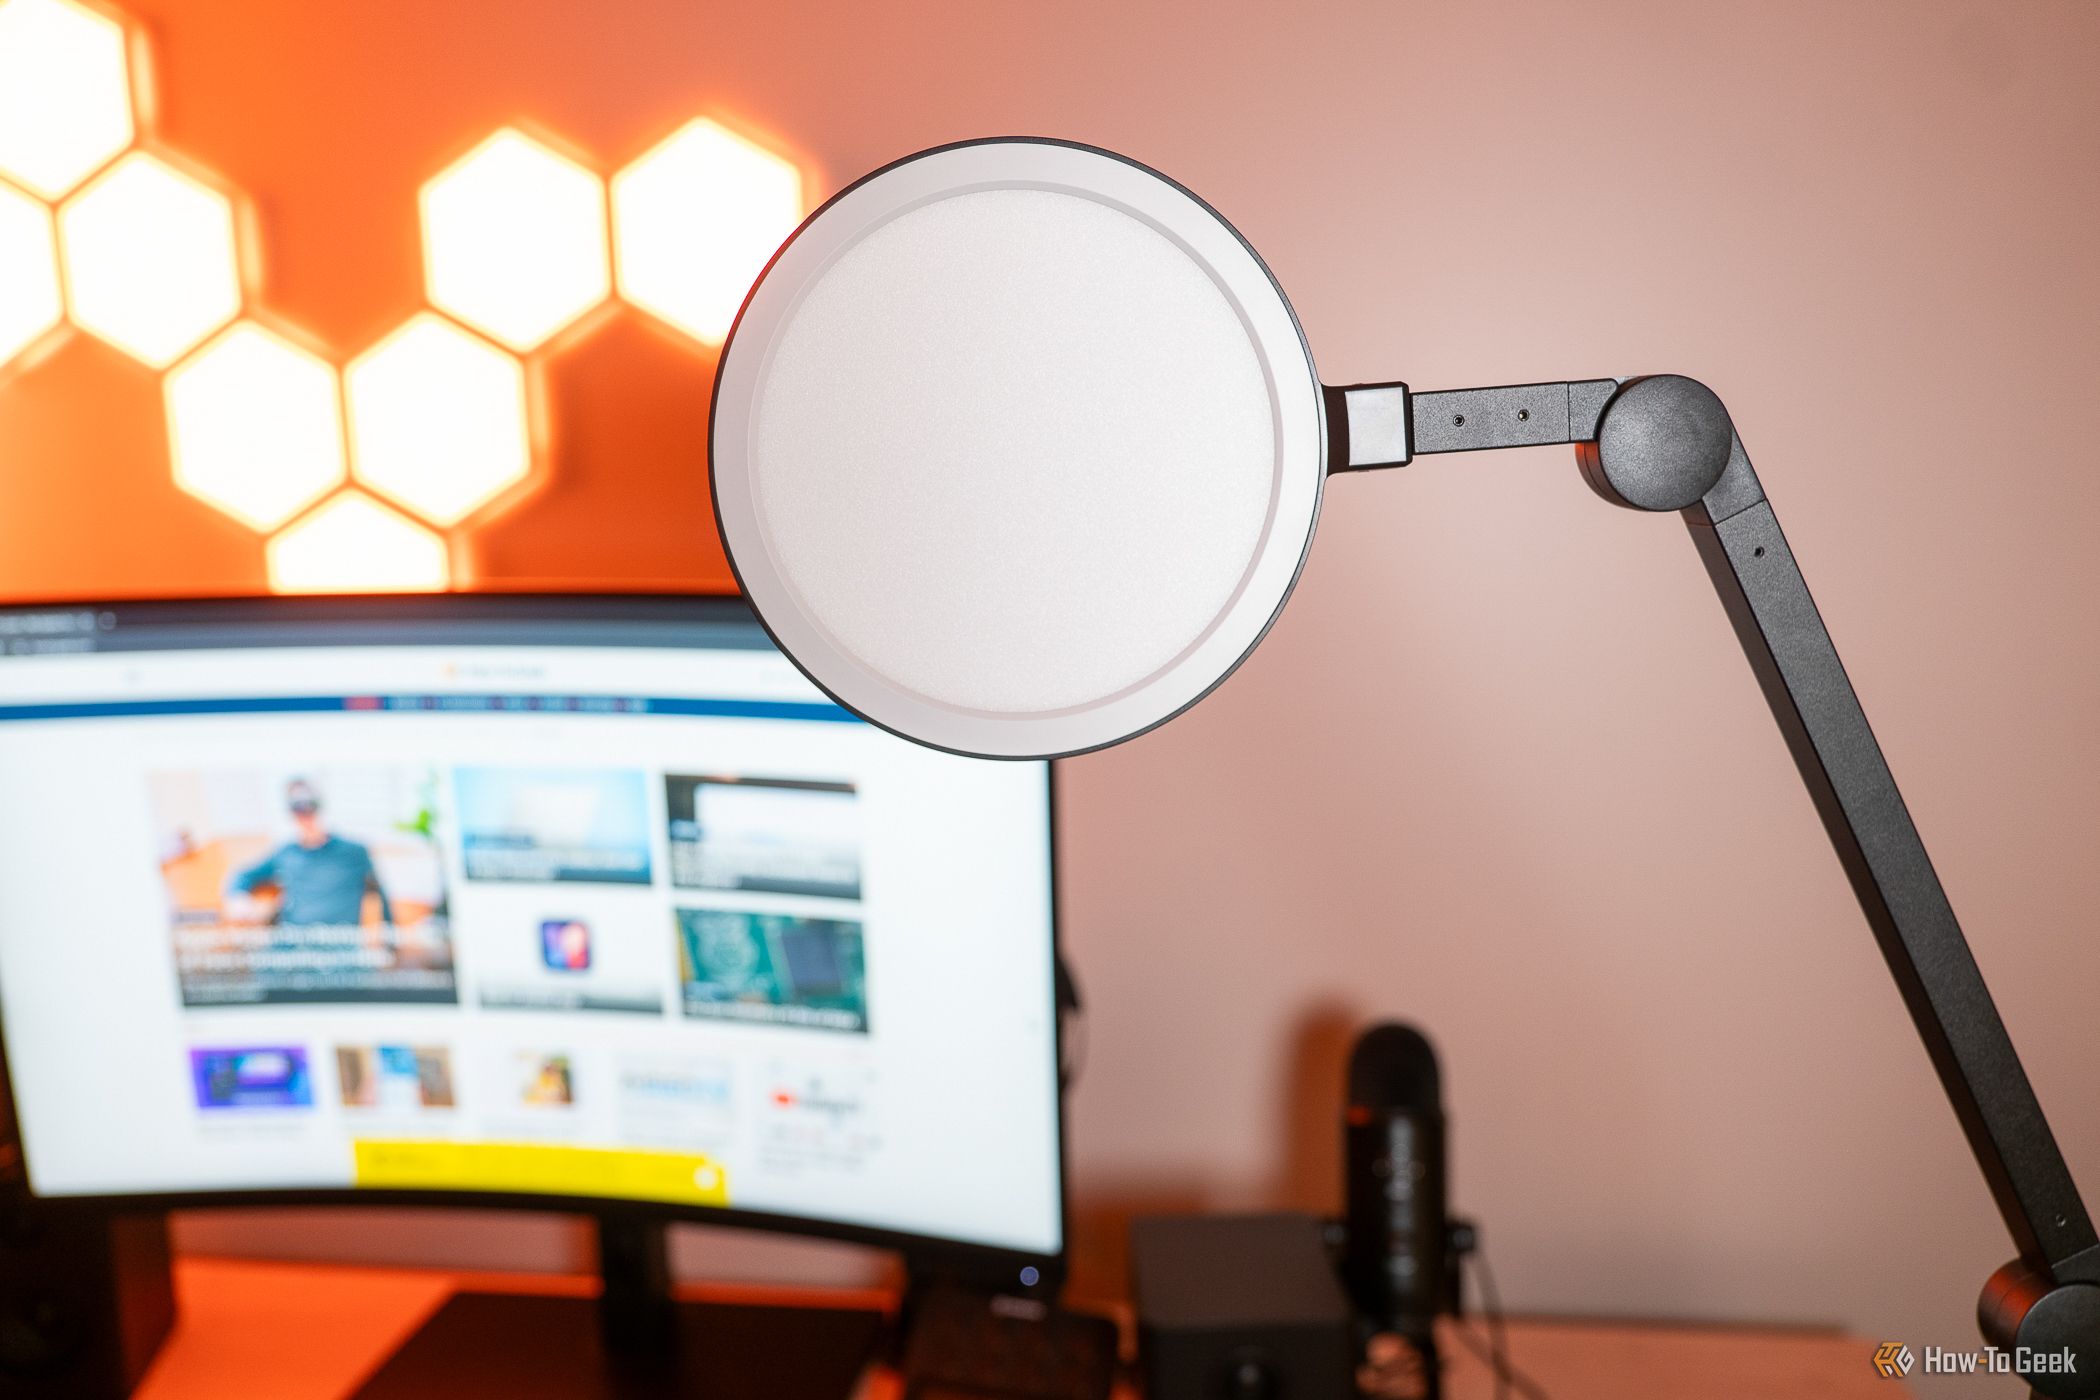
Lume Cube Edge Light 2.0 Review: This is the best desk light I’ve ever used

The Lume Cube Edge Light 2.0 features two USB ports, customizable brightness and color temperature, and a range of adjustability.

On top of creating a warm, inviting atmosphere at my desk, having more light helps reduce eyestrain significantly.

If you clock in many hours at your desk in the dark as well, a monitor light could work even better than my lamp. Plugging it directly into the monitor means it’ll stay attached even if it’s mounted on a monitor arm and you frequently shift it around.

2

Charge My Devices

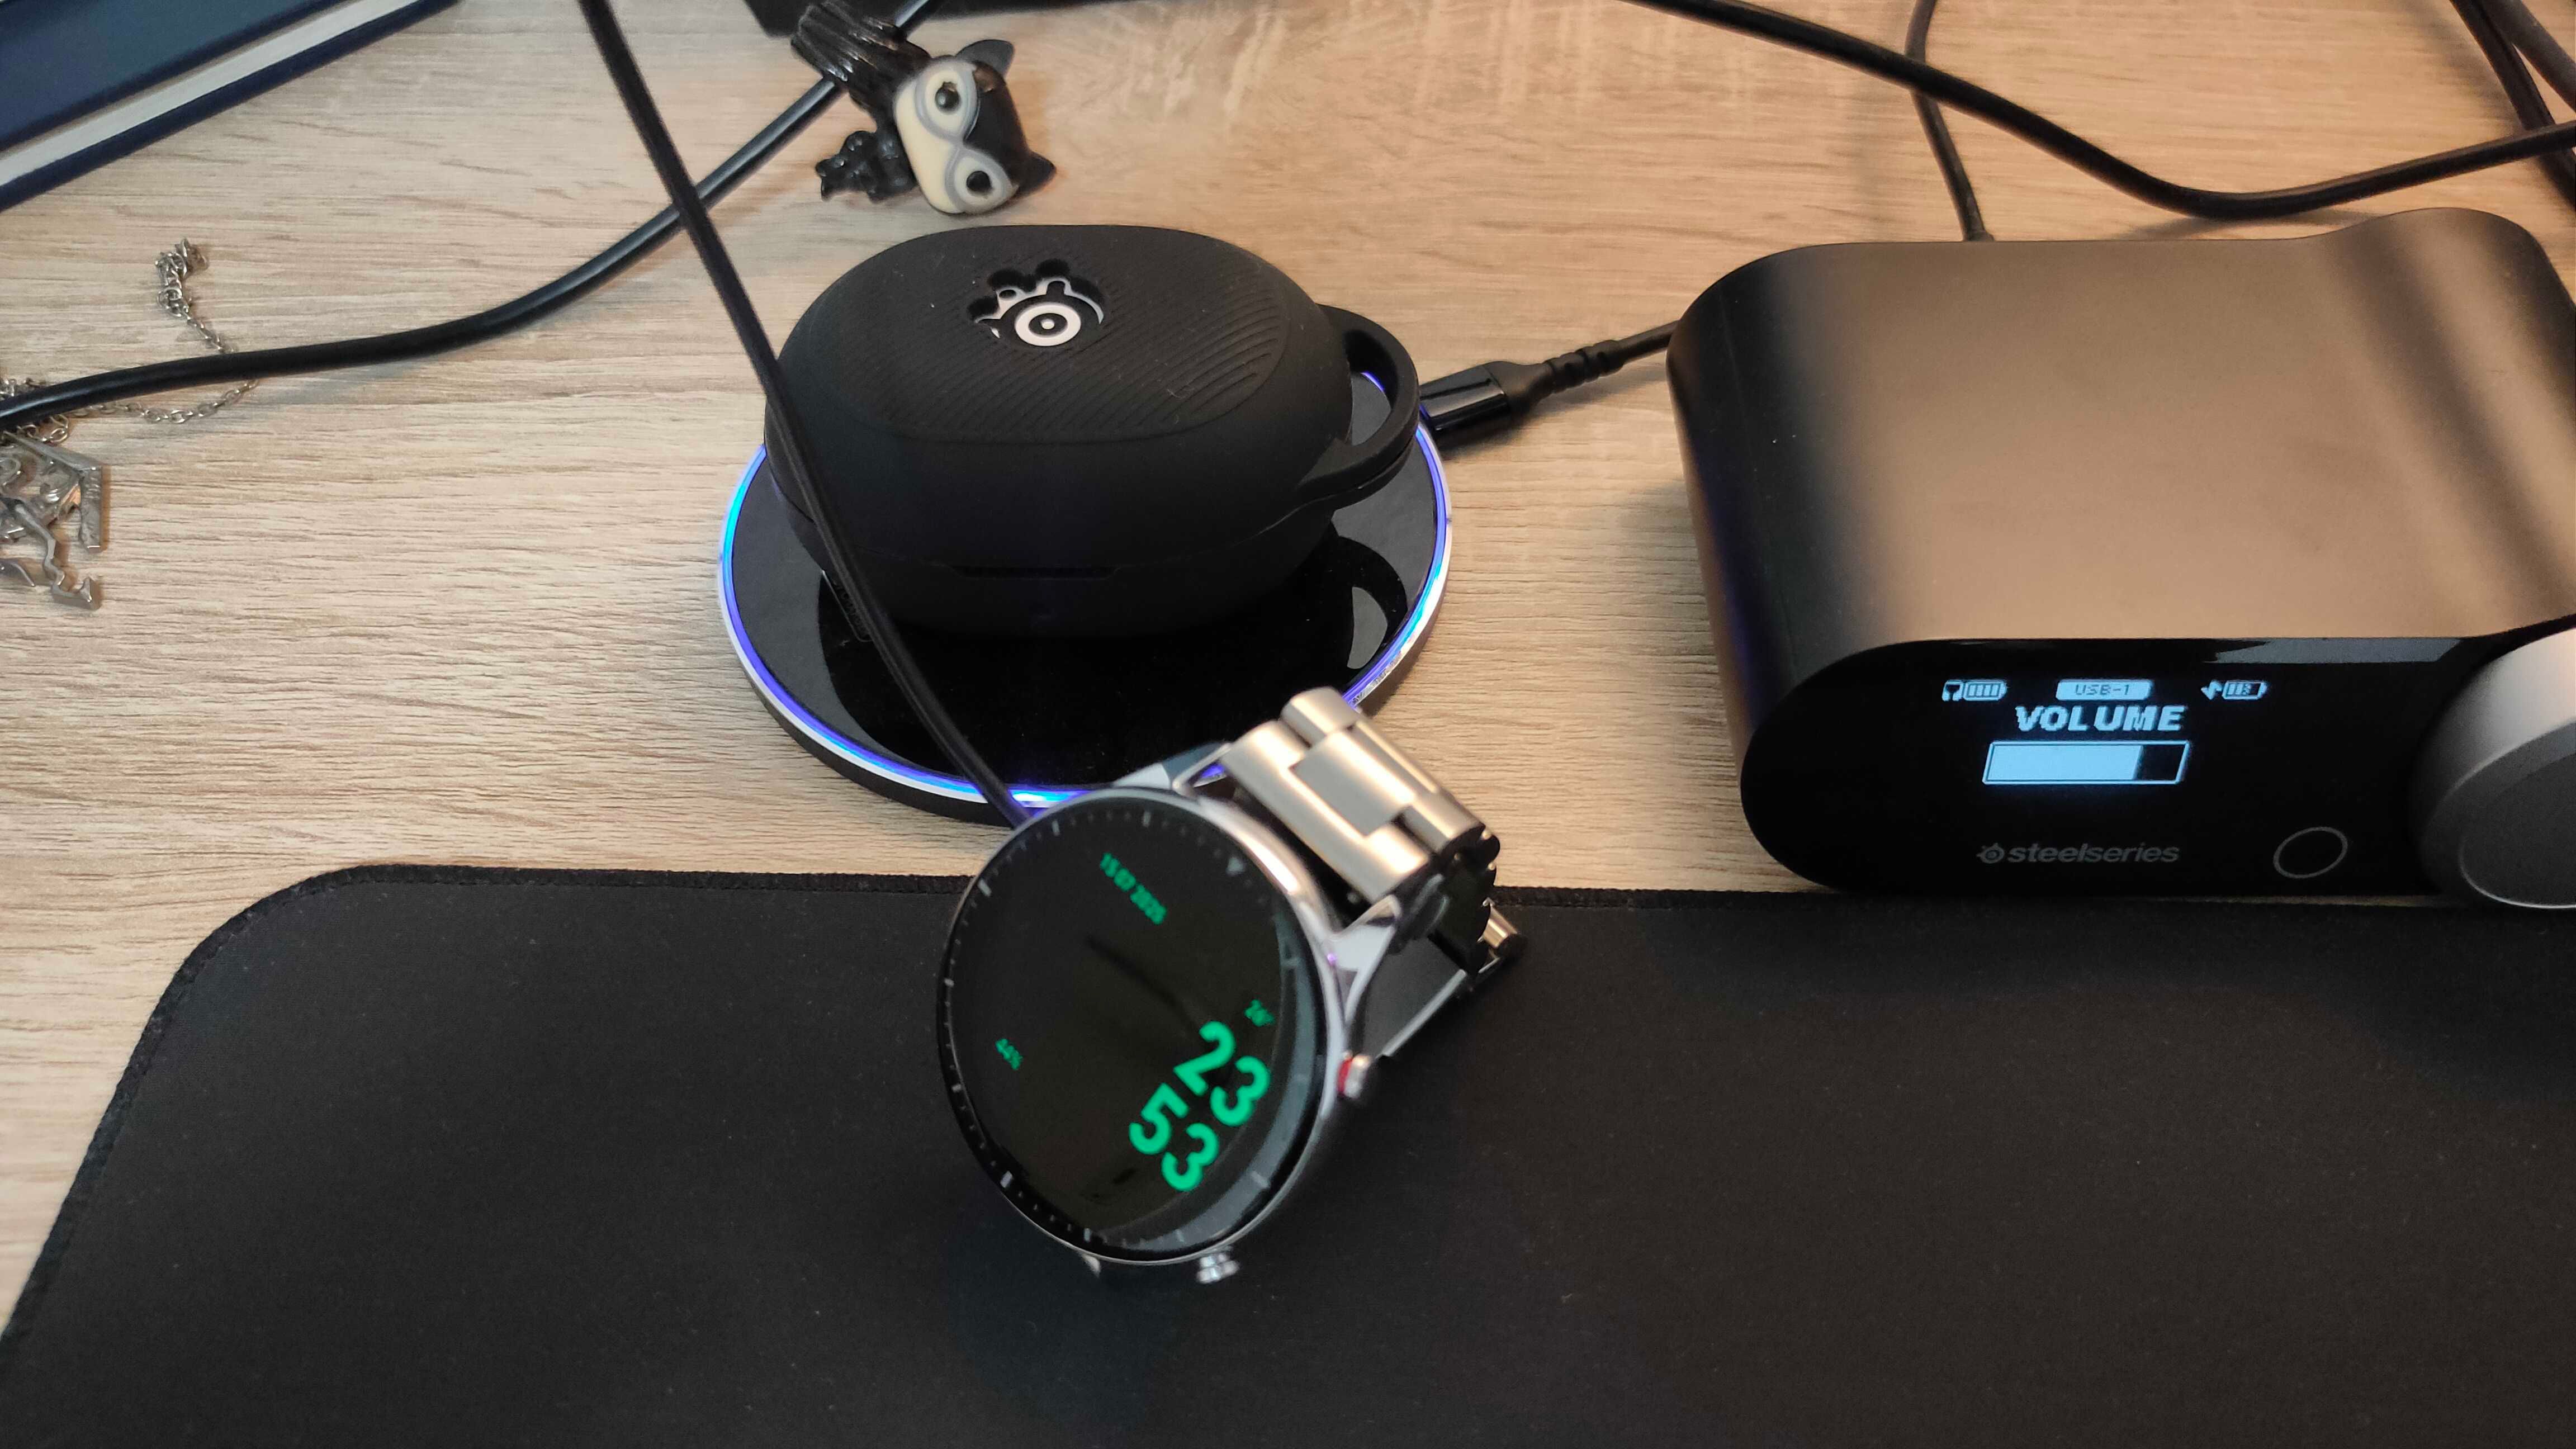
An Amazfit GTR 2 smartwatch and SteelSeries Arctis GameBuds charging.

Ismar Hrnjicevic / How-To Geek

As I mentioned earlier, both of my desk lamps have additional USB-A ports that I use to power various devices, effectively creating a daisy chain.

Most of the time, I charge gadgets through these ports—whether it’s via my cheap Qi wireless charger or devices like my smartwatch with its proprietary charger, multiple pairs of earbuds, a Bluetooth speaker, Xbox One controller’s AA batteries, LED closet lights, and several other accessories.

Related

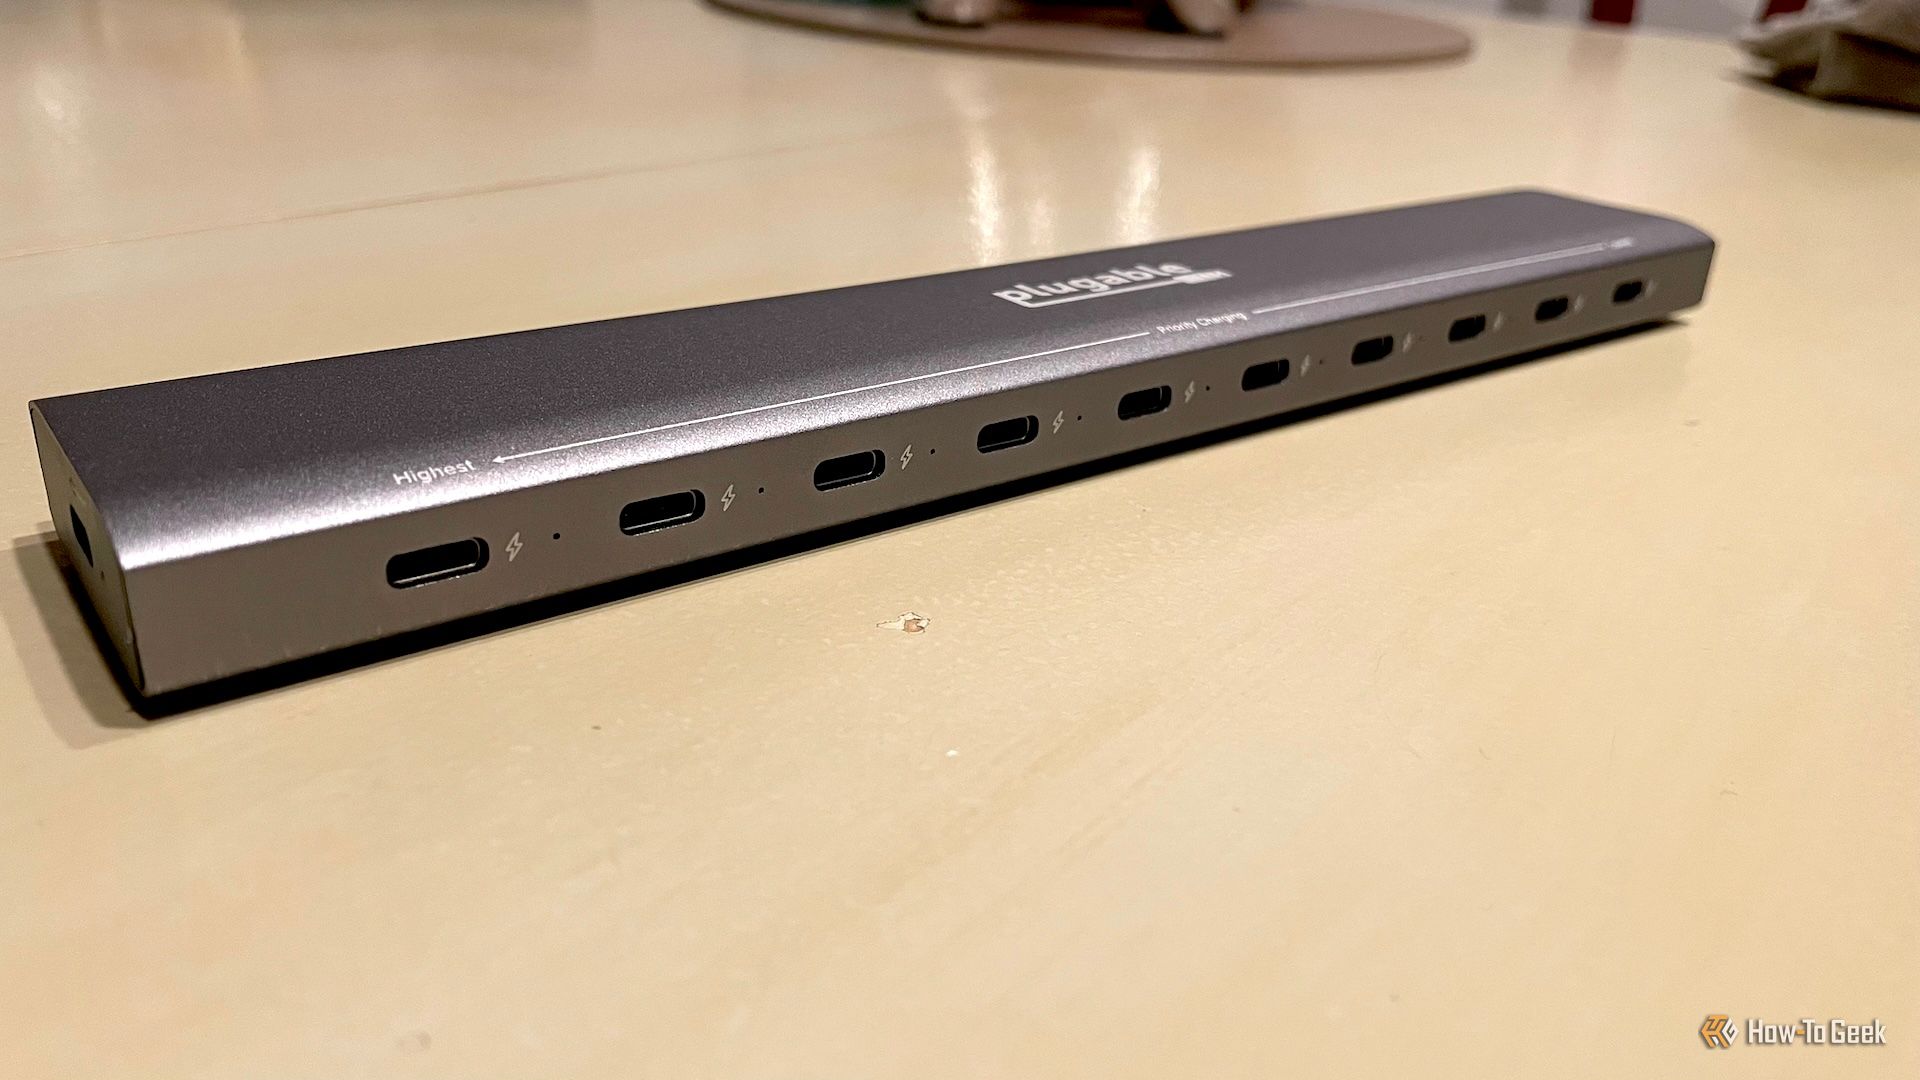
Plugable 10 Port USB-C Charging Station Review: A Reminder of Just How Great USB-C Can Be

The USB-C mothership.

By keeping these devices charging within sight instead of plugging them into the front or back of my PC, I can easily tell when they’re done, unplug them, and get back to using them quickly.

You might consider this a bit of a cheat, but since the lamps are still technically connected to the monitor, I think it’s fair to mention this use case. Plus, I only got a second lamp recently; before that, I simply used a regular USB cable to charge my devices.

Related

8 Hidden Ways to Wirelessly Charge Your Phone

Does wireless charging still blow your mind? Wait until you see this.

3

Connect My Controller

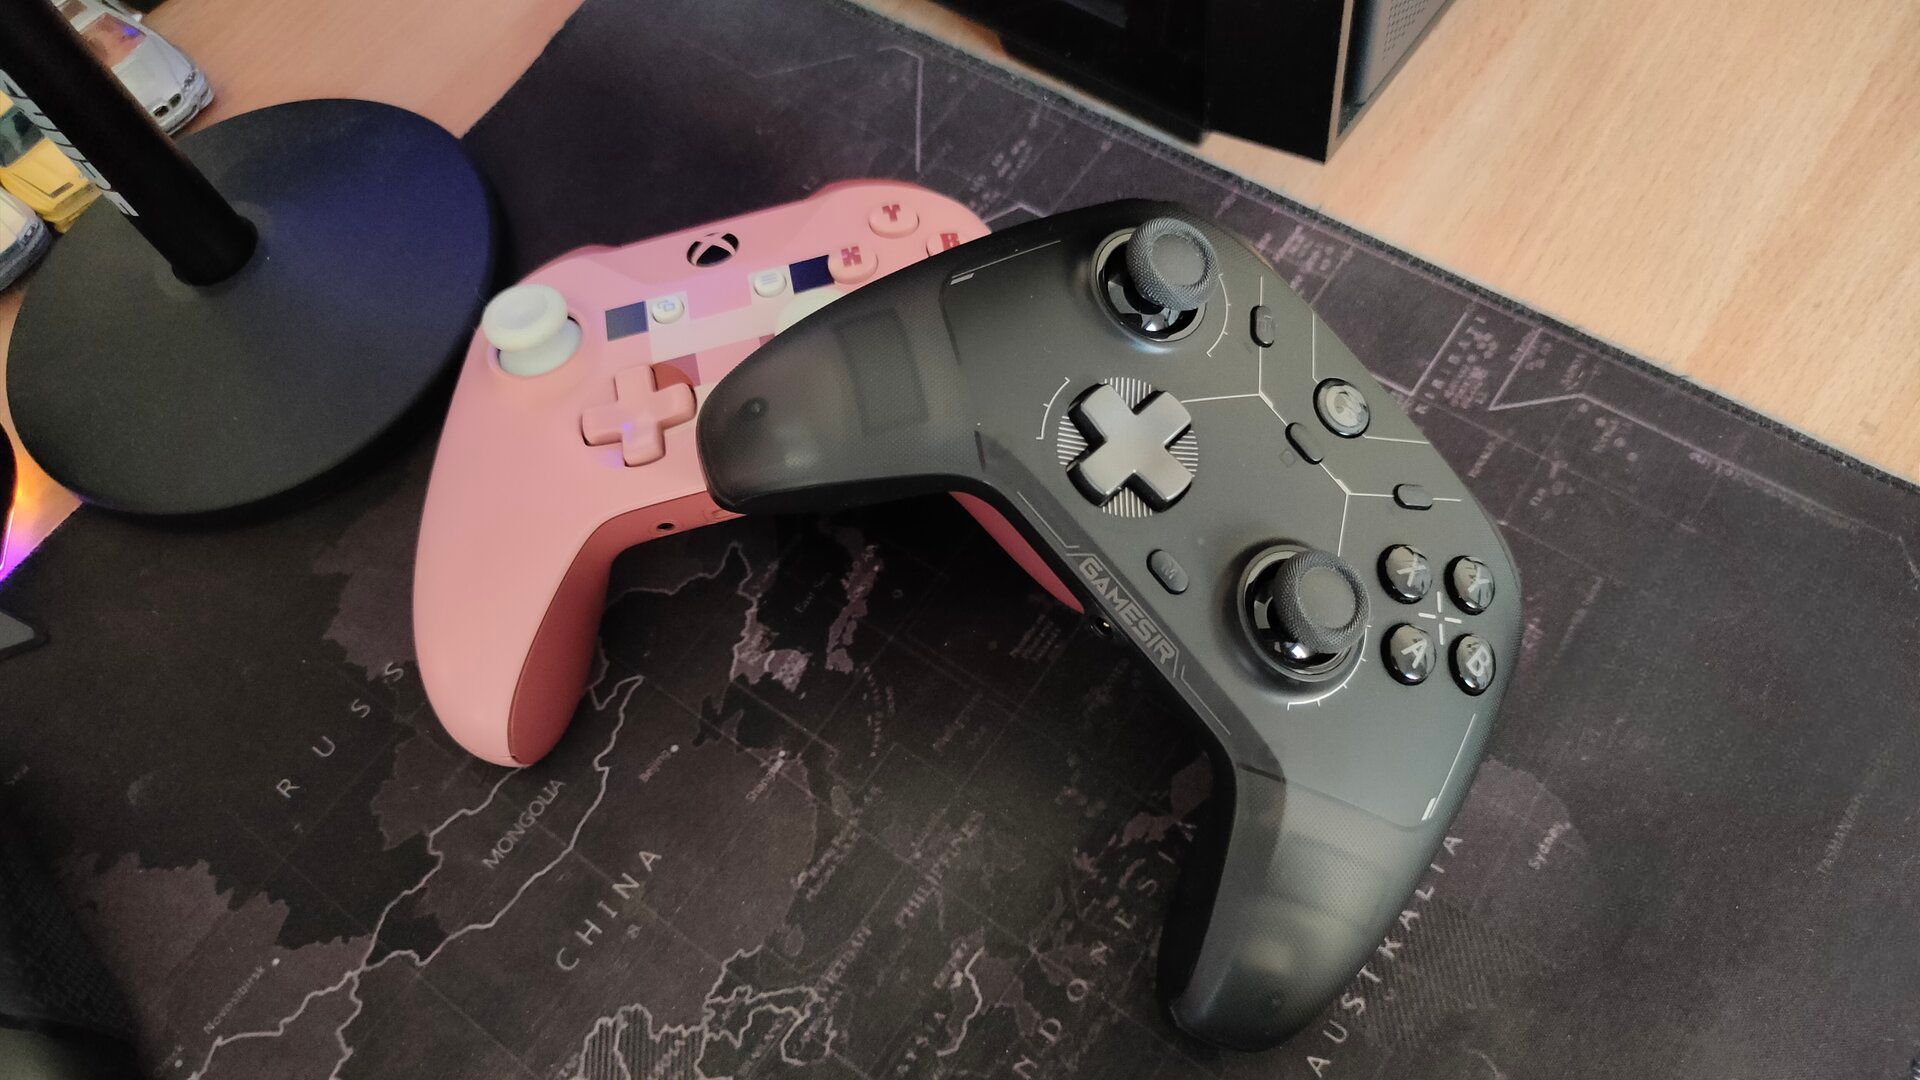
The GameSir Cyclone 2 game controller charging.

Ismar Hrnjicevic / How-To Geek

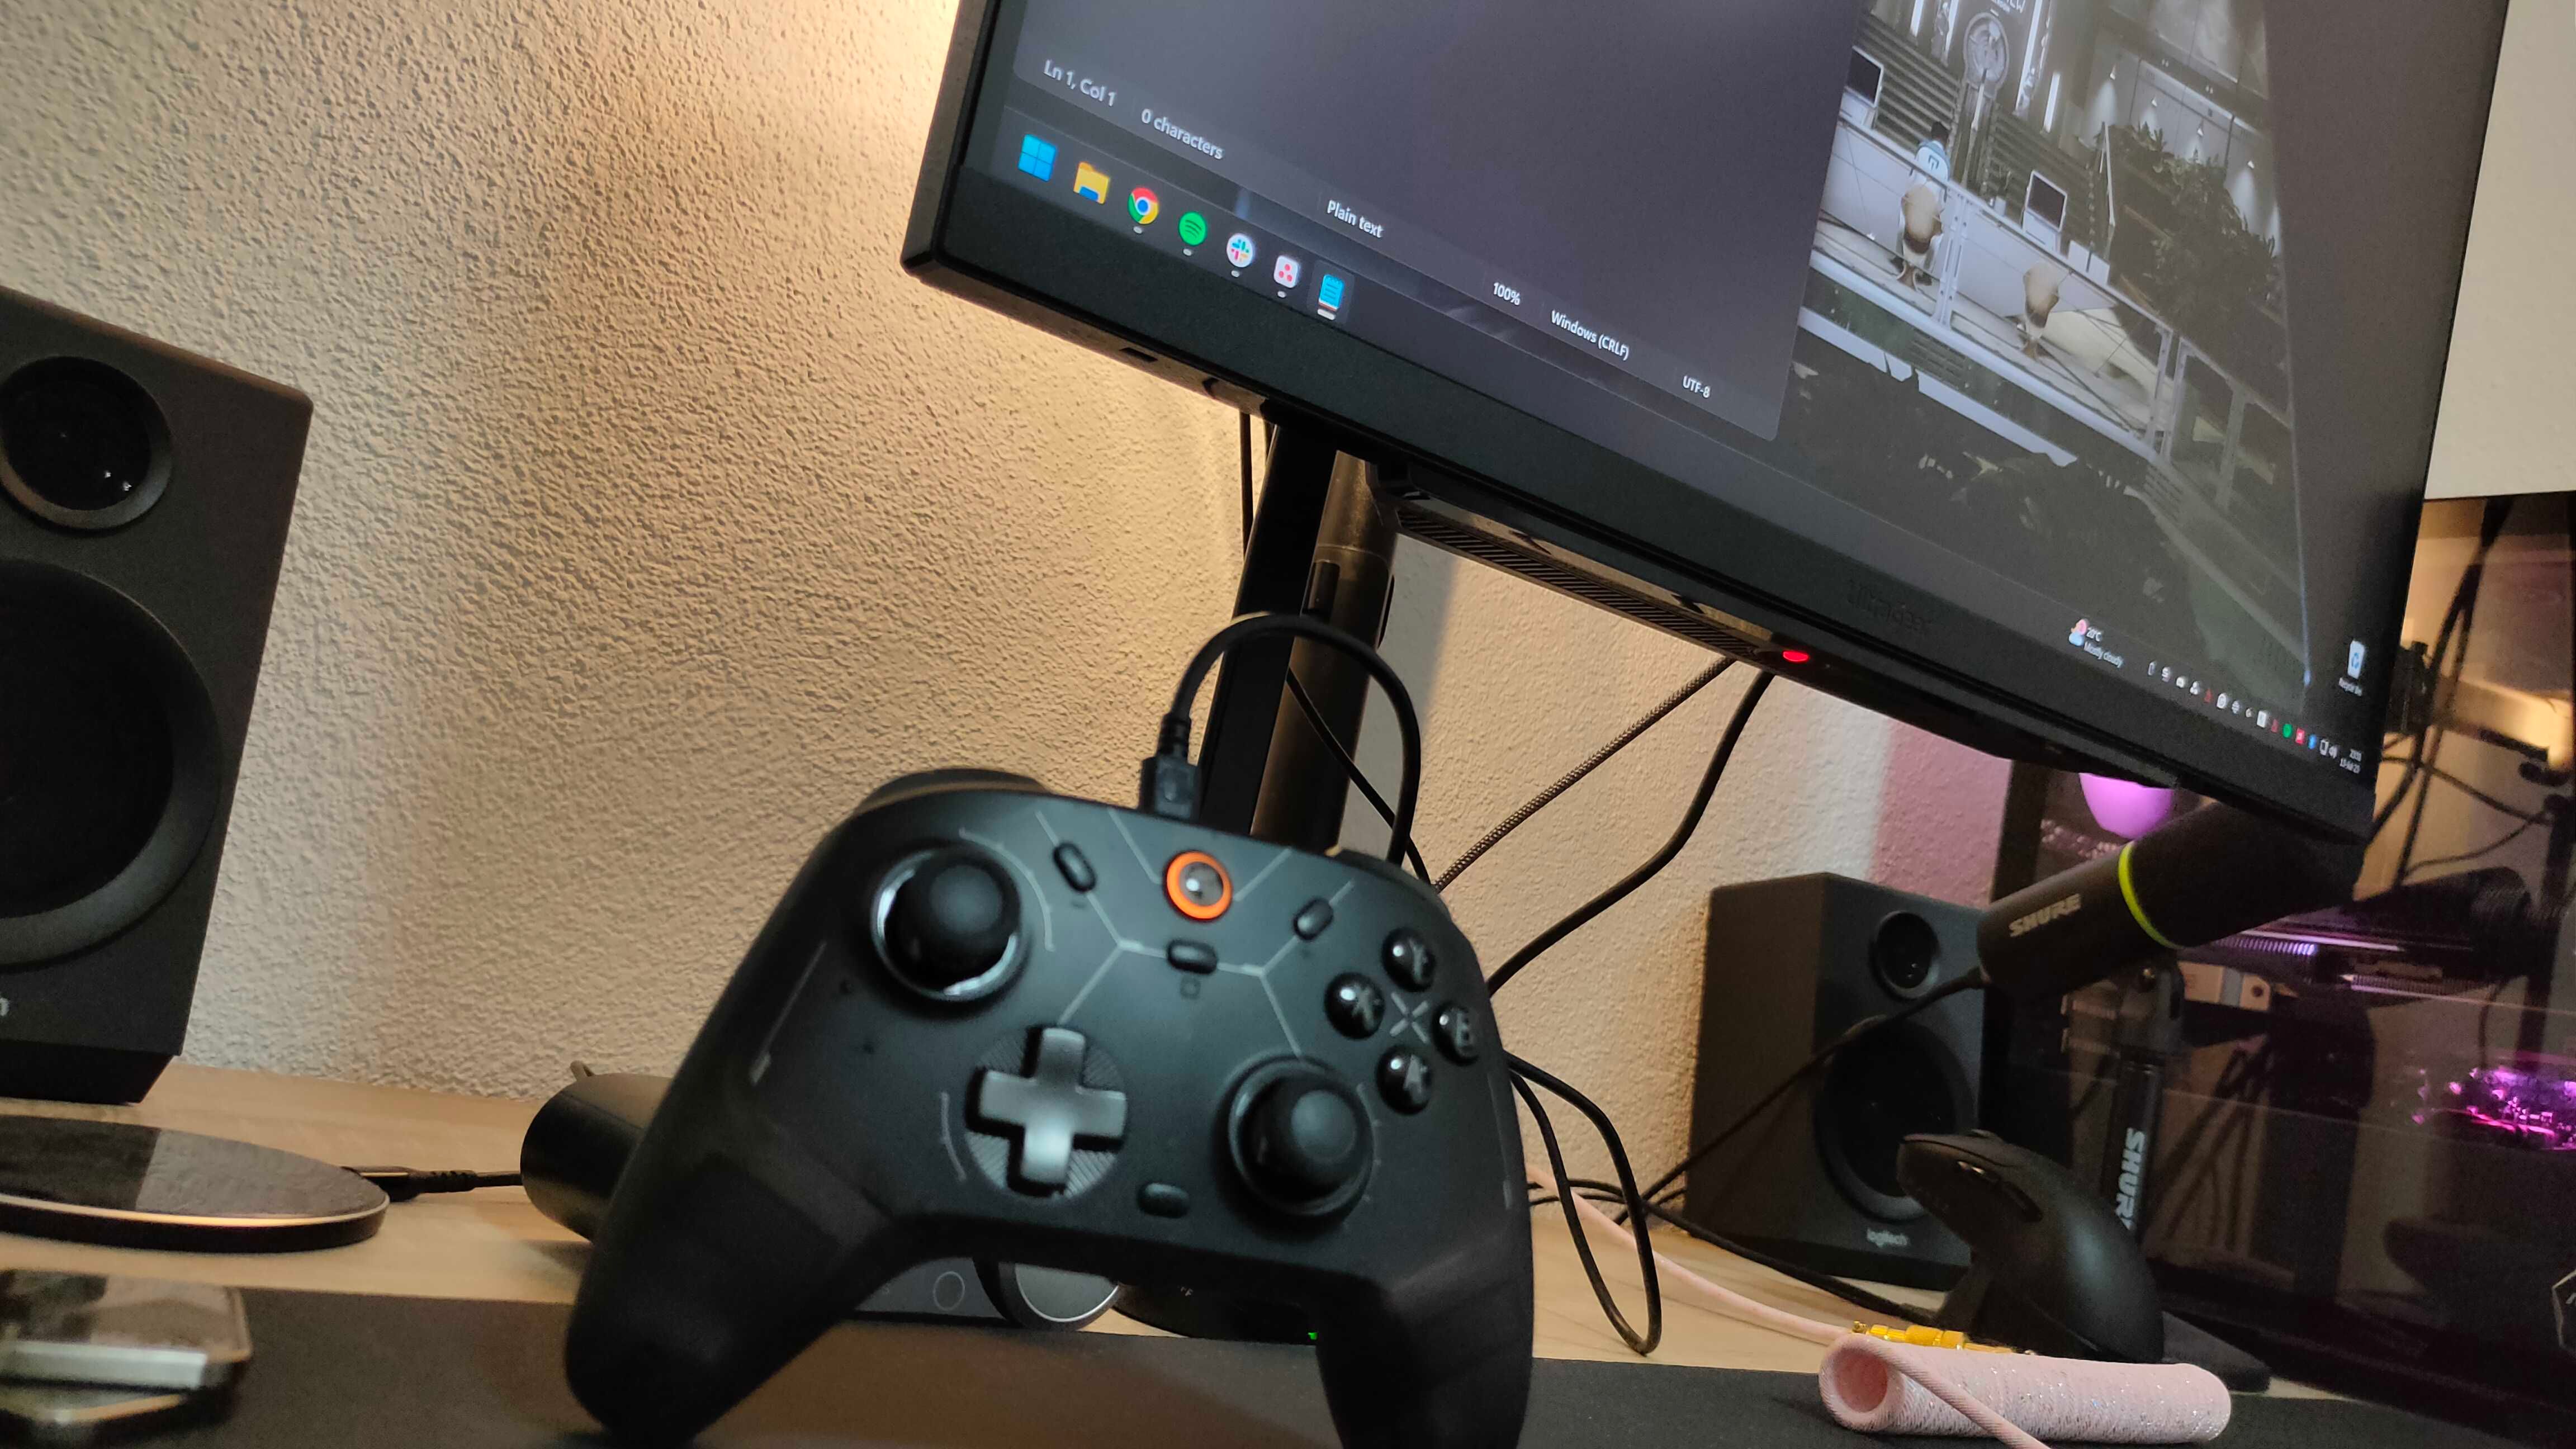
When I’m gaming at my desk instead of on the TV, I prefer to plug in my controller—the monitor is the perfect place to do it. Since it’s right in front of me, and the cable is already plugged in, it can run straight to the controller without getting in the way, making for a neat and convenient setup.

Using a wired connection offers slightly lower input lag, which can give me a very small edge in competitive online games like Rocket League.

Before you ask, the monitor’s USB ports don’t add any input lag, at least not even nearly as much as a 2.4GHz dongle or Bluetooth does. The ports on the monitor function very similarly to the front-panel USB ports on your PC, which connect directly to the motherboard via a cable.

Related

Should You Use HDMI, DisplayPort, or USB-C for a 4K Monitor?

HDMI, DisplayPort, USB-C, and Thunderbolt are all common now, but which is best?

Wired connections are also far more reliable. While 2.4GHz wireless is generally stable, it’s still vulnerable to interference, especially because my setup includes several other wireless devices, namely, a Wi-Fi router, gaming headset, keyboard, and two wireless mice.

I’ve only experienced signal drops once or twice in the six months I’ve owned the Cyclone 2, but even a single disconnect at the wrong moment in an online match could cost you the game.

My older Xbox One controller was even worse for this because I used Bluetooth. I’d gotten so used to using it wired, which is part of why I’ve stuck with wired play now that I have the GameSir Cyclone 2.

The GameSir Cyclone 2 Wireless Controller.

Platform

Nintendo Switch, PC, IOS, Android

Weight

0.65 Kilograms

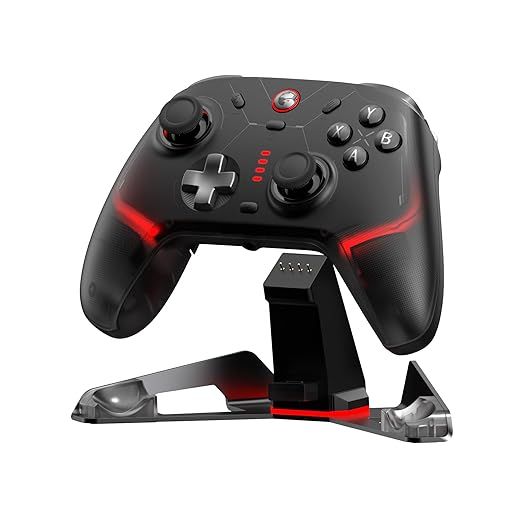
The GameSir Cyclone 2 is a wireless controller for PC, Switch, and mobile that’s equipped with TMR electromagnetic sticks, mechanical face buttons, and two rear paddles. The controller provides many high-end features at a reasonable price.


Another benefit of keeping my controller plugged in is that I don’t have to worry about charging. I didn’t buy the optional charging dock, and charging my Xbox One controller involves removing the AA batteries and using a separate charger. By keeping the controllers wired, the battery stays topped up—or unused entirely—so they’re always ready for a quick gaming session on the couch or local co-op when friends come over.

Related

Third-Party Controllers Aren’t Just Cheaper—They’re Plain Better

There’s almost no reason to buy a first-party controller anymore.

4

Use My Webcam Occasionally

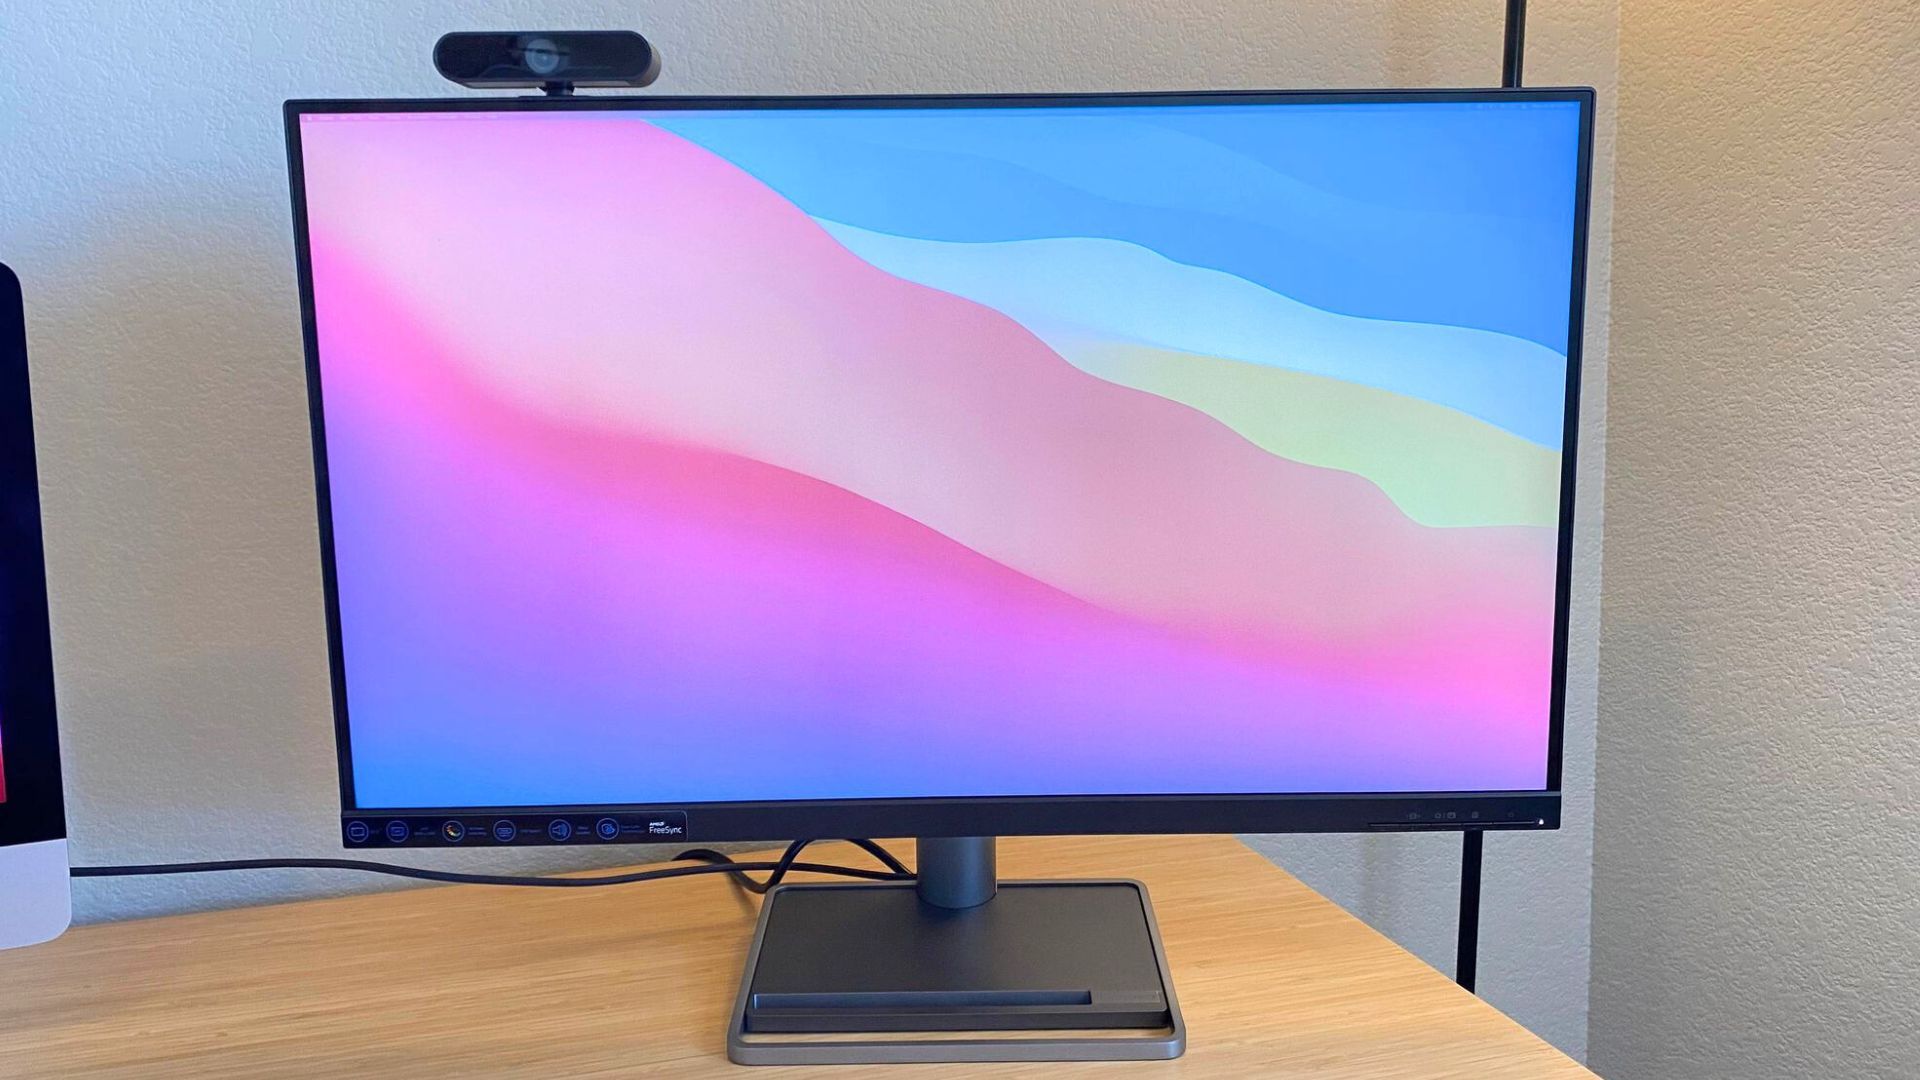
Lenovo L32-p 30 monitor with webcam.

Mark LoProto / How-To Geek

I rarely use my fifteen-year-old webcam anymore. In fact, it’s been over six months since I last needed it—and even then, I plugged it into my old monitor’s USB port. That setup made sense: my previous PC had even fewer motherboard USB ports than my current one, and the webcam’s cable is pretty short, so using the monitor’s port was a no-brainer.

At the time, I was skeptical that the drivers would recognize the webcam when plugged into the monitor. To my surprise, it worked flawlessly. The next time I have a conference call, I’ll use it as an excuse to finally upgrade to a webcam made in this decade—and you can bet I’ll still be plugging it into the monitor.

Like Mark Zuckerberg, I don’t like having a webcam pointed at me all the time. Even if it’s not hacked or I have tape over it, I just don’t want that thing cluttering my monitor’s clean bezels. It’s easier to just unplug it and plug it back into my monitor when the time comes.

5

Plug in USB Flash Drives

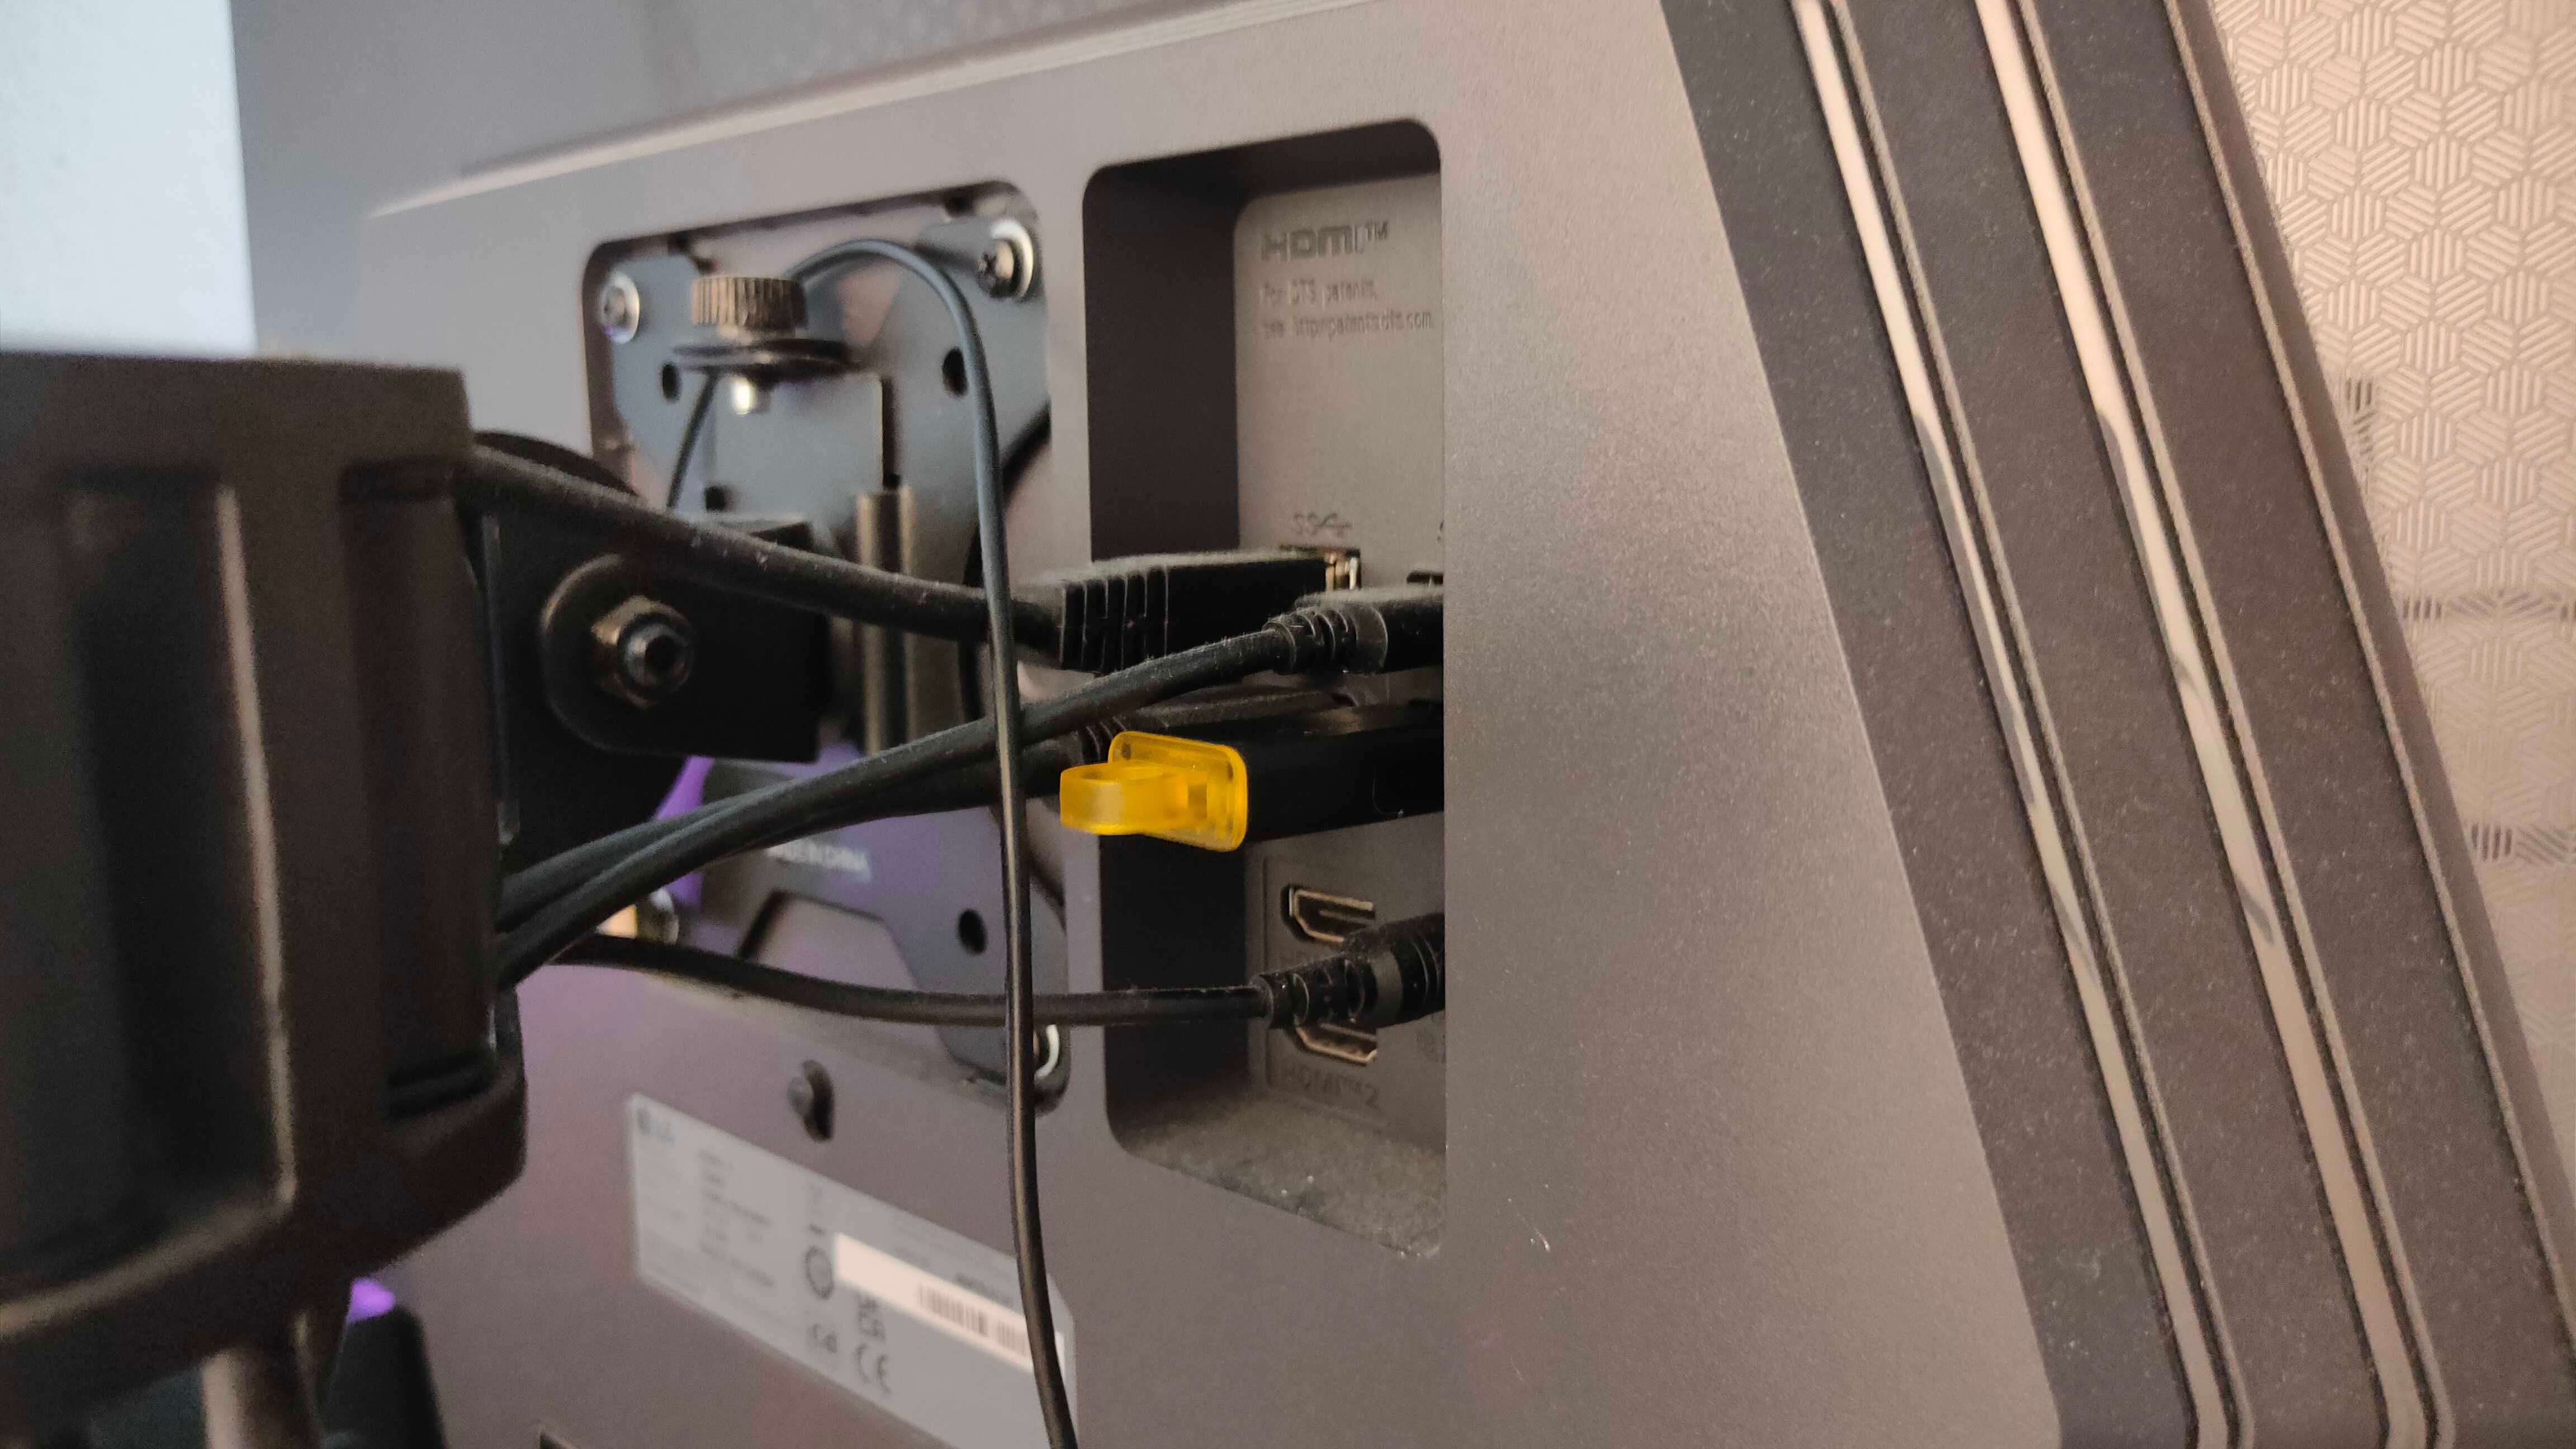
A USB flash drive plugged into monitor.

Ismar Hrnjicevic / How-To Geek

What better use for a built-in USB hub than plugging in flash drives? Admittedly, since my monitor’s USB 3.0 ports are on the back, I usually opt for one of my PC’s front ports instead.

However, when I’m transferring files between multiple flash drives or using them for temporary storage when my NVMe fills up with games, the monitor’s USB ports become a convenient alternative.

6

Power My USB Desk Fan

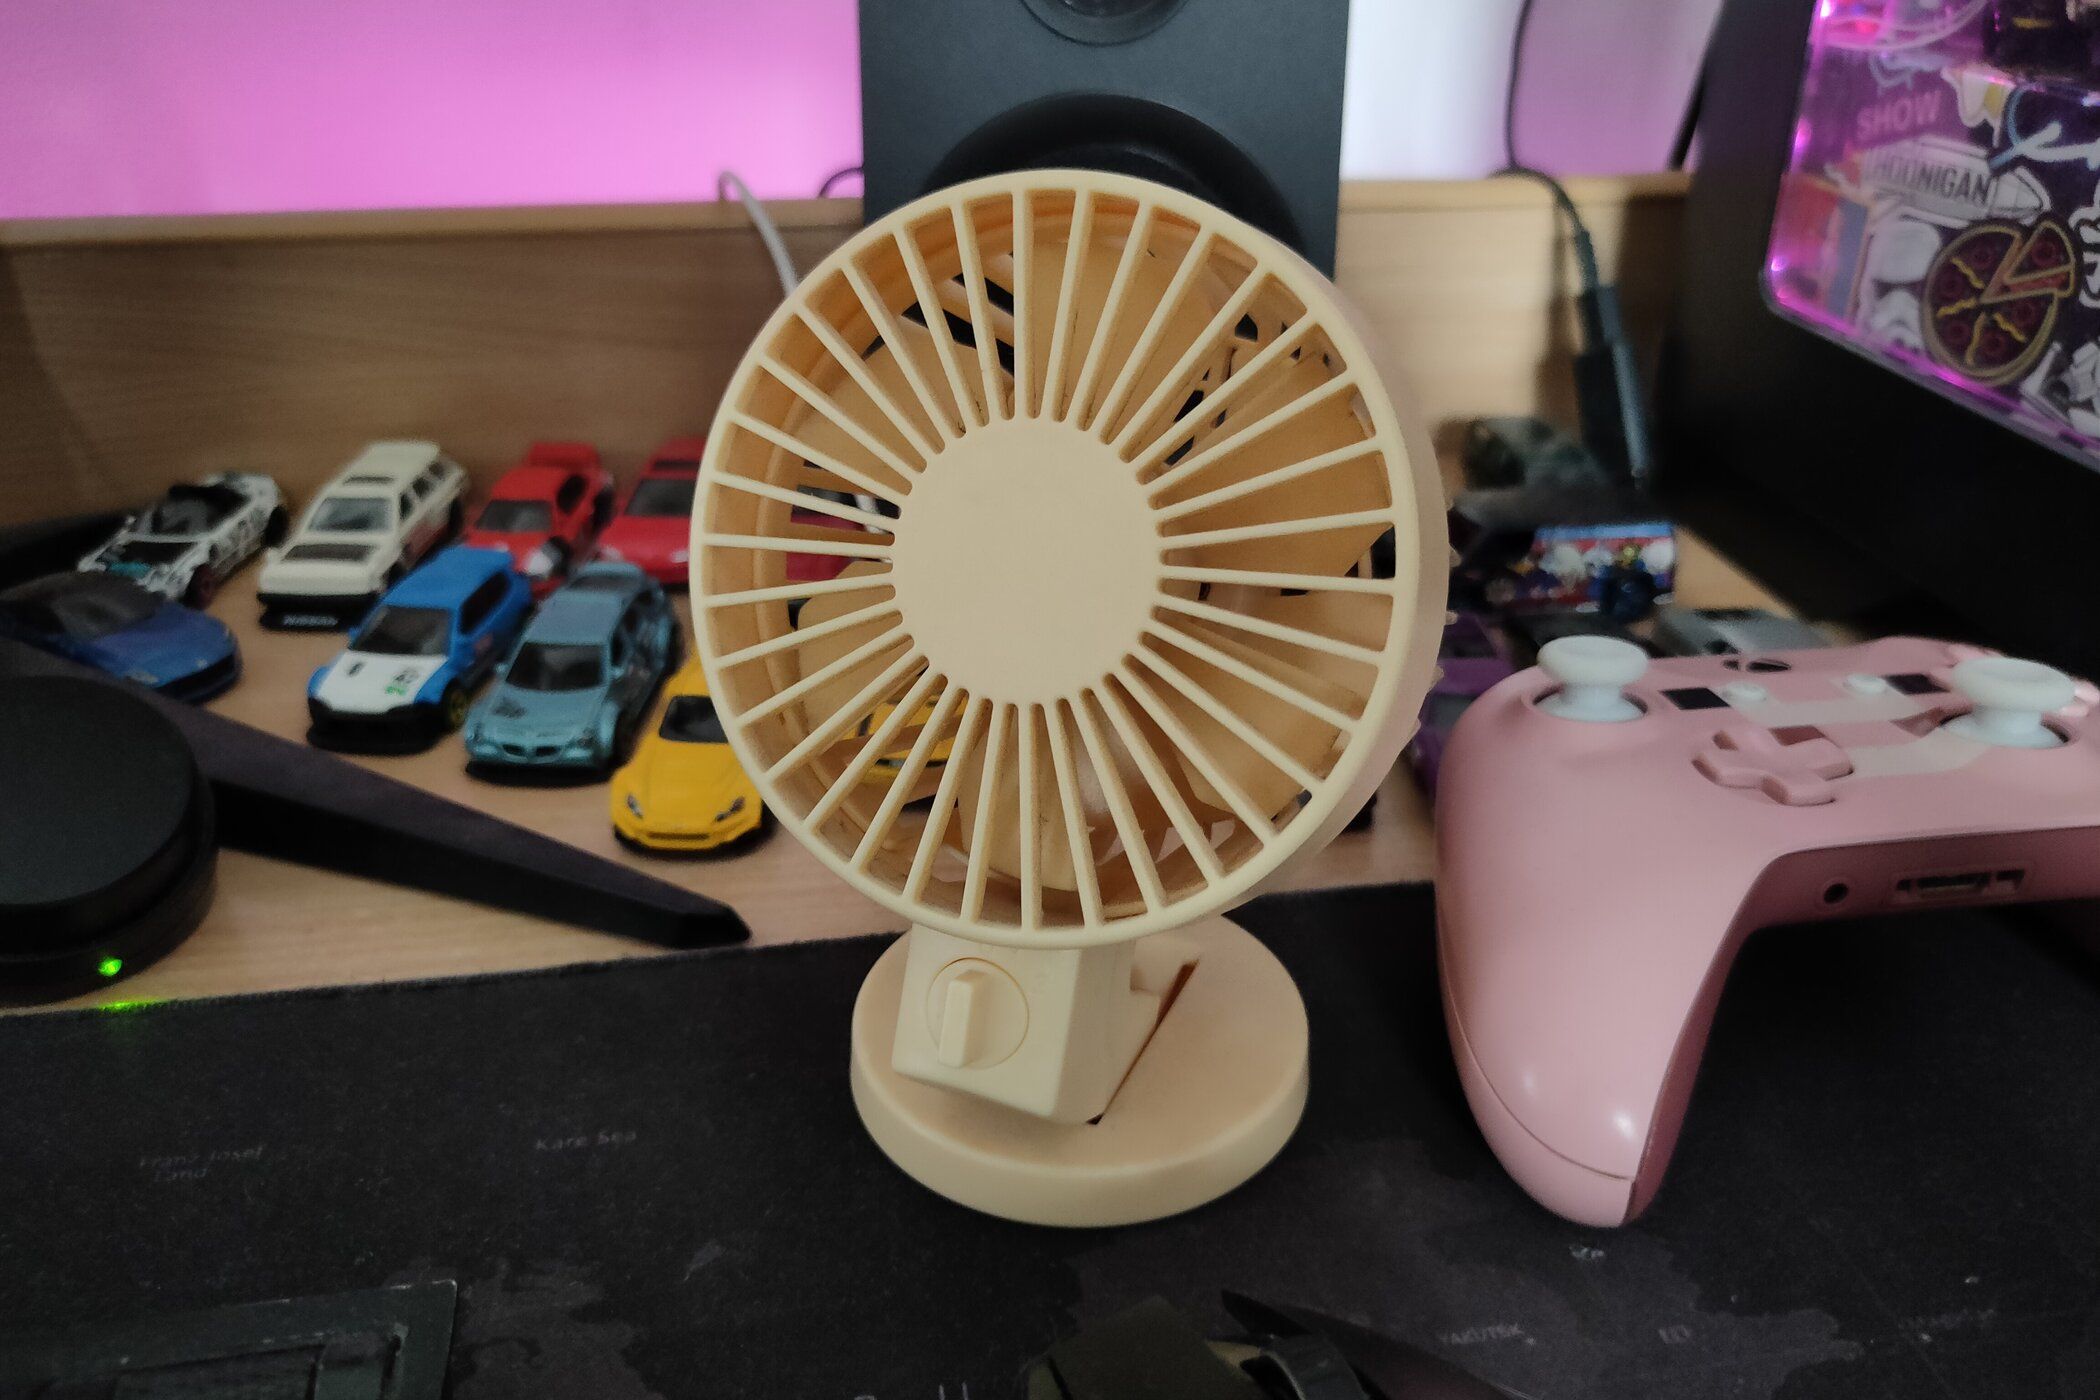
A small USB fan sitting on a table.

Ismar Hrnjicevic / How-To Geek

A semi-permanent addition to my desk during the sweltering summer days is my trusty USB fan. It’s an essential accessory that keeps my face and hands cool. And like many of my other desk accessories, there’s no better place to plug it in than my monitor.

I usually connect it to one of my desk lamps, but if you don’t have as many lamps, or if your monitor has more than two USB ports, you can just as easily plug it directly into the monitor instead.

7

Plug in Wireless Dongles

A 2.4GHz dongle plugged into a monitor.

Ismar Hrnjicevic / How-To Geek

Between my two wireless keyboards, controller, Bluetooth dongle, earbuds, gaming headset, and two wireless mice, there are just so many 2.4GHz dongles and receivers to keep track of, and I can’t keep all of them plugged into the front or back of the PC.

Not that I’d ever plug them into the back, anyway. That giant metal box filled with components and electromagnetic noise is basically a signal interference machine.

Fortunately, the monitor’s panel is just thin enough to allow signals to pass through without issue, at least from my personal experience. That’s why I love using its USB ports for dongles when I run out of room on the front I/O. I’d much rather sacrifice one of the lamps if need be.

Related

Here’s Everything You Can Do With the Ports on Your Monitor

Any port in a storm? No, you need to pick the right one!


As you can probably tell by now, nothing in my setup is truly permanent. I’m constantly swapping things around, and having those extra USB ports on the monitor makes it much easier to find a spot for every single gadget all at once. Now that you’ve seen how I use mine, hopefully you’ve got a few ideas of your own for putting those USB ports to good use!

Here’s What I Did to Get My Data Back

Here’s What I Did to Get My Data Back

Getting your phone stolen is one of the most frustrating experiences you can have. And while you may not be able to get your old device back, there are ways to recover your data.

4

Secure Your Phone

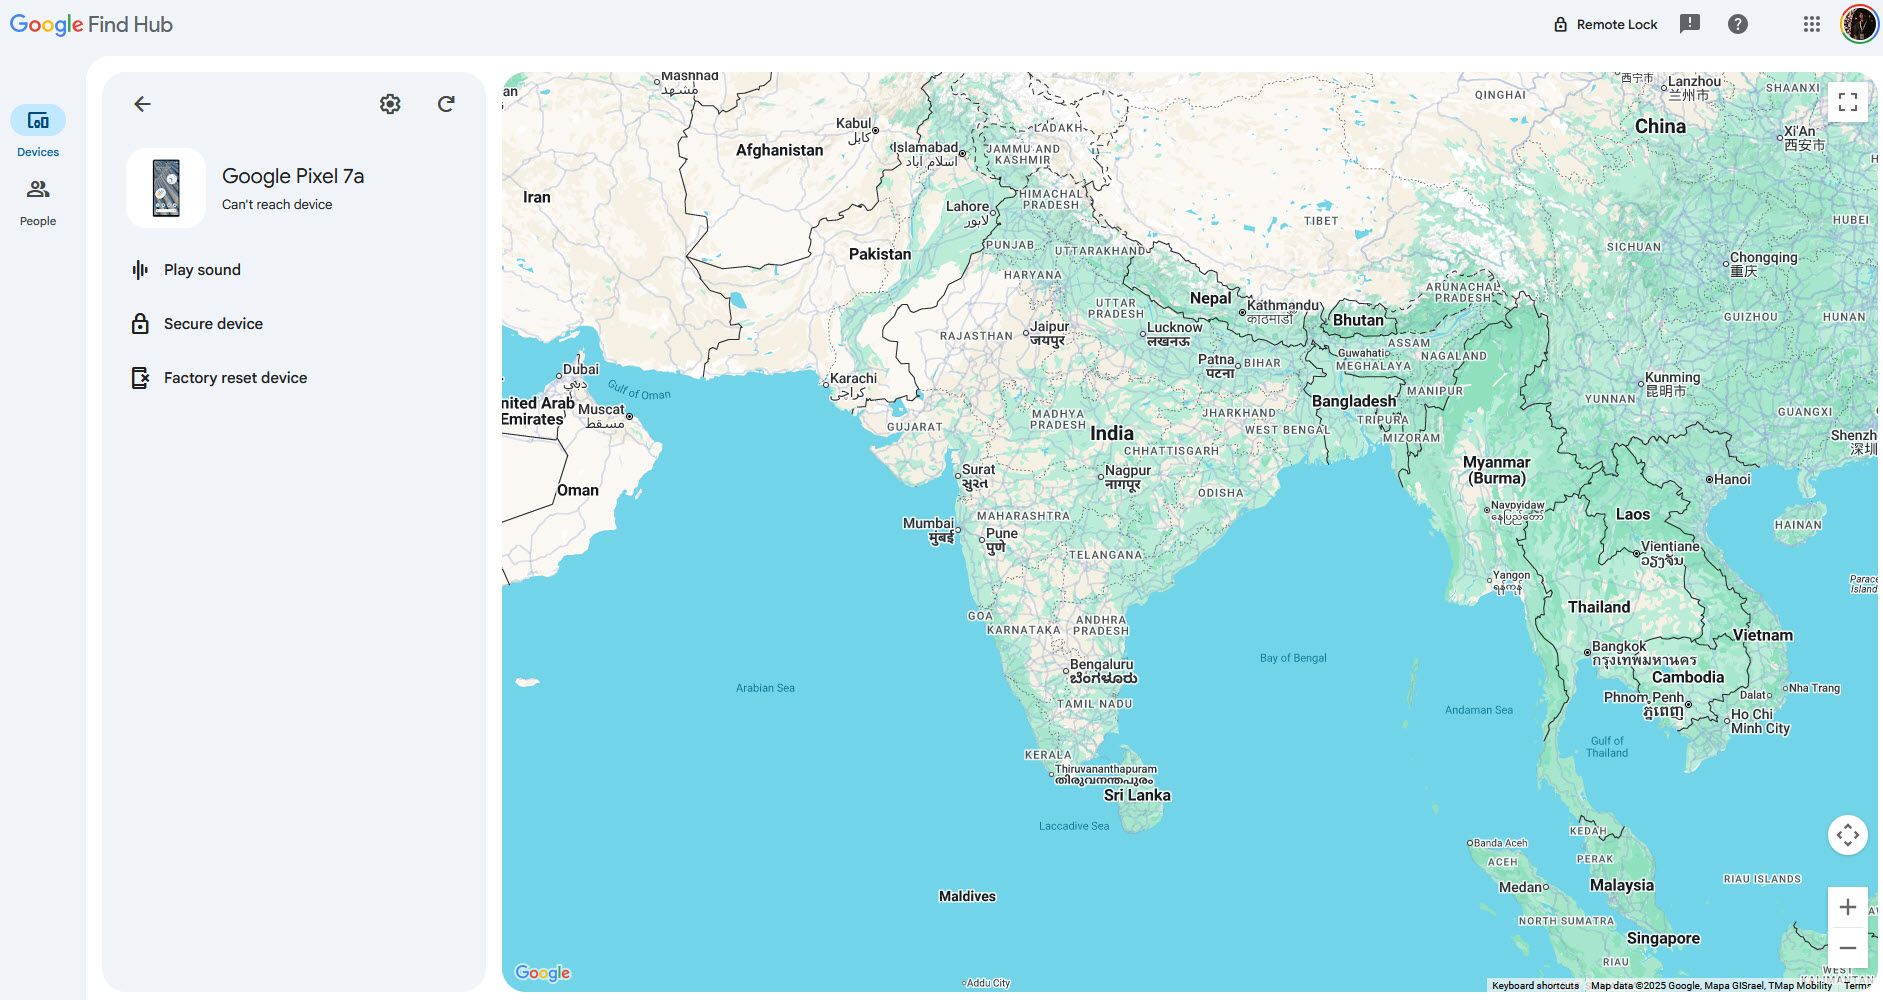
The first action to take when you realize your phone is gone is to secure it. Google’s Find Hub has a Secure device feature that locks your phone with its PIN, pattern, or password, signs you out of your Google account, and deletes any payment cards stored in Google Wallet—but still lets you locate the device.

There’s also a Remote Lock option that lets you add a unique password to your device to lock it remotely. This also gives you the option to leave a phone number and message on your device’s screen.

Google Find Hub tracking screen

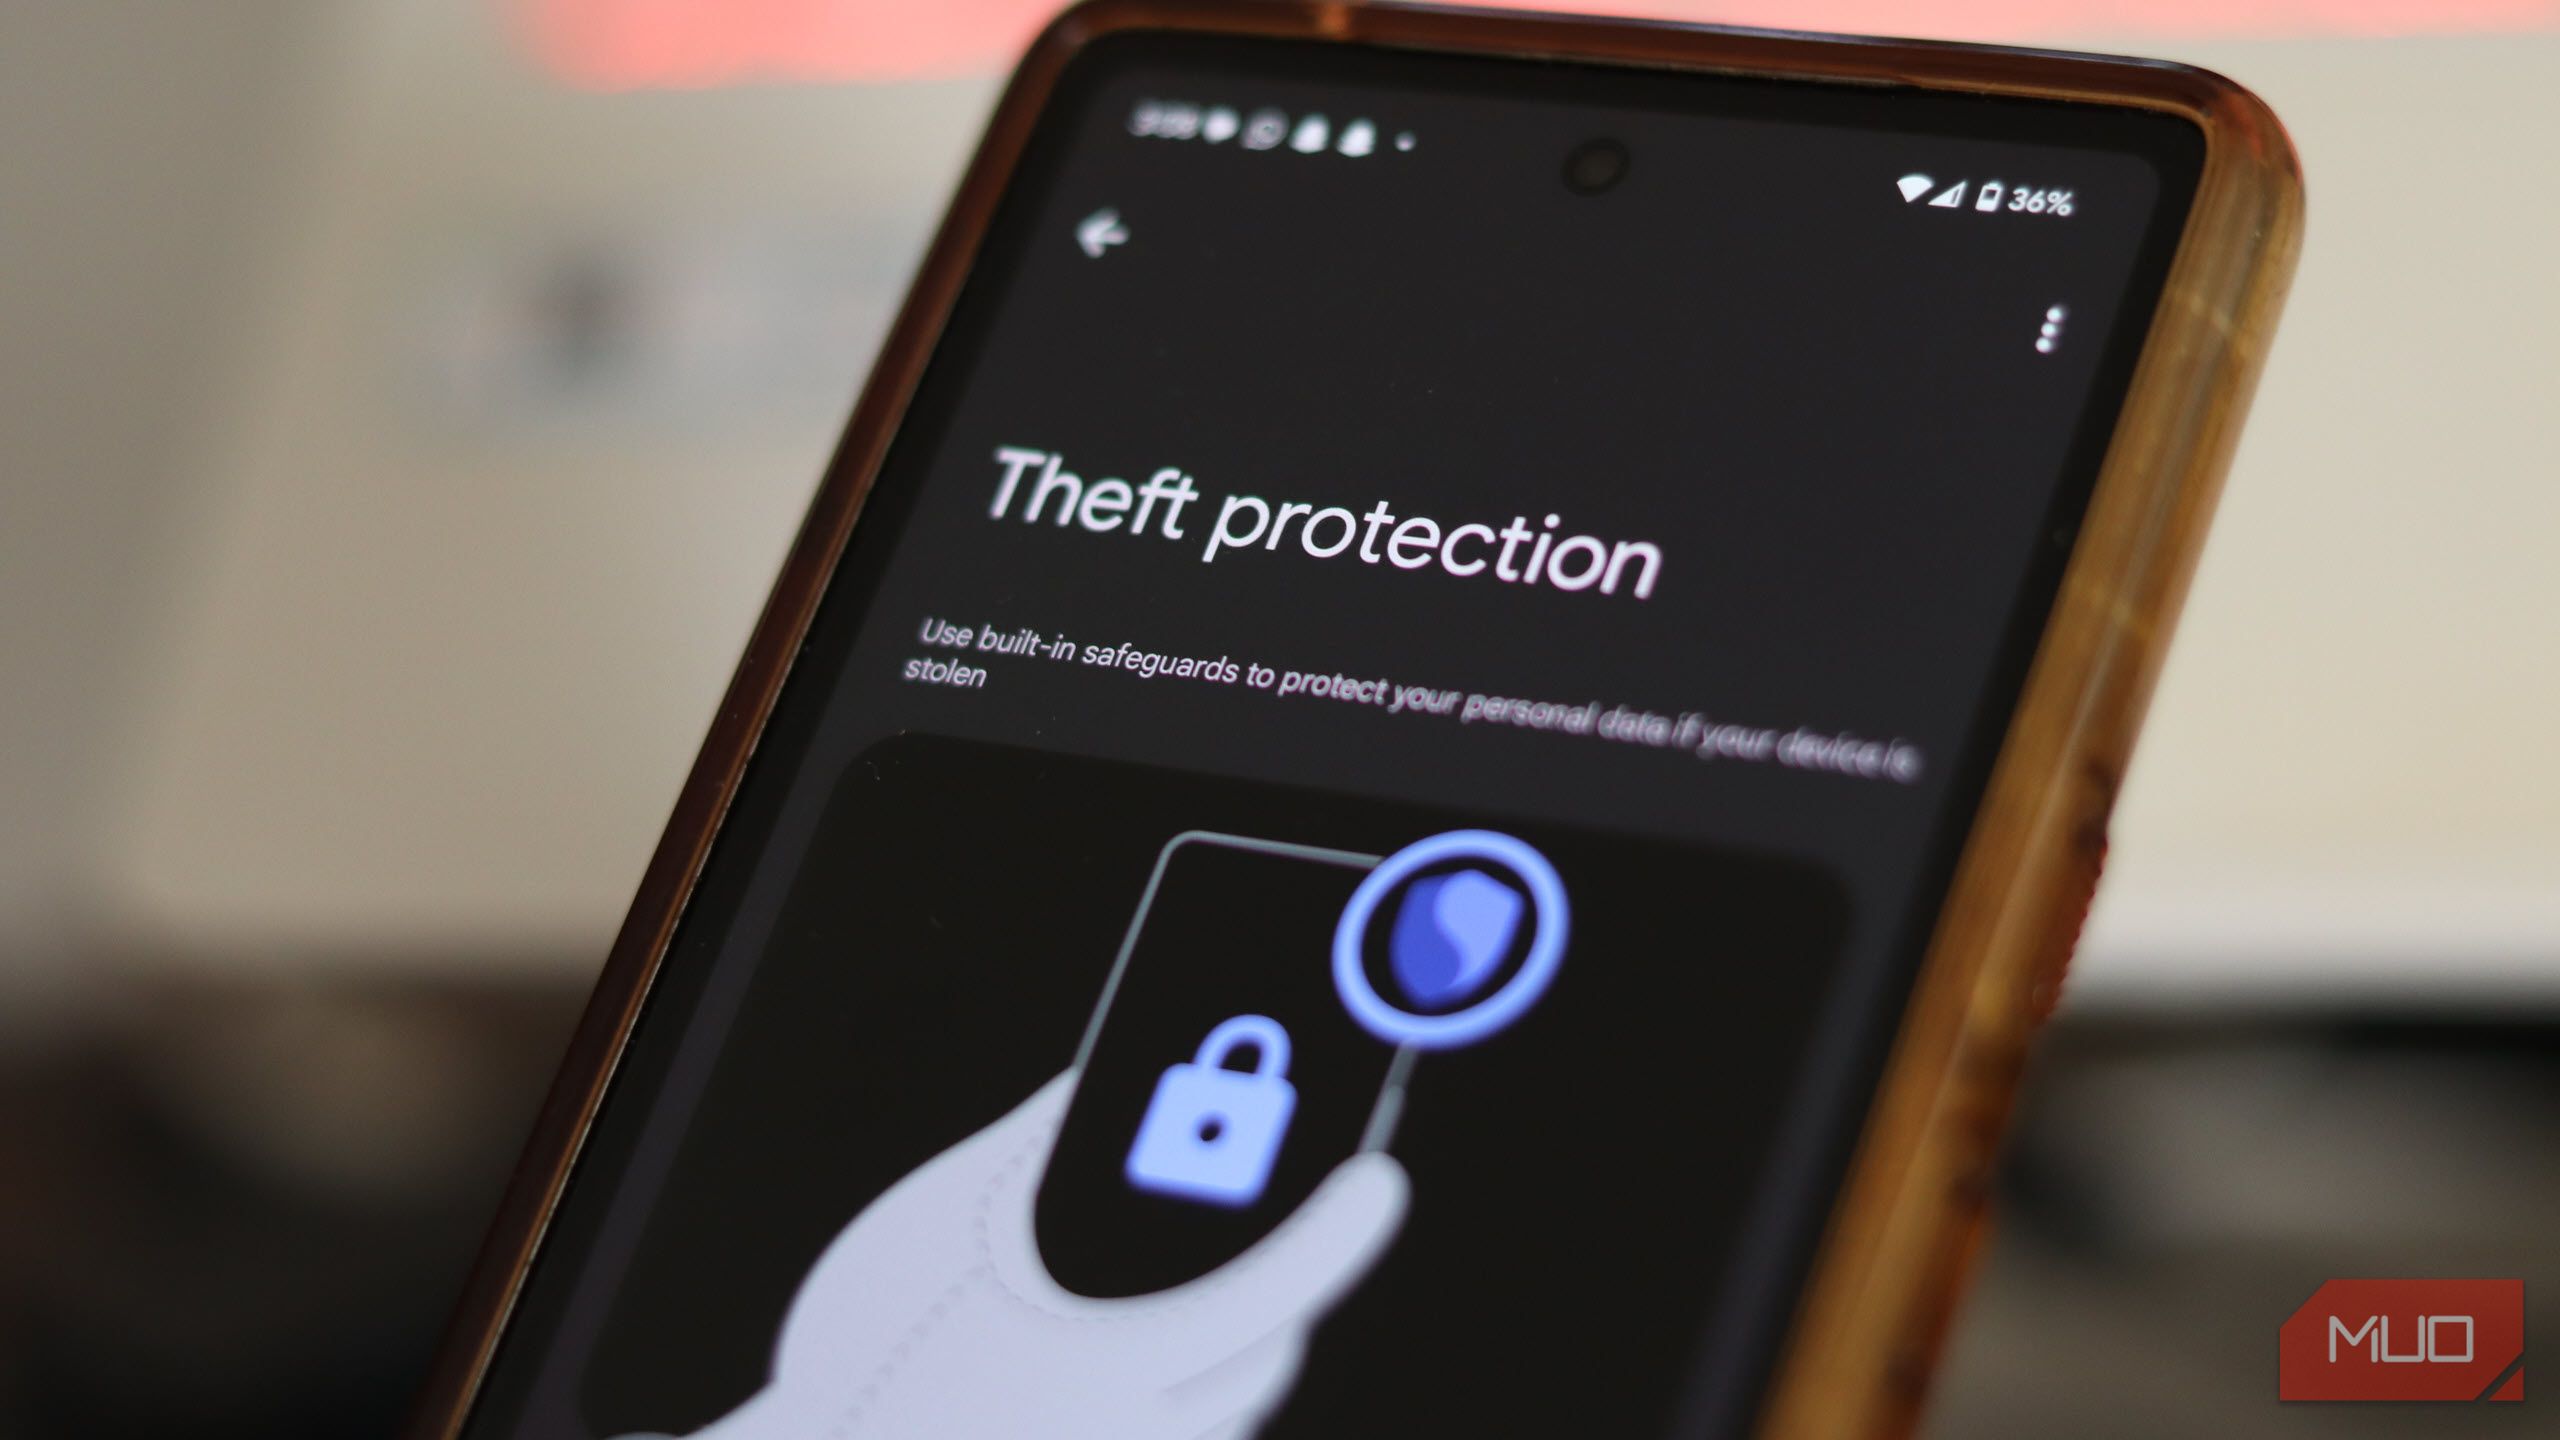
Keep in mind that Remote Lock needs to be enabled on your phone, and your device must be online. If it isn’t, the screen will automatically lock once it’s online. This is also a fairly new feature and will likely not be present on older versions of Android. If you’re not using a relatively modern phone that has received Android updates to add anti-theft protection, you’re probably out of luck.

That said, the Find Hub can still factory reset your device for you. There’s a catch, though—you won’t be able to track your phone once it’s reset. Google’s Find Hub (formerly Find My) is getting a lot better with upcoming Android features, but some of these features are already available, and you should enable them if possible.

3

Start Updating Your Credentials ASAP

The next step to take after your phone is stolen is to start updating all your credentials. If you’ve properly locked down your phone against theft, your data should be relatively protected, but it’s always a good idea to update your passwords out of caution.

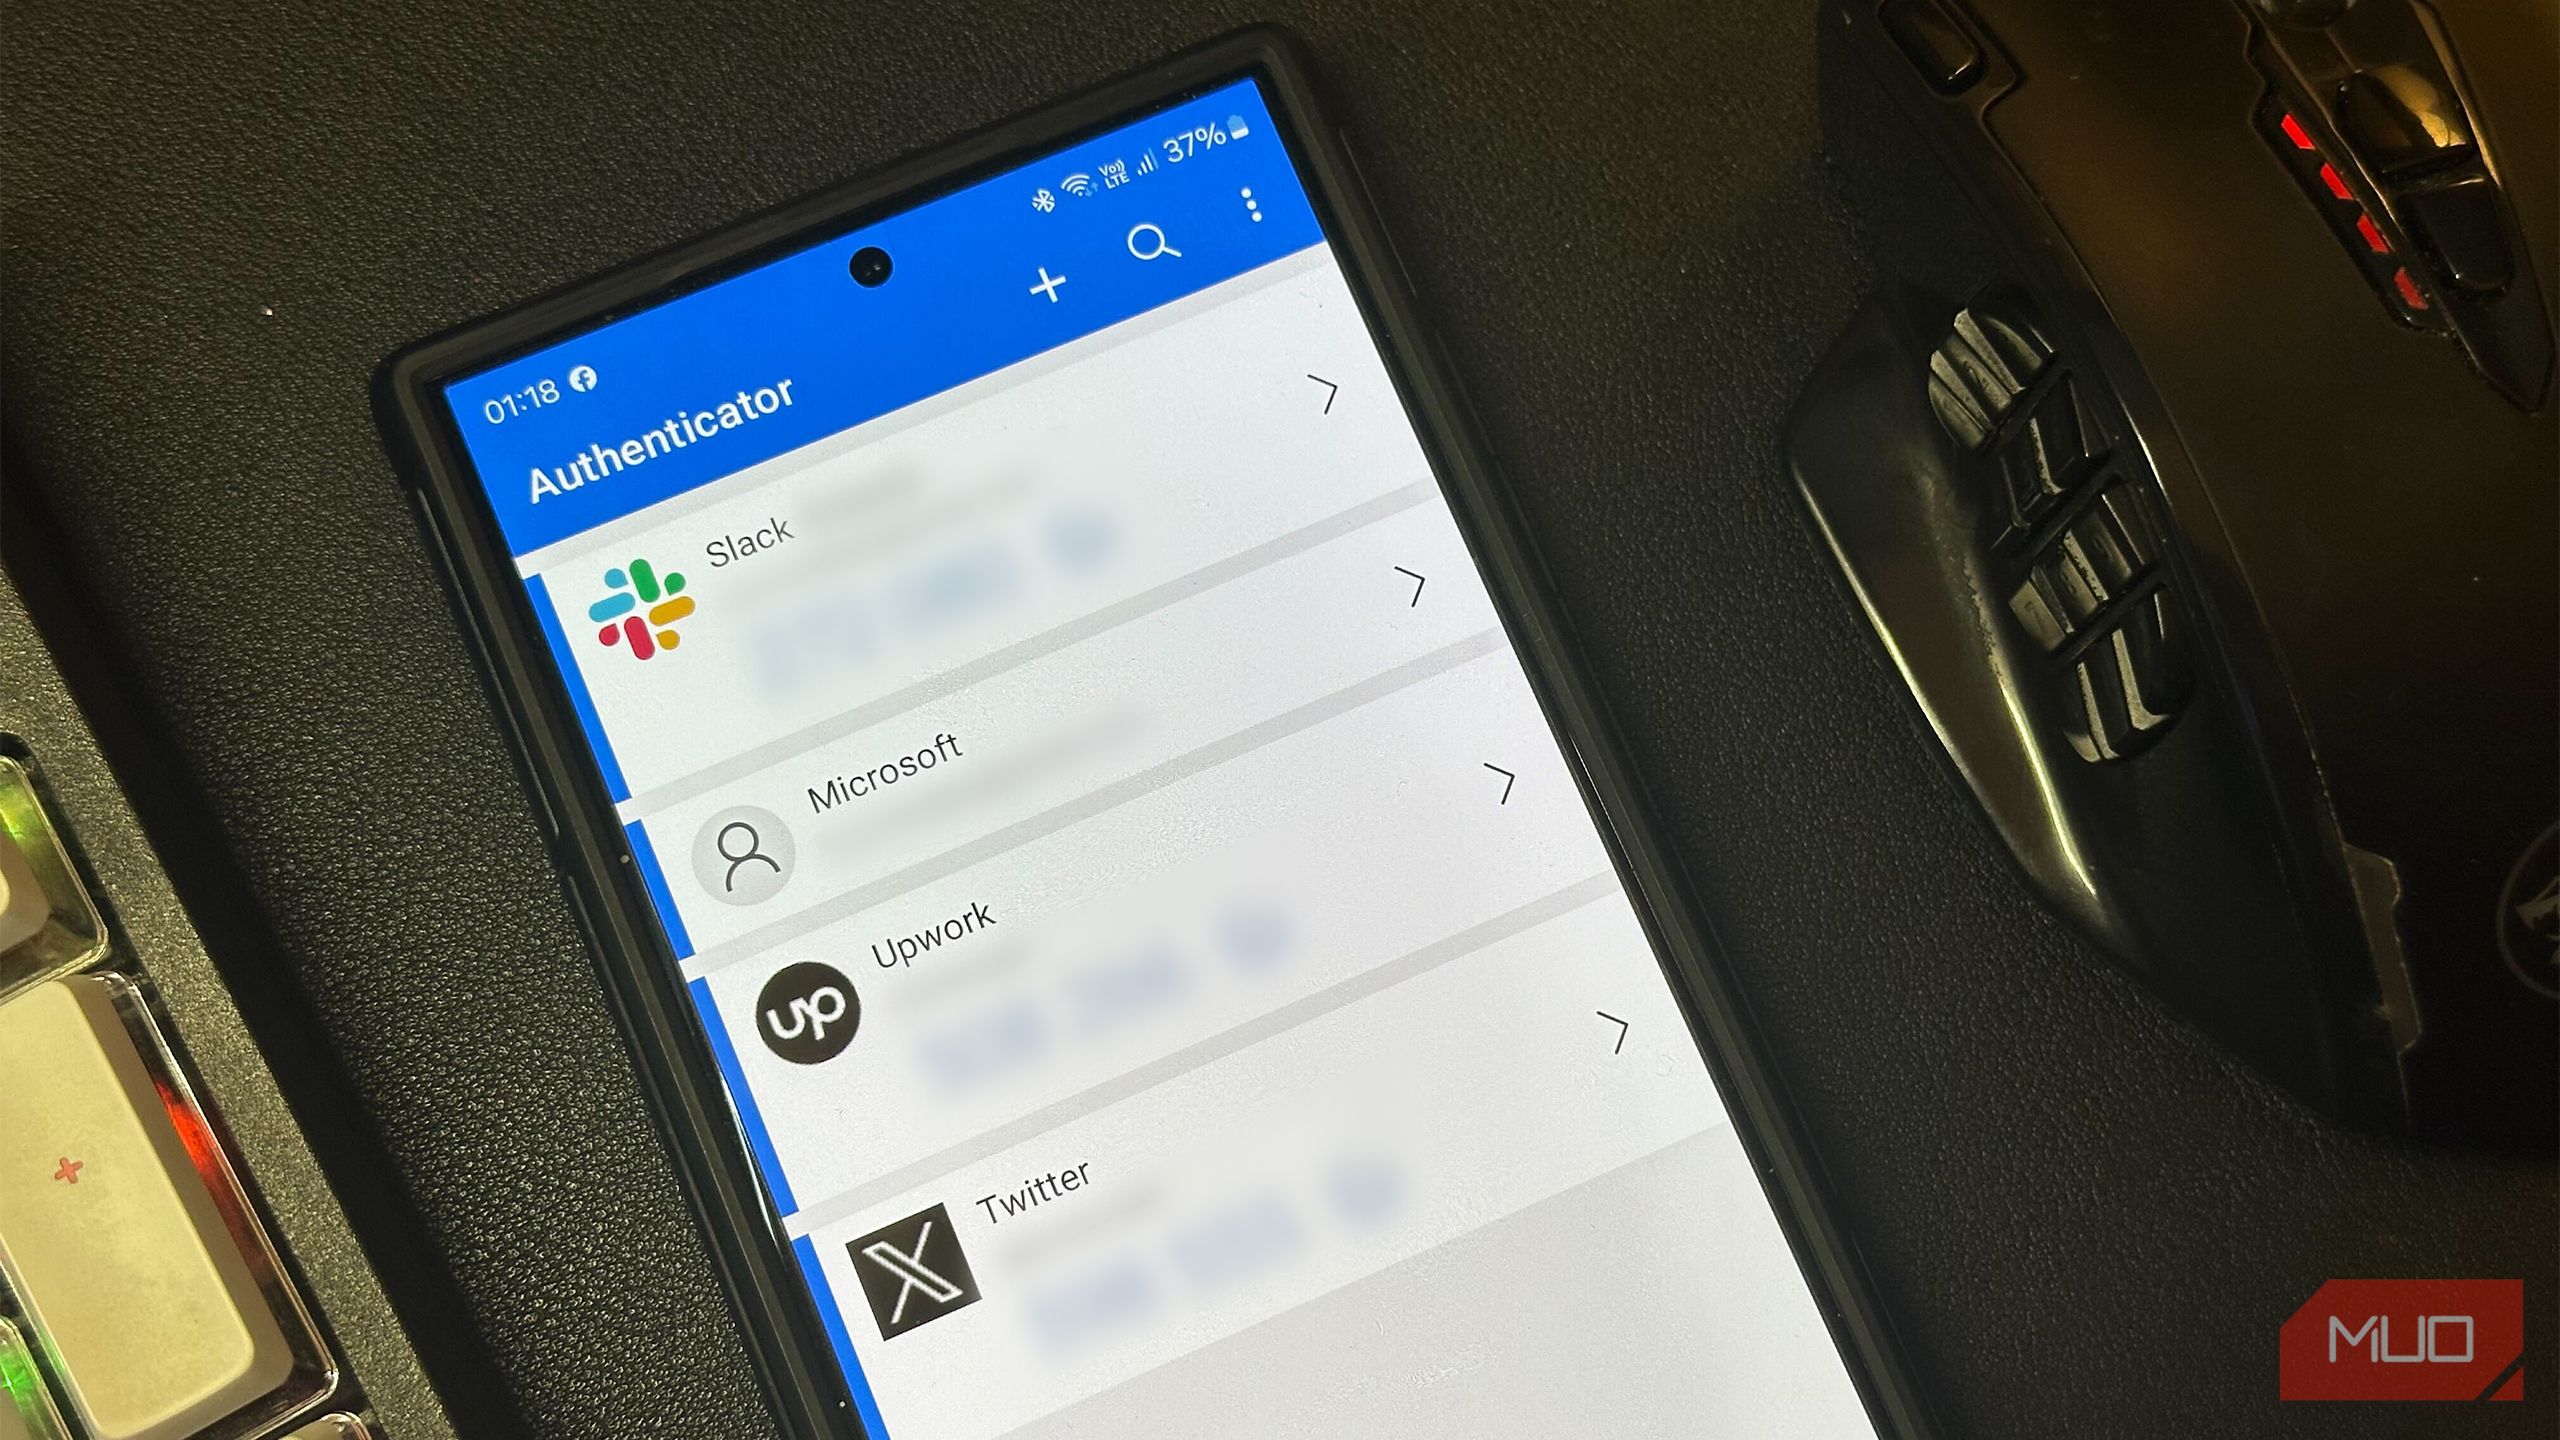
This will be tricky, especially if you’re using 2FA apps like Google or Microsoft Authenticator. I started by making a list of all the accounts logged into various apps and websites on my phone, in order of importance. It’s best if you update your Google account (or Apple if you lost an iPhone) first, as that’s the most accessible account on an Android smartphone.

Microsoft Authenticator on Samsung Galaxy S24 Ultra

Jowi Morales / MakeUseOf

Next should be your banking credentials. If you added your cards to a wallet app on your smartphone, I’d recommend canceling the old cards and getting new ones from the bank. I keep relatively little payment information on my phone, so resetting my bank account’s online password was enough.

Then come your other important credentials, especially any work-related emails or apps you might be using on your phone. Make sure you sign out of all active sessions as you update your passwords, as that’ll force any app or website that was previously logged into your account to ask for the new password before letting anyone in.

When you enable 2FA, you’ll receive some backup codes that you can use to log in and change important account security settings. If you have access to these keys, life will be a lot easier as you won’t have to jump through hoops trying to disable 2FA on your account before gaining access to it. If not, depending on the account you’re trying to reset, it can be a troublesome process to regain access. This is why many of the best 2FA apps let you sign in on your desktop or multiple devices, so losing your phone doesn’t completely remove access.

Note that this might break functionality on some accounts, meaning you’ll likely have to reach out to support to get your accounts back. I still can’t log into LinkedIn on my new phone, despite resetting my password and disabling 2FA from my PC.

2

Check Your Backups

Most apps do a pretty good job of backing up your data, even if you haven’t messed with the options. Your contacts are automatically synced to your Google account, so you’re covered there. Depending on your SMS app, you may or may not be able to recover your messages. Internet-based messaging apps like WhatsApp also save backups on your Google Drive.

I use Google Photos as my main gallery app, which automatically backs up photos and videos from select folders when you’re connected to Wi-Fi. Most of my photos, except for those from the day my phone was stolen, were recovered thanks to Google Photos backups.

Related

Where Are Google Photos Stored and How Do You Find Them?

Looking for old photos you’ve taken? They may still be accessible online in Google Photos.

Apart from that, most apps you use daily, especially social media apps like Instagram or Reddit, are synced with their servers. As long as you’re able to log into your accounts, you shouldn’t see any major data loss there either.

That said, I would highly recommend getting your hands on a new device as soon as possible, so you can start to recover your data from any backups available. In case the thief gains access to any of your accounts before you’ve had the chance to change your passwords, you could lose access to your cloud backups—and by extension, any data that would have been recoverable in such situations.

1

You Can’t Save Everything

While you can save a lot of the data on your stolen phone, you can’t protect everything. Most of what you can recover will depend on whether you had automatic cloud backups enabled on your device. Files, photos, and any other data stored on your phone that haven’t been backed up can’t be saved.

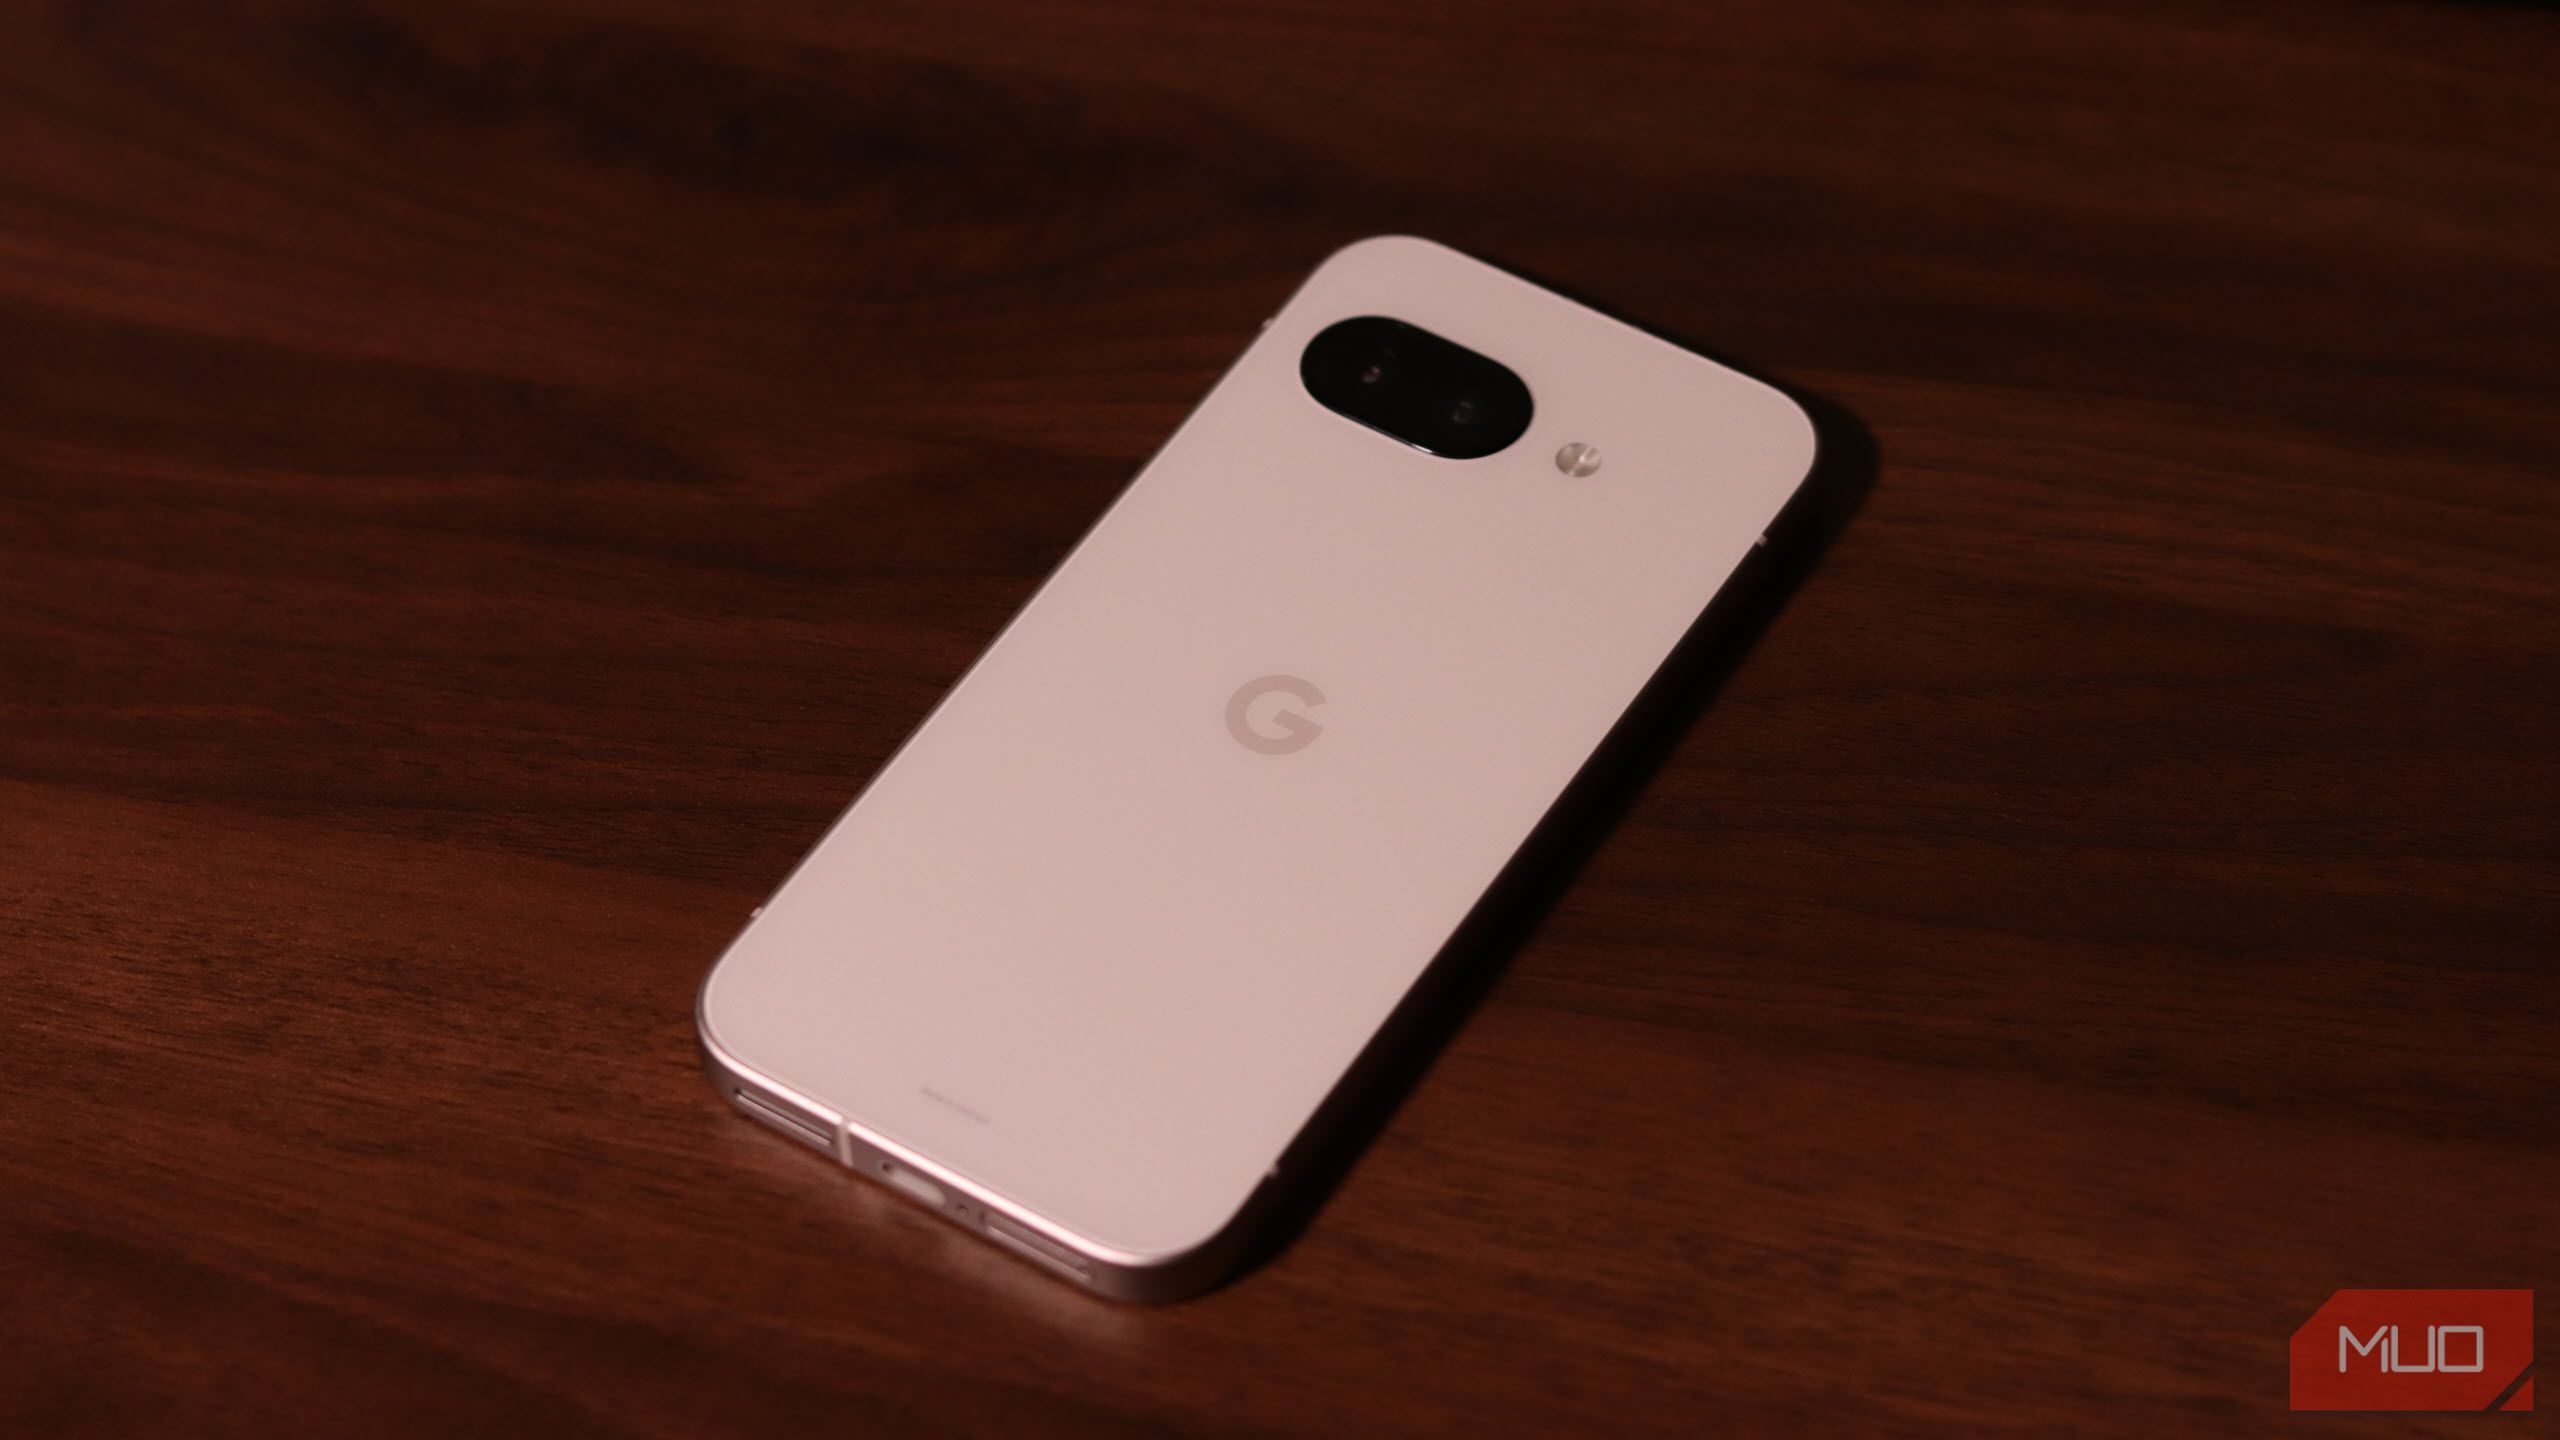
Pixel 9a on a wood surface

Yadullah Abidi / MakeUseOf

For example, when my Pixel 7a was stolen, I had no way of recovering local documents, several APK files, and photos that Google Photos hadn’t backed up at the time of the theft. If something is only stored locally on your device, it’s gone for good when you lose that device.

Related

The Next Time You Lose Your Android Phone, It Will Be Easier to Recover

Your Android phone will lock itself to oblivion rather than be reset.


Having your phone stolen is an incredibly frustrating experience and one that I hope none of you go through. There are plenty of ways thieves can stop you from tracking your device, but there’s still a good chance you can lock it remotely. That lets you prevent your data from falling into the wrong hands and gives you a chance to recover it on your new phone.

Amazon Prime Subtitles Not Working: Quick Fixes

Amazon Prime Subtitles Not Working: Quick Fixes

The Download

  • First, double-check your subtitle settings and switch them off and on again to fix display issues.
  • Restarting the app and your device can help clear temporary cache problems affecting subtitles.
  • If subtitles still don’t work, try updating or reinstalling the Amazon Prime app for a fresh start.

If your Amazon Prime Video subtitles aren’t working, it can be frustrating. However, fixing this problem is usually straightforward. Here’s how to address the most common issues and what steps to take if the problem continues.

How to Fix Prime Video Subtitles

Start with the simplest and most likely solutions first. Try each step one by one, in order, until you identify the fix that resolves the issue.

  1. Check subtitle settings. Begin by accessing the settings menu in your Prime Video app to resolve subtitle issues. Turning subtitles off and then back on can recalibrate their display.

    Besides toggling subtitles, adjust their size and font. Access the Subtitles menu during playback and select Subtitle Settings.

    Check if Closed Captioning (CC) is activated. Prime Video may offer both with and without CC options for a specific language, depending on the title. Some users have noted that subtitles sometimes only appear during foreign-language audio. Toggle the CC setting to see if it resolves the issue.

  2. Check if subtitles work with other TV shows or movies. Since the content creator typically encodes subtitles, the title you’re watching may not support them. Test subtitles on various TV shows or movies to see if the issue is isolated. If subtitles don’t work on other titles, it’s likely an app-wide problem.

    If a title doesn’t support subtitles, you might receive an error message like “Subtitles are not supported on this video.” However, this message may not always appear, so ensure other titles also have subtitle issues before exploring other solutions.

  3. Restart the Amazon Prime Video App. If subtitles aren’t working properly after making adjustments in the Subtitles menu, your next best option is to restart the Prime Video app. This step will clear up some of the app’s temporary cache, which could fix subtitle issues.

    Depending on the device you’re using, exiting out of the app may not actually close it. If you can’t force the app to restart, you should restart the device instead.

  4. Restart or shut down your device. Try restarting fully or power-cycling the device you’re watching Prime Video on. This list includes computers, smartphones, tablets, game consoles, streaming media players, and any other device that supports Prime Video. A system restart will clear the cache, which could be affecting playback performance in apps such as Prime Video.

    Try power-cycling or fully shutting down computers, mobile devices set-top boxes, and gaming consoles. If your gaming console supports app suspension make sure you manually quit out of the Prime Video app before initiating a reboot.

  5. Check for updates. If you’re still having issues with subtitles after trying the fixes above, the problem is likely caused by a bug in the app itself. The best way to fix this issue is to ensure your Prime Video app is updated to the latest firmware version. 

    The easiest way to check for updates is to go to the app store where you initially downloaded the Prime Video app and navigate to the Prime Video app page. If an update is available, you should see an update option displayed.

  6. Reinstall the app. Uninstalling the Prime Video app from your device will also delete all app files, so it’s a good way to potentially get rid of any files that could be causing subtitle issues. Depending on the device you’re using, this option will be labeled as Uninstall or Delete App under app settings.

    Once you’ve deleted the app, reinstall it and check if subtitles are now working.

  7. Watch Amazon Prime Video on a different device. To check if the cause is the device you’re streaming from, try using Prime Video on a different platform.

    Since you can use your Prime Video subscription across multiple devices, you can install it on any device that supports the app to see if the problem persists.

  8. Delete your watch history. If subtitles still aren’t working across your different apps and devices, it’s likely an account-level issue. One fix you can try is to delete your viewing history, which will remove your user preferences for a particular show or movie.

Subtitles Still Not Working? Contact Amazon for Help

If your subtitle issues persist, it’s best to contact Amazon for help. They should be able to identify any backend issues that may be causing the error and provide you with additional troubleshooting steps.

Log in to your account in a web browser or the app and go to Your Account > Customer Service > Choose Something Else > I need more help.

When you make this selection, a customer support chat window opens. If you prefer to speak with a representative over the phone, choose Request a phone call in the chat window.

Causes of Amazon Prime Subtitles Not Working

There are a few reasons why subtitles may not be working with your Amazon Prime Video account. These include:

  • The app or browser cache may need to be cleared.
  • Your device’s cache is causing issues and needs to be restarted/reset.
  • The app needs to be updated.
  • Closed Captioning (CC) needs to be turned on in the Accessibility Settings.
  • Subtitle configuration error.
  • The TV show or movie you’re watching doesn’t support subtitles for your chosen language.
  • You’re using a legacy app that no longer receives updates from Amazon (such as an older model of Apple TV or Fire Stick).
  • There is an issue with Closed Captioning for a particular TV show or movie.

FAQ

  • How do I enable subtitles for Amazon Prime Video?

    On the website, select the Speech Bubble icon and select the language you want. In the app, press the options button on your controller or remote and go to Subtitles to enable subtitles on Amazon Prime or turn off Prime Video subtitles.

  • How do I change the subtitle text on Prime Video?

    In the web player, select the Speech Bubble Subtitle Settings in the pop-up menu to find the text settings. In the app, size and style options appear alongside language options. If you want to create subtitle presets, go to Amazon.com/cc in a browser and select Edit.

  • How do I change the language for subtitles on Prime Video?

    In the web player, go to the Subtitle settings to see the available languages for your content. To automatically set the default language for subtitles, change the default language in your device settings.

I’m a Lifelong PC Gamer, Here’s Why the Switch 2 Will Be My First Console

I’m a Lifelong PC Gamer, Here’s Why the Switch 2 Will Be My First Console

It might sound strange coming from a lifelong gamer, but I’ve never actually owned a console. I’ve always managed to get my kicks on a PC, with a mouse and keyboard in hand poised in front of a monitor at a desk.

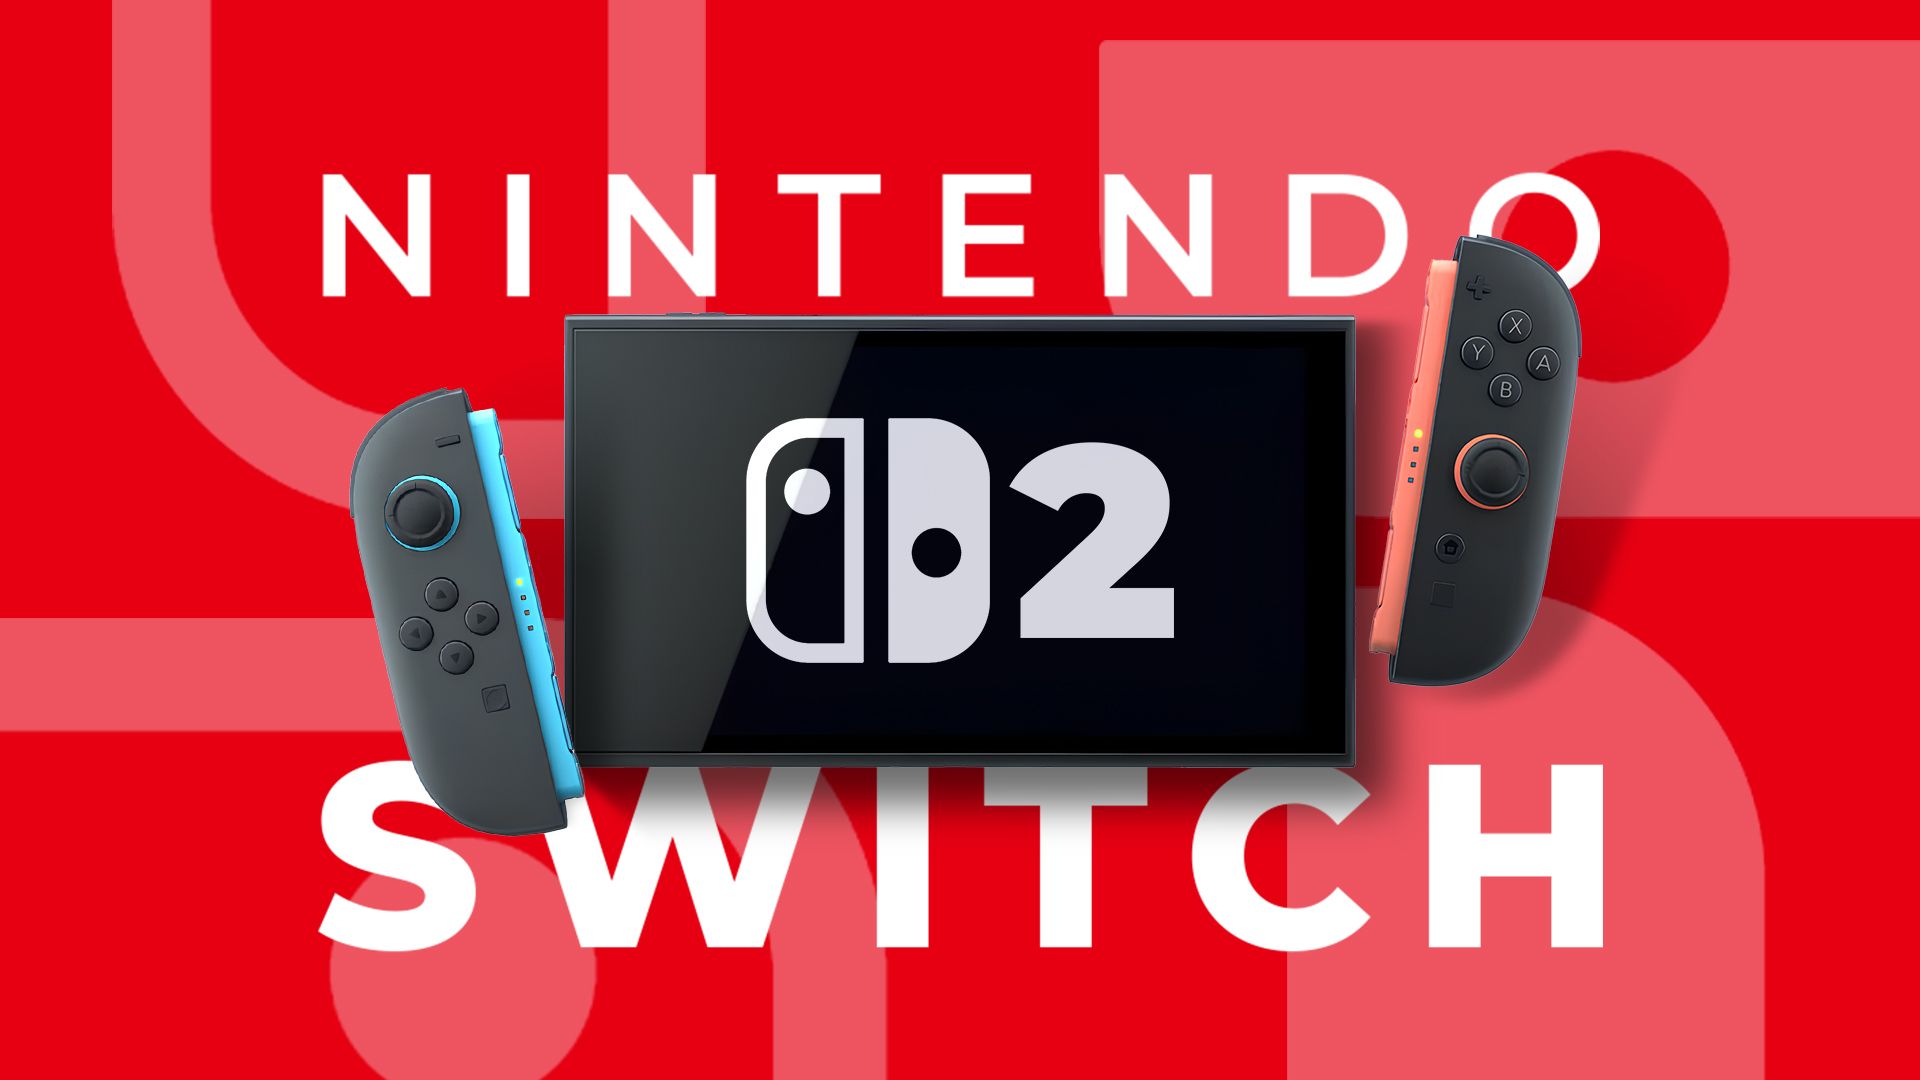
However, with the release of the Nintendo Switch 2, I’m seriously considering making the jump for the first time. Allow me to explain.

I Ignored the Original Switch Because I Thought It Would Fail

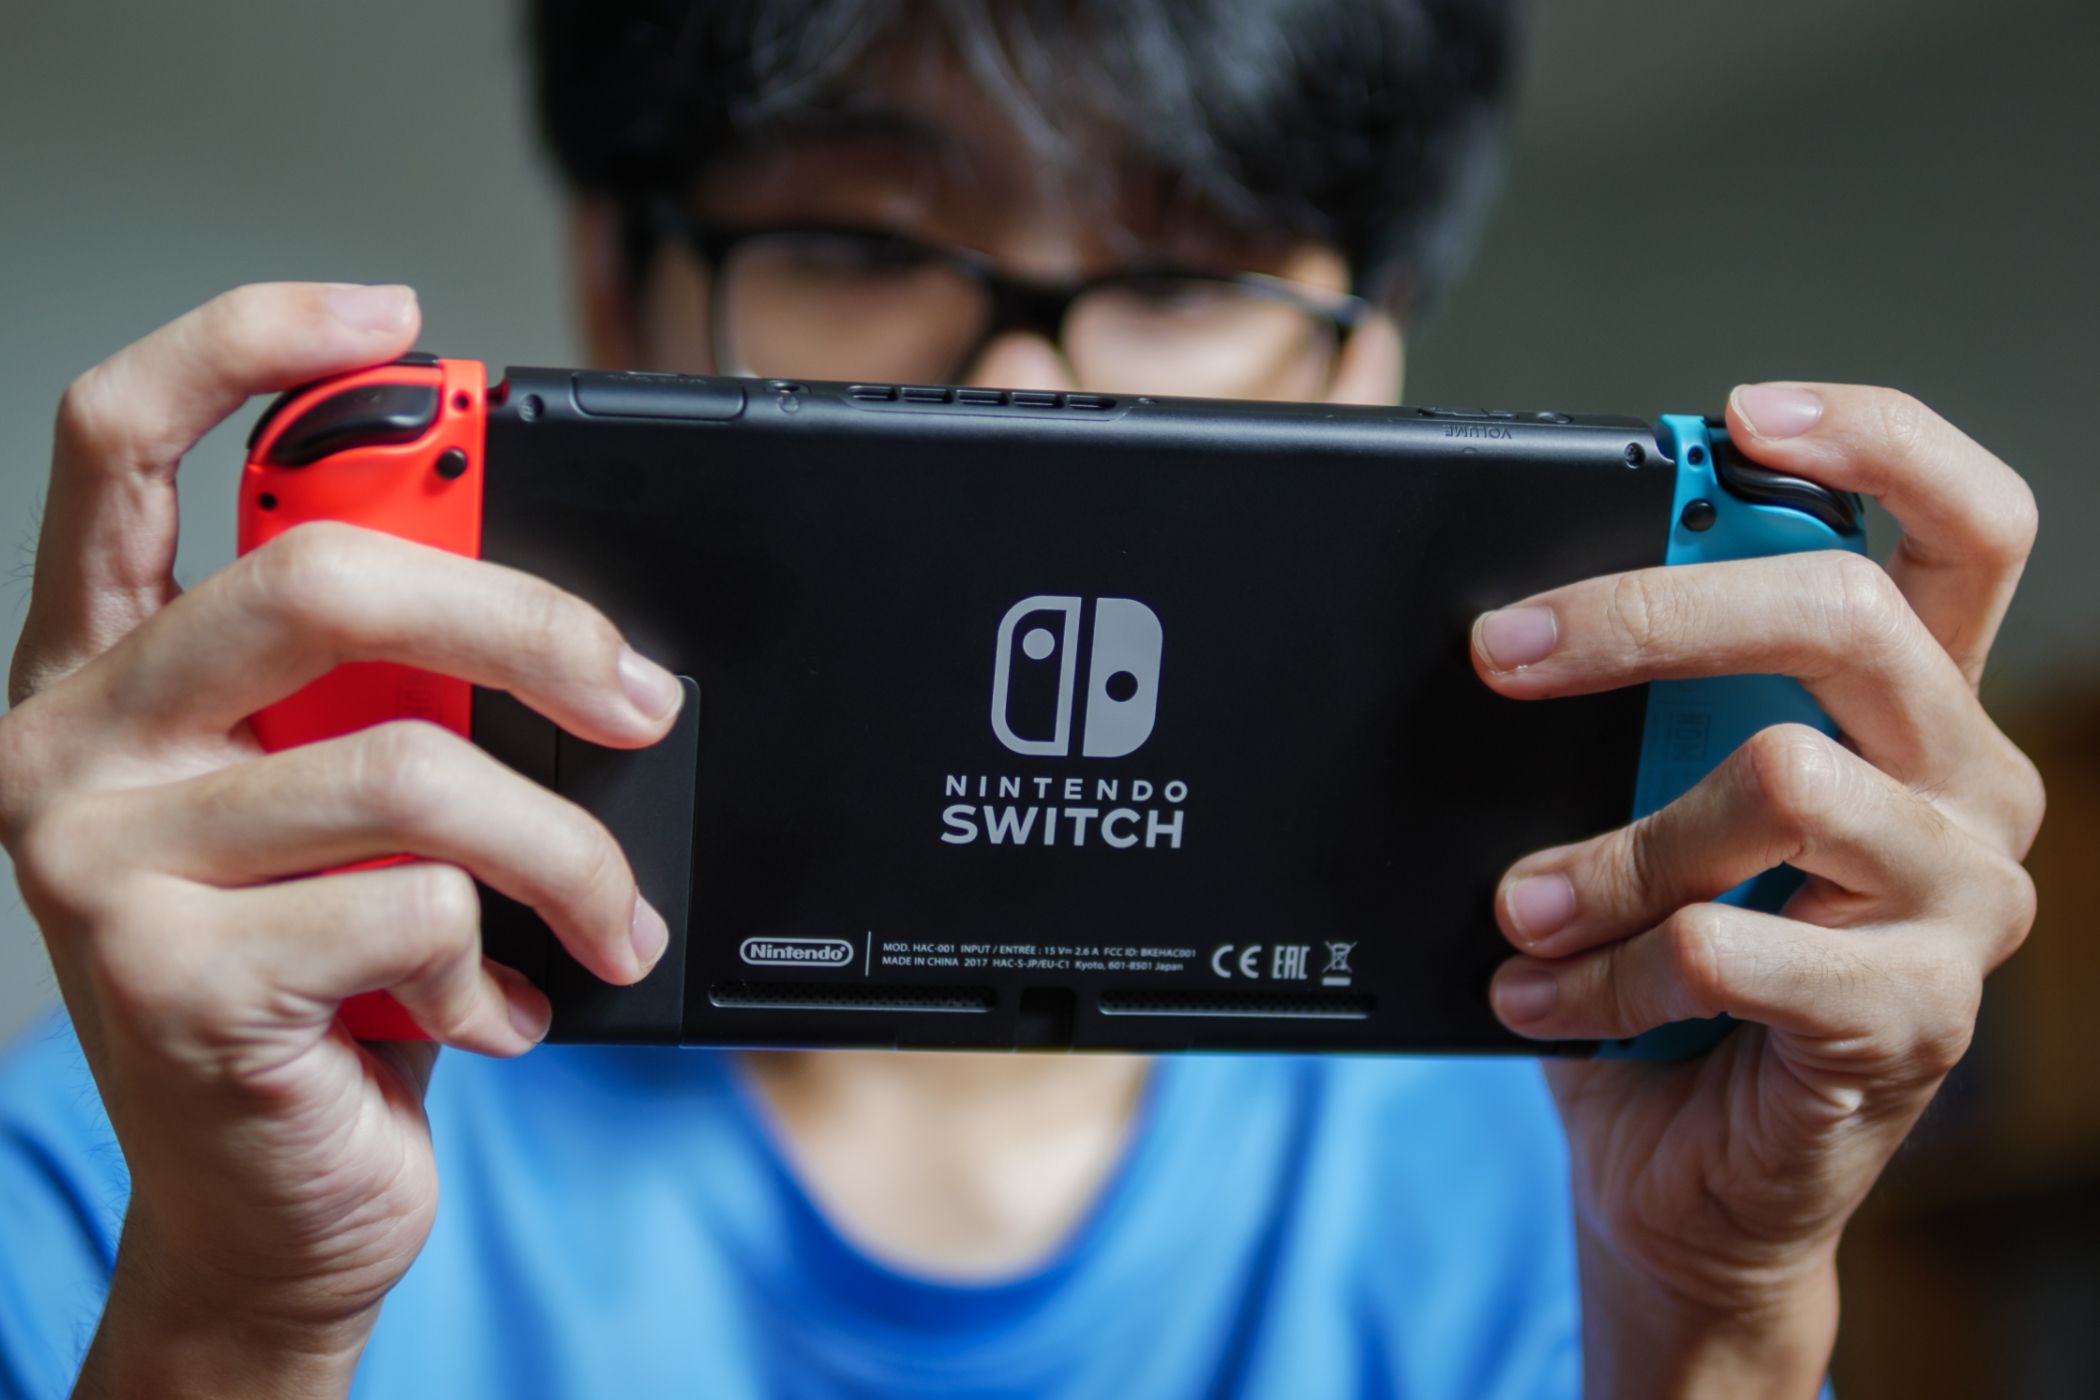
When the original Switch was first announced in 2017, I was convinced it would fail. Nintendo had been on a downturn for a few years, and combining the Wii and 3DS into a single hybrid console sounded like the worst of both worlds. I figured it would be too bulky for handheld gaming and too underpowered when docked.

I was sitting at my powerful gaming PC, looking down on the modest $299.99 console that cost as much as a decent graphics card, fully expecting it to be another misstep like the Wii U.

Related

How the Nintendo Switch 2 Avoided Its Wii U Moment

It’s a Switch 2, not a Switch U.

Yet, to my surprise, despite launching late in the 8th console generation, the Switch held its ground even after the PlayStation 5 and Xbox Series X launched. Thanks to Nintendo’s strong first-party exclusive games and widespread third-party ports, it thrived even against its far more powerful competition.

Now, eight years later, Nintendo has released a successor to the original Switch that builds on everything the original accomplished. I see the original Switch as an experiment (a proof of concept, if you will), and the new, refined model is the one worth buying.

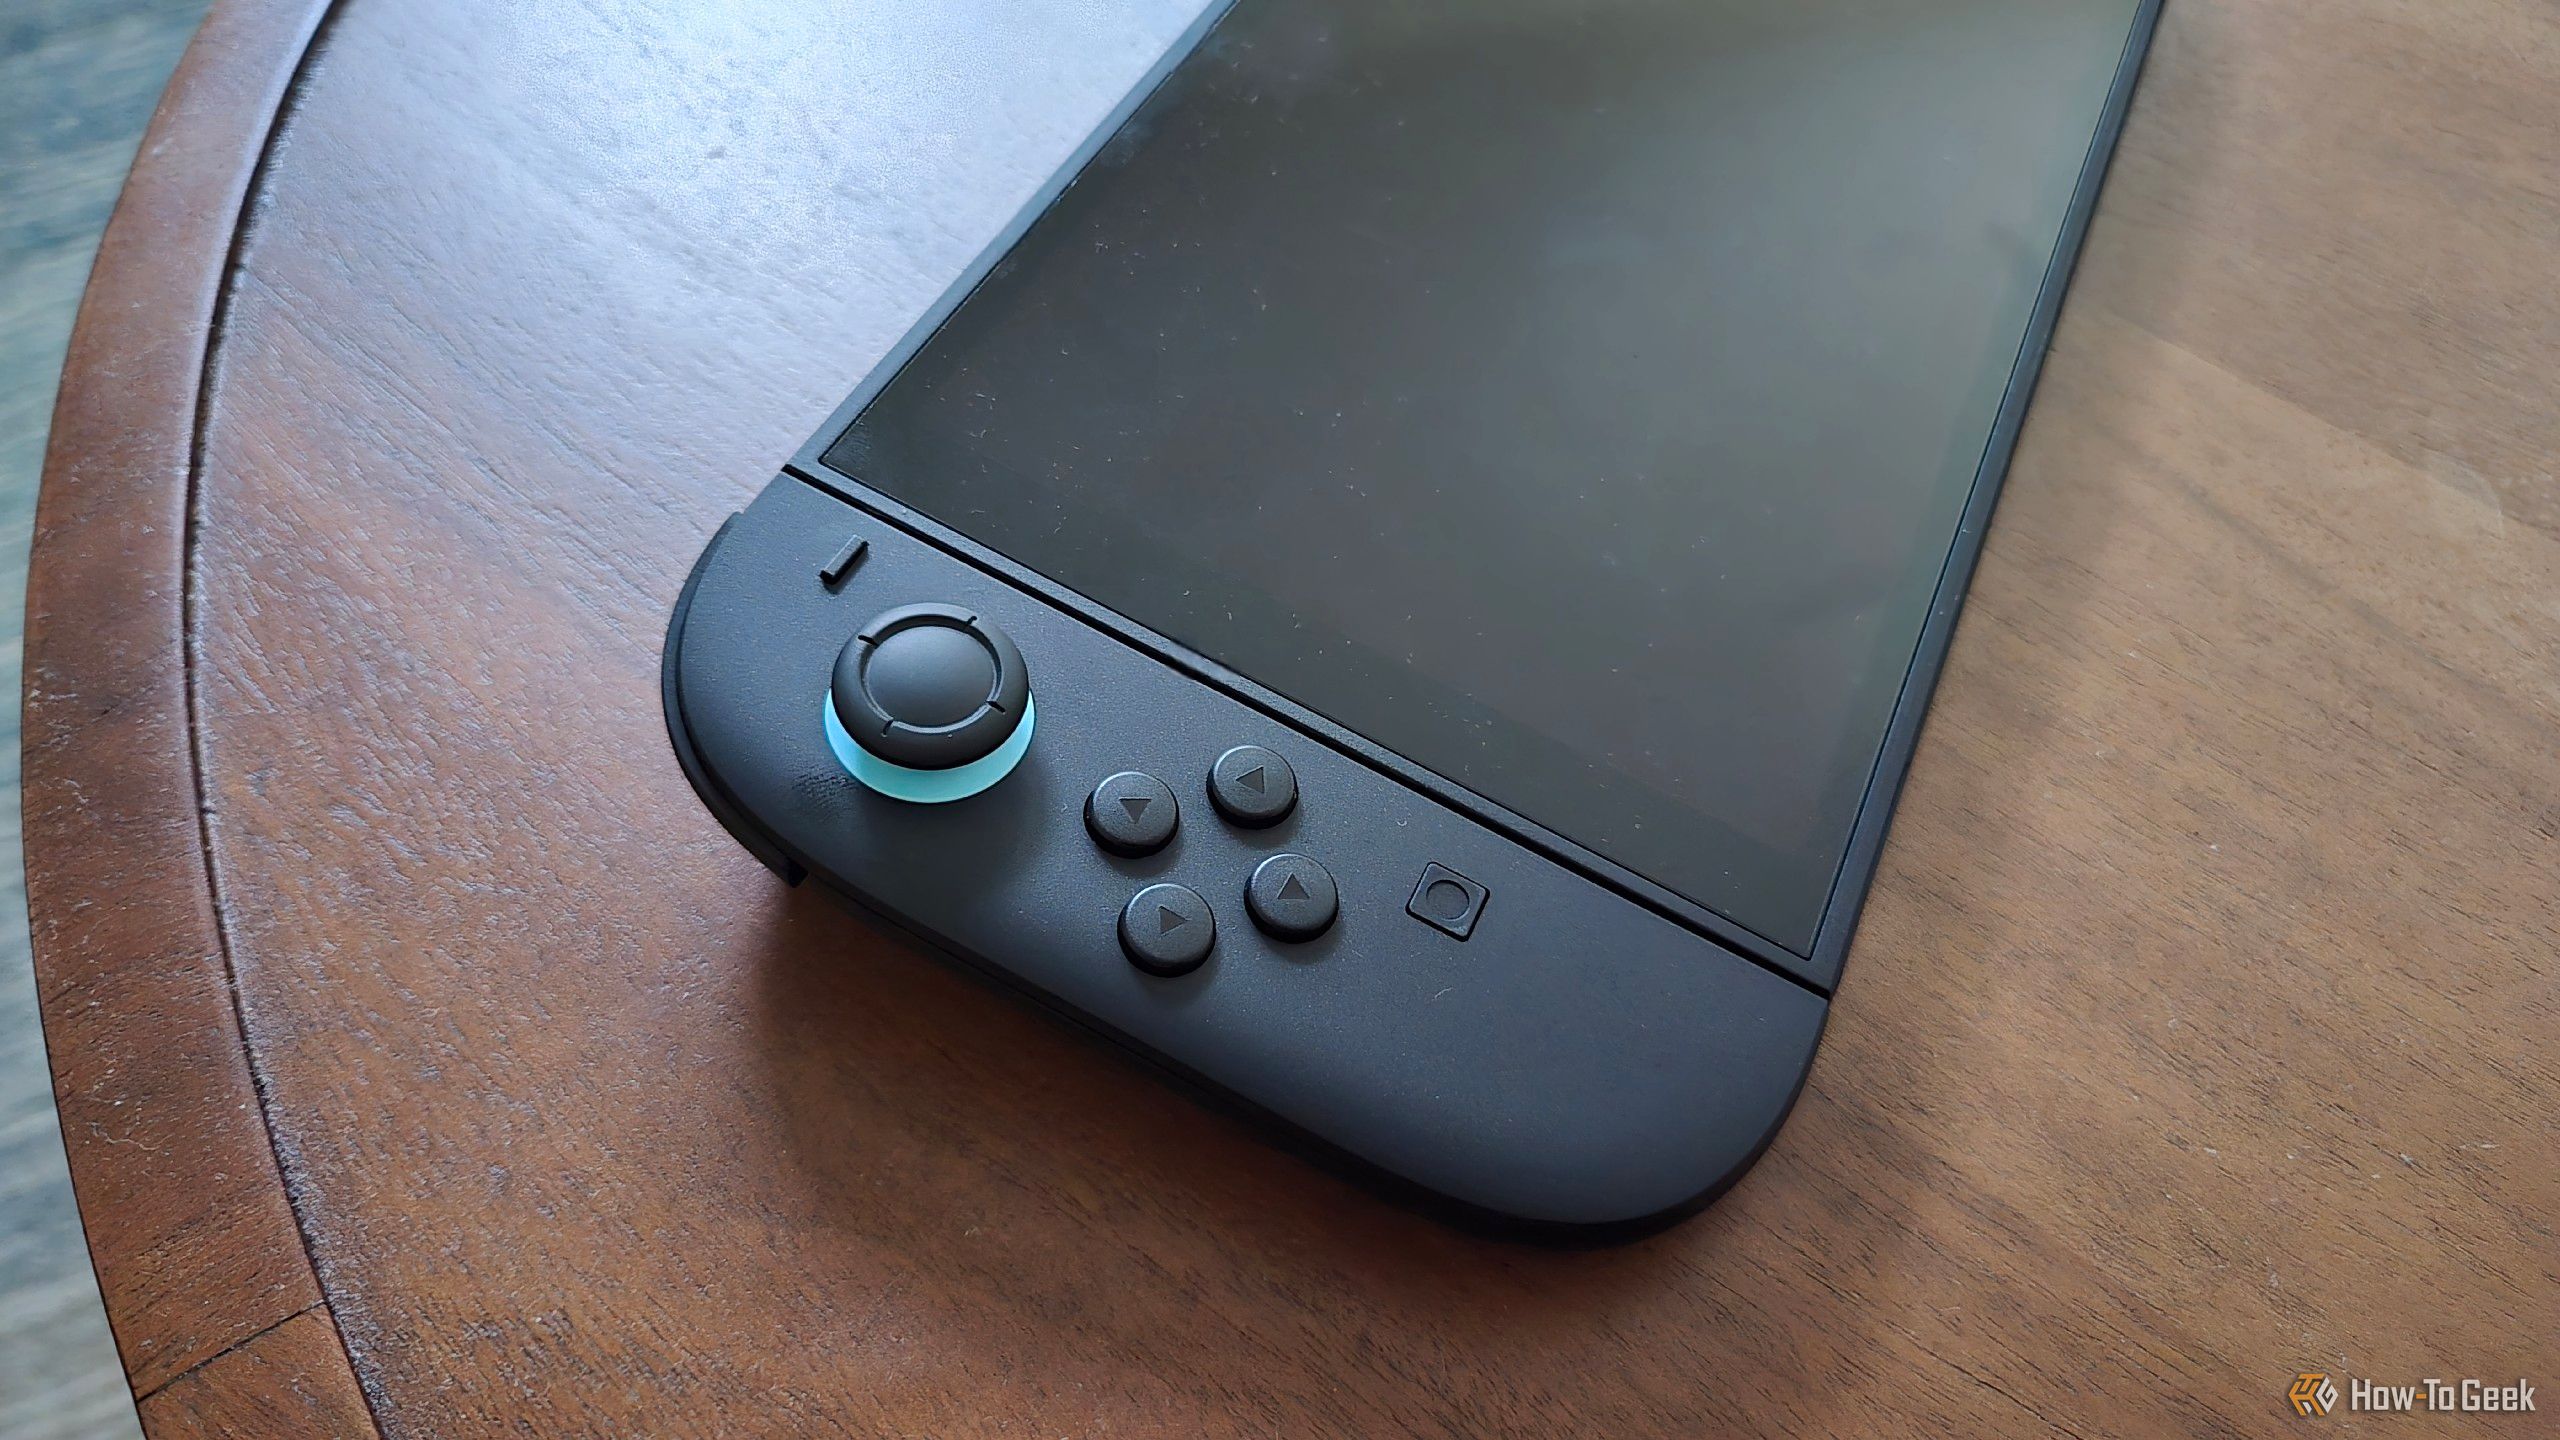
A close-up of the left Joy-Con on a Nintendo Switch 2.

Bertel King / How-To Geek 

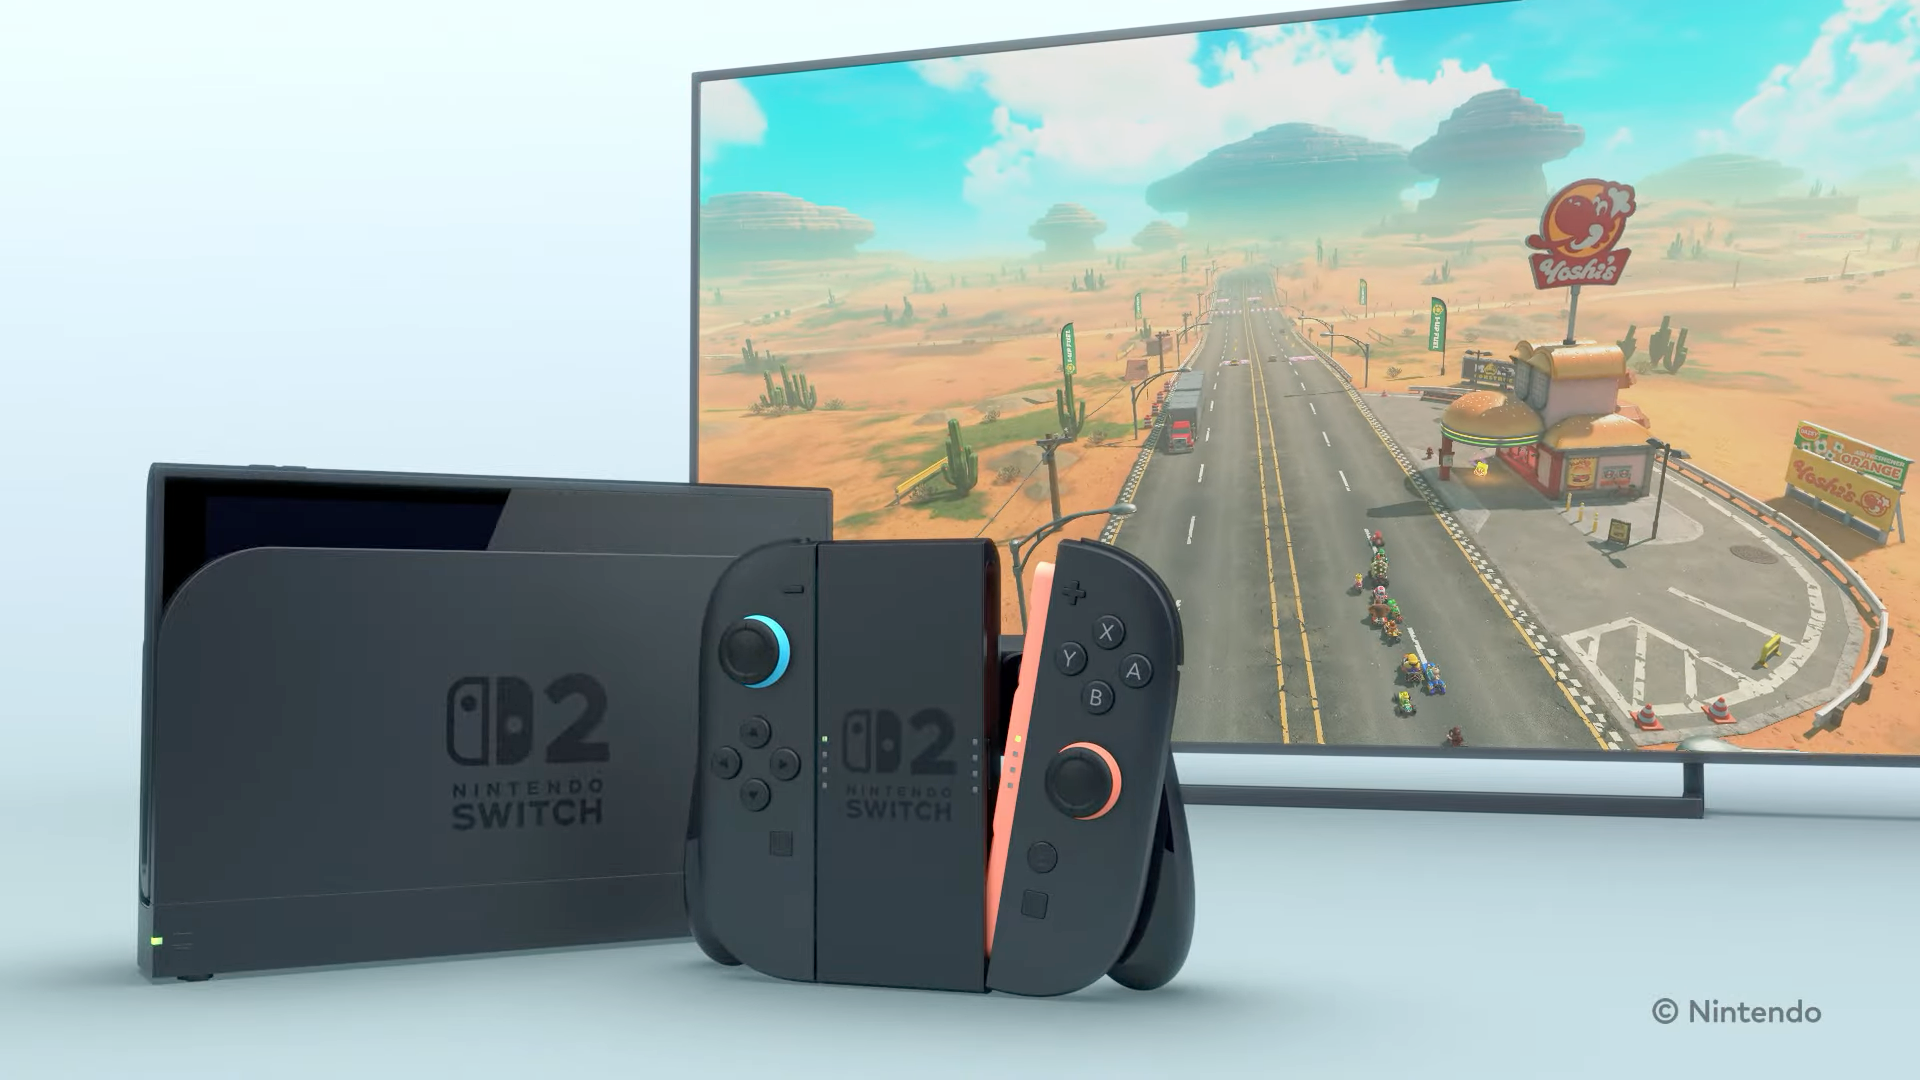
As Tim noted in his Switch 2 review, it features a larger screen, a more premium and comfortable design, an excellent kickstand, a 120Hz refresh rate display (a must for me), and, of course, significant improvements in both performance and software over the original.

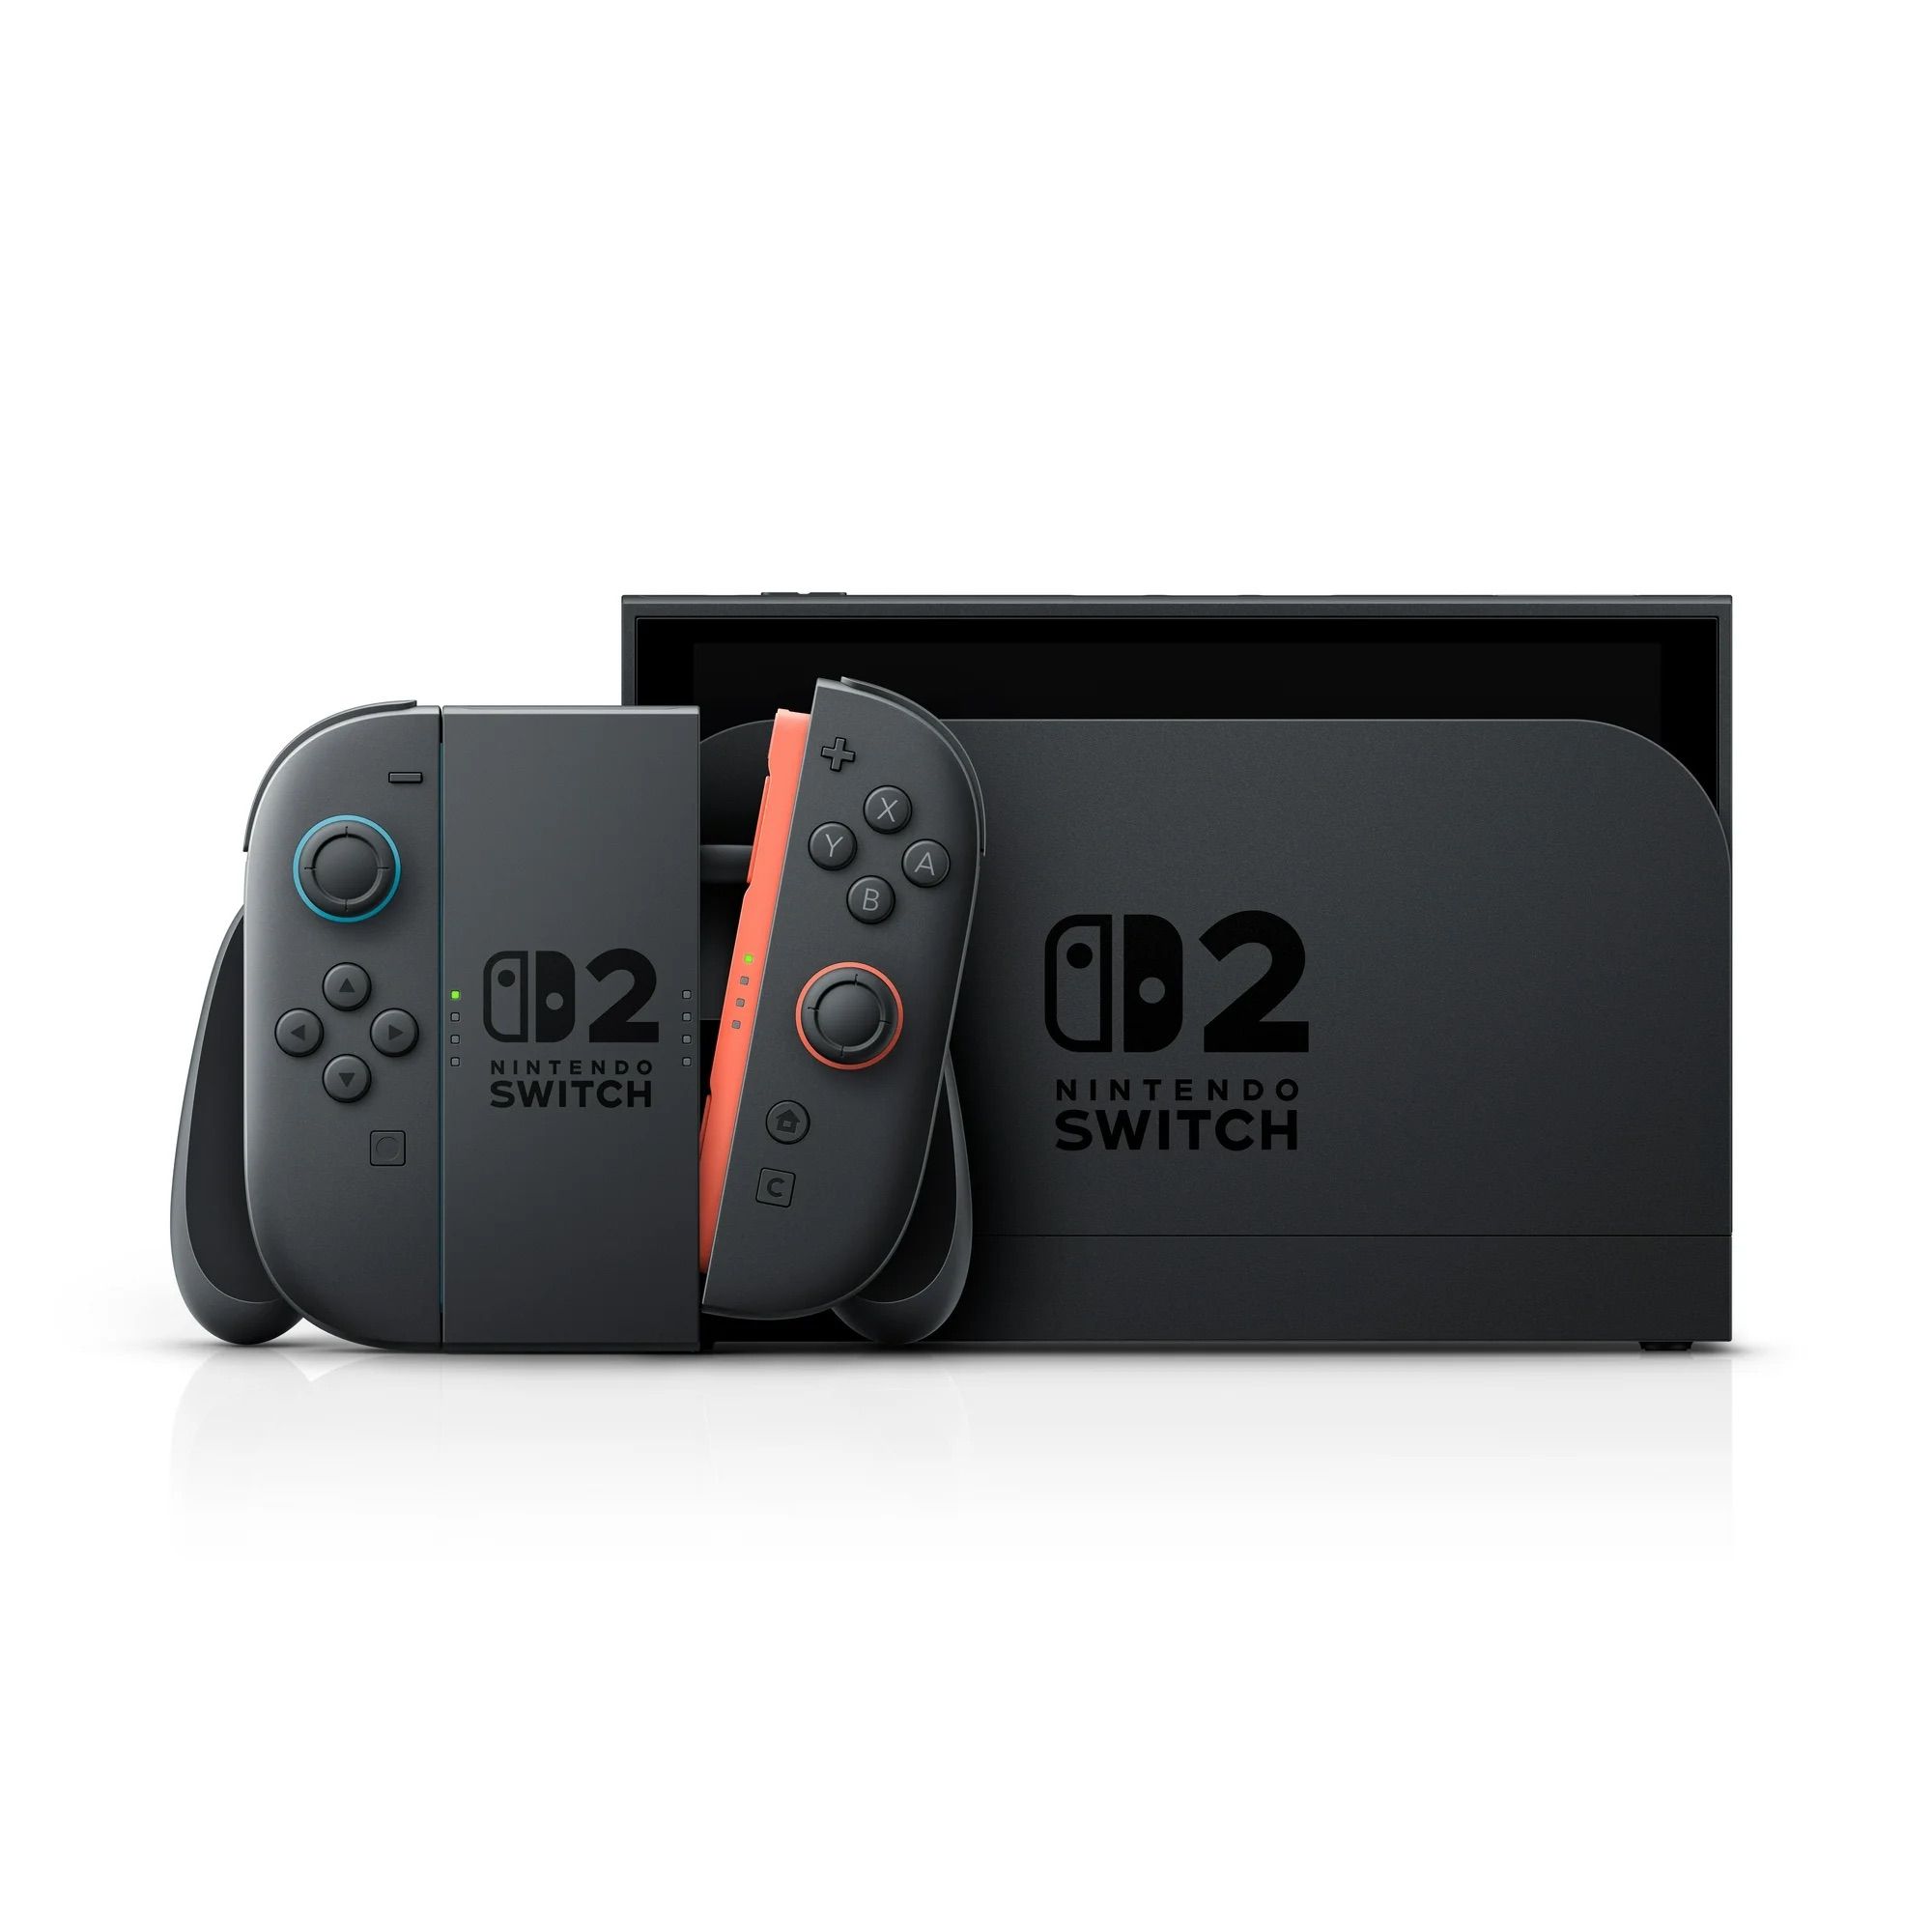
Nintendo Switch 2

4K Capability

Yes, docked

4K Capabilities

HDR

The Nintendo Switch 2 is the company’s latest hybrid home console, with more powerful graphics and processing, a larger 7.9” LCD touch screen with support for HDR, and more online features.


Beyond Nintendo’s numerous design improvements, mobile chips themselves have experienced a massive boom since the original’s launch.

The Switch 2’s Nvidia Tegra T239 SoC is a powerhouse. Beyond its raw processing power, the chip supports DLSS and ray tracing. DLSS alone could enable the Switch 2 to run games well into the future, especially with ongoing software optimizations.

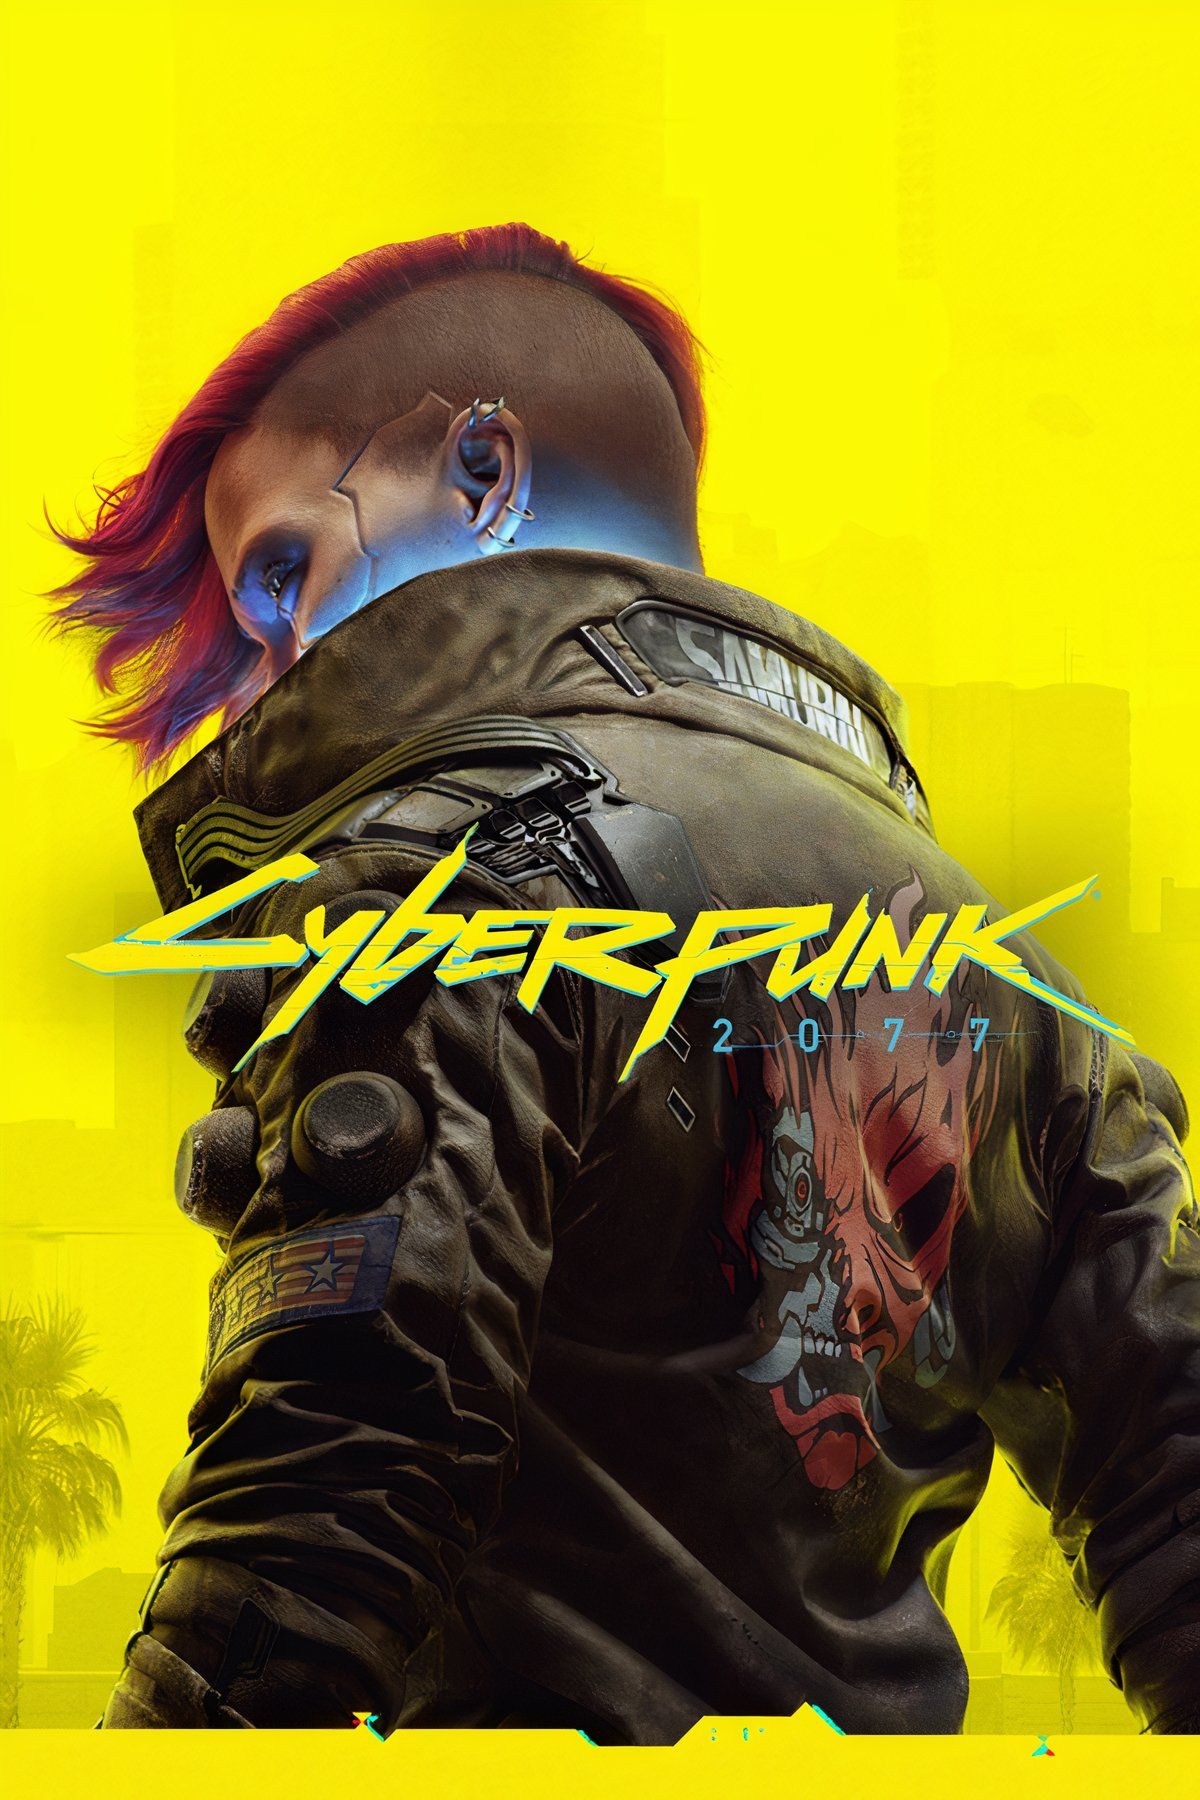
The console can already run Cyberpunk 2077 (though it struggles a bit with the Phantom Liberty expansion), which is proof enough for me that it’s equipped to handle the lighter games I want to play.


mixcollage-08-dec-2024-02-38-pm-3116.jpg

Cyberpunk 2077


Released

December 10, 2020

ESRB

M for Mature: Blood and Gore, Intense Violence, Nudity, Strong Language, Strong Sexual Content, Use of Drugs and Alcohol

Developer(s)

CD Projekt Red

Publisher(s)

CD Projekt Red


The Switch 2 Gives Me an Opportunity to Catch Up

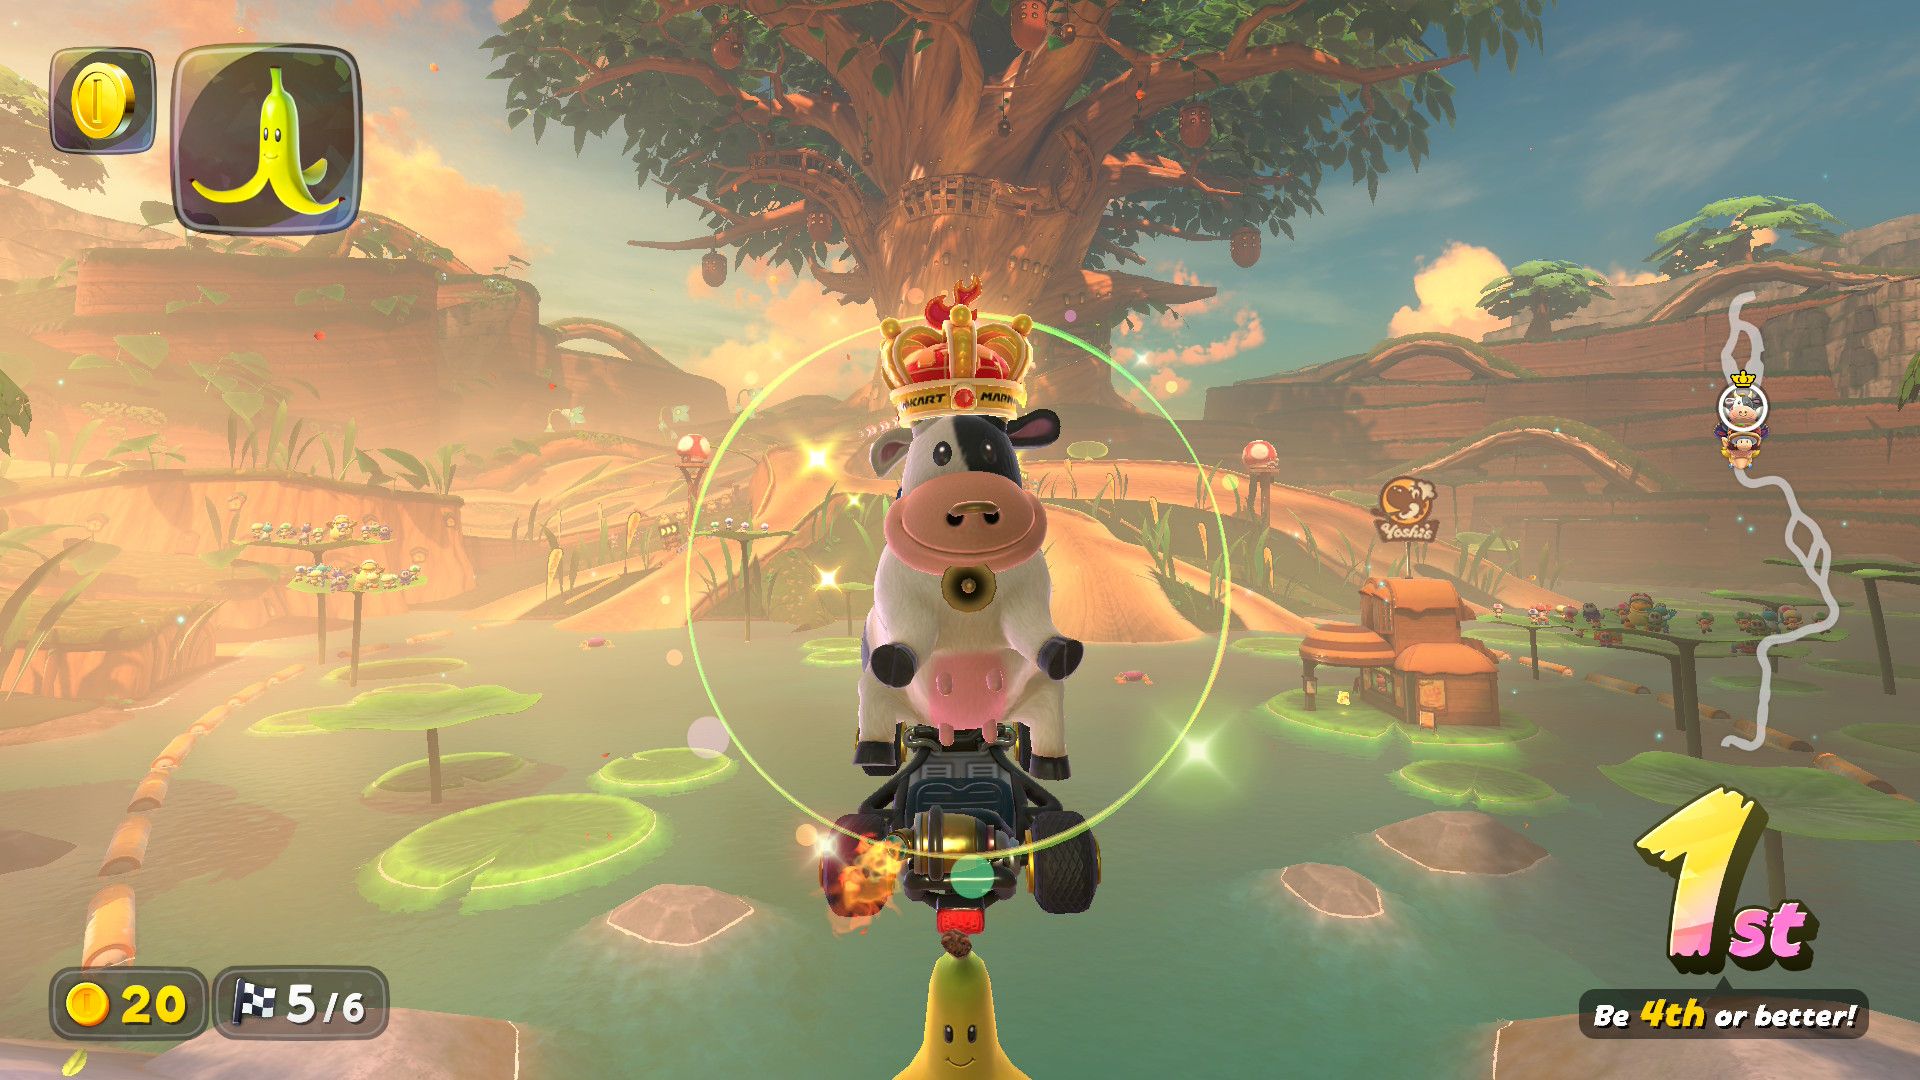
Racing as a cow in Mario Kart World.

Since I’ve never owned the original Switch (or any Nintendo console for that matter), I’ve missed out on a huge library of exclusives. Some of my friends who own a Switch love the exclusives, so I want to finally see what all the hype is about.

Specifically, I’m excited to dive into Nintendo’s beloved exclusives: The Legend of Zelda, Mario Kart, Animal Crossing, Xenoblade Chronicles, and all the iconic Super Mario mainline titles and spin-offs.

A screenshot from The Legend of Zelda: Breath of the Wild.

Nintendo

Unlike Sony, Nintendo never brought most of its exclusives to PC and other non-Nintendo platforms, and I’d rather not rely on emulation for a bunch of reasons.

Fortunately, now that the Switch 2 is out and (mostly) backward compatible, with many first-party games receiving Switch 2 updates, it’ll be the best way to experience these older Switch 1 titles. The upgraded display has double the refresh rate, and the new SoC can easily power through less demanding titles. And of course, that’s all before factoring in all the exciting new games coming to the Switch 2 in the years ahead.

Related

I Skipped the Switch, But I’m Getting a Switch 2 at Launch

It’s time to play catch up.

My Gaming Habits Have Changed as I’ve Matured

You can think of this as personal growth—I can finally see the appeal of the Switch. When the original was released, I was at the peak of my League of Legends addiction and had little interest in games that weren’t online, competitive, and extremely stress-inducing.

As you probably know, most Nintendo games are the opposite. They’re relaxing, approachable, and built to be played anytime, anywhere, for however long you have.

A man playing with a Nintendo Switch console in handheld mode.

Wachiwit/Shutterstock.com

I still enjoy competitive games, but I don’t take them as seriously anymore. These days, I value single-player experiences more and want to make time for them. I’m also no longer a teenager—I don’t have the time or energy to game for hours every day.

It makes way more sense now to take a quick break from work, pick up a handheld like the Switch 2, and play for 5–10 minutes just for the fun of it. My PC can still be my main platform, but I don’t want it to be my only choice.

I also travel frequently and spend a lot of time outdoors, so having a handheld would be perfect for gaming in those situations. Technically, I could use my work laptop, but it’s bulkier and far less convenient.

Related

How Handheld Consoles Made Traveling My Best Time for Gaming

As an adult, it can be hard to find time to game which is why traveling presents a golden opportunity.

I’ll Buy the Switch 2, Just Not Yet

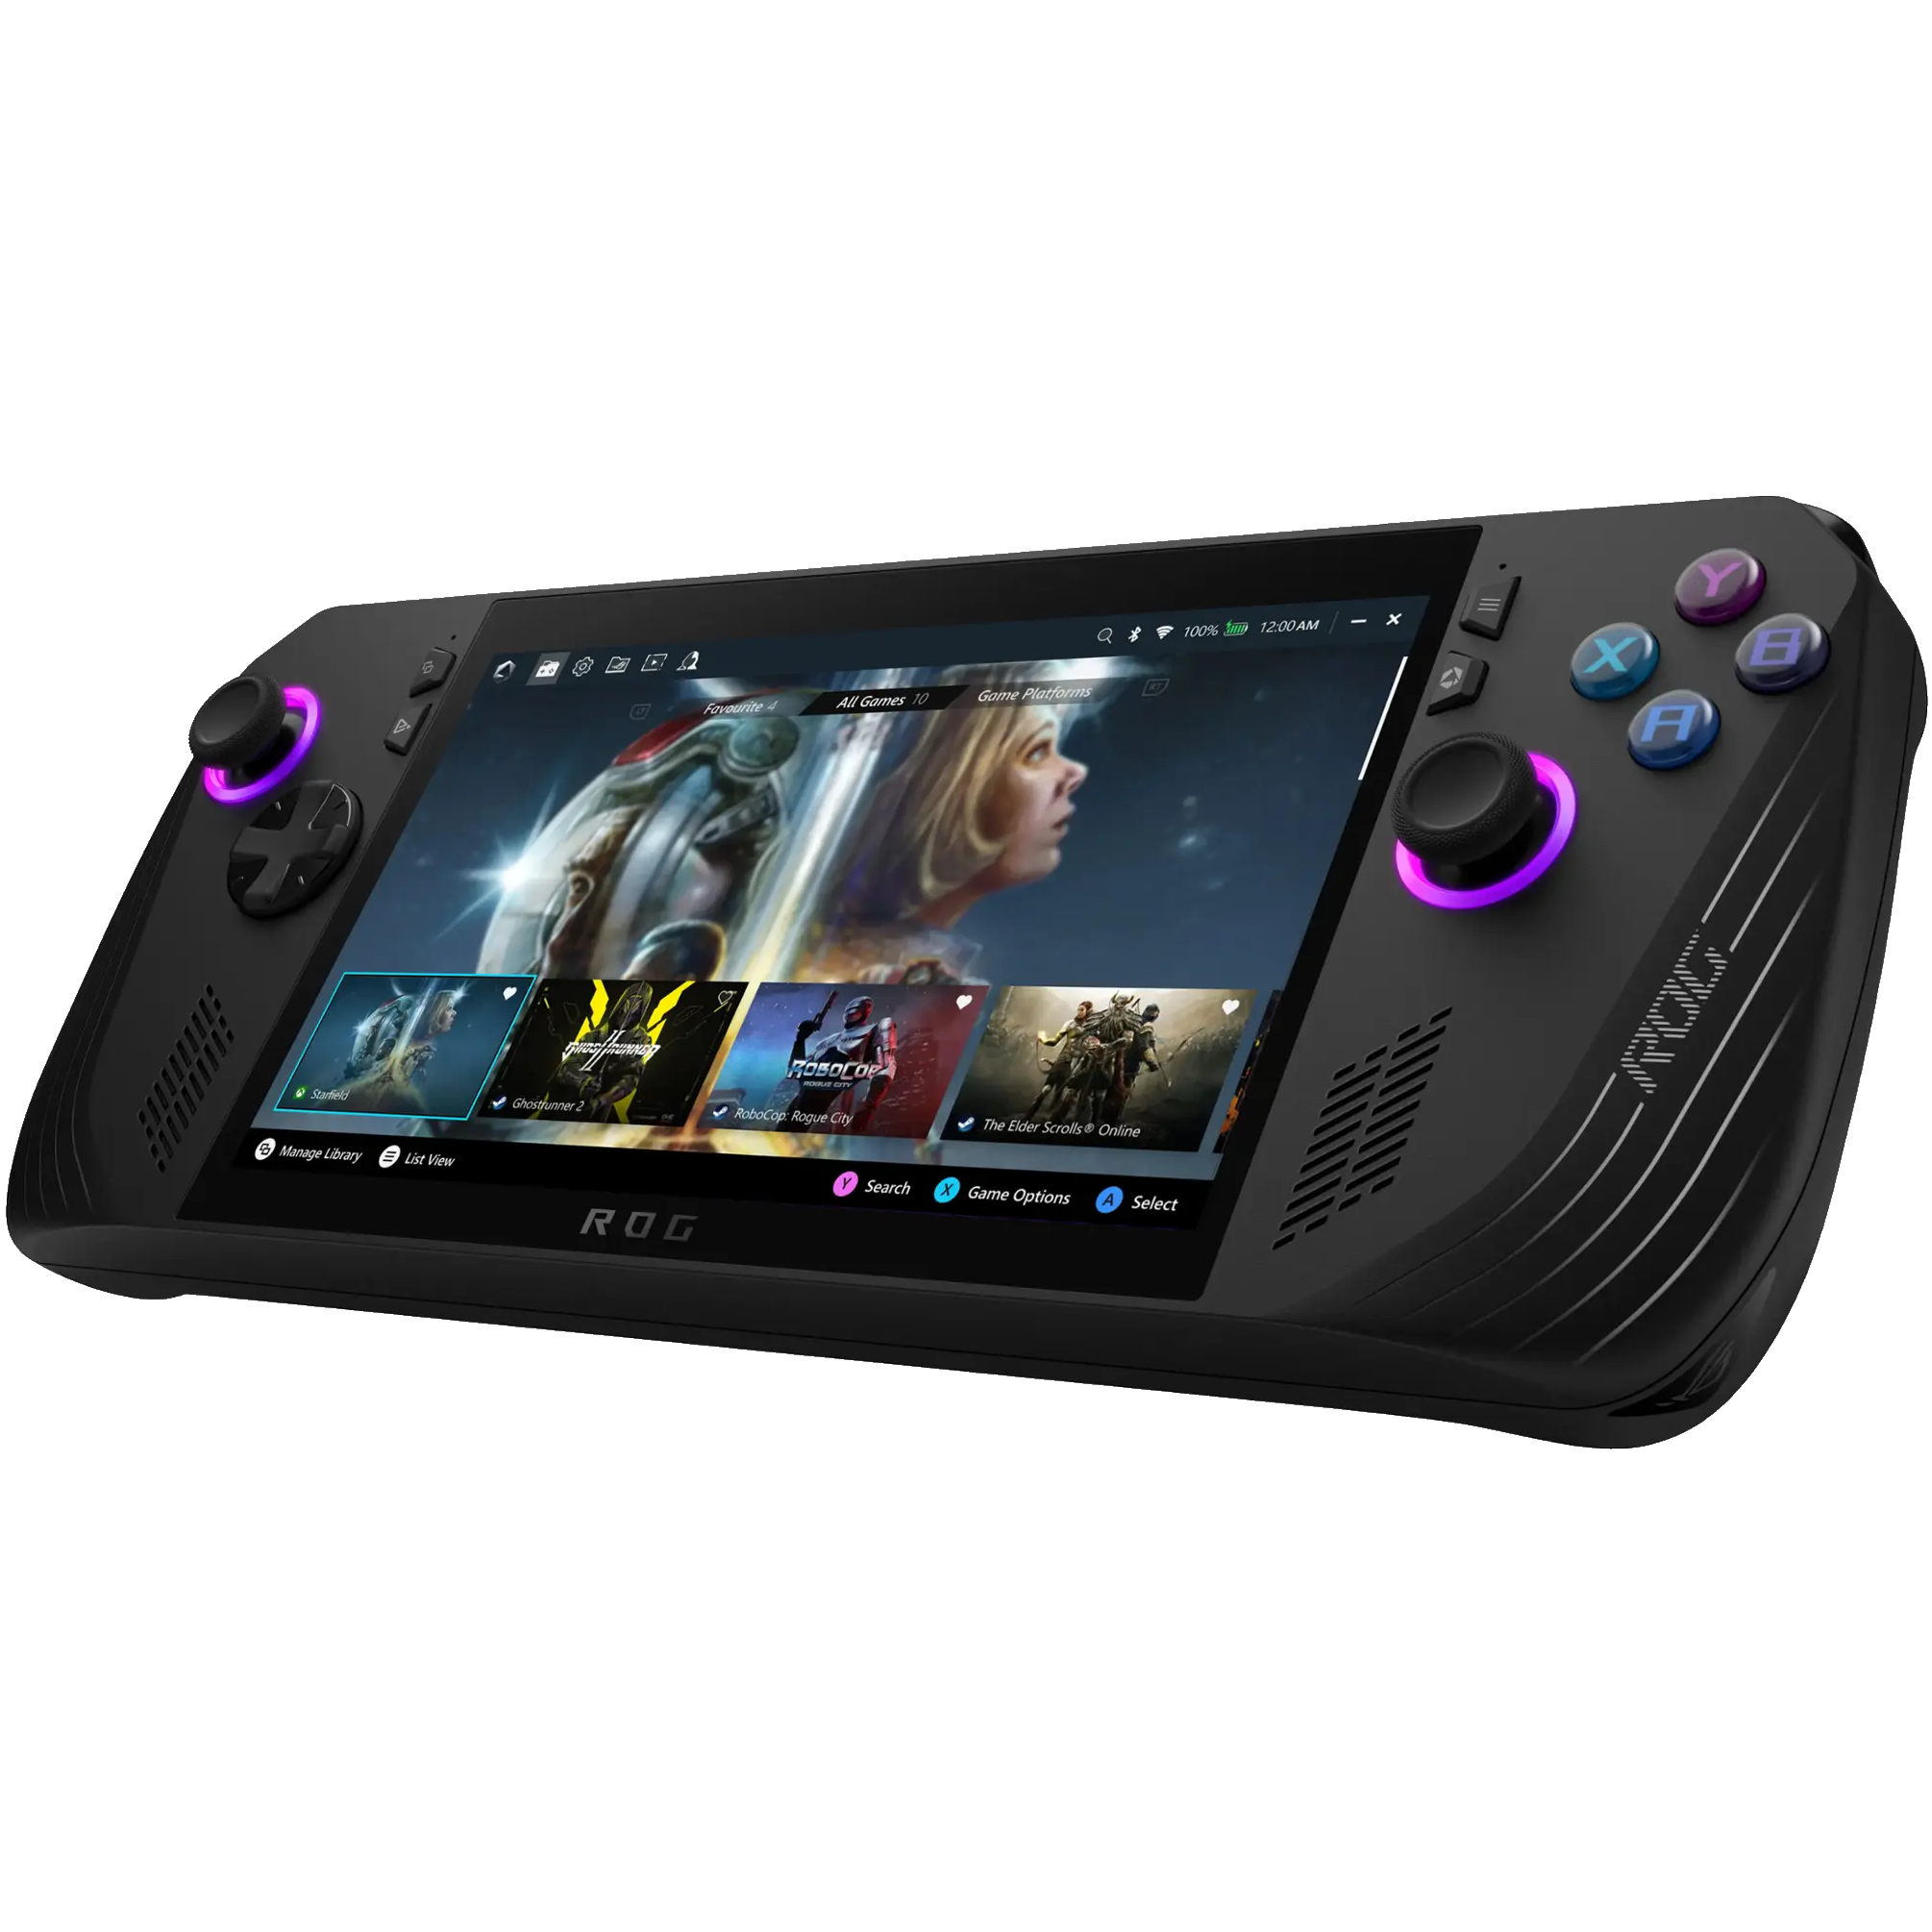
If there’s one console I’ve actually wanted in my life, it’s the Switch 2. It offers dozens of exclusives from the Switch 1, with more to come, alongside numerous indie titles that genuinely interest me. Plus, the price is significantly lower than that of more powerful handhelds like the ASUS ROG Ally X.

rog ally x handheld pc console with black finish

Dimensions

11.02 x 4.37 x 1.08 inches

Brand

ASUS

The ASUS ROG Ally X (2024) is a handheld gaming PC designed to take your favorite titles on-the-go. With the AMD Z1 Extreme processor and 24GB of RAM, you’ll find that the ROG Ally X packs a punch in the power department. It’s capable of playing games like Call of Duty: Black Ops 6 at over 100 FPS using recommended settings. USB4 and USB-C allow the ROG Ally X to be converted to a desktop through a USB dock, making it even more versatile.


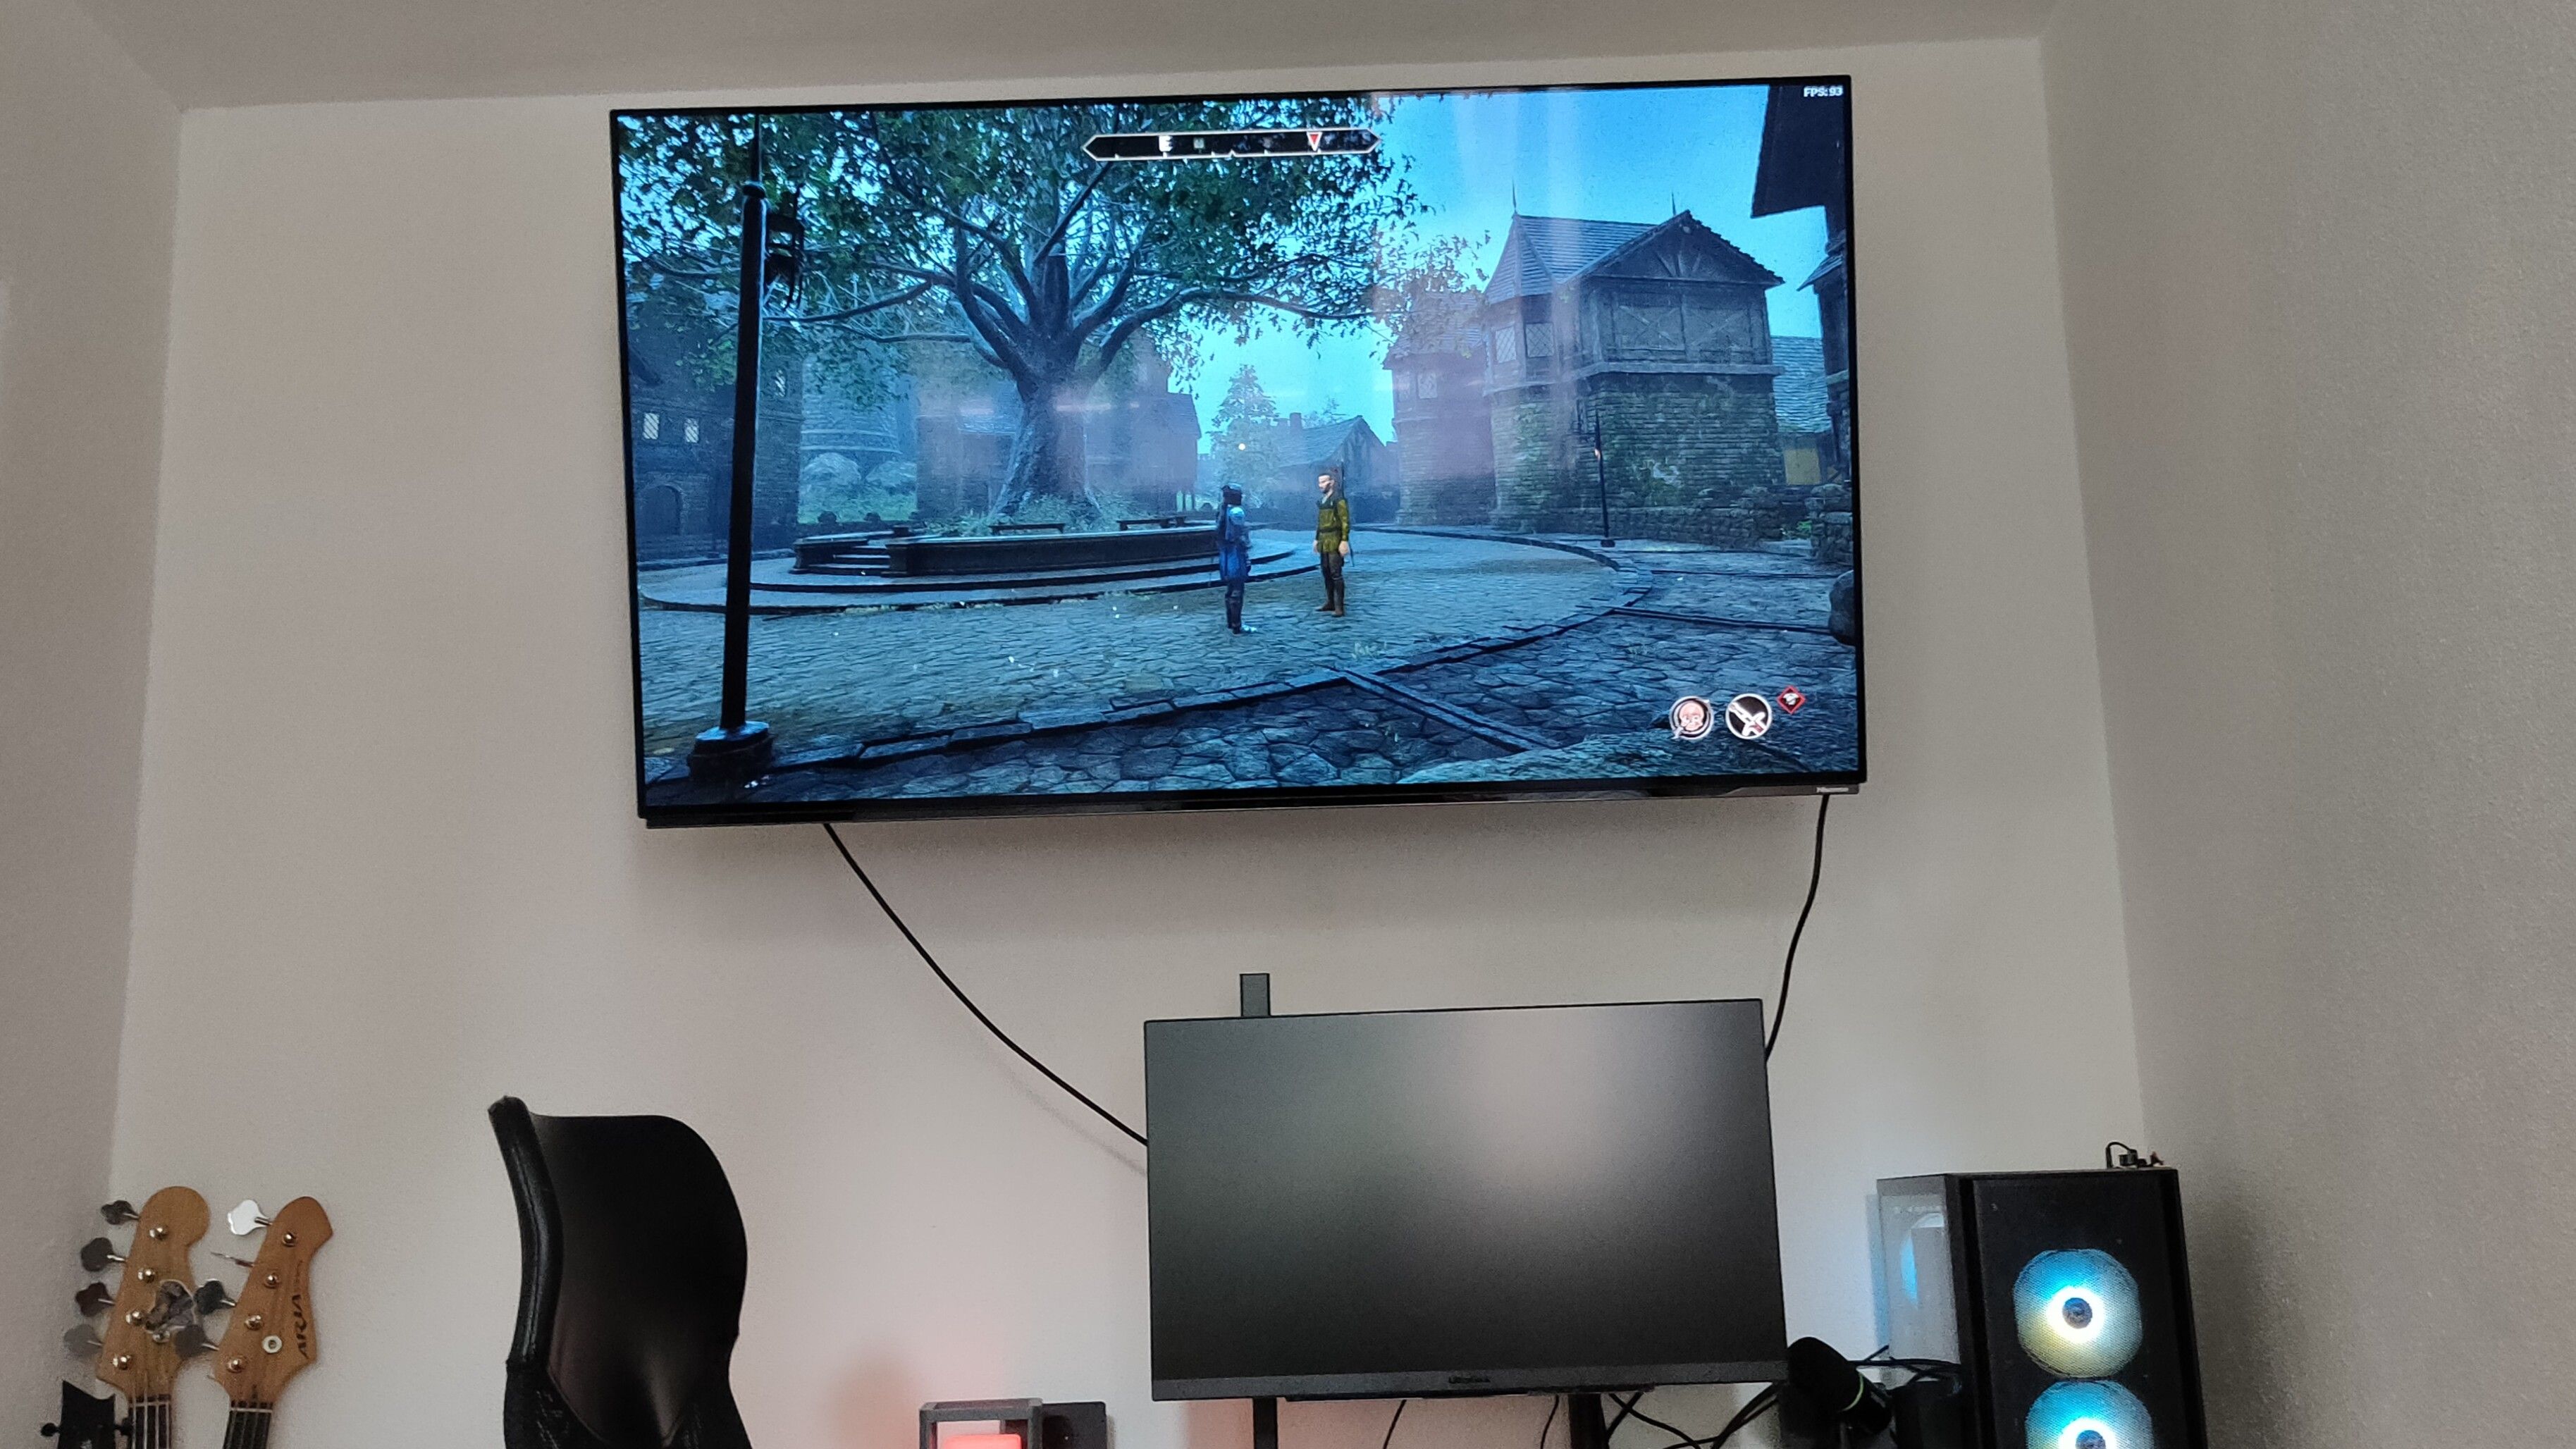
Not that I even need a high-end handheld—I can already play AAA games on my far more powerful gaming PC, whether on a 240Hz monitor or a 120Hz OLED TV.

The Hisense 55A85K 55-inch 4K 120Hz OLED TV connected to a gaming PC playing The Elder Scrolls IV: Oblivion Remastered.

Ismar Hrnjicevic / How-To Geek

That said, I need to clarify that the Switch 2 is not available at its $449.99 MSRP in my country. The lowest retail price I’ve seen is closer to $700, and that’s without any extras or games. There are a few listings from questionable resellers at around $650 without a warranty or return, which is still too much.

Considering even the original price can be a stretch for many, and factoring in the cost of games and extra accessories I’d want alongside the console, you can probably see why the Switch 2 is currently out of reach for me.

Instead of paying the premium now, I’ll just wait for the first wave of gamers to start selling their Switch 2 in a few years—maybe when a Switch 2 OLED comes out?

Related

The Switch 2 LCD Is a Big Upgrade Over the OLED Switch

OLED isn’t the only thing that matters.

That way, I’ll have a chance to grab the console at or even below MSRP, potentially with some discounted extras bundled in, like the Switch 2 Pro Controller, a case, an expensive microSD Express Card, and a few used games (assuming Nintendo doesn’t ban the console).


While I’d love to get my hands on the Switch 2, I’m not in a rush to buy it. The launch lineup of exclusives is a bit underwhelming, and with an $80 price tag on new games, it’s smarter to wait for better deals that’ll undoubtedly come.

I see it as a much better investment than an expensive smartphone, which helps me justify the purchase. Consoles have long lifespans, with years of continued game releases and software updates. And if I eventually finish the games I care about, and the Switch 2 winds up collecting dust, I can always sell it and recoup some of the cost.

Related

I Already Sold My Switch 2 and I Don’t Regret It

I thought I might regret selling my Switch 2, but I’m happy I got rid of it.

7 Plex Apps Everyone Should Try Once

7 Plex Apps Everyone Should Try Once

I’m always on the lookout for apps that enhance Plex, whether it’s fetching accurate metadata or organizing my library. In my search, these Plex apps won me over after just one interaction and have already become part of my go-to for each Plex installation.

7

Amazon Alexa

An Amazon Echo Dot displaying the time

Josh Dolloghan / MakeUseOf

Controlling gadgets with your voice is good fun, especially if you have an army of smart home devices, so why not add Plex to that list? I know I lose the remote at least every other day, and having a hands-free backup to control media playback would be nice.

Although Amazon Alexa has all the basic voice commands you need to navigate Plex, you can add commands using Alexa Skills and get specific. For example, if you can’t decide on what to watch, there’s an Alex Skill that suggests content after you’ve said, “Alexa, suggest something to watch.”

Download: Amazon Alexa for Android | iOS (Free)

6

Plex Dash

As your Plex library expands and you invite more people to enjoy the content, you’ll learn that having backend information is invaluable. What’s the most-watched movie on your server? How has your bandwidth been holding up, and when does it tend to spike in usage? What are your viewers watching right now? Plex Dash will answer every one of those questions and more.

Plex Dash also doubles as a helpful tool for troubleshooting and making changes to your server on the fly. Not only can you refresh your libraries from the app, but if your server happens to crash, you can get your hands on server logs.

Download: Plex Dash for Android | iOS (Free; premium available)

5

Plexamp

streaming music in plexamp via remote access to plex media server

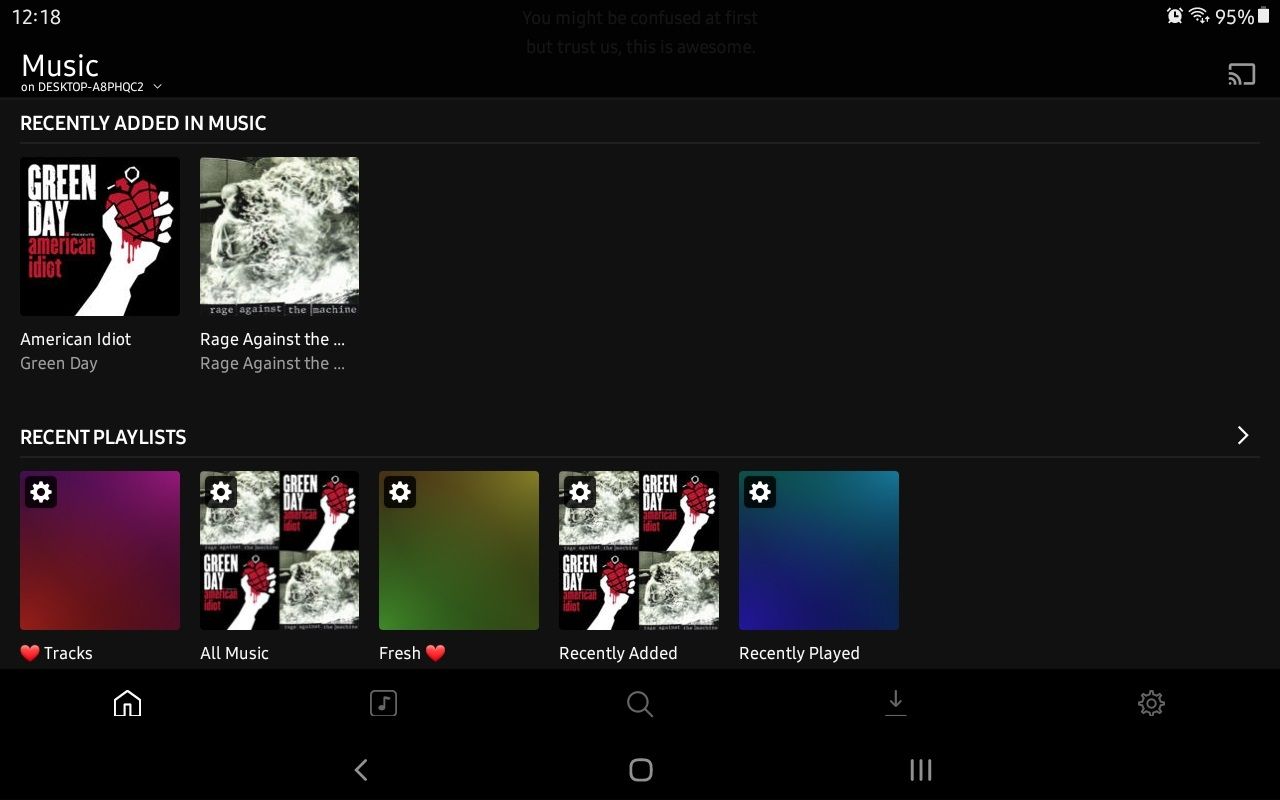
YouTube is as far as I’ll go when it comes to streaming music, so you won’t catch me using Spotify (or listening to its AI music). When I’m not streaming music, I’ll listen to my own library on Plexamp, where I can quickly access all the CDs I ripped to my Plex server. It’s the most frictionless music app I’ve used to date—even easier than VLC.

For one, I appreciate that the UI resembles a miniaturized Plex app, similar to Plex Dash and Plex Photos. Secondly, Plexamp is incredibly lightweight, especially on PC, where it’s nothing but a teeny-tiny sidebar you can drag. Lastly, I particularly love its Mood playlist, which Plexamp creates and organizes itself, then gives me the option to pick music based on my mood.

Download: Plexamp for Android | iOS | Windows | MacOS | Linux | Raspberry Pi (Free)

Related

I Use This Simple App to Stream My Personal Music Collection Wherever I Am

Once set up, Plexamp is simple to use.

4

Plex Photos

Accessing a library of photos in the Plex Photos app

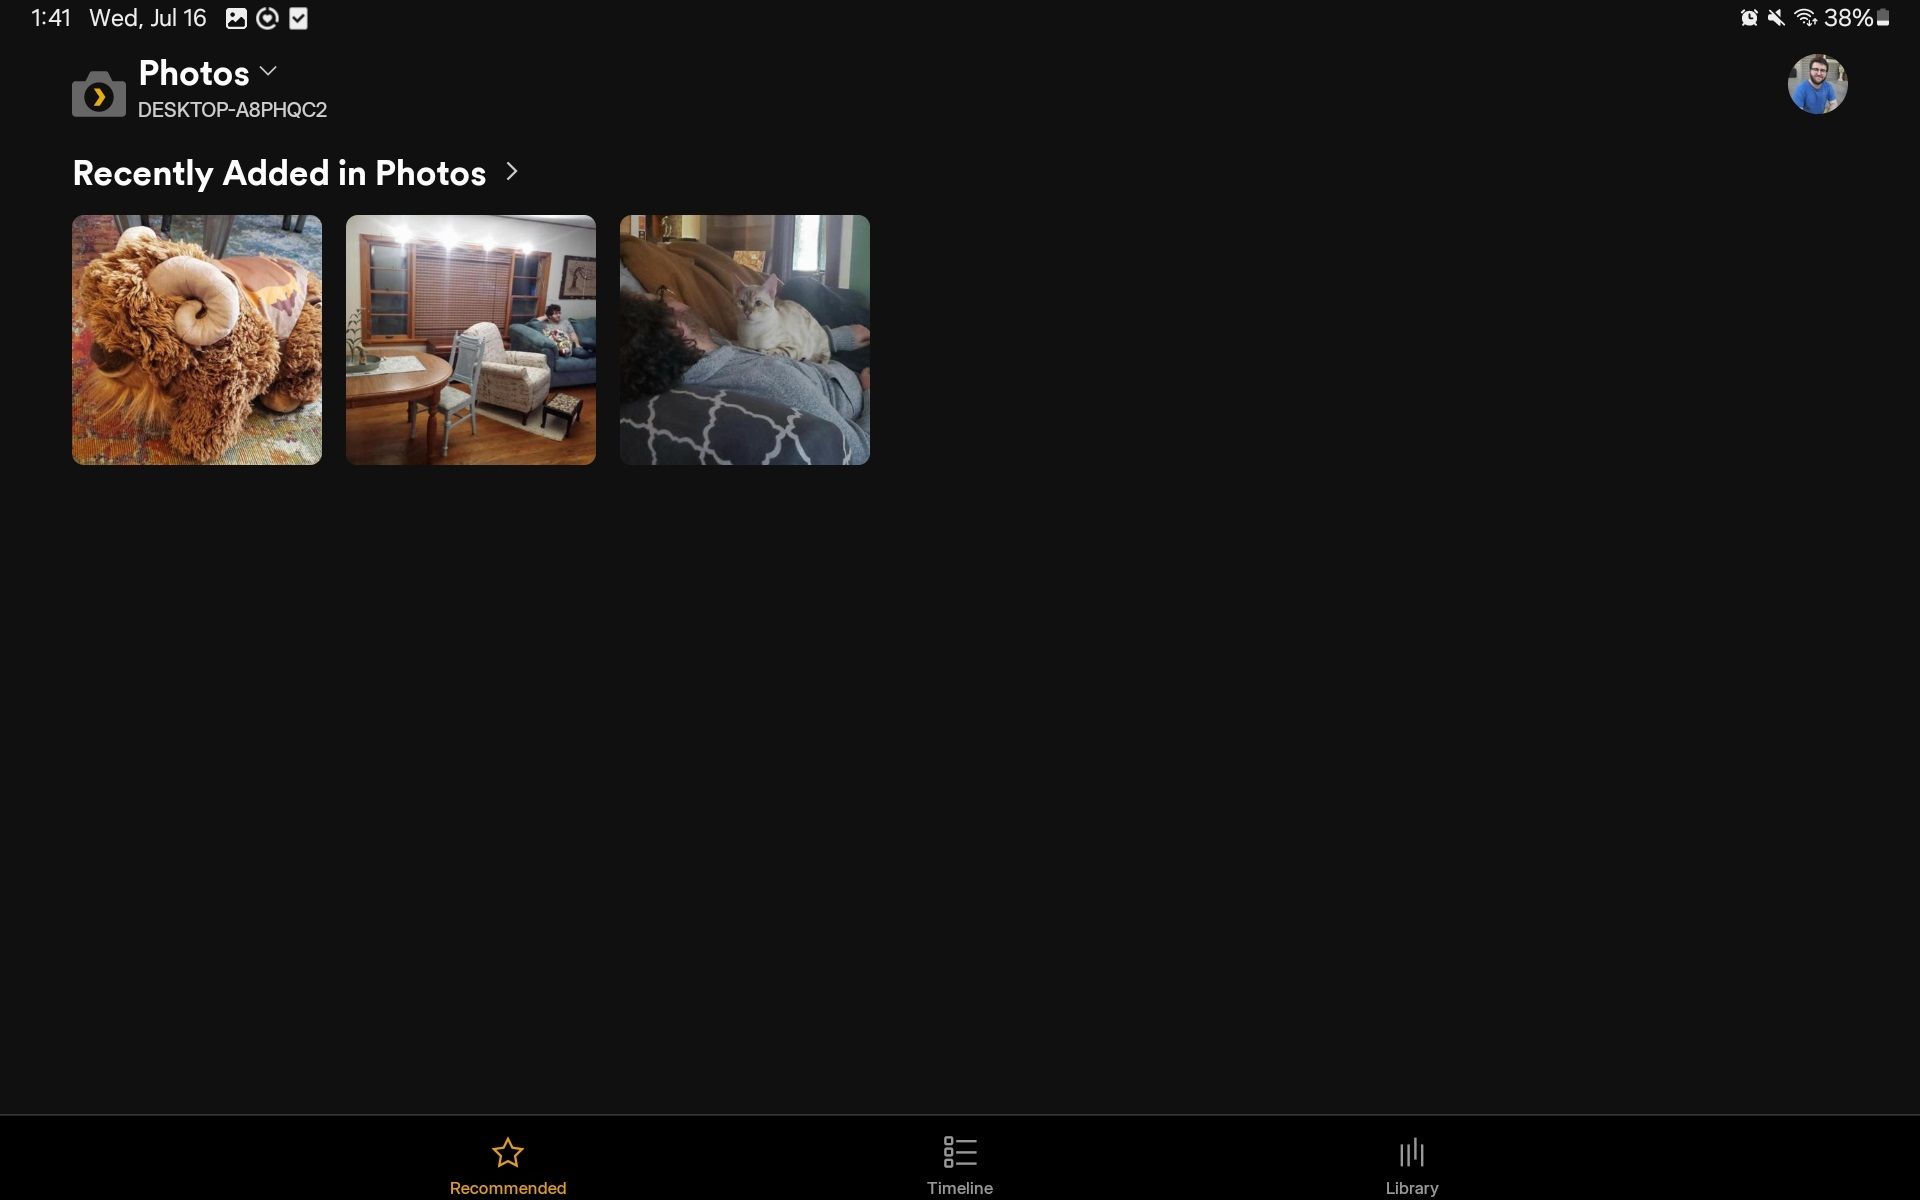
Lately, I’ve been thinking of gathering images I’ve uploaded on Facebook of my family and making them accessible on Plex for my wife and I. With the Plex Photos app, as long as my server keeps running, we can download copies of images and videos any time we need to.

Now, Plex Photos isn’t rich with features—it just accesses images and videos. However, if you go the extra mile to organize your library, it’ll reflect in the app when you switch to Library View. You’ll then see all your photos, segregated by folders and albums. But my favorite feature is Timeline View, which orders them by dates uploaded, making it easier to find something from, say, a year ago.

Download: Plex Photos for Android | iOS (Free)

3

The Plex App

searching for movies and tv shows using plexs discover page

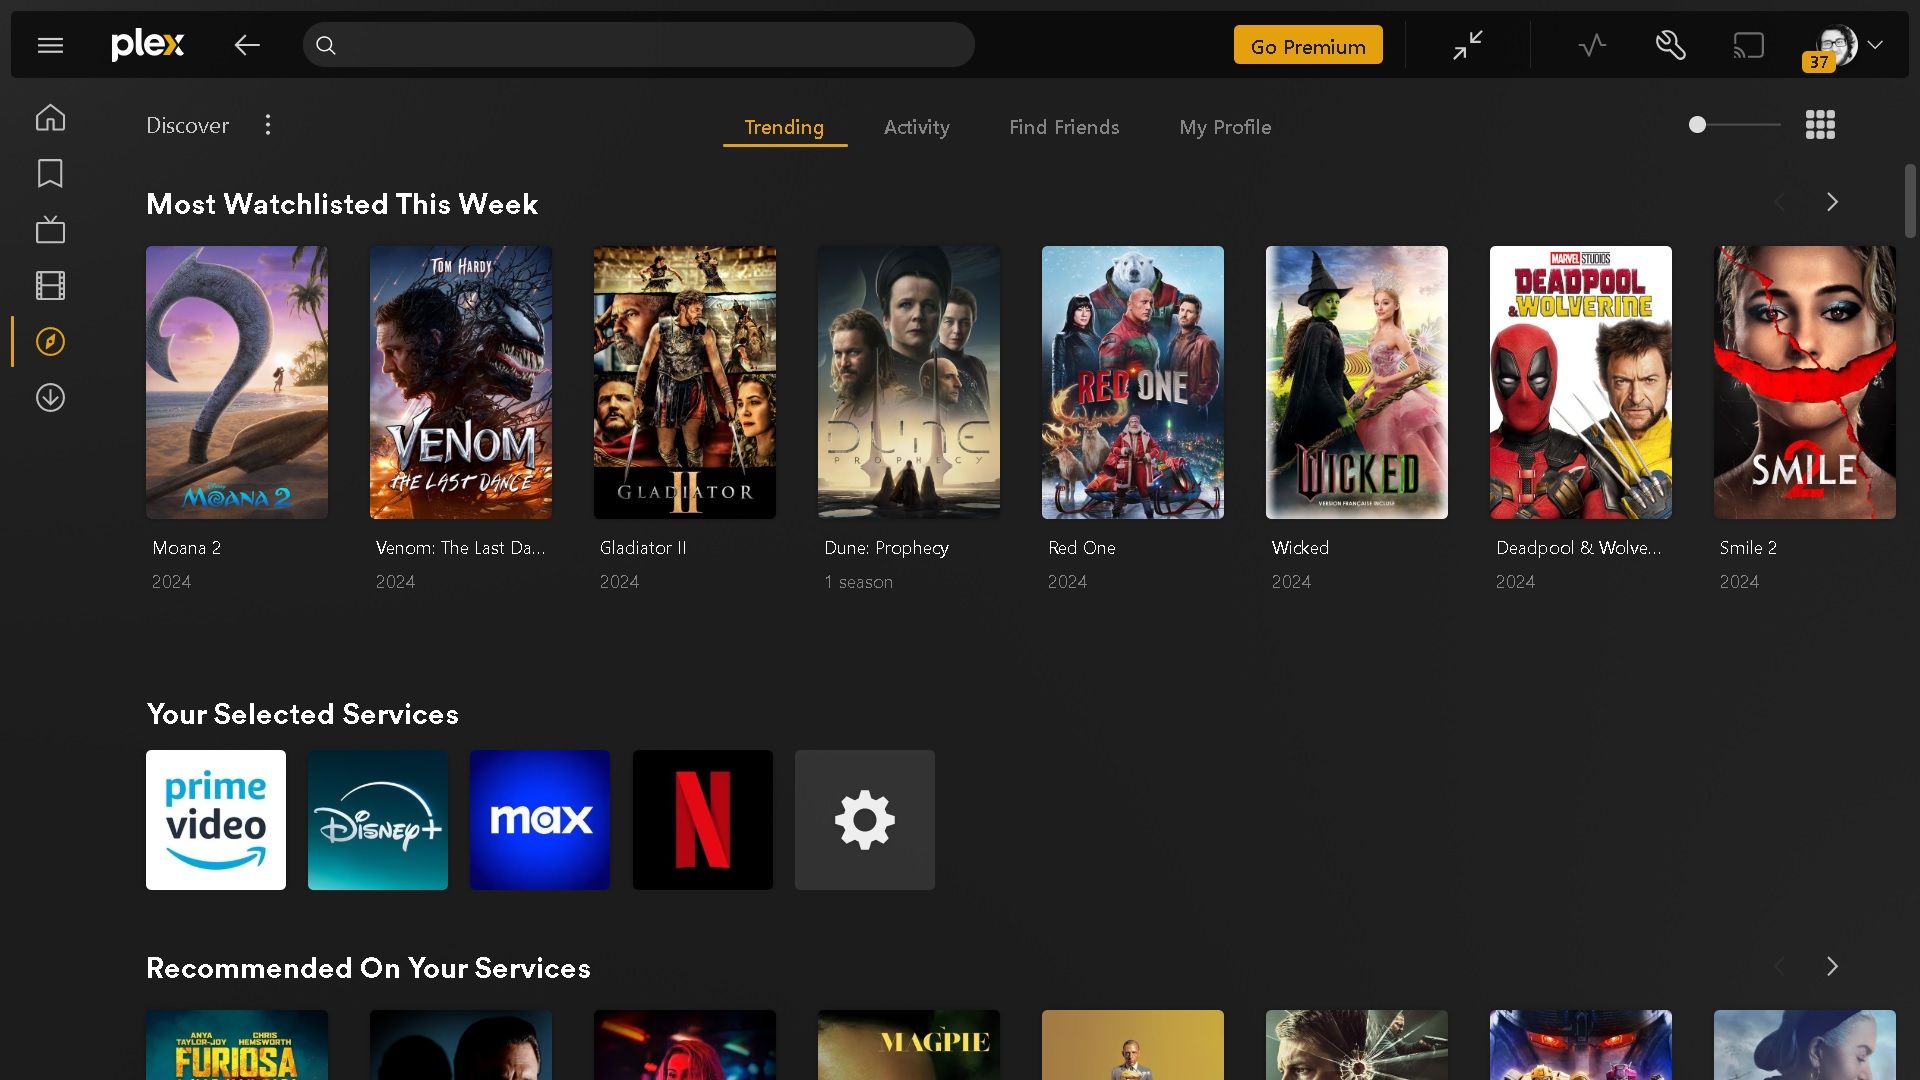
If you’re someone who mostly streams Plex from their browser, having the Plex app will feel significantly better. I use Google Chrome and, for some reason, the browser really punishes the quality when I stream Netflix or HBO Max, but that’s where the Plex app solved my problem.

For one, I like the very minor convenience of having an app that takes me directly to Plex, as opposed to typing a URL into a browser. Secondly, Plex has my second favorite streaming UI (the first being Netflix), which is sleek, simple, and the icons are sized well. And lastly, I like having control over my Plex server and don’t want to risk my browser’s own settings getting in the way.

Download: Plex (Free)

Related

Here’s What I Do to Expand My Plex Library for Cheap

It’s all about finding the right deal at the most opportune time.

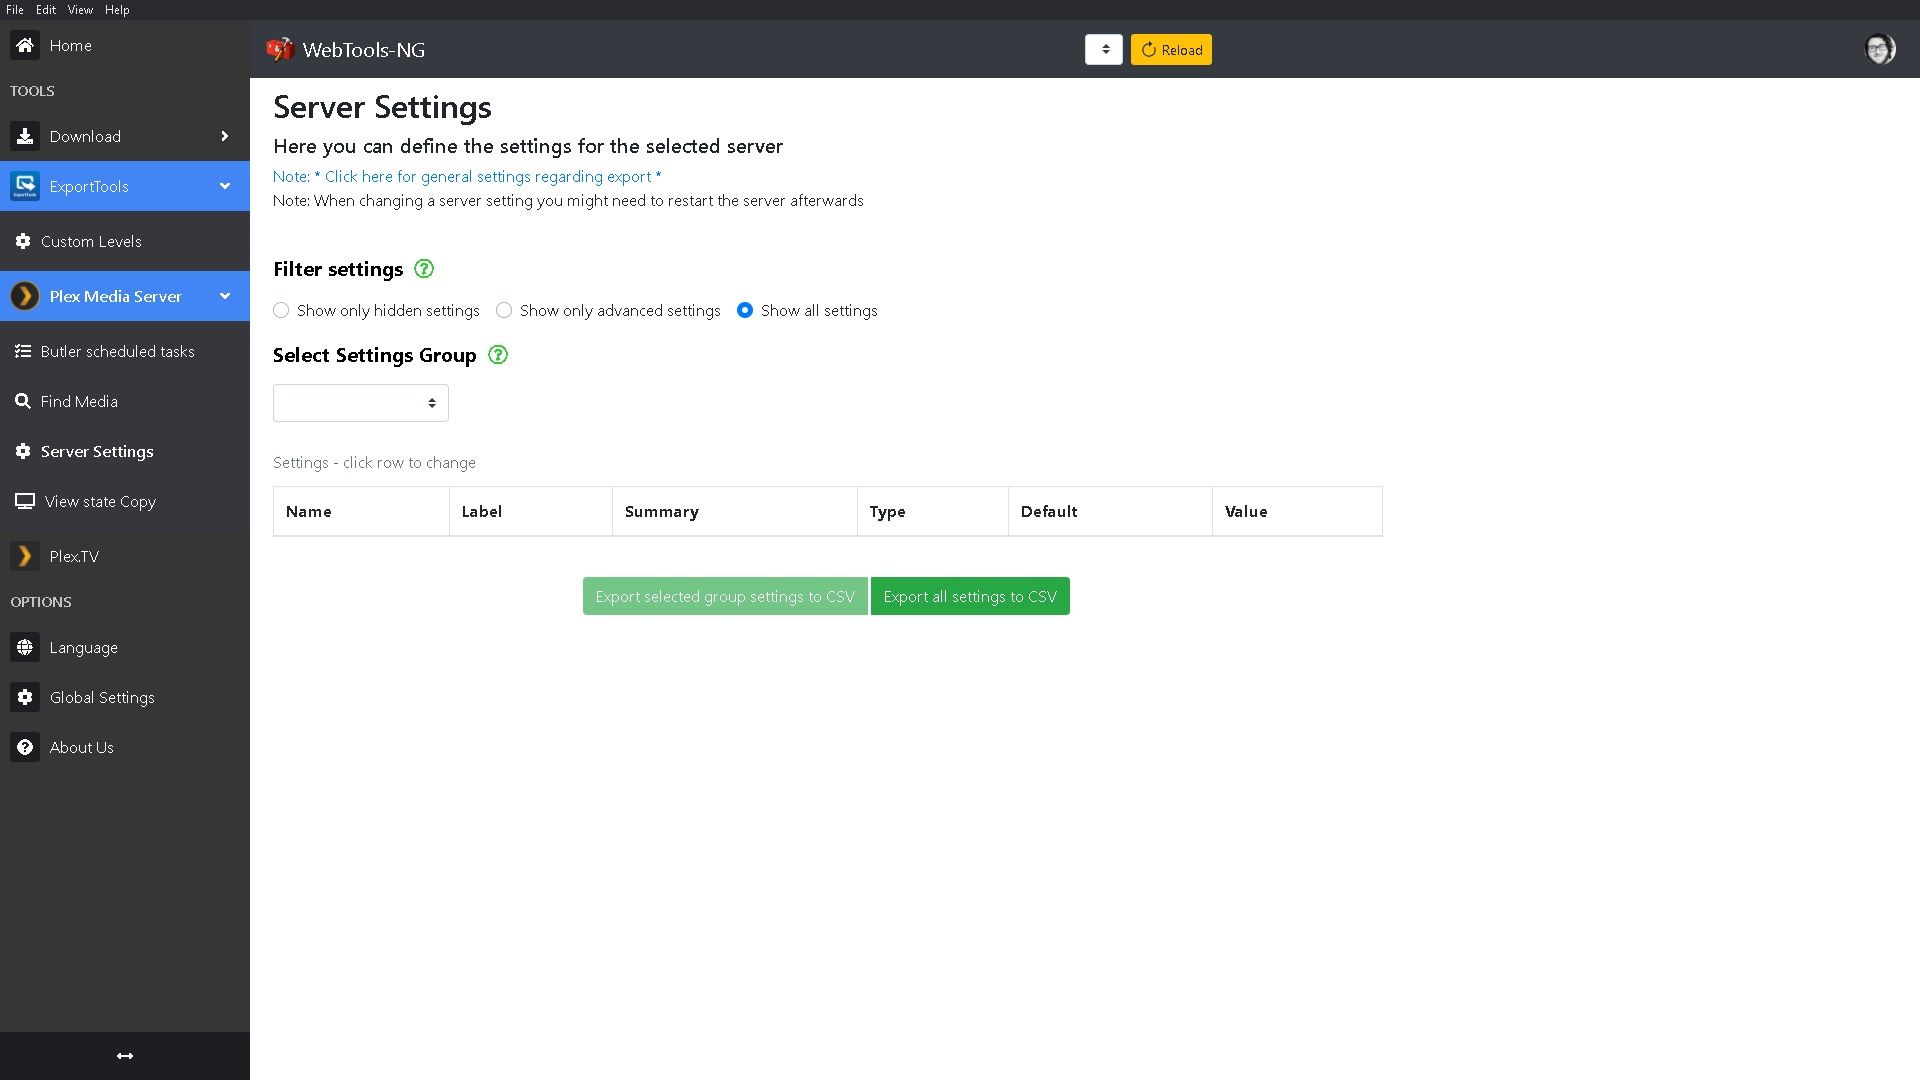
webtools-ng server settings interface

WebTools-NG is a bit of a hodgepodge of different features, from organizing your Plex server to plugins; in fact, getting plugins is the app’s specialty. Once installed, you’ll be able to check out and install plugins for Plex through the Unofficial App Store (UAS)—at least the ones that still work.

Aside from organization and troubleshooting, one of the best features WebTools-NG has is the ExportTools module. With it, you can export a handy list of all the available content in your Plex library, which lets you export a handy list of available content on your library. It can even be used to create lists of specific content, like only 4K movies, or find missing episodes.

Download: WebTools-NG for Windows | MacOS | Linux (Free)

1

FileBot

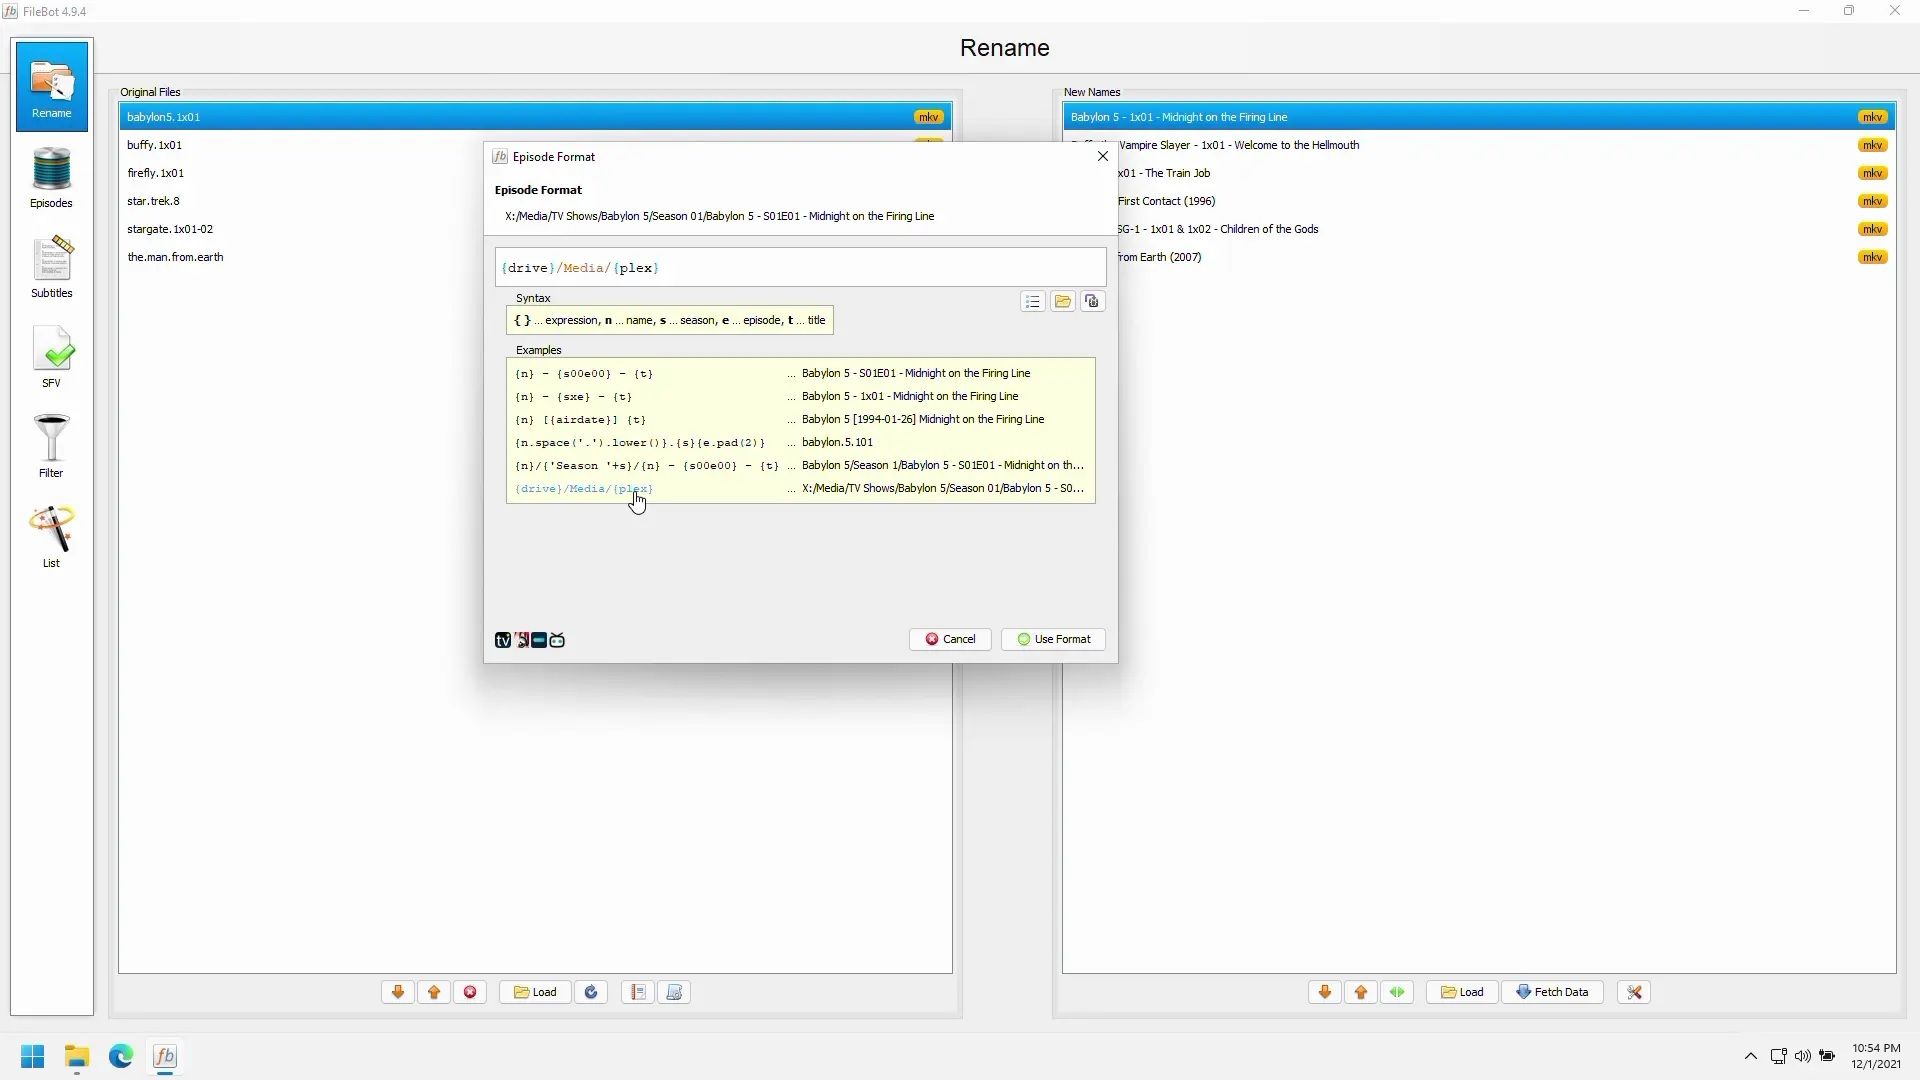
filebot episode formatting window

Say your library grows to a respectable size, but you haven’t exactly been the best organizer. You could do it manually, but FileBolt is far quicker and even includes the work of renaming files to their proper titling, episodes included. Though there are plenty of other tools for organizing your Plex library, FileBolt is the one I rely on the most.

Aside from pulling metadata for accuracy, FileBot also has the ability to find artwork, cover images, and subtitles for movies and shows. For example, Plex originally pulled the cover image for Clash of the Titans (2010) for my copy of Clash of the Titans (1981), but FileBot rectified the problem. Now, Harry Hamlin’s stoic stare graces my Plex server!

Download: FileBot (Free trial; Subscription & Life-Time license available)


With plugins being phased out, I hope apps start to take center stage when it comes to customizing Plex. Just with these apps alone, you can organize your Plex library, troubleshoot, install plugins, even keep a watchful eye on server usage.

How to Fix Netflix Error Code NW-2-5 on Any Device

How to Fix Netflix Error Code NW-2-5 on Any Device

The Download

  • Restarting your device and your internet can help fix the Netflix error code NW-2-5.
  • Make sure your device is connected to the internet to resolve the NW-2-5 error code.

Netflix error code NW-2-5 signals a network connectivity issue, which means your device can’t reach the necessary resources to use Netflix properly. It’s a common but challenging issue to identify and fix. However, by following the right steps, you can usually resolve it yourself.

How to Fix the NW-2-5 Netflix Error

The steps you need to take may differ slightly depending on your device. Follow these directions to fix Netflix error code NW-2-5:

  1. Press Try Again on the error screen. Sometimes, that’s all it takes.

  2. Restart your device.

    If your device has a sleep mode, be sure to shut it down fully before restarting. In some cases, you may need to unplug the device for up to one minute before turning it back on.

  3. Ensure your device is connected to the internet.

    Some devices can test the internet connection for you. If yours doesn’t, open any app other than Netflix that requires an internet connection. If that app can access the internet, you’re connected and can move to the next step.

    You might also need to disable and reenable internet connectivity on your device. On a phone, tablet, or computer, you can do this by toggling Airplane Mode on and off.

  4. Verify that your network supports streaming.

    Some networks disable streaming or block Netflix to save on bandwidth. If you’re connected to the internet through a university, hotel, or another large network, contact the network administrator to see if streaming has been disabled. You can skip this step if you’re at home or control your network.

    Disconnect from your VPN if you’re using one, as Netflix often doesn’t work well with VPNs.

  5. Restart your home network.

    Turn off both your router and modem if they’re separate devices. You may also need to unplug them to fully resolve the issue.

  6. Verify your DNS settings.

    Some devices let you check the DNS settings, but if yours doesn’t, you’ll need to skip this step.

  7. Try an Ethernet connection, or improve your Wi-Fi signal.

    Using a wired connection offers the best streaming experience. If that’s not possible, reposition your device and router for the strongest Wi-Fi signal.

  8. Reinstall the app.

    Whether you’re watching Netflix on your phone, tablet, computer, or TV, there should be a way to remove the app. Reinstall it and log in again.

    If you’re in a browser, close the site and clear the cache.

  9. Connect your device to a different network temporarily.

    Although it might sound strange, some users have found that connecting the device to a different network fixes the NW-2-5 error. For instance, if your TV displays this error, try connecting it to your phone’s hotspot.

  10. Contact Netflix customer service.

    If the issue is on Netflix’s end, you’ll have to wait for it to be fixed.

  11. Contact your internet service provider.

    If you follow all of these steps and still have a Netflix code NW-2-5, the only option left is to contact your internet service provider. You may have a hardware issue with your modem, router, or streaming device, but it’s more likely that there is an issue with your internet connection.

    ISP-related issues are usually resolved when the company fixes its equipment. If you wait and the problem mysteriously resolves, your internet service provider is likely at fault.

    Some internet service providers offer parental controls. You may need to disable those restrictions or alter the settings to use Netflix.

Causes of the NW-2-5 Netflix Error

NW-2-5 is a Netflix error code indicating your device isn’t connected to the internet or something is blocking its connection to Netflix. This error can occur on nearly any Netflix-capable device, including game consoles, streaming devices like Roku, Blu-ray players, and smart TVs.

This error occurs due to a connection problem with your device, home network, or internet service. When this Netflix error happens, your device usually displays this message on the screen:

 Netflix has encountered an error. Retrying in X seconds.
Code: NW-2-5

FAQ

  • What does error code NW-1-19 mean on Netflix?

    Netflix error code NW-1-19 means that your device can’t connect to Netflix. Turn off any VPN you use, then restart your streaming device, router, and modem.

  • How do I fix Netflix error code NW-3-6?

    To fix Netflix error code NW-3-6, troubleshoot your internet connection. Restart your device and Wi-Fi network. Turn off your VPN and connect your smart TV directly to your modem if possible.

  • How do I fix Netflix error code NW-48?

    Netflix code NW-48 is another connection error code. Restart everything, disable your VPN if you have one, and restore your network to default settings if necessary.

  • What is error code NW-2-4 on Netflix?

    Error code NW-2-4 on Netflix is an internet connection error, so follow the usual steps for troubleshooting your network. Restart your equipment, turn off your VPN, and reset your connection if you still have trouble.

How to Screen Record on Linux With Spectacle

How to Screen Record on Linux With Spectacle

A good screencast is useful for all kinds of things, from making a how-to video to showing off a program you coded. Spectacle, an app you might know already for taking screenshots, is one of the easiest way to do that on Linux.

Spectacle Has Screen Recording (With the Right Setup)

Spectacle has been around for a long time as the KDE project’s screenshot tool that’s the default for Plasma desktops and available for many non-Plasma Linux desktops too. You can search your distro’s software browser for “spectacle” and it should come up.

It isn’t news to anyone on the cutting edge of Linux software using Spectacle, but the screenshot app as of version 23.04 a couple of years ago got the ability to make video recordings in addition to regular screenshots. I was happy to find this out because until then I’d been relying on SimpleScreenRecorder for screen captures. Its less-than-simple interface can be overwhelming, and the project appears to be abandoned; at the time of writing, it hasn’t seen an update since 2021, and unanswered bug reports are piling up. An up-to-date but simple screen-capturing app was just what I needed.

There are a couple of big caveats, though. For one, video capture only works with the Wayland windowing system. If your Linux distro is using X11, even the latest version of Spectacle won’t show you the screen record option. Depending on your distro, you might be able to switch from X11 to a Wayland session at your login screen, so try logging out and looking for that option.

Related

ShadowPlay for Linux? Make Screencasts With GPU Screen Recorder

This tool for recording games is just as good but built for Linux.

Another drawback to be aware of is that Spectacle currently does not record audio of any kind. It won’t capture sound from the software you’re recording, and it doesn’t integrate with your microphone to record your voice either. Audio capture is currently on the feature “wishlist” for Spectacle, but for now you’ll have to go without. I’ll cover some possible solutions at the end.

The Fastest Way to Start Recording

To start recording, you can open Specatcle from the application launcher and then click the Recording button. Why do that though when there are handy keyboard shortcuts? To start recording a specific part of your screen with Spectacle, just hit Meta+R, click and drag to form the area you want to record, and double-click.

A little red dot will appear in your system tray, and you can click it to immediately stop the recording. It may remain for a few seconds while the video saves, then you can then find the video file in your Videos/Screencasts directory.

Blue arrow pointing to a red dot indicating a video is being recorded with Spectacle.

You have more options, though. Here’s a complete list of commands:

  • Meta+R or Meta+Shift+R: Record a specific region of the screen
  • Meta+Alt+R: Record the entire screen when you click
  • Meta+Ctrl+R: Record the next window you click on

Every Useful Configuration Option for Spectacle Recordings

After playing around with Spectacle and fiddling with its settings, I figured out there were a few settings that might be worth changing.

Adjust the Keyboard Shortcuts

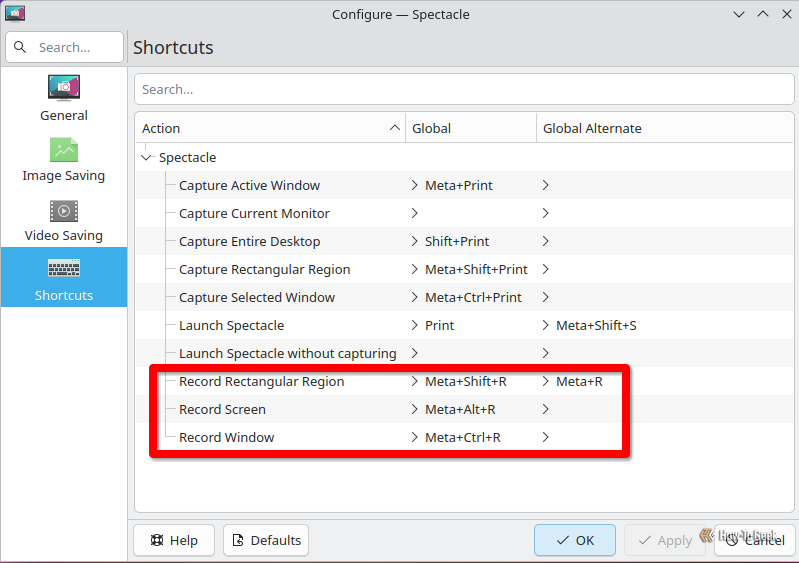
Three-part keyboard shortcuts can be hard to remember, and fortunately Spectacle lets you change them. If, for example, you record whole windows most frequently, you could assign the Meta+R global alternative to window recording instead of the rectangular region option. That way the shortcut you use most is the one that’s easiest to remember.

Shortcut configuration for Spectacle, with a red rectangle around the screen recording options.

Of course you could assign any shortcut you want. Just make sure it isn’t an already existing shortcut, especially for any application you plan to record.

Force Spectacle to Remember a Region

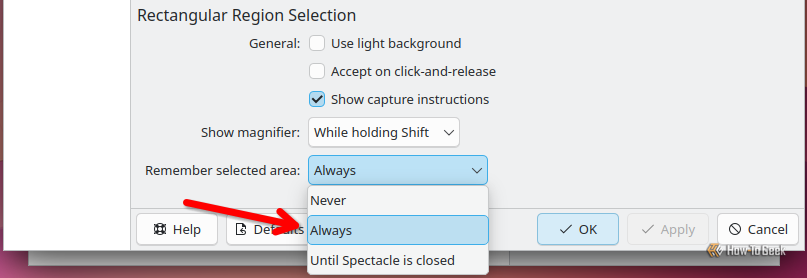
If you’re repeatedly capturing the same region of the screen, you can tell Spectacle to default to using the same screen region you recorded last, even after closing Spectacle. Just click the dropdown menu for “Remember Selected Area” and change it to “Always.”

Arrow pointing to the Remember Selected Area option in Spectacle configuration.

Change the Video Format

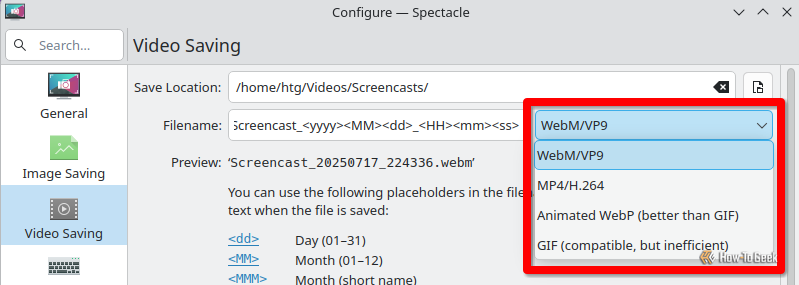
If you don’t want to save your screen capture as a WebM file, you can switch to MP4, to GIF, or to the WebP format in the settings.

Video file format options in Spectacle.

Which one you should choose depends most on what application you plan to watch these screen recordings with, or which platforms you’ll be uploading to. YouTube will accept either MP4 or WebM, for example. Before you start making long recordings, make sure the format you’re using is the one you need.

With that said, though, I noticed weird artifacts in the video when I switched to MP4. There’s a possibility it was specific to my setup, but you should make some test videos and watch them to make sure you can’t spot any strange behavior.

Edit the Save File

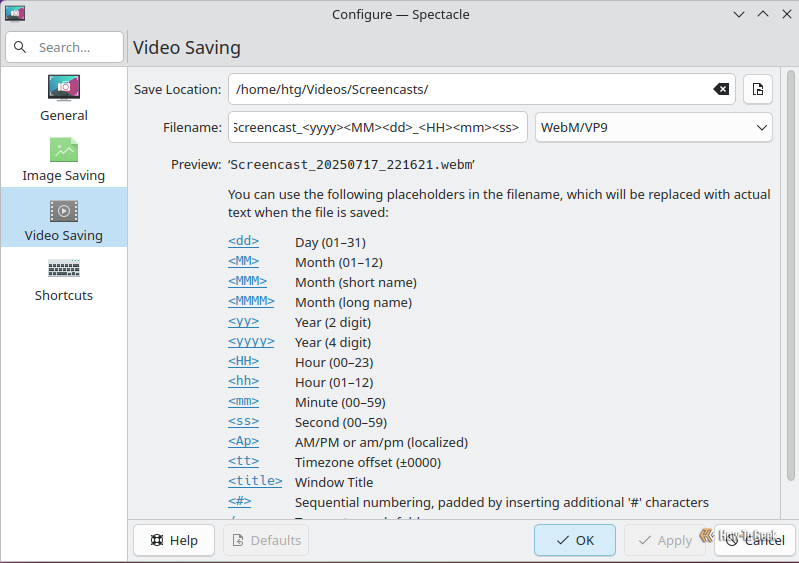
By default, Spectacle saves your file in the Screencasts folder. In the Spectacle configuration menu, though, you can tell Spectacle to put them somewhere else.

Video saving configuration options in Spectacle.

One use for this feature is automatic organization. For example, with the / operator you could have Spectacle create new subdirectories for each new calendar day. Just paste this into the Filename field:

        /<MM><dd><yy>/Screencast_<yyyy><MM><dd>_<HH><mm><ss>
    

Or, you could create a subfolder for each window you record, with a number assigned to each new screencast:

        /<title>/Screencast_<#>
    

Want to Record Your Voice? Try These Apps

Like I said earlier, Spectacle unfortunately can’t capture microphone audio. One workaround, if awkward, is to use Spectacle in combination with another KDE app called Recorder. It’s a dead-simple voice recording app that can save in a variety of audio file containers. Just hit the record button in Recorder, then hit Meta+R, and start recording video and audio at the same time.

You’ll end up with two separate files though, and you’ll have to combine them to form a complete video. I recommend Kdenlive for that job. Just import both files into Kdenlive and put the video in the video track and the audio file in the audio track. Since you probably didn’t start recording both at the exact same time, you’ll have to make adjustments in the timeline to the audio track so it syncs up with the video correctly. Then you simply export the project as a new video.

Related

This Linux Tool Makes Terminal Recording Easy

No need for full-fledged screen recorders.

Of course, if you want a fully-featured screen-capturing system, you’re probably going to want to record with OBS Studio. It’s not only free and open source, but it fully supports Linux, and can record software audio and microphone input at the same time.

I Couldn’t Wait for Spotify Wrapped—There Is a Better Way to Flex Your Musical Taste

I Couldn’t Wait for Spotify Wrapped—There Is a Better Way to Flex Your Musical Taste

Toward the end of every year, social feeds overflow with Spotify Wrapped flexes—colorful, curated snapshots of our year in music. But I’m too impatient to wait that long. There’s an easier, better way to show off your taste whenever you want.

Spotify Wrapped Ignores How We Actually Discover Music

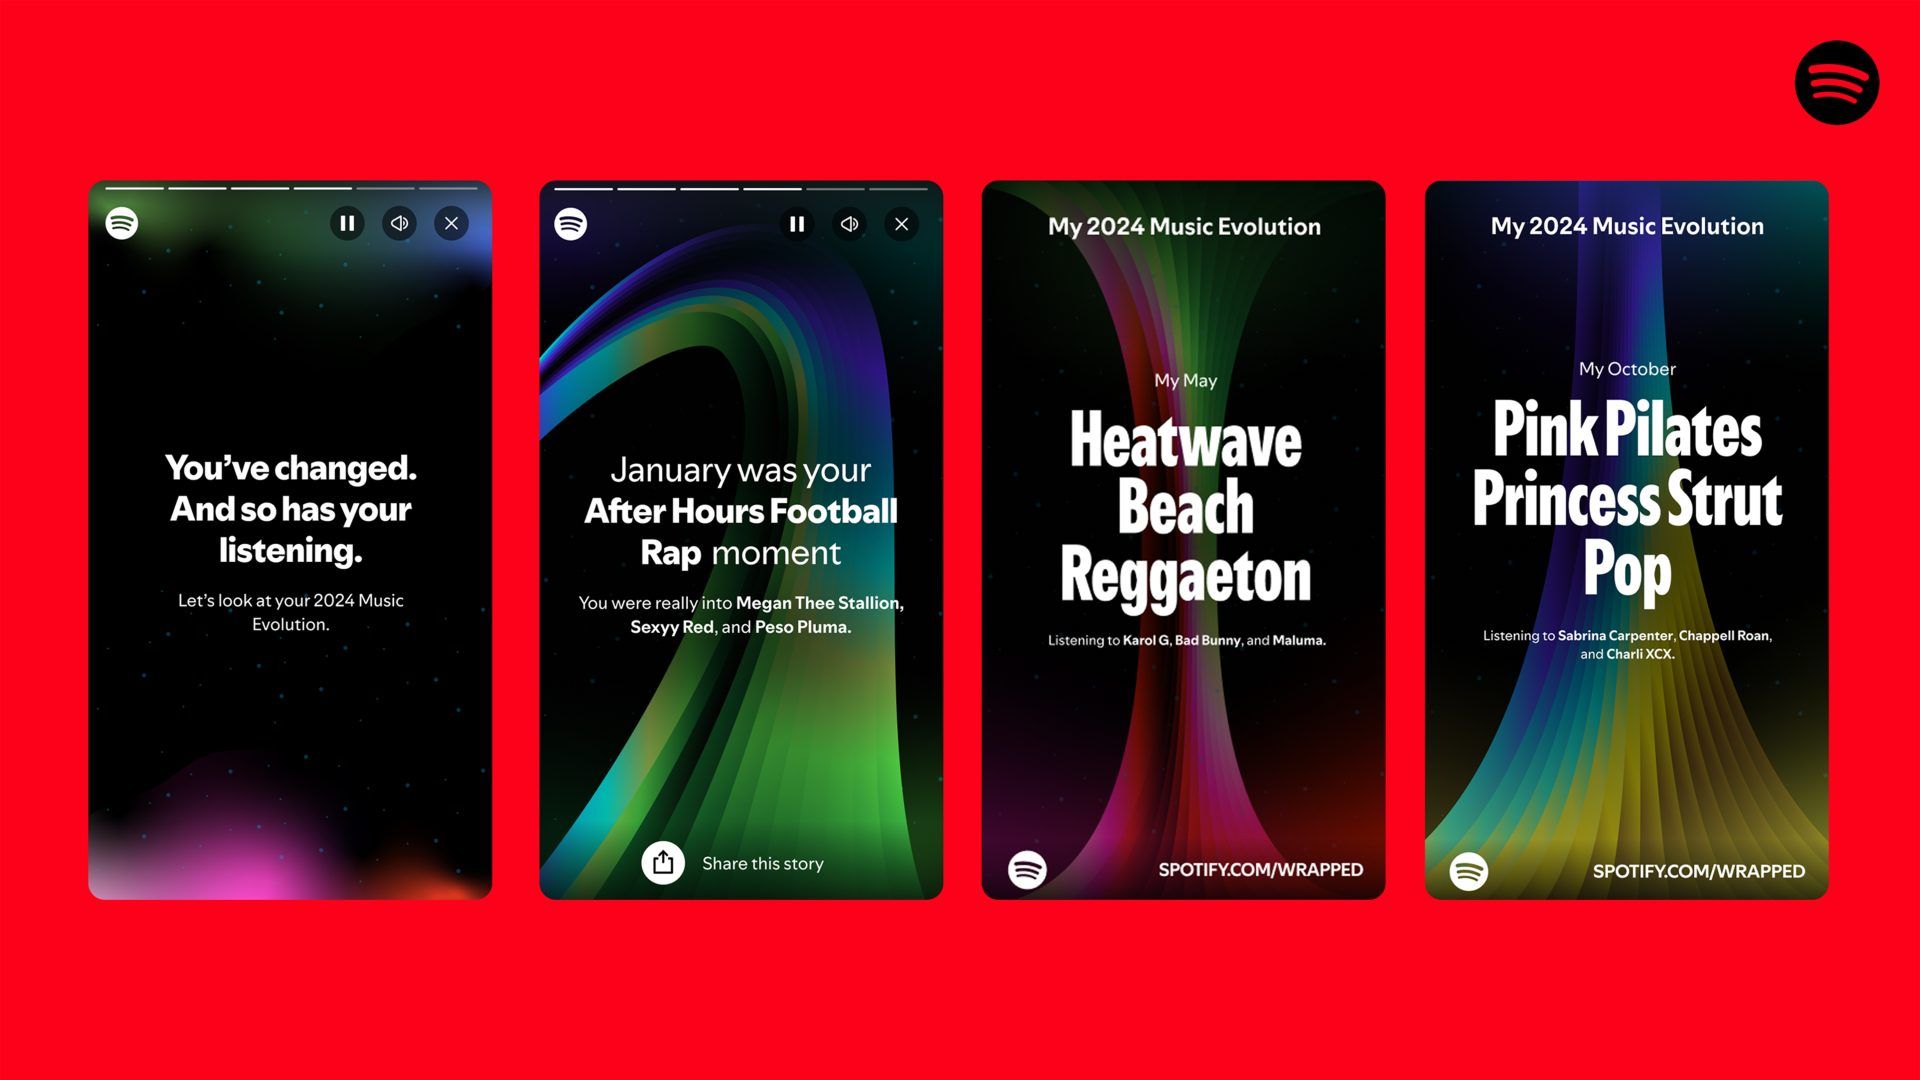
Spotify’s 2024 Wrapped introduced a feature called Your Music Evolution, in an attempt to chart our music taste month by month.

Music Evolution on a Spotify Wrapped Poster-1

Spotify

But it still misses how we discover music. Think about your last great musical find. Was it during a 2 a.m. rabbit hole session? Or perhaps you discovered your new favorite artist through a friend’s carefully curated playlist, or even from a random TikTok video.

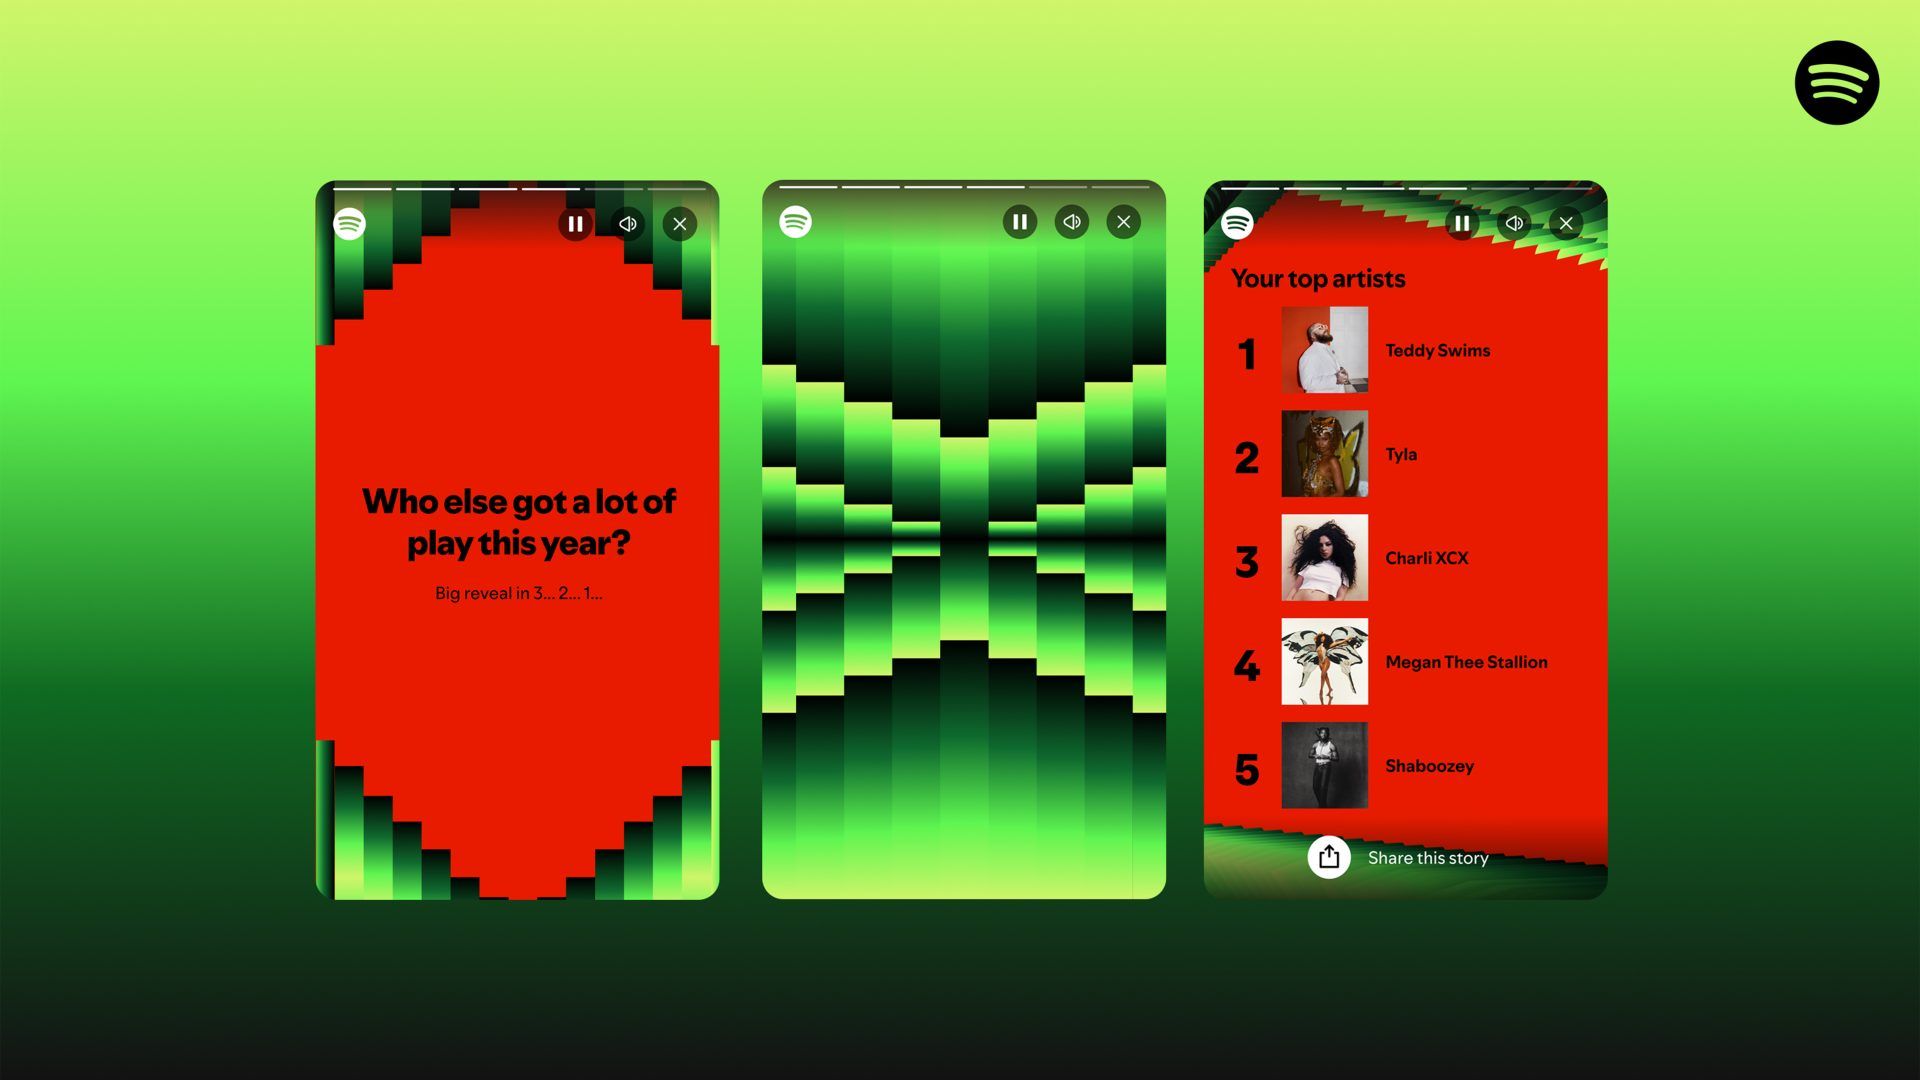
These moments don’t happen on a quarterly schedule, but Wrapped compresses all that into neat, digestible quarterly snapshots. So, you’ll only see the songs and artists you played on repeat. Let’s say you explored 1970s Brazilian funk for some time or had a three-week obsession with Bulgarian choirs. Unless you absolutely binged those genres, they’ll disappear from your year-end summary. Instead, you get your top five artists and a tidy genre pie chart that tells you what you already know.

Top 5 Artists on a Spotify Wrapped Poster-1

Spotify

The once-a-year format also creates another problem: it turns music discovery into a performance. Some people start gaming their listening habits months before November, all in a bid to boost their favorite artists up the charts. Your musical identity deserves better than a once-a-year performance review.

Icebergify Turns Your Listening History Into a Living Map

Icebergify Home Page-1

Instead of reducing your year to a top-five list, Icebergify maps your favorite artists by how popular they are in the world and presents them in the form of an iceberg.

The site pulls your top 50 artists across different periods from Spotify, then checks each one’s popularity based on streams, shares, saves, likes, followers, and the like. The mainstream artists you love are placed at the top of the iceberg, while the less popular ones sink into the lower layers.

You can take the lower layers as proof that you actually dig for music beyond Spotify’s recommendations. It’s why you might see some surprising names, like an artist you barely remember or a super-obscure band, on your iceberg. I take those names as a badge of honor.

Related

7 Ways I’ve Improved My Spotify Recommendations

These are the features and methods I’ve used to make sure that I get better recommendations from Spotify.

Now, your top 50 artists aren’t static. Icebergify analyzes your short-term (about a month), medium-term (six months), and long-term (years) listening history. So you may find an artist from 2021 in your all-time iceberg, waiting to remind you of a musical phase you’d completely forgotten about.

When I checked my Spotify Iceberg at the start of July and again in mid-July, I noticed significant changes in who I was listening to.

Even my supposedly stable all-time iceberg changed a little bit. One artist at the penultimate level was no longer there.

This is something a single end-of-year snapshot just can’t capture.

Icebergify Doesn’t Compromise Your Privacy

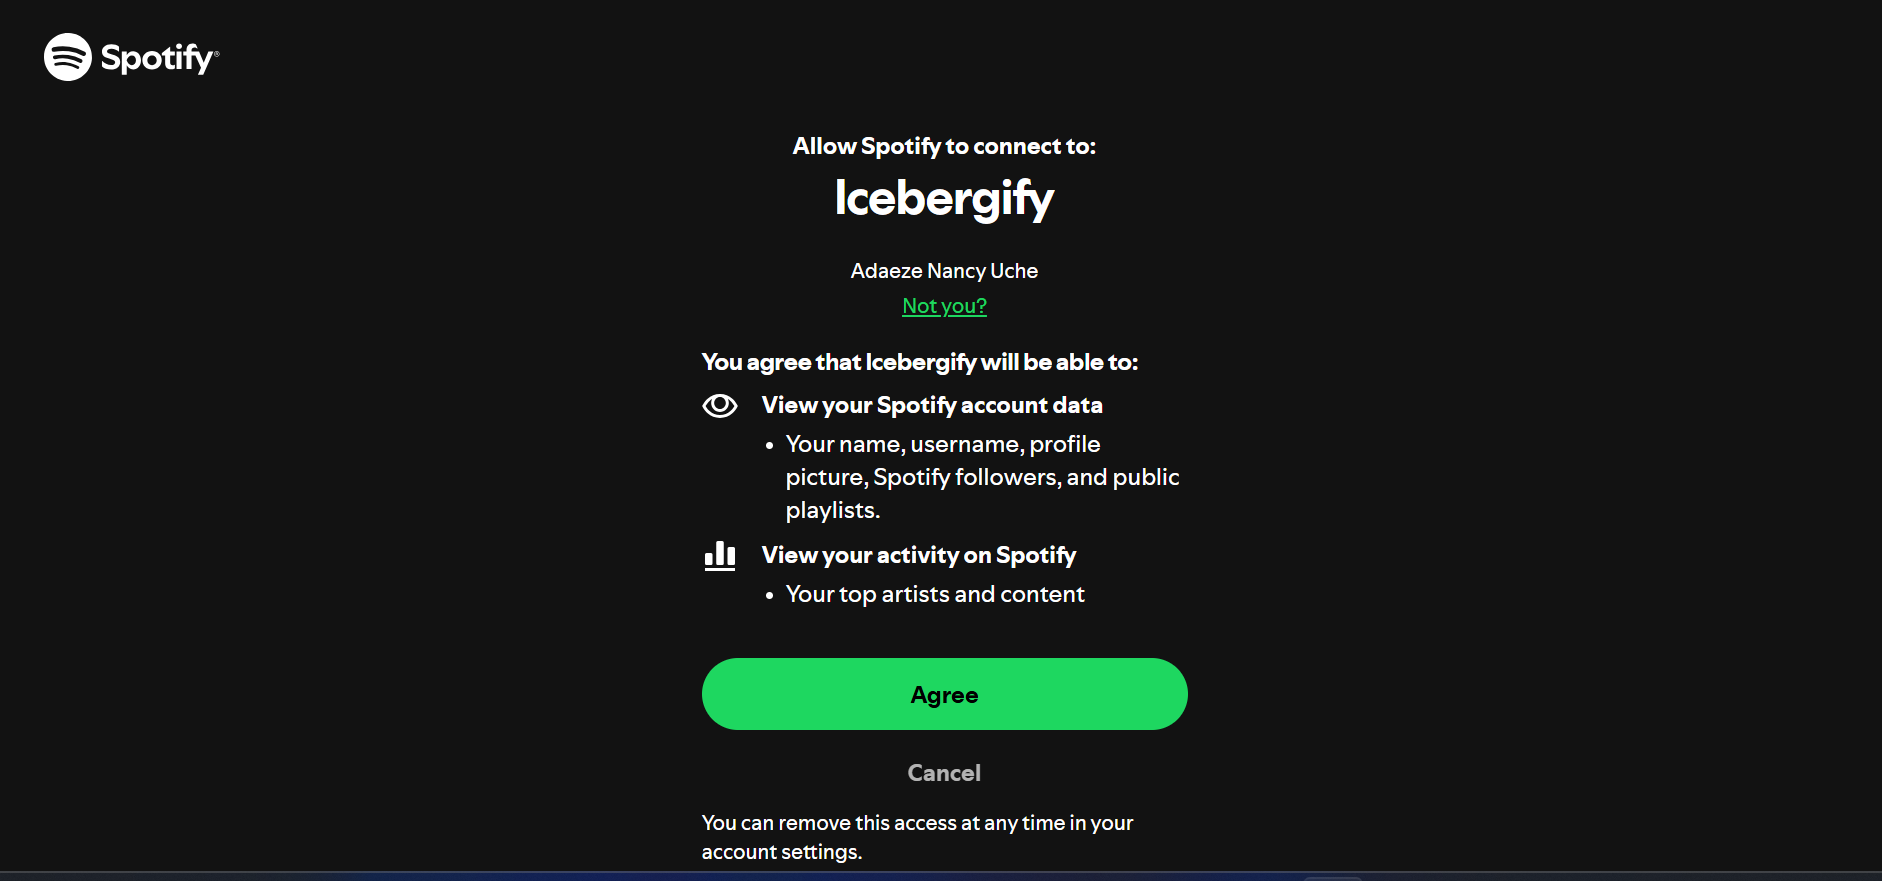
Before you worry about handing over your data, Icebergify was built using Spotify’s official Web API, and it’s completely transparent about how it works.

When you connect your account, Icebergify only pulls the basics: your account ID, username, and your top 50 artists and tracks across different timeframes. That’s it. No diving into your private playlists, no access to your personal information, and definitely no data sharing with third parties.

Related

How Much Data Does Spotify Use?

Data rules everything around me.

If you’d like some proof. Just close the site and reopen it. You’ll find that you’ll have to reconnect your Spotify account all over again. That’s because nothing gets stored long-term.

A screenshot showing Icebergify's Spotify Connection Request-1

Also, since the site is open-source, you can easily get in touch with the creator to suggest improvements or contribute new features.

Your Spotify Iceberg Can Also Spark Conversations

Just like Wrapped, sharing your Spotify iceberg gets people talking. When your friends see those mysterious artists floating in your deeper layers, they’ll most likely ask, “Who is this band I’ve never heard of?” Suddenly, you’re talking about how you discovered these less popular artists, recommending them, and just having conversations about music—not just comparing your listening hours.

People who see your Spotify Iceberg can also glean an idea of how you listen to music. If you have a lot of obscure artists, you’re clearly someone who actively hunts for new sounds. And if your friend has a few artists in his lower layers, it might mean that he’s the perfect person to explore new genres with.

Related

This Old Music App Is Still Miles Better Than Spotify For Finding New Music

This decades-old platform still beats Spotify when it comes to music discovery

There’s also something refreshingly human about Spotify Icebergs. When someone shares artists you’ve never heard of, you’ll know it’s the person recommending it, not an algorithm guessing what you’ll like. If it’s someone whose musical judgment you trust, you’ll be more keen to check them out.

Sharing couldn’t be easier, either. On your desktop, just right-click to save the image. On mobile, hold down on the iceberg to save it or take a screenshot if you prefer. Then, you can share it wherever you talk about music.

Fix Errors on Galaxy Devices

Fix Errors on Galaxy Devices

The Download

  • Restarting your Samsung Galaxy device can often fix the ‘Camera Failed’ error easily.
  • Updating apps and the system software might stop the camera error from happening again.
  • Clearing the camera’s app cache can help make it work better and fix the error.

Samsung Galaxy smartphones and the discontinued Samsung Galaxy digital camera are known for their excellent picture quality. However, like all electronic devices, they can sometimes malfunction. A common issue is the Camera failed error. What causes this, and how can you fix it? There are several potential causes and solutions.

How to Fix the Camera Failed Error in Samsung Galaxy Smartphone Cameras

You may have to try several strategies to fix this camera error. Work through these steps in order to try the simpler solutions first.

  1. Restart your phone. A simple restart can resolve many software-related errors.

    A restart and reset are two very different things. Restarting your phone simply powers it down and then starts it back up. None of your apps, files, or settings will be removed.

  2. Check for system and app updates. An outdated operating system or app can cause this camera error.

  3. Power up in Safe Mode, then check to see if your camera works properly. If it does, the problem could be a third-party app that conflicts with the camera software.

    Restart the phone in regular mode and remove recently installed or updated third-party apps one at a time until the problem is resolved. You may need to restart the phone after removing each app to ensure it’s completely removed.

    Third-party apps are a common cause of the Camera Failed error, so don’t skip this step.

  4. Clear the Camera’s app cache and storage data. Once the cache is cleared, restart the Camera app and test it to see if the issue is resolved.

  5. Remove and then reinsert the microSD card. Occasionally, a Galaxy phone camera may encounter an error reading the SD card, leading to the Camera Failed error. Reformat the card if prompted.

    Reformatting a microSD card erases all data on the card. If there are pictures or apps you wish to keep, transfer these files to your computer using a microSD card reader.

  6. Turn off Smart Stay. This feature uses the selfie camera to monitor your face’s position when you’re looking at the screen for a long time without touching it. Since it utilizes the camera, it can sometimes conflict with the rear camera when Smart Stay is active.

  7. Reset your phone. If nothing has worked up to this point, the last thing to try is a full factory reset. This returns the phone to its factory settings, after which you’ll need to go through the initial setup process again as if it’s a ew device.

    Completing this step will erase everything on your phone, including all apps you’ve added since you first got the device, any downloaded files, and photos and videos stored on the phone. Back up anything you don’t want to lose before starting the factory reset process.

  8. Try customer support. If you’re still getting the error even after resetting the phone’s software, contact Samsung Support for further assistance.

How to Fix the Camera Failed Error in the Samsung Galaxy Camera

Samsung Galaxy cameras can experience the same Camera Failed error as Galaxy smartphones, though some troubleshooting steps differ.

Ensure the camera battery is fully charged before continuing. Some of these steps could take several minutes to complete. If the battery dies during the process, you may encounter other errors and have to start the troubleshooting process over.

  1. Press-and-hold the Power button to turn off the camera. Once it’s off, allow the camera to sit for at least 30 seconds before powering it back on. Many issues that cause software errors can be fixed with a simple restart. 

  2. Shut down running processes that could be causing a camera conflict and then restart the camera.

    To do this, go to Settings > Device care > Memory . Then, tap Clean now.

  3. Reformat the SD card. Occasionally, the Samsung Galaxy camera encounters an error reading the SD card, leading to the Camera Failed error. Reformatting the card may resolve the issue.

    Here’s how: Go to Settings > Storage > Memory > Format SD card.

    A reformat will erase all of its data. If you don’t want to lose the pictures on the card, transfer the files to your computer using an SD card reader before performing a reformat.

  4. Restore the camera to its factory default settings. This option is available in Settings > Apps > Camera > Camera Settings > Reset Settings.

  5. Visit Samsung’s Digital Camera Support page for repair information. At this point, if the camera error remains after resetting the software, reaching out to Samsung is the next best choice.

Causes of the Camera Failed Error in Samsung Devices

This error doesn’t include any other information about why the camera isn’t working correctly. That makes troubleshooting difficult. It’s not impossible to fix, though, since, in most cases, it’s a simple software issue. The error can be caused by an incomplete firmware update, out-of-date third-party apps, or an SD card the camera suddenly doesn’t recognize.

Back to Top
Product has been added to your cart