

Running low on storage interrupts your workflow and can slow your laptop down. The constant low storage notifications used to drive me crazy until I started following smart habits to ensure I never ran out of storage.
6
Keep Storage Sense Turned On
Windows offers a handy feature called Storage Sense that helps free up space by automatically deleting temporary system and app files, clearing out the Recycle Bin, and removing files from the Downloads folder you haven’t used in a while. You can also customize how often it runs and how long it waits before cleaning up files.

Related
How to Use Storage Sense on Windows 11
Storage Sense is a handy way to keep your PC from running out of space and using it on Windows 11 is a little different than on Windows 10.
I’ve adjusted it to suit my needs, and you can do the same. Here’s how to enable and set it up:
- Right-click the Start button and select Settings.
- Navigate to System > Storage.
- Toggle Storage Sense on.
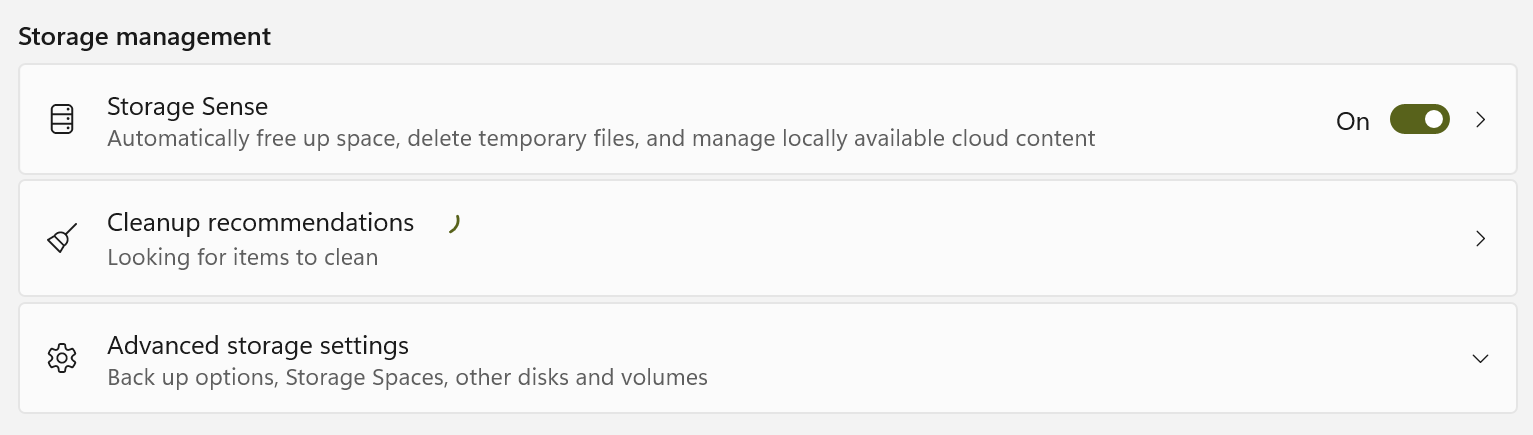
To adjust the cleanup schedule, click on Storage Sense and tweak the settings to match your preferences.

5
Remove Duplicate Files
Most of us have countless duplicate files cluttering our computers, whether from downloading something twice by mistake, copying files from a source that already had duplicates, or forgetting to delete them from an earlier location after relocating them. Over time, these files accumulate and take up storage. That’s why I now check and regularly delete duplicates.
Since manually tracking them down can be tedious and time-consuming, I use the Microsoft PC Manager app, which quickly scans the system for duplicates and lets you easily remove them. The app is developed by Microsoft and available directly from the Microsoft Store, so it doesn’t come with the concerns often associated with third-party alternatives.
Download: PC Manager (Free)
4
Remove Apps You No Longer Use
How many apps on your computer have you not opened in months? I used to have quite a few myself—apps I installed for a one-time task and then forgot about. These unused programs often sit in the background, quietly taking up valuable disk space. Identifying and removing them is a simple way to free up storage.
To locate and uninstall apps that take up a lot of space, follow these steps:
- Open the Settings app and head to Apps > Installed Apps.
- Sort the list by size and spot the ones you no longer use.
- Click the three horizontal dots next to an app and select Uninstall.
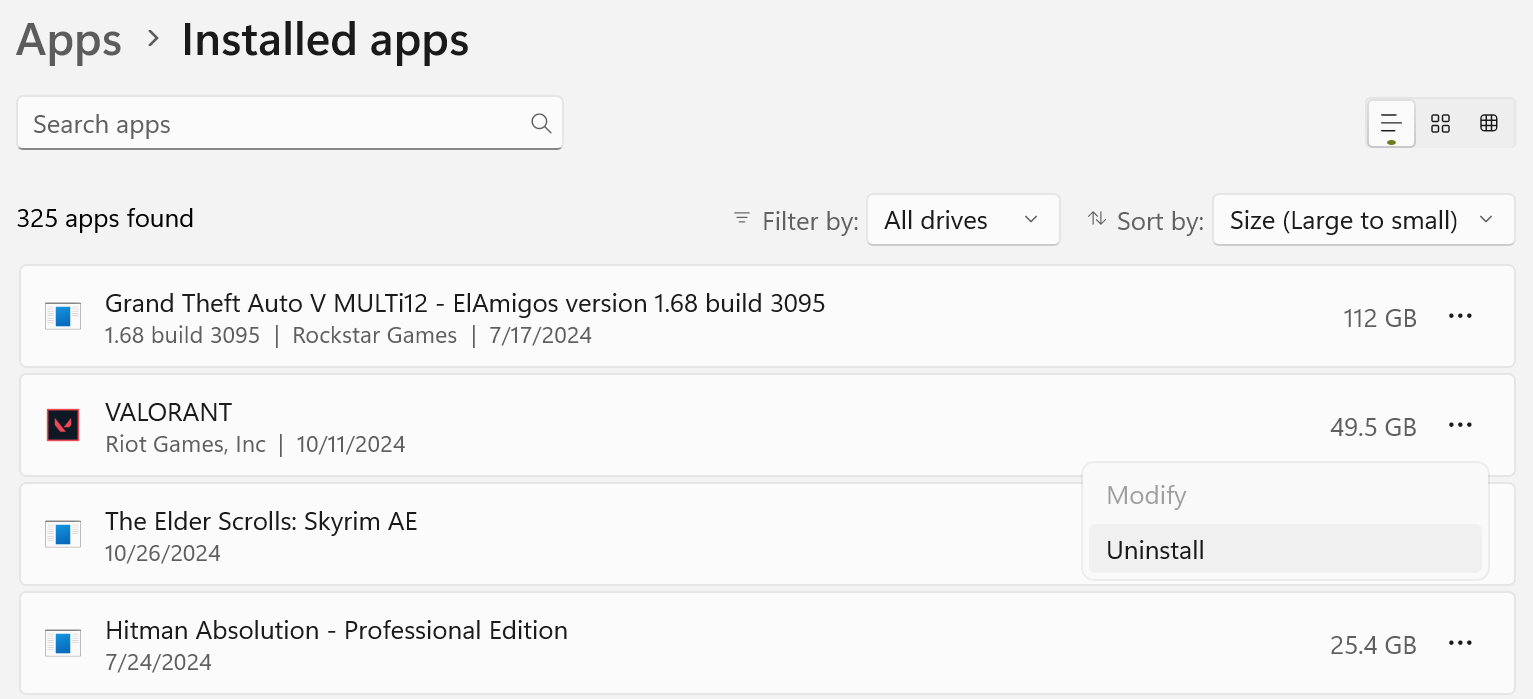
Uninstalling these apps not only frees up storage but can also boost your PC’s performance, especially if they were running in the background and consuming system resources.
3
Tidy Up the Downloads Folder
If there was one spot on my computer that was consistently overlooked when it came to storage, it was the Downloads folder. I used to download installers, documents, and random images that sat there, even after I’d used or moved them. Sure, Storage Sense clears unused files every thirty days, according to my schedule, but that wasn’t enough.
I’ve made it a habit to review my Downloads folder at least once a week. I scan for files I no longer need—especially the bulky ones—and delete them to keep my storage in check.
2
Store Large Data on External Drives
Over 50 percent of my storage space was once consumed by a few folders filled with movies, videos, high-resolution images, and similar files—some of which I only needed to access a few times a year. It was an inefficient use of my built-in storage, but it took me quite a while to notice. To solve this issue, I invested in a dedicated external drive to store these large files.
Moving them freed up so much space, it was almost unbelievable. Now, I’ve made it a habit to store large, infrequently used files on the external drive, keeping my primary storage available for important data. However, if you’re transferring important files to an external drive, handle the drive carefully to prevent damage and avoid losing valuable data.
Related
7 Reasons Why Hard Drives Fail (and How to Prevent It)
They’re not as durable as they look
1
Use OneDrive’s Files On-Demand
OneDrive’s Files On-Demand feature helps you save local storage by keeping files in the cloud and downloading them only when needed. This way, you can keep essential files offline while storing rarely accessed ones online. It keeps your storage drive clutter-free without losing access to anything.
All your files remain visible in File Explorer, and you can control which ones stay on your device or live in the cloud. To free up space, right-click a file you don’t frequently use and select Free up space—this makes it available online only. For files you want to always have access to, right-click and click Always keep on this device.

Remember that if a file is marked as online-only, you’ll need an internet connection to access it. You won’t be able to open or use that file without internet access.
That’s how I keep my laptop storage in check and avoid running out of space. If you’re dealing with low storage problems, try these tips—they’ve worked well for me and can help you too.


Leave a Comment
Your email address will not be published. Required fields are marked *