Often, when your Wi-Fi option goes missing, it’s because the network device is disabled. It’s a fairly common problem and easy to fix. Here are some solutions you can try to restore connectivity on your Windows computer.
9
Restart Your PC
A quick restart is often all you need to get your Wi-Fi back. If you’re using a laptop, press the Sleep (Power) button once to put your device into sleep mode, then press the Power button again to wake it up and check if the Wi-Fi is restored. If that doesn’t help, go to Start > Power > Restart to reboot your computer.
However, if you notice your Windows laptop’s Wi-Fi and Bluetooth disappear after waking it from sleep but return after a restart, it’s likely due to incorrect power management settings. Follow the linked guide to adjust your power management settings. Otherwise, if the issue persists, continue with the next steps to troubleshoot common connectivity problems.
8
Run the Internet Connection Troubleshooter
Windows 11 has built-in troubleshooters to fix common issues with network devices. The Network and Internet troubleshooter scans your PC for common network problems and can fix them automatically.
To run the Internet Connection troubleshooter:
- Press Win + I to open Settings.
-
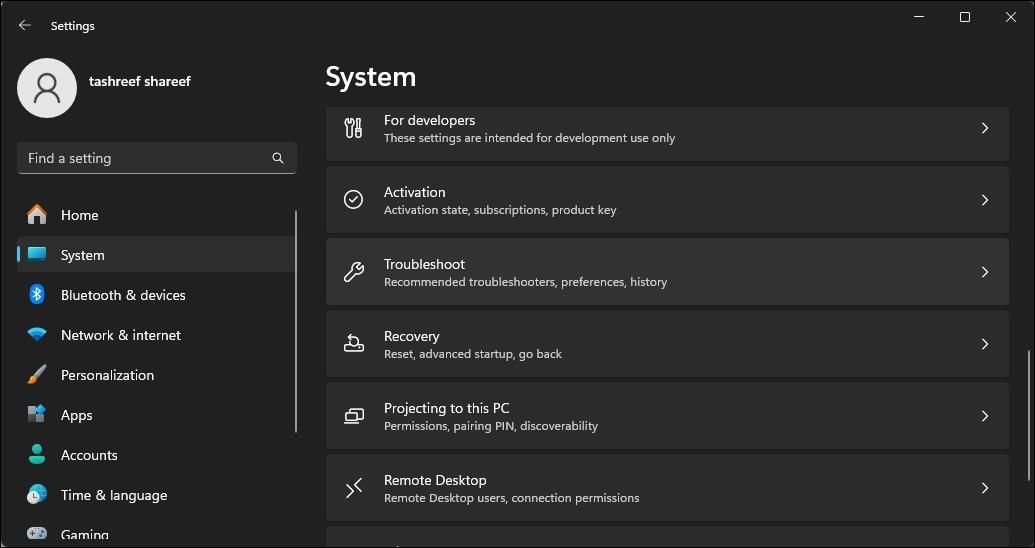
Open the System tab in the left pane.
- In the right pane, scroll down and click Troubleshoot.
-
Under Options, click Other troubleshooters.
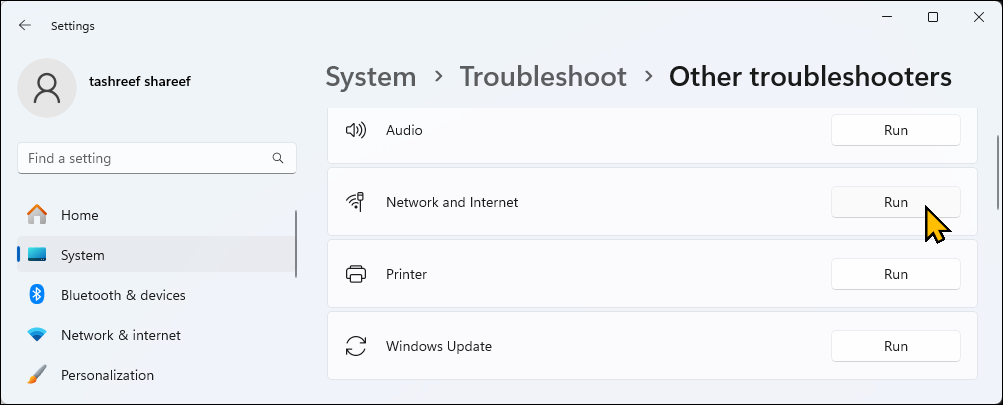
- Click Run for Network and Internet. Windows will launch the troubleshooter and show the issues that Windows can troubleshoot.
- Click Troubleshoot my connection to the Internet. The troubleshooter will scan the system for issues and recommend potential fixes. Apply the fixes and check for any improvements.
7
Enable the Wi-Fi Adapter in Network Connections
Windows 11 won’t display the Wi-Fi option if the Wi-Fi adapter is disabled. Fortunately, you can manually enable or disable the network devices in the Control Panel:
-
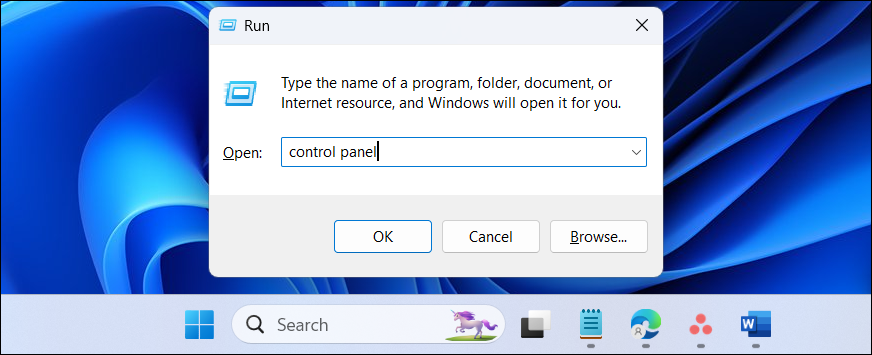
Press Win + R to open the Run dialog.
-
Type control and click OK to open the Control Panel. You can also search for the Control Panel in Windows search and open it from the search results.
-
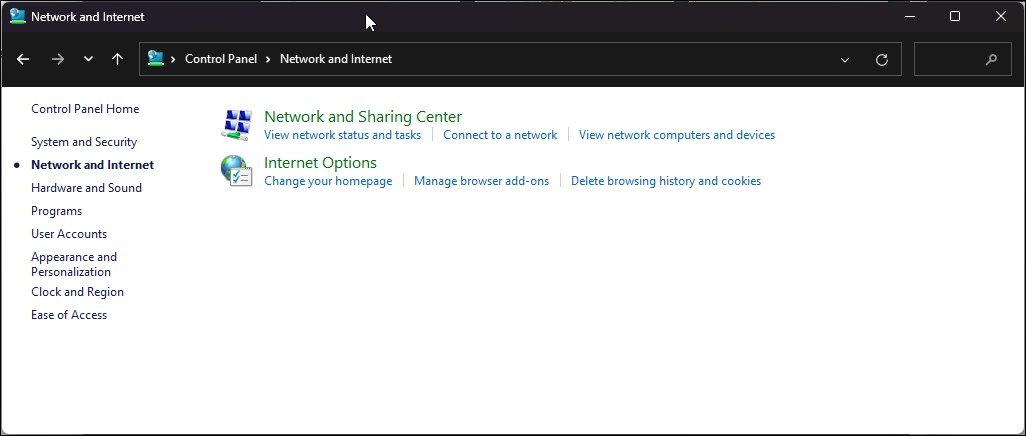
In the Control Panel, go to Network and Internet > Network and Sharing Center.
-
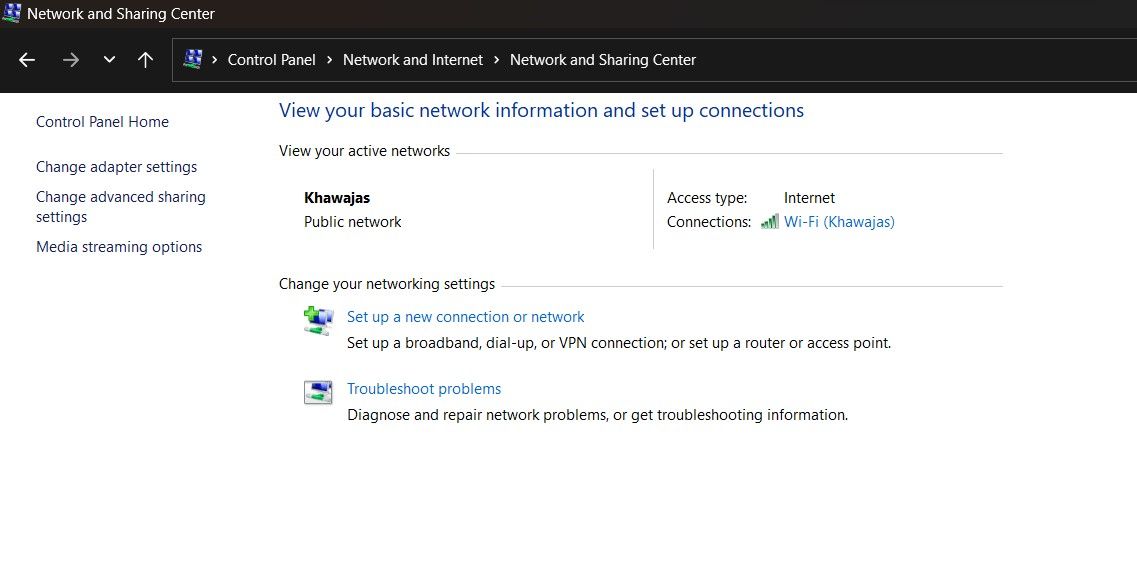
Click Change adapter settings to view all the installed network devices in the left pane.
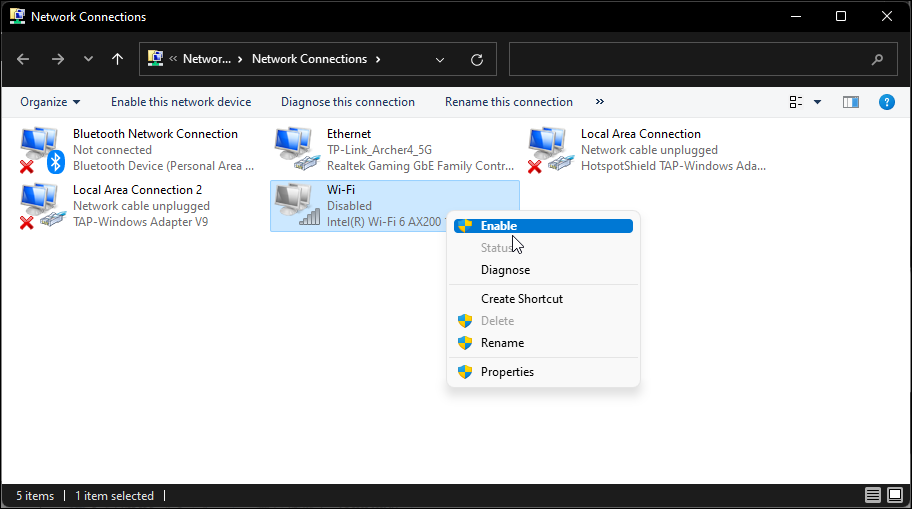
- Right-click the Wi-Fi adapter and select Enabled.
If it is already enabled, run the network diagnostic to troubleshoot the driver. To do this, right-click on the Wi-Fi adapter and select Diagnose.
Windows will scan the device for issues and recommend potential fixes. Click Apply this fix to apply the recommended solution.
6
Update the Network Adapter Drivers
Your computer might be missing the latest network drivers, especially if you’ve recently performed an upgrade. Corrupt or glitchy network adapter drivers can also cause your Wi-Fi to malfunction. To fix this, try updating your network adapter drivers to the latest version.
- Press the Win key, type device manager and open it from the search results.
- In the Device Manager, expand the Network adapters section.
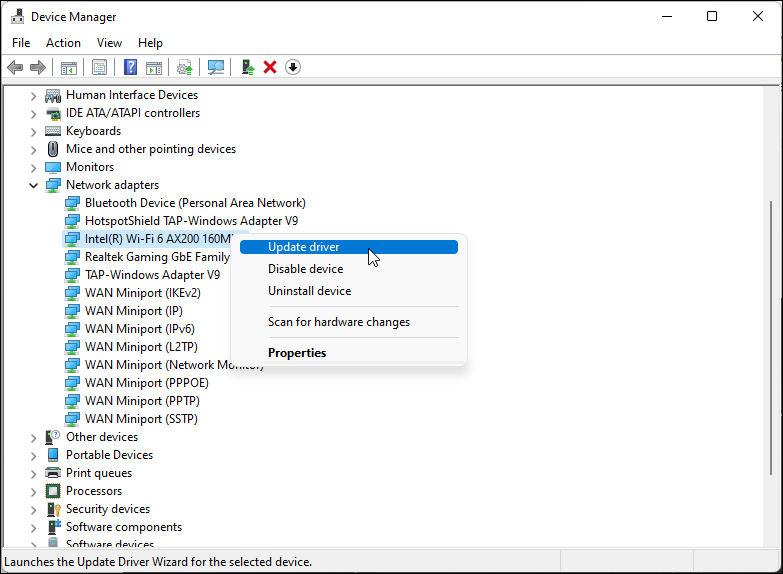
- Right-click on your Wi-Fi device. For example, Intel (R) Wi-Fi AX200 and select Update driver.
- Select Search automatically for drivers. Windows will scan for new drivers and install them if available.
- Close the Device Manager and check if the Wi-Fi option is restored.
If you can’t locate your network adapter in Device Manager, try our guide to fixing a missing network adapter in Windows and try again.
5
Configure the Network Adapter Power Management Settings
By default, Windows can turn off your network adapter to save power when your computer enters sleep mode. However, this setting can cause Wi-Fi connectivity issues. You can quickly fix this by turning off the power management settings for your network adapter.
- Open Device Manager and expand Network Adapters.
-
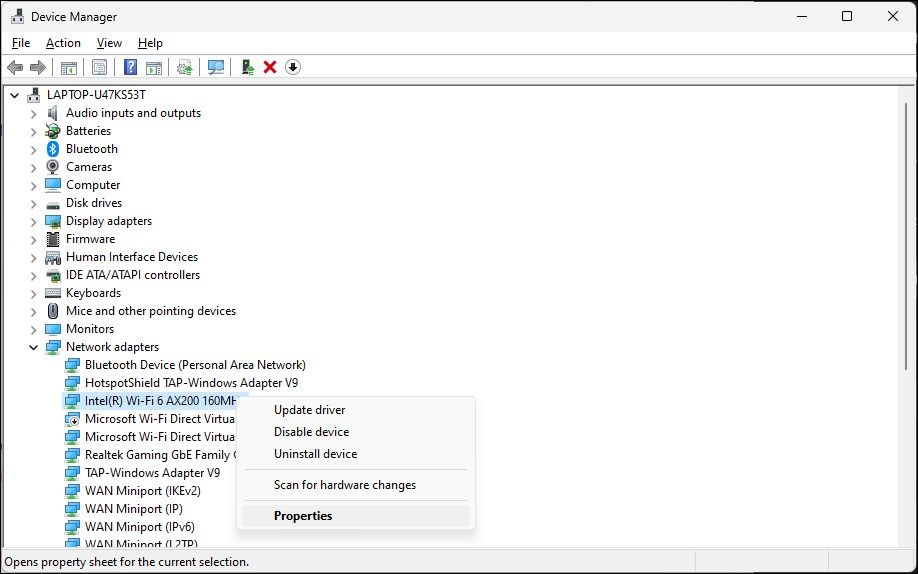
Right-click on your Wi-Fi adapter and select Properties.
-
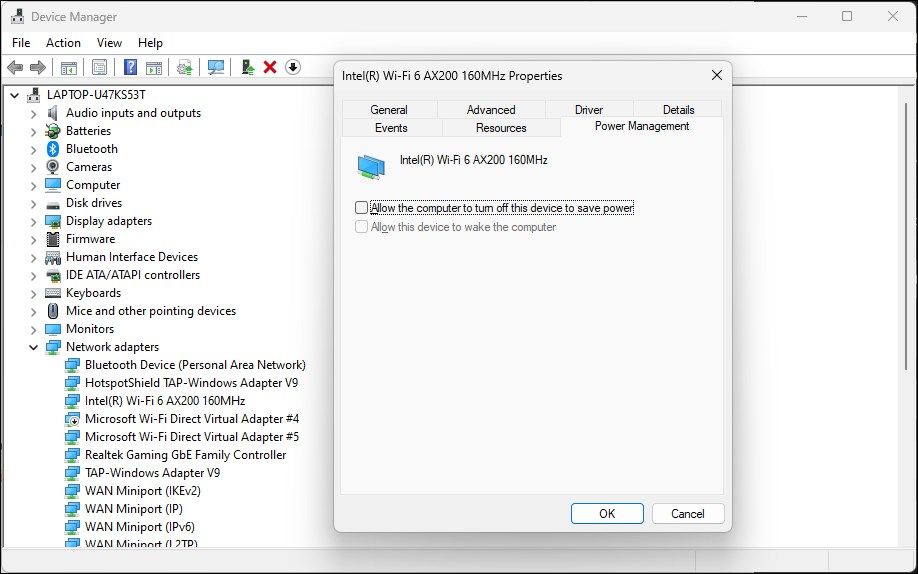
Open the Power Management tab in the Properties dialog.
- Uncheck the Allow the computer to turn off this device to save power option.
- Click OK to save the changes and restart your computer to see if the issue is resolved.
Related
Optimize Your Wi-Fi on Windows With Preferred Band Settings
Ensure Wi-Fi stability and speed.
4
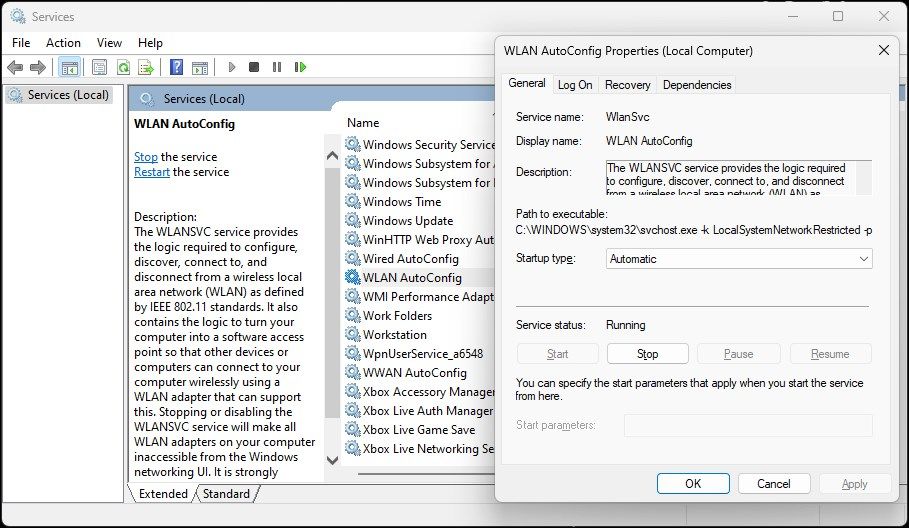
Enable the WLAN Auto Config Service
The WLAN Auto Config is a critical service for your wireless network connections. Check if the service is stopped and restart it to fix issues with your Wi-Fi.
- Press Win + R to open Run.
-
Type services.msc and click OK.
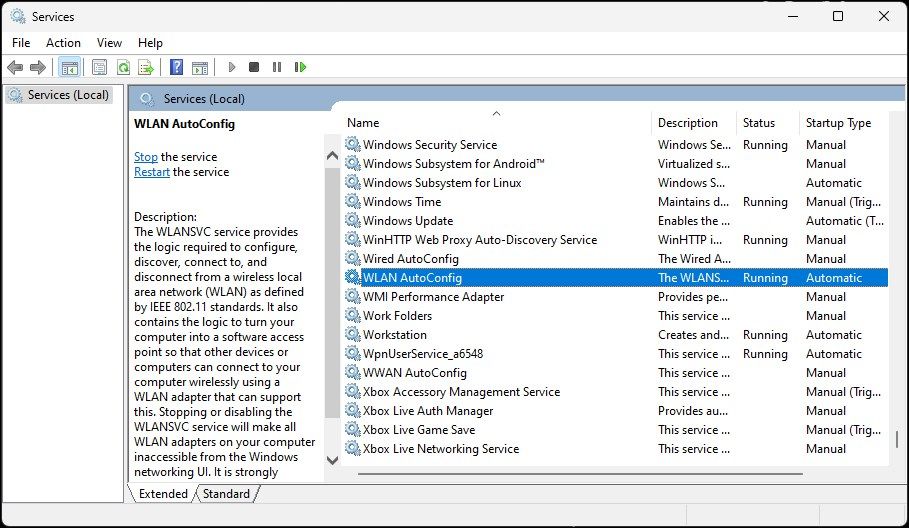
- In the Services snap-in, locate the WLAN AutoConfig service and check if it is running. If not, right-click and select Properties.
-
In the Properties dialog, click the Startup type drop-down and select Automatic.
- Select Start.
- Choose Apply and OK to save the changes.
Related
How to Configure Windows for a Safer Wi-Fi Connection
Browse the web with peace of mind.
3
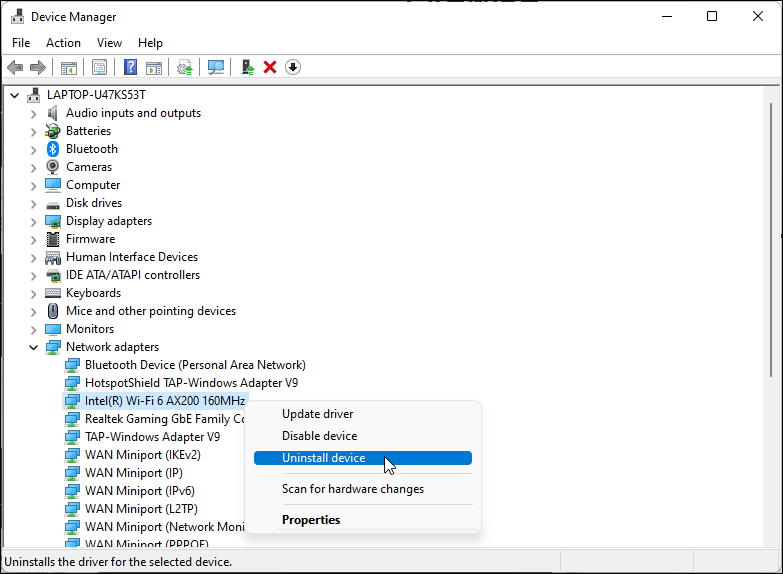
Reinstall the Network Adapter Driver
You can also reinstall the network adapter device. This process will remove and reinstall the network device driver, fixing common issues.
- Open Device Manager and expand the Network adapter section.
-
Right-click the Wi-Fi device and Uninstall device. Click the Uninstall button to confirm the action.
- Once uninstalled, click Action in the Device Manager toolbar and select Scan for hardware changes. Windows will scan for missing but connected devices and reinstall the necessary drivers.
If the issue persists, follow these steps to perform a complete shutdown and reinstall the drivers.
- Make sure to save any unsaved work or documents.
- Open Device Manager and uninstall the Wi-Fi adapter driver.
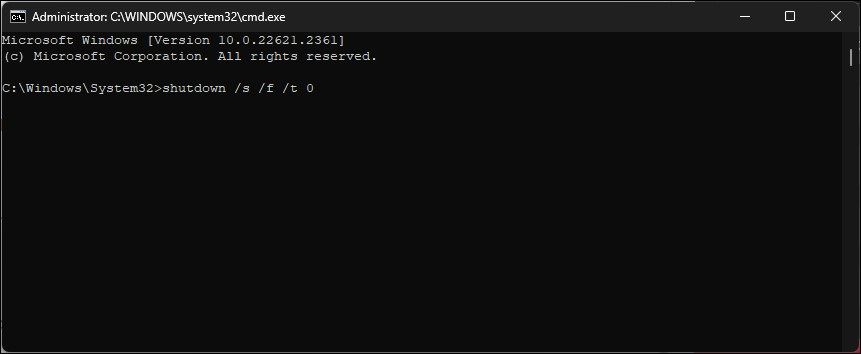
- Once uninstalled, press the Win key and type cmd.
-
Right-click Command Prompt and select Run as administrator.
-
In the Command Prompt window, type the following command to perform a total shutdown of your computer:
shutdown /s /f /t 0 - After the restart, Windows will automatically reinstall the Wi-Fi device driver and restore Wi-Fi connectivity.
2
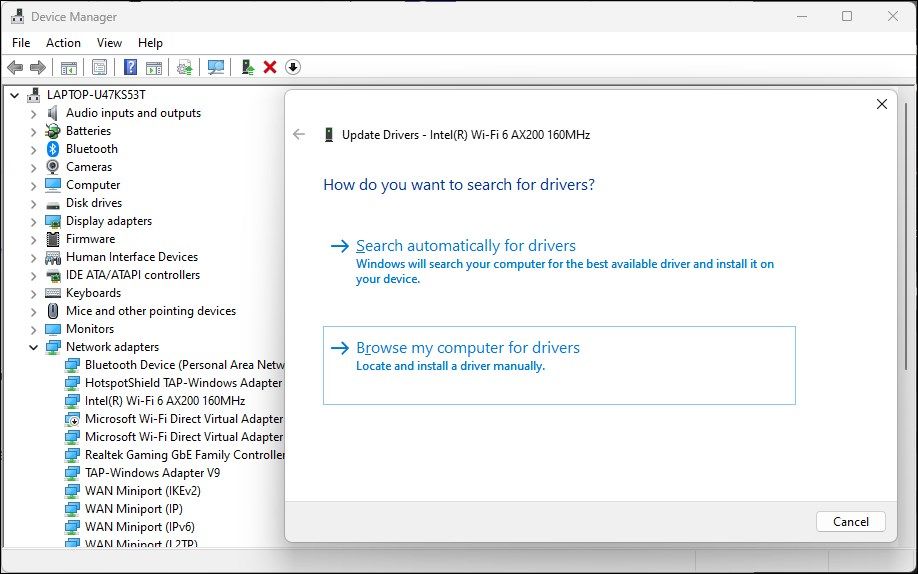
Manually Reinstall the Wi-Fi Device Driver
You can manually install the Wi-Fi device driver to restore a missing Wi-Fi option. Here’s how to do it:
- Open Device Manager and expand the Network Adapters section.
-
Select and right-click your Wi-Fi adapter and select Update Driver.
-
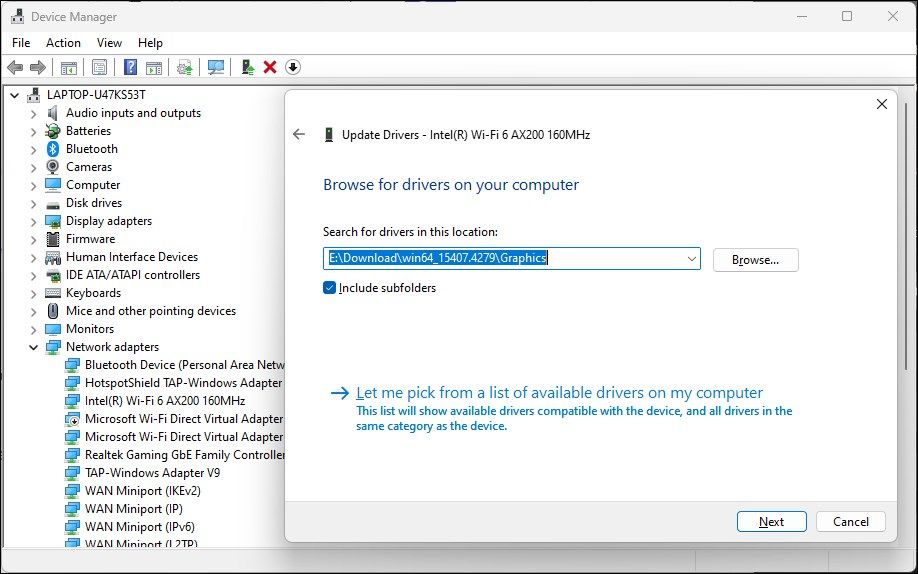
Select Browse my computer for drivers.
-
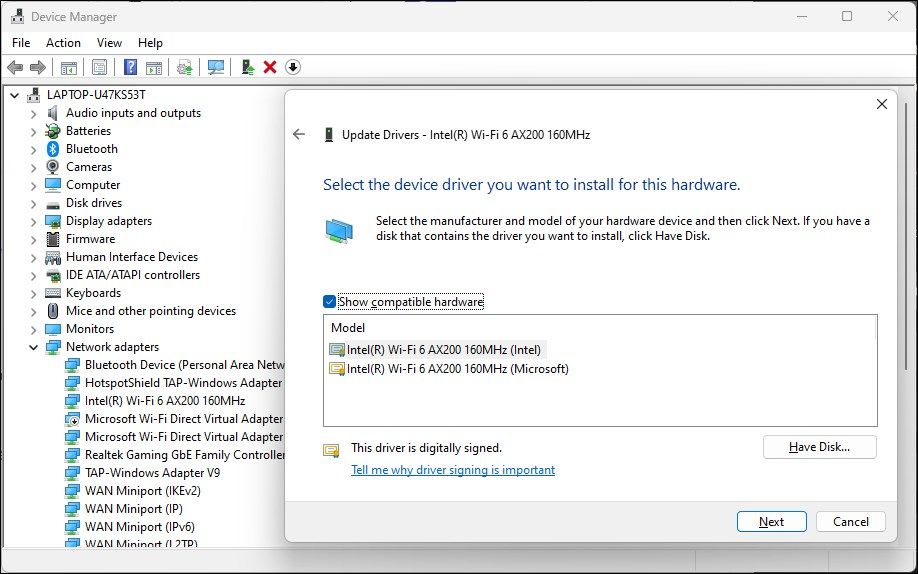
Select the Let me pick from a list of available drivers on my computer option.
- Select the first driver in the list and click Next. Device Manager will start installing the selected driver. Once completed, check if your Wi-Fi is working.
1
Perform a Network Reset
Windows 11 offers a built-in option to perform a network reset. This process will remove and reinstall the network adapters, including other networking components, to fix problems triggered due to incorrect network configuration.
- Open Settings and click the Network & Internet tab in the left pane.
-
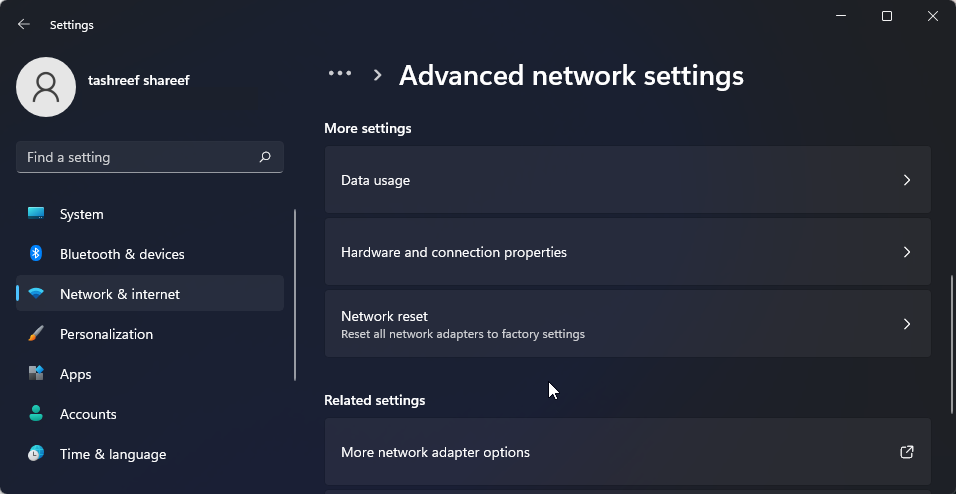
Scroll down and click Advanced network settings to view all network devices and the network reset option.
-
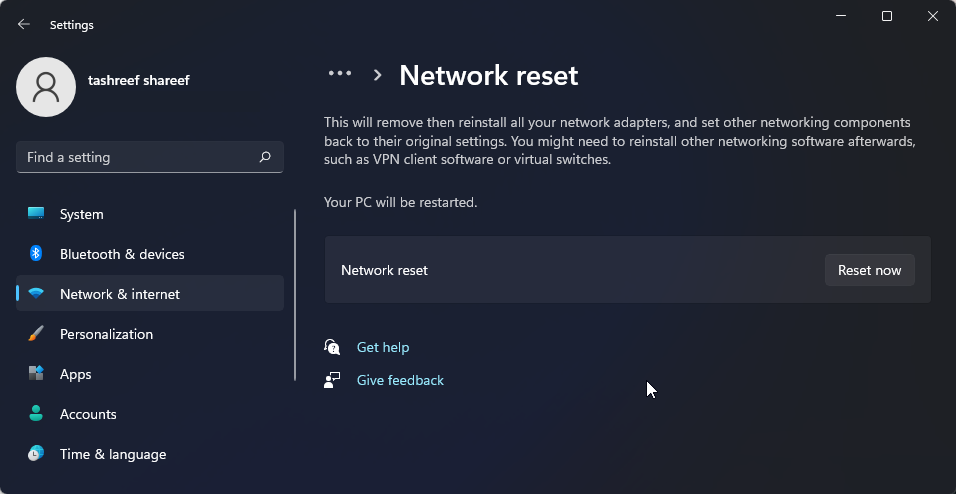
Scroll down to the More settings section and click Network reset.
- Click Reset now for the Network reset option. Click Yes to confirm the action.
- Once the reset is complete, you should have the Wi-Fi connection restored. However, after the reset, you might need to reinstall and reconfigure other networking devices and software.
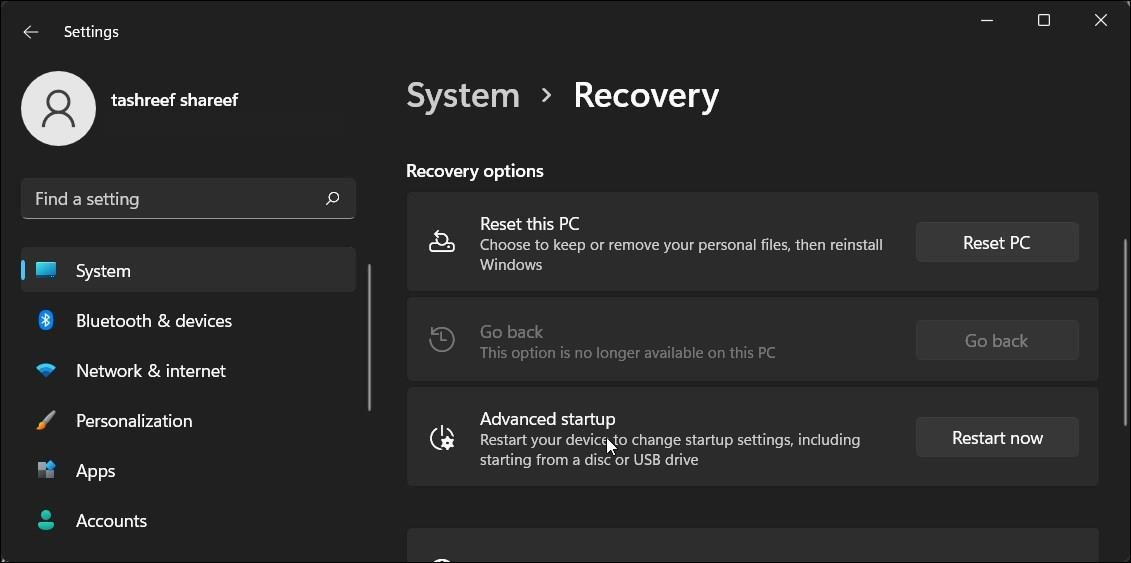
Finally, if the problem persists, consider going back to the previous version of Windows 11. This is particularly useful if the Wi-Fi connectivity issue occurs after performing an upgrade.
To do this, open Settings > System > Recovery. Under Recovery options, click the Go back button and follow the on-screen instructions to restore the earlier version of Windows.
This feature, however, is time-sensitive and only available for ten days after performing an upgrade. You can extend the 10-day rollback period to 60 days in Windows 11.
Wi-Fi in Windows 11 can stop working for several reasons. However, you can often fix it using the built-in network troubleshooter. Additionally, reinstall or update the network drivers to fix the problem. If the system still refuses to see your wireless network, check your Wi-Fi card for hardware issues. You can replace the faulty Wi-Fi card or opt for a Wi-Fi dongle as a quick plug-and-play solution.




Leave a Comment
Your email address will not be published. Required fields are marked *