Summary
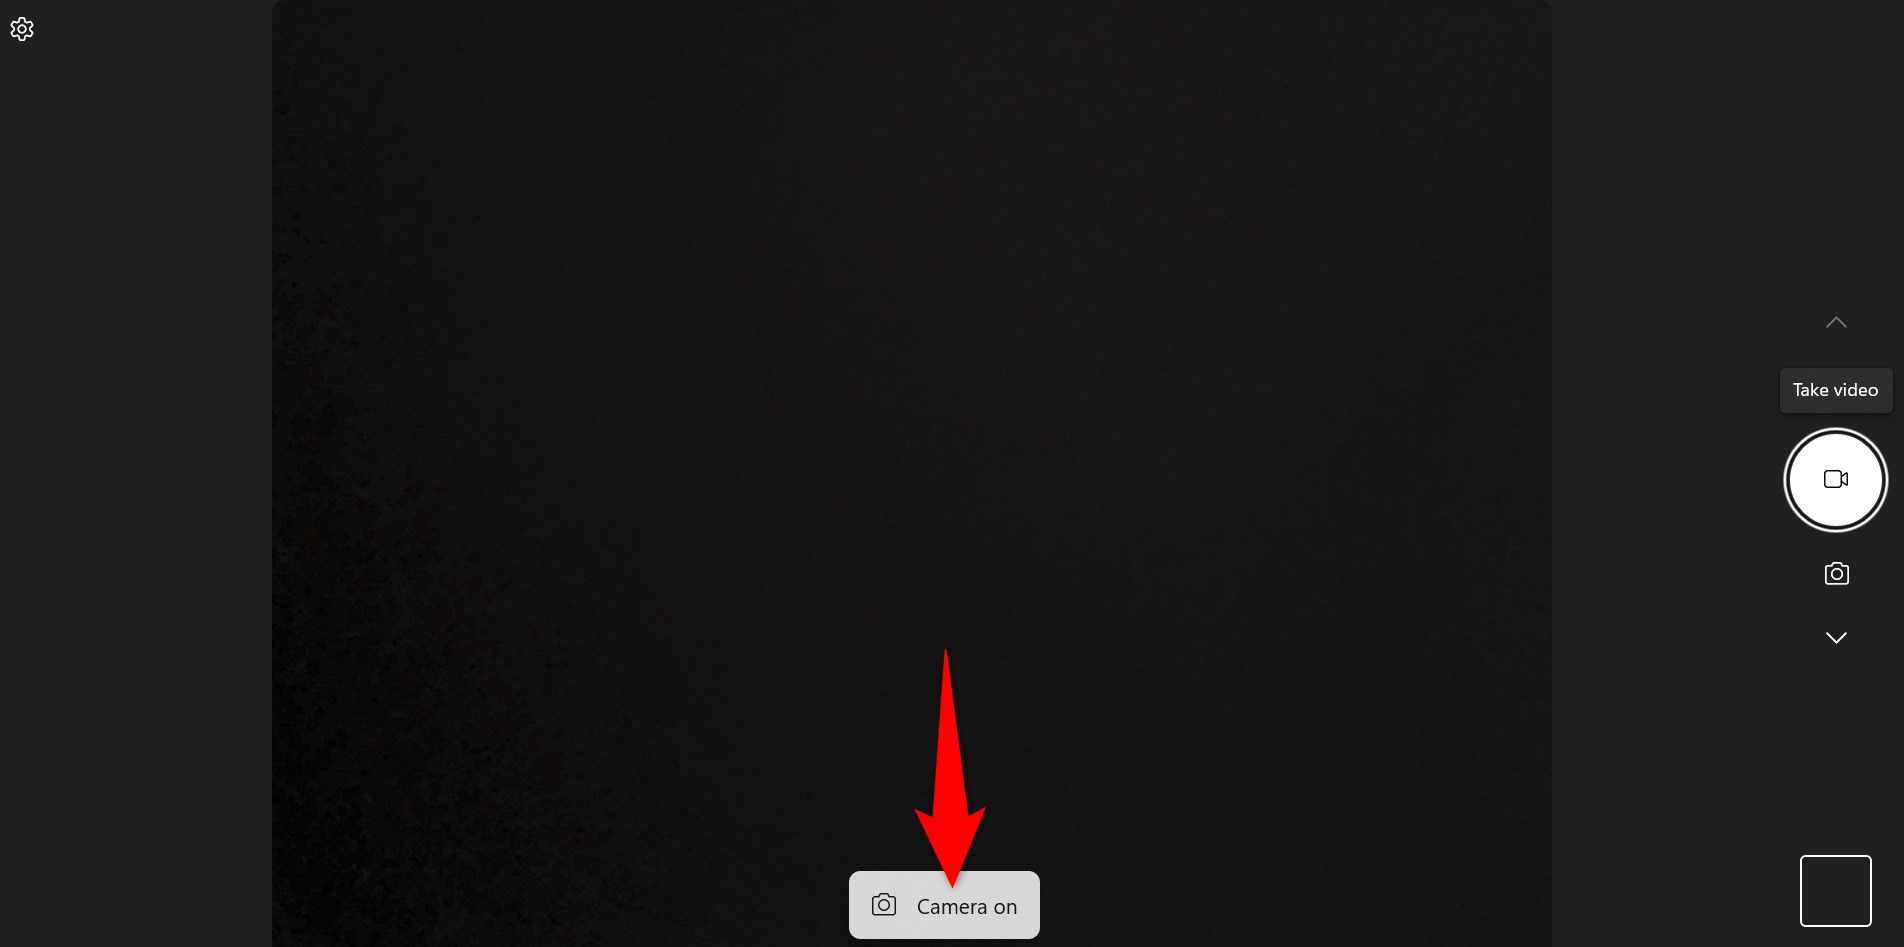
- If an app is using your camera, Windows 11 will display a “Camera On” toast notification. If an app is using your mic, you’ll see the mic icon in the system tray.
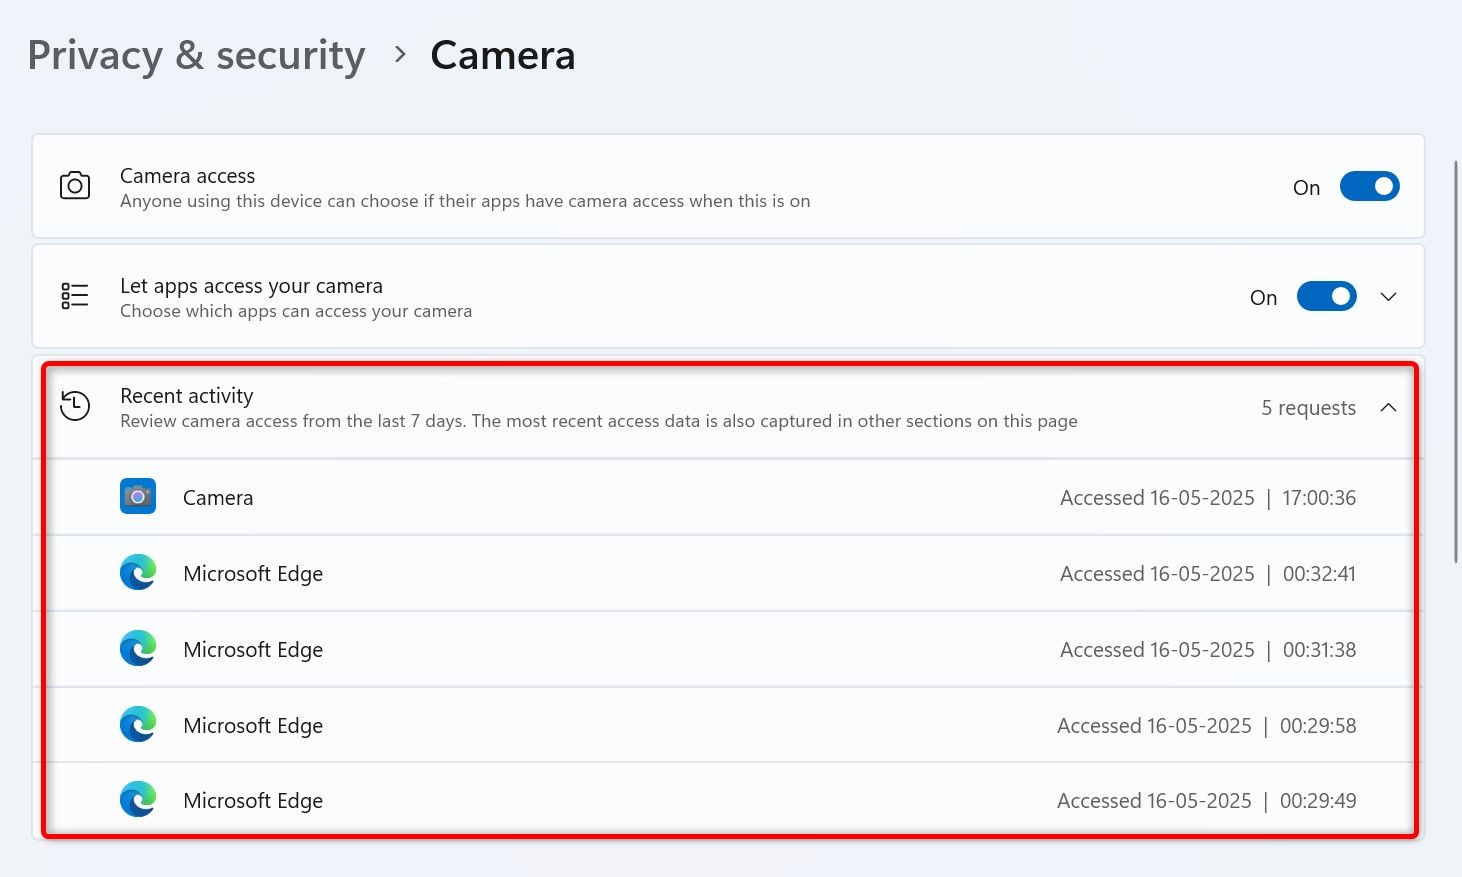
- To view the apps that have recently accessed your camera or mic, head into Settings > Privacy & Security, choose “Camera” or “Microphone,” and click “Recent Activity.”
- You can disable camera or mic access for all or specific apps from Settings.
If you’re privacy-conscious and want to know what apps are accessing your camera or microphone, you can use the built-in tools on your Windows 11 PC to do that. I’ll show you how.
Check the Camera Notification or the Mic Icon
When an app accesses your PC’s camera, Windows 11 displays a toast notification saying Camera On. This indicates an app has activated your PC’s camera. When the app stops using the camera, you’ll see another notification saying Camera Off. Also, on many computers, you’ll see the light beside the physical camera lit up, indicating the camera is in use.
When an app starts using your PC’s microphone, you’ll see the mic icon in the system tray (the bottom-right corner). Hover over this icon to see which app is using your mic.
Related
How to Secure Your Webcam on Windows 11
Prevent anyone from seeing your webcam footage.
Use Settings to See the Apps That Have Recently Accessed Your Camera or Mic
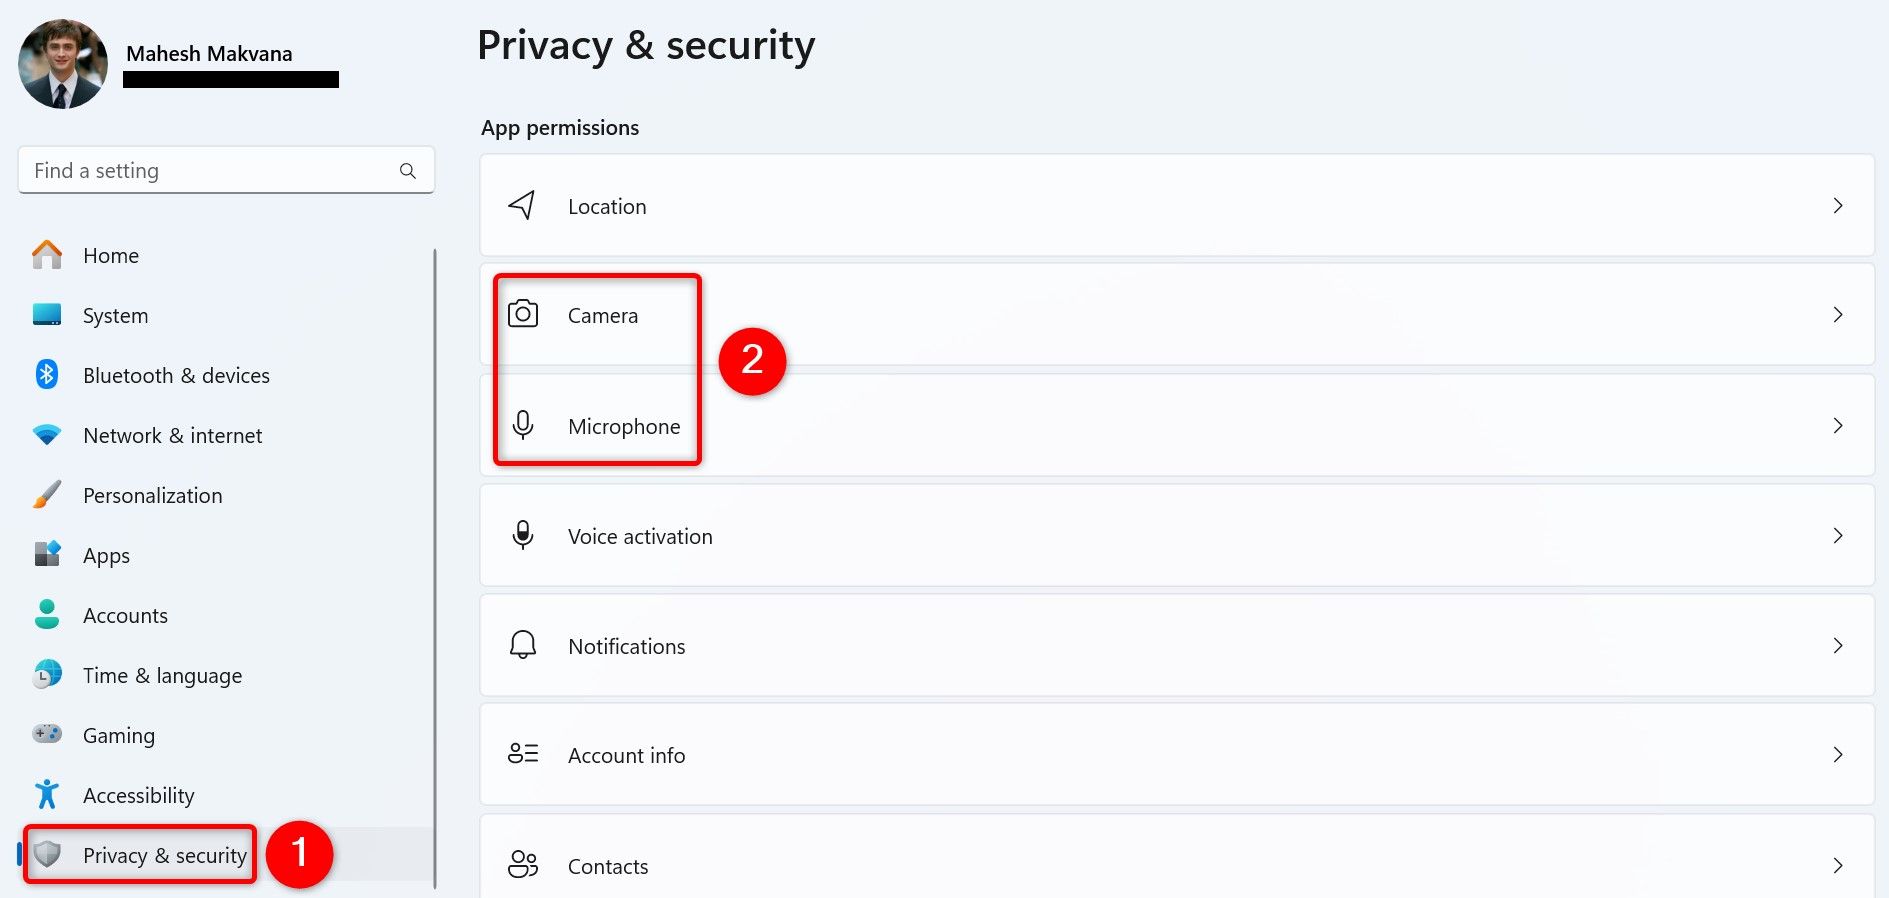
To know which apps have recently accessed your PC’s camera or mic, use the Settings app. To do that, open Settings by pressing Windows+i. From the left sidebar, select “Privacy & Security.” On the right pane, in the App Permissions section, choose “Camera” or “Microphone.”
On the following page, click the “Recent Activity” section. You’ll see the list of apps that have accessed your camera or mic. You’ll also see the date and the exact time when these apps accessed your PC’s equipment.
Prevent an App From Accessing Your Camera or Mic
If you don’t want an app to be able to access your camera or mic, use the Settings app to disable access for that app. Start by opening Settings using Windows+i. From the left sidebar, select “Privacy & Security.” On the right pane, in the App Permissions section, choose “Camera” or “Microphone.”
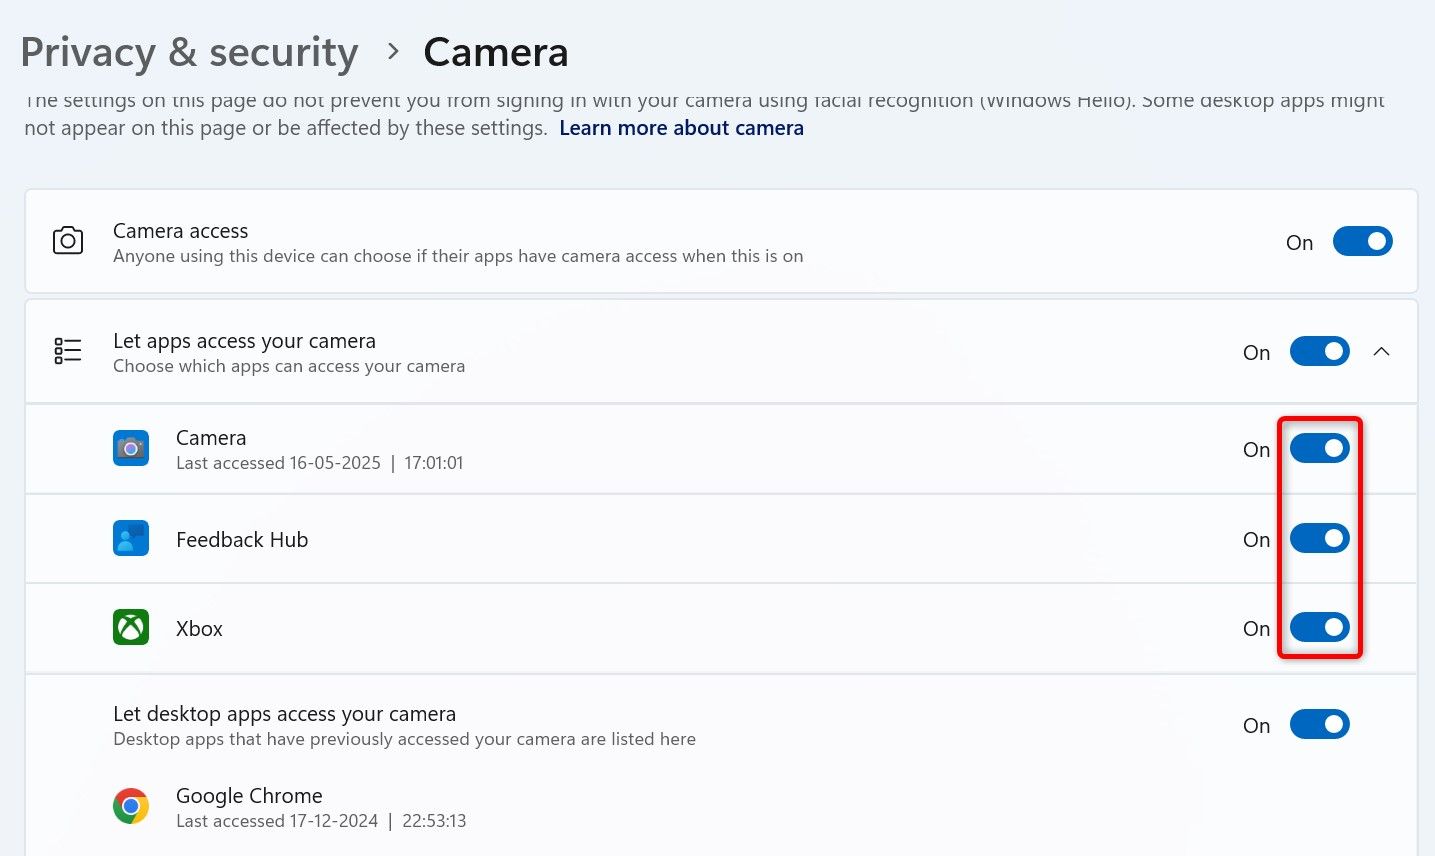
To disable camera or mic access for a specific app, in the Let Apps Access Your Camera/Microphone section, find that app. Next to the app, turn off the toggle.
To disable camera or mic access for all apps, at the top, disable the “Camera Access” or the “Microphone Access” toggle.
Related
Is Putting Tape Over Your Webcam Actually a Good Idea?
While it’s absurd that people are putting tape over their webcams, it’s doubly absurd that it’s actually kind of a good idea.
Prevent Websites From Accessing Your Camera or Mic
If you suspect a website is accessing your camera or mic in a web browser, you can turn off camera or mic access for all sites or on a per-site basis in Chrome, Firefox, and Edge. Here’s how.
Google Chrome
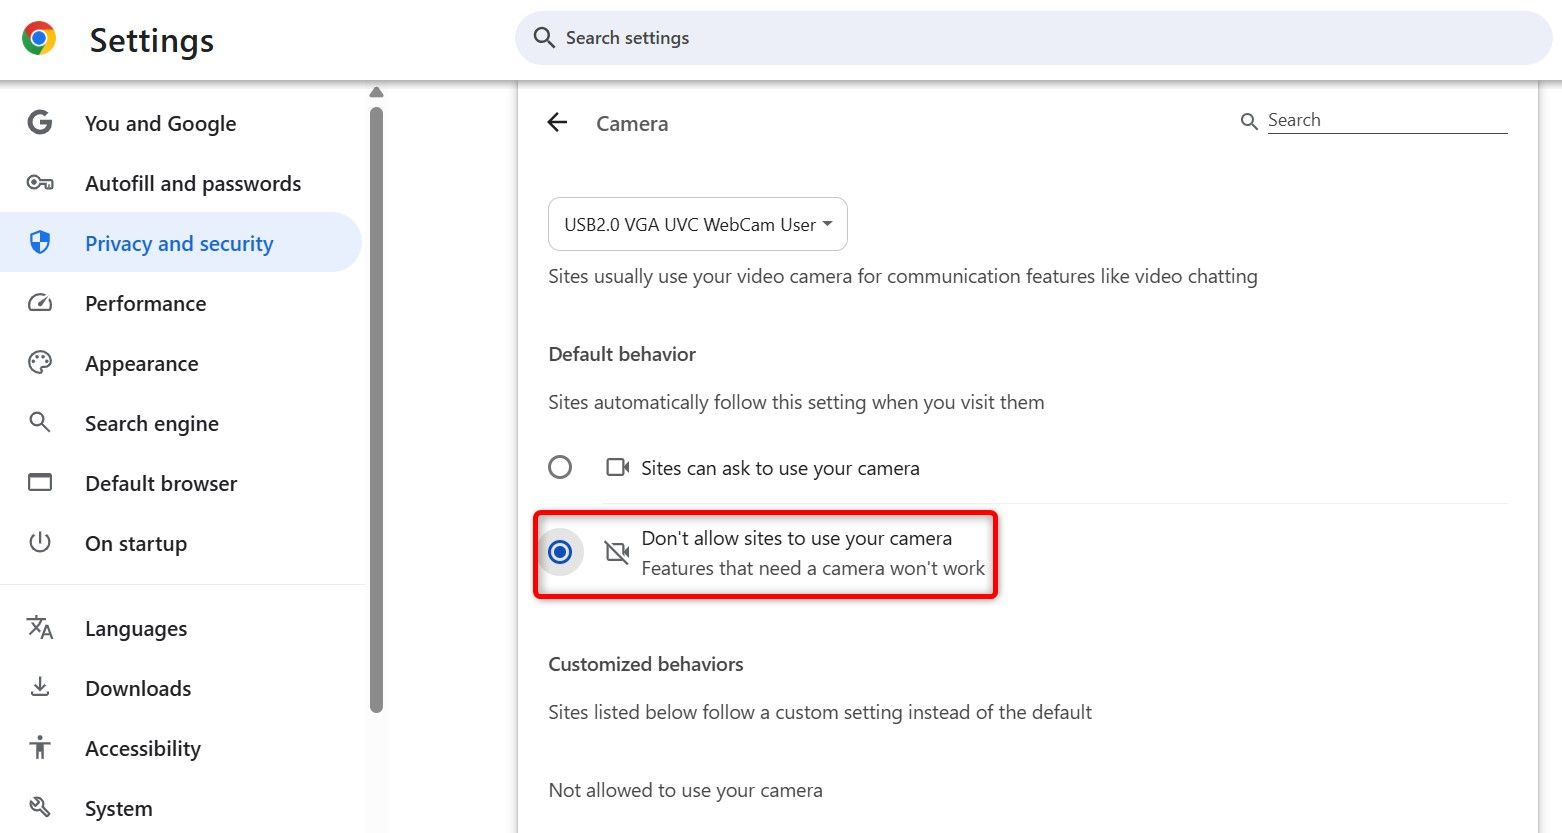
Launch Chrome, select the three dots in the top-right corner, and choose “Settings.” From the left sidebar, select “Privacy and Security.” On the right pane, choose Site Settings > Camera/Microphone.
To disable the camera or mic access on a per-site basis, use the appropriate options. To disable access for all sites, turn on the “Don’t Allow Sites to Use Your Camera/Microphone” option.
Mozilla Firefox
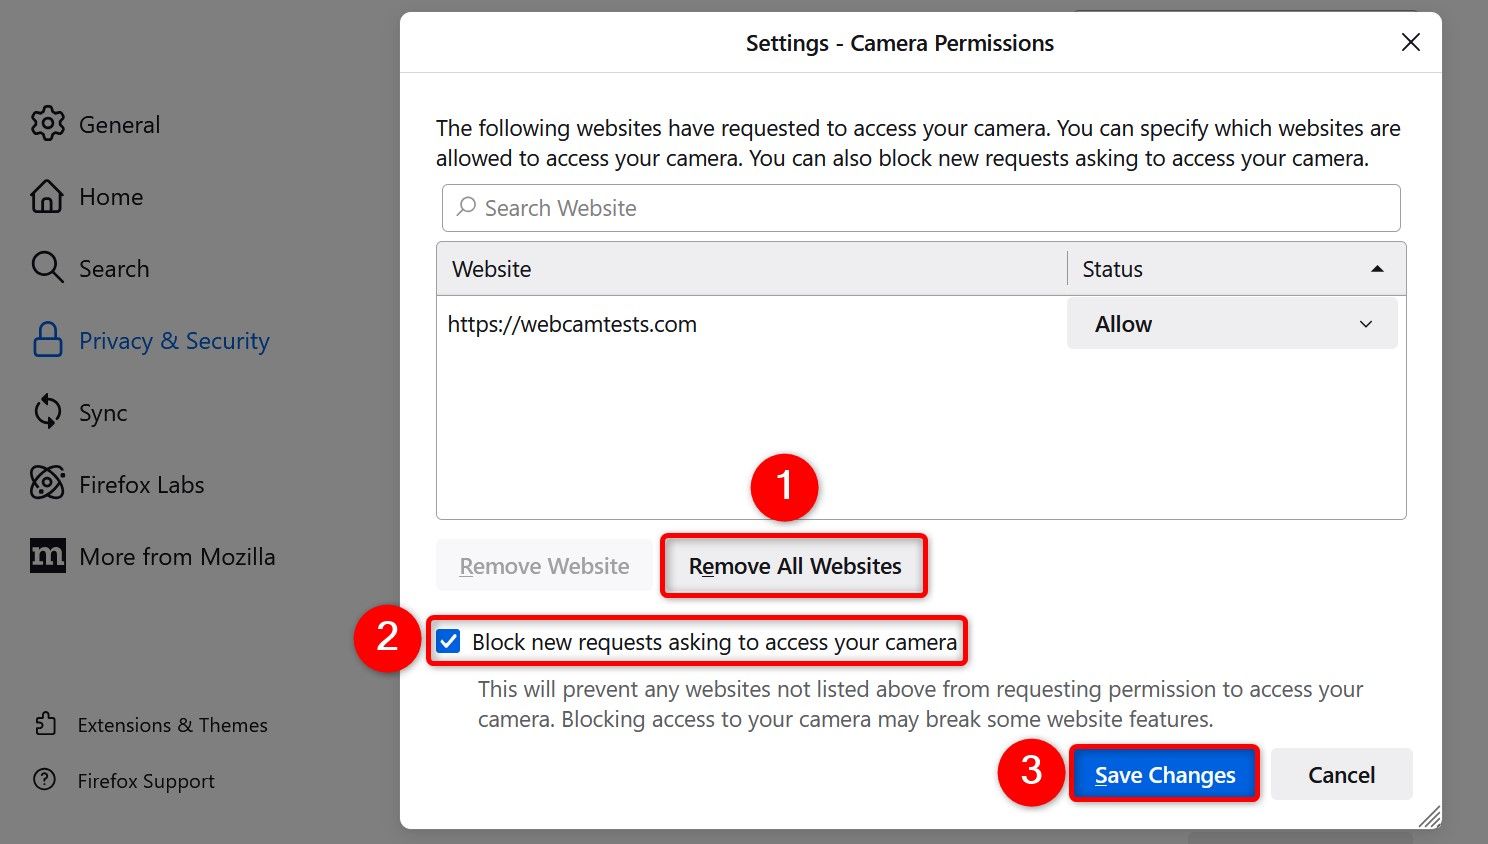
Open Firefox, click the hamburger menu (three horizontal lines) in the top-right corner, and choose “Settings.” From the left sidebar, select “Privacy & Security.” Scroll down to the Permissions section. Next to Camera or Microphone, choose “Settings.”
You can turn off camera or mic access on a per-site basis. To disable access for all sites, click “Remove All Websites,” turn on “Block New Requests Asking to Access Your Camera/Microphone,” and choose “Save Changes.”
Microsoft Edge
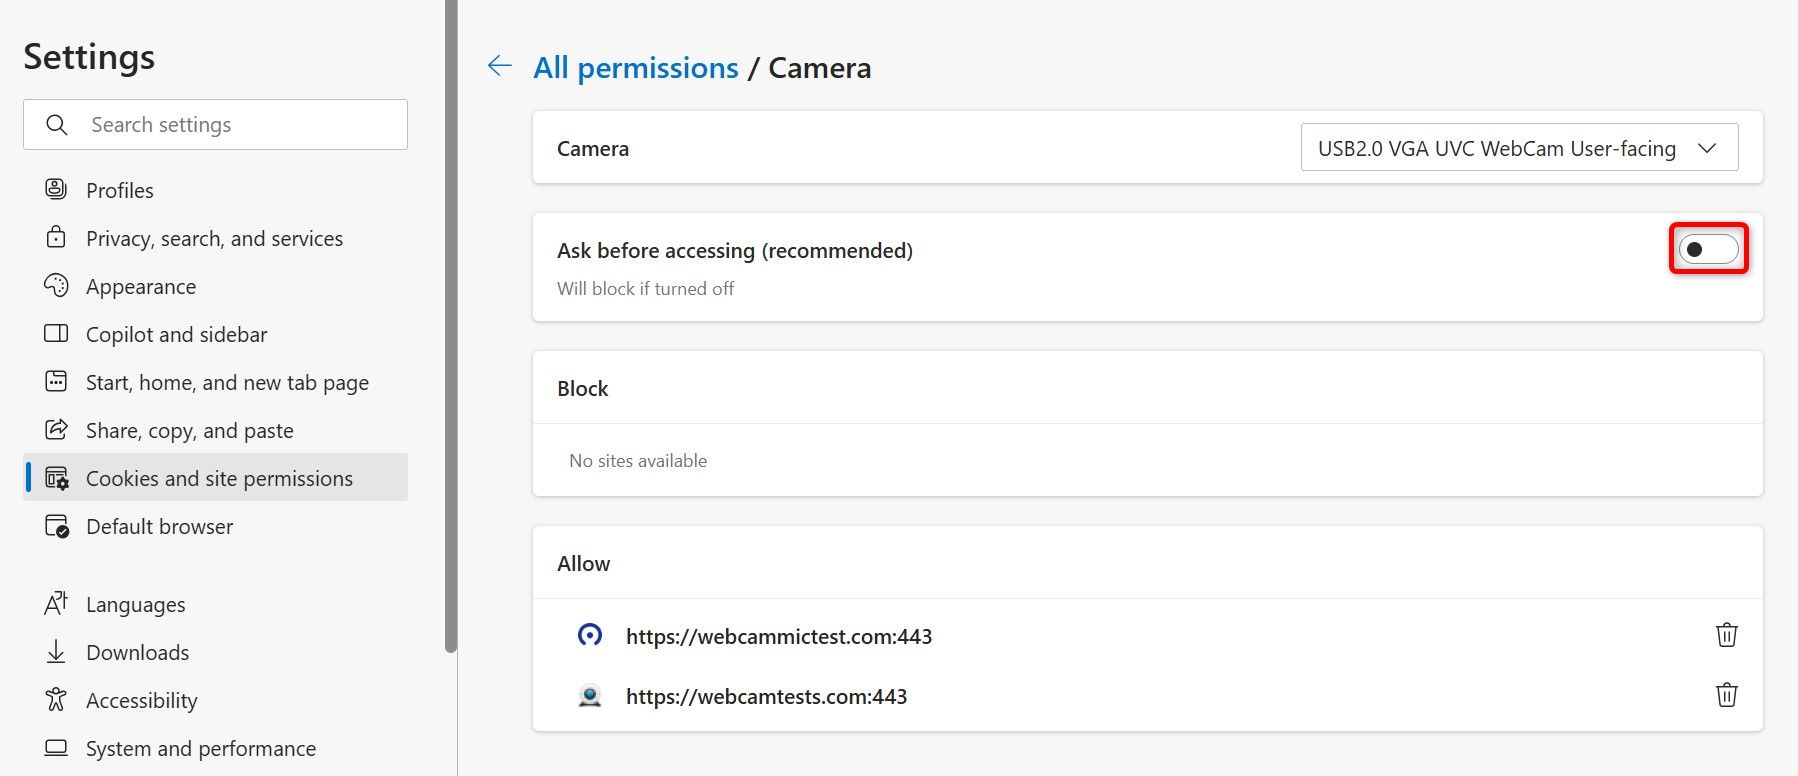
Access Edge, click the three dots in the top-right corner, and choose “Settings.” In the left sidebar, click “Cookies and Site Permissions.” On the right pane, select “All Permissions” and click “Camera” or “Microphone.”
You can disable the camera or mic access for specific sites. To turn off access to these items for all sites, disable the “Ask Before Accessing (Recommended)” toggle.
How to Turn Off Camera and Mic Completely on Windows 11
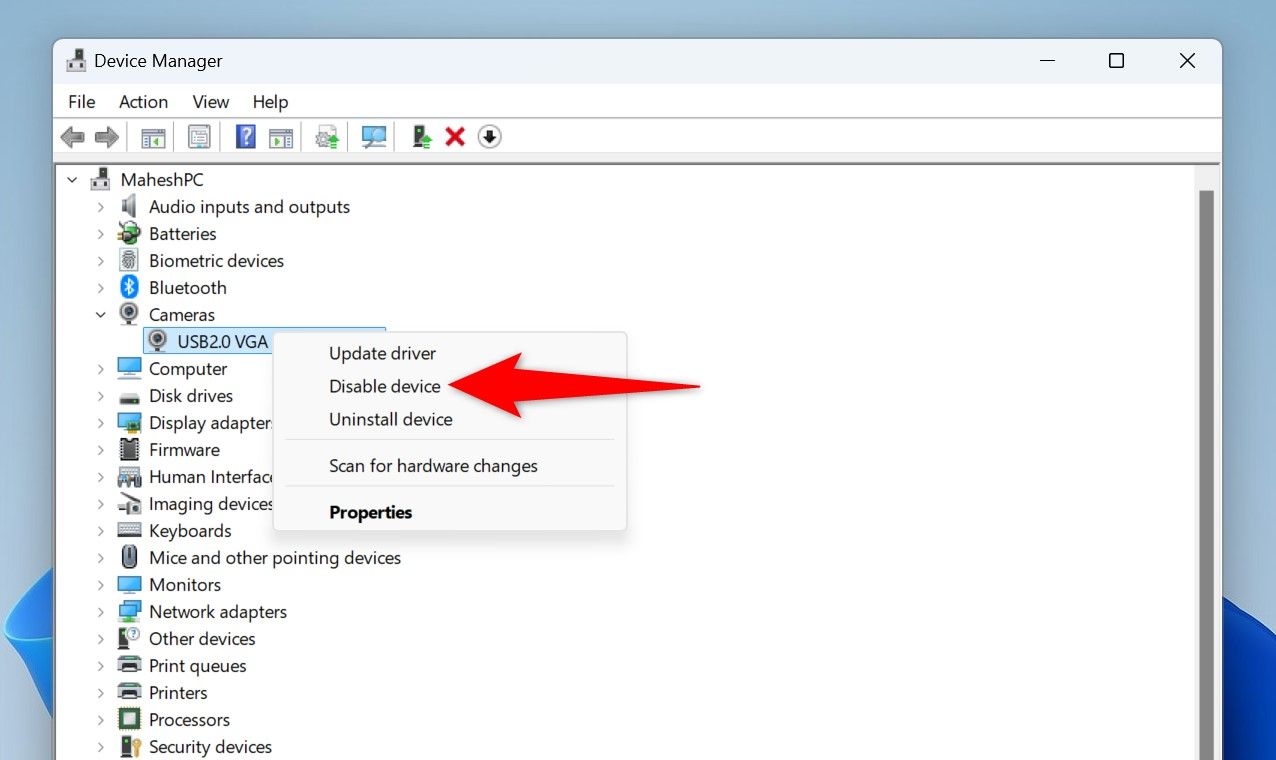
If you don’t want any apps or system utilities to access your camera or mic, you can disable this equipment from Device Manager. This works as though you’ve unplugged your camera or mic from your computer.
Related
How to Disable Your Webcam (and Why You Should)
Once a concern that was the province of the paranoid, years worth of reports and revelations have made it readily apparent that people really can spy on you through your webcam.
To do that, open Windows Search (press Windows+S), type Device Manager, and launch the utility. To disable the camera, expand “Cameras.” To disable the mic, expand “Audio Inputs and Outputs.” Then, right-click your device and choose “Disable Device.” In the prompt that opens, select “Yes.”
In the future, to re-enable your device, right-click the device and choose “Enable Device.”
And that’s how you know what apps are accessing your camera or mic. Like that, there are a few Windows 11 privacy settings you might want to tweak to improve your privacy on your PC.





Leave a Comment
Your email address will not be published. Required fields are marked *