

Six distinct lighting styles are built into the iPhone as Portrait modes. But they aren’t just for selfies. I tried all six lighting styles to see how they work, where they shine, and how to use them for better photos.
Portrait Mode Is So Versatile Now
Portrait mode used to be simple. Its job was to blur the background and make the subject stand out. Now, with the iPhone 16, Apple gives you six portrait lighting effects. Each one brings a different feel. Some are subtle. Others are bold. Depending on the lighting, subject, and background, some modes work better than others.
I spent a week testing them. I tried shooting in daylight, indoors, at night, and under artificial lights. I took photos of people, pets, and even random objects to understand each of them better.
I learned a few things along the way. For instance, they aren’t only for selfies and faces. You can use the Portrait Mode to improve any photo. So, here are my “field notes” with the different portrait modes on the iPhone.
Portrait modes on iOS use depth-sensing technology and advanced algorithms on the phone hardware to analyze the scene and apply virtual lighting adjustments.
1
Natural Light
Simple and Reliable
This is the default setting in Portrait mode. It keeps things natural while softly blurring the background. I always start here for all my shots. You can too for the unvarnished view.
The Natural Light Mode is good for candids and everyday shots. It’s clean and doesn’t mess with the lighting too much. Skin tones stay true, and the effect is subtle. You don’t have to think too much about the details except the light you shoot under.
But it’s easy to stifle your creativity with this. Sometimes, switching to a different mode can give more personality to your photo. The other modes allow you to adjust the intensity, but the Natural Light mode doesn’t have an adjustment slider.
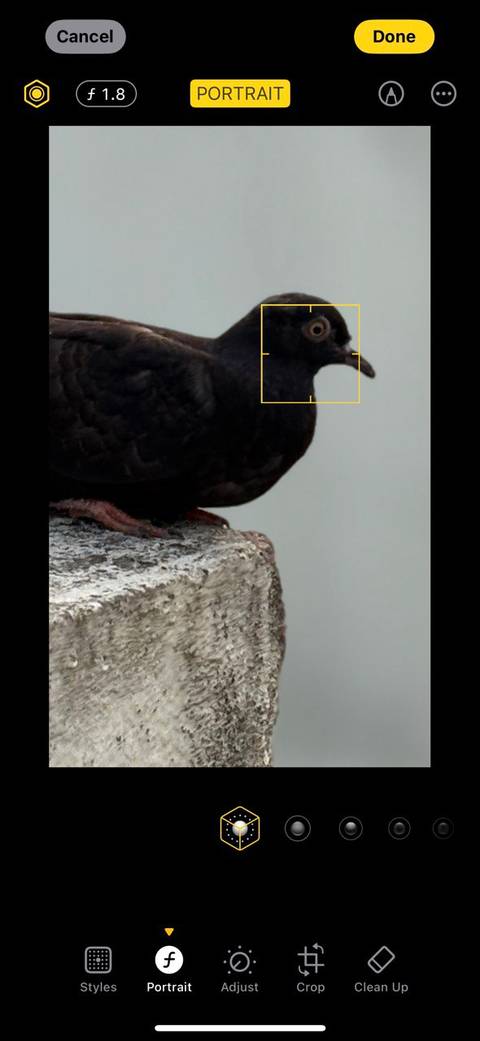

This is like shooting without a filter, so try not to shoot in direct sunlight. Early mornings or evenings near the “Golden Hour” are perfect. Tap to focus and slightly adjust the exposure slider on the iPhone if the lighting feels off.
2
Studio Light
Soft Light Your Subject
Studio Light adds a layer of soft light to your subject. It brightens up the face and smooths shadows, especially around the eyes.
Studio Light tries to mimic the lighting accessories available in professional studios. So it’s ideal for selfies, indoor portraits, your LinkedIn profile photos, and anything that won’t look good under flat lighting.
It has often saved me from a shot I have to take in bad lighting. The boost is subtle without making it “filter-like.”
But don’t use it too often. Faces may appear overly smooth, especially on older subjects as you can see on my face.


Use a neutral background to keep the entire focus on the subject. Switch between Studio Light and Natural Light to compare.
3
Contour Light
Adds Shape and Mood
Contour Light emphasizes the contours of the face. Now, we are getting into the modes that resemble the stronger lighting techniques studio photographers use. This portrait mode deepens shadows and highlights to make the subject look more defined. For instance, you might notice the chins on your face go a bit darker or lighter depending on the light source.
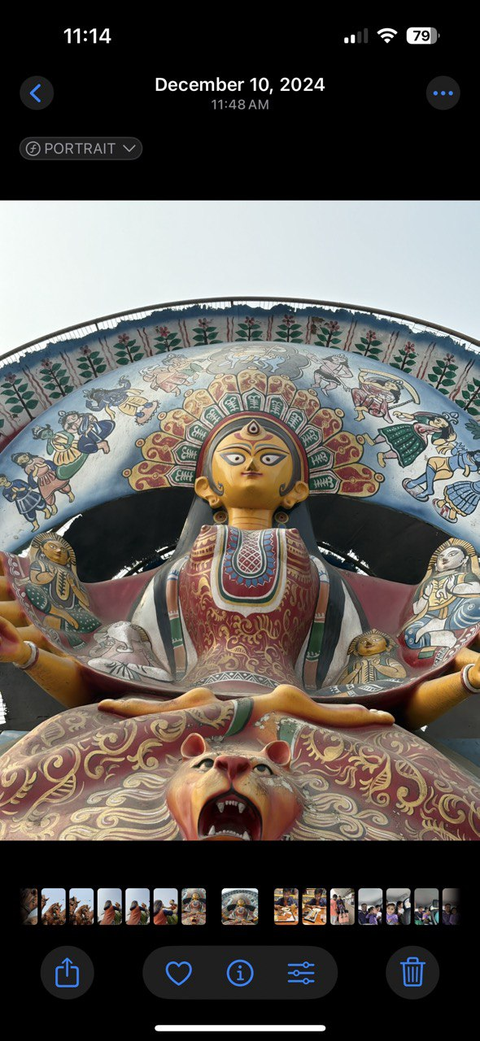
Contour Light is ideal for more stylized portraits and black-and-white photos, as in the screenshots below.
It makes my amateur shots feel professional with little effort. I use it selectively when I want the photo to feel more than a candid snapshot.
You need a bit of contrast to show the effect. Shadows and highlights need a bit of light. So, avoid poorly lighted areas when using this mode. Place your subject near a window for natural side lighting.


Portrait modes aren’t only for selfies. Try this mode on objects, too, and watch it add mood to things like coffee mugs or houseplants.
4
Stage Light
Isolate Your Subject
Stage Light is like shooting against a solid black curtain. It removes the background completely. The black backdrop hides everything and focuses only on the subject.
Stage Light is excellent for dramatic portraits, product shots, or when you want that “spotlight” look. You can also try shooting a great profile picture for your online presence.
As it is dramatic, I use it selectively. When it works, it looks like a studio shoot.
The tricky part is making it work, as the computational edge detection is a hit-or-miss. If your subject (like a pet) is shaggy, the result may look off. As I wear spectacles, the edge sometimes blurs too much. So, keep your subject well-lit and in front of a plain background.

Don’t use it for group shots. Only one subject at a time works well.
5
Stage Light Mono
Bold and Timeless
This is the black-and-white version of Stage Light. It’s high contrast and removes all color. Like Stage Light, it computes in real time and focuses on shape and light.
Stage Light Mono is great for street portraits, serious expressions, and anything you want to give an old-world classic feel.
Using the mode forces me to focus on the person’s face and mood. And, of course, it does make us all look better photographers than we are!
However, it has some of the same issues as Stage Light. Edges can look off. And if the lighting is too flat, the image loses its punch.
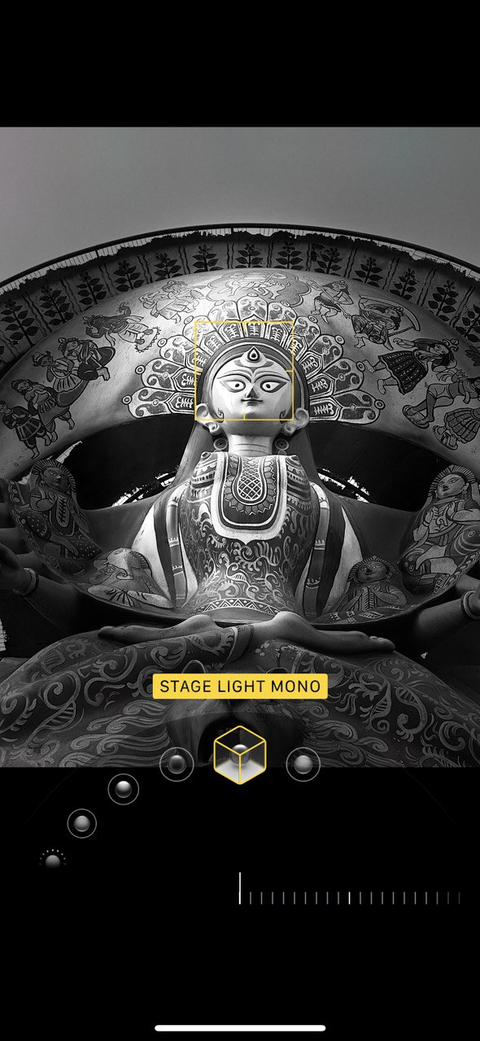
Works well with black outfits or strong facial features. Try it when you want your photography to look minimal.
6
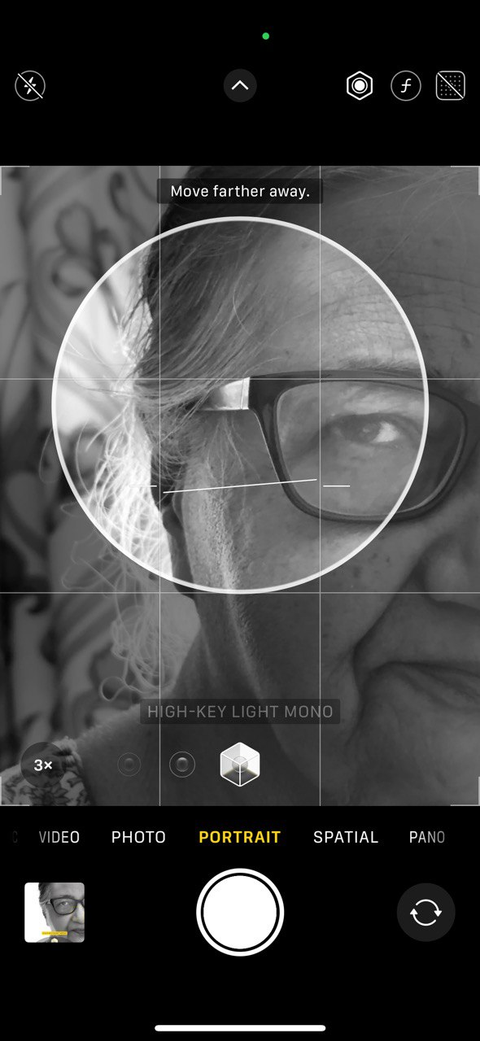
High-Key Light Mono
Clean and Modern
The subject turns grayish in this mode, and the backdrop becomes white. Like all high-key photography, the effect is high contrast and removes all color. Think of it as the opposite of Stage Light. And just like Stage Light, use it sparingly. It is more dramatic and more surreal than any of the other modes.
You can use the high-key for street portraits of pets and people.
When I separate the subject from the background, the effect looks great. I can even catch frizzy hair. The mode’s high-key effect works best with dark or patterned clothes. If the subject is wearing white, they can fade into the background.
But beware of too much white in the photo, as it can feel washed out. Add some contrast.

Don’t shoot against a cluttered background. The portrait mode software replaces it, but its edge detection needs all the help it can get. It’s one of the modes that gives the best results when you directly shoot with it.
How I Use Each Portrait Mode on My iPhone
Portrait mode isn’t one-size-fits-all. Each lighting style gives you a different feel. Some are perfect for casual snaps. Others work better when you slow down and think about the shot. If you see weird edges like transparent spectacle frames, switch to a different mode or edit the photo afterward.
Here’s how I use them:
- Natural Light for candid real-life moments.
- Studio Light for clean, bright portraits.
- Contour Light when I want a bit more depth.
- Stage Light and Stage Light Mono when I’m feeling dramatic.
- High-Key Light Mono for stylish, minimal shots.
You don’t need to remember every rule. Just try each mode out. Take a few extra seconds to choose the right one. You can shoot perfect photos without filters and without using the iPhone’s Photographic Styles. When unsure, I choose the basic Natural Light mode for a shot and then edit with the other modes in post-processing. That said, try shooting with one portrait mode in place and see if it helps you develop an eye for the scene.


Leave a Comment
Your email address will not be published. Required fields are marked *