Tired of those annoying pauses during your favorite shows? After experimenting with my router settings, I found five simple router tweaks that greatly reduced buffering on my devices and allowed me to watch streams uninterrupted.
5
Disable WMM Power Save Mode
WMM (Wi-Fi Multimedia) is a QoS (Quality of Service) feature built into most modern routers that helps prioritize network traffic like voice, video, and background services. While WMM itself may be helpful for network optimization, its power-saving component can actually cause problems.
WMM Power Save (sometimes called Automatic Power Save Delivery) is designed to reduce power consumption on devices by allowing them to enter sleep mode when not actively sending or receiving data. The router buffers incoming data until your device wakes up to receive it. While this sounds great, it can be a problem with streaming performance, causing unstable connections and buffering.
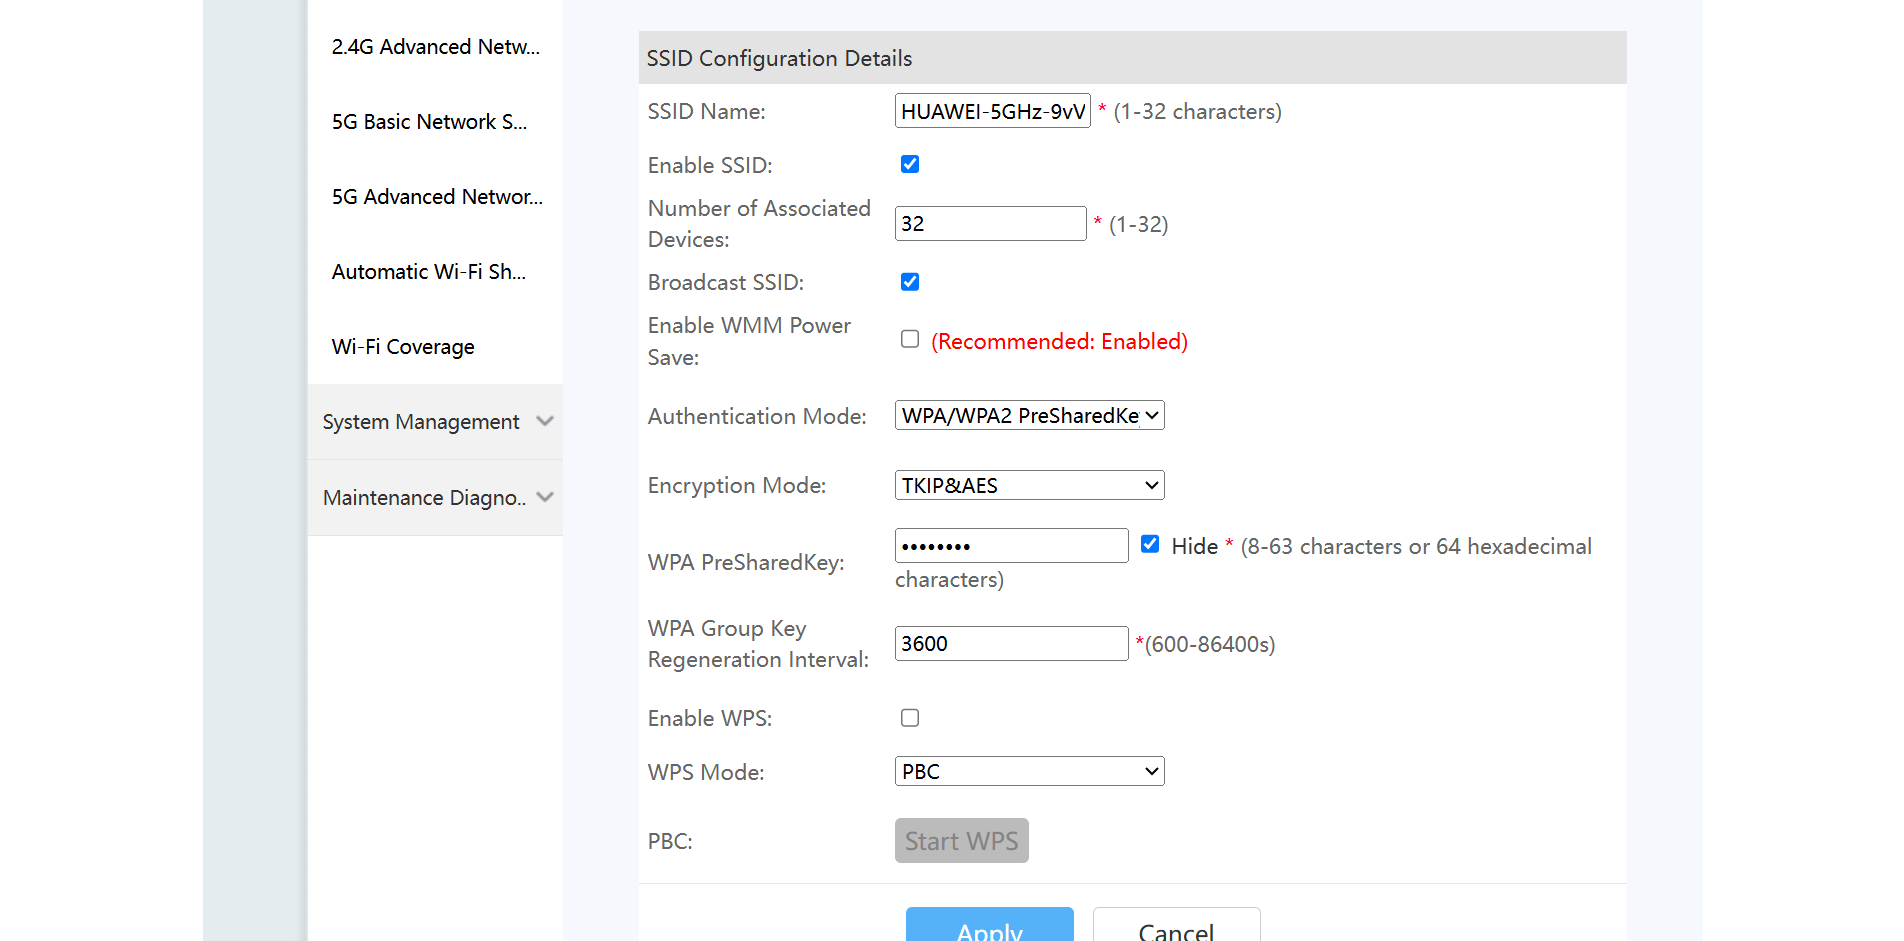
I had a problem when my streaming device would sometimes stop mid-stream, despite having a strong Wi-Fi signal. After playing around with a few settings on my router, disabling WMM Power Save made my Wi-Fi respond more reliably to my streaming devices, reducing latency and buffering.
I accessed the WMM settings by going to WLAN > 5GHz Basic Network Settings in the sidebar menu. Your router may have a slightly different interface, but the settings should be available somewhere within the Wi-Fi settings menu.
4
Change the Default DNS
When you type a website address in your browser, your router uses DNS (Domain Name System) servers to translate that name into the actual IP address that is required to load the page you are visiting. Basically, DNS is the internet’s phonebook. Your ISP automatically assigns default DNS servers to your router, but sometimes they’re not necessarily the fastest or most reliable option.
You can change your DNS to help speed up your internet connection by reducing the time it takes to look up the addresses of your favorite streaming services. The improvement you see depends on the speed and proximity of the DNS server you choose compared to your previous one. Sometimes there are no notable differences, but in some cases, it can be significant, especially if your ISP’s DNS is slow or routes you inefficiently.
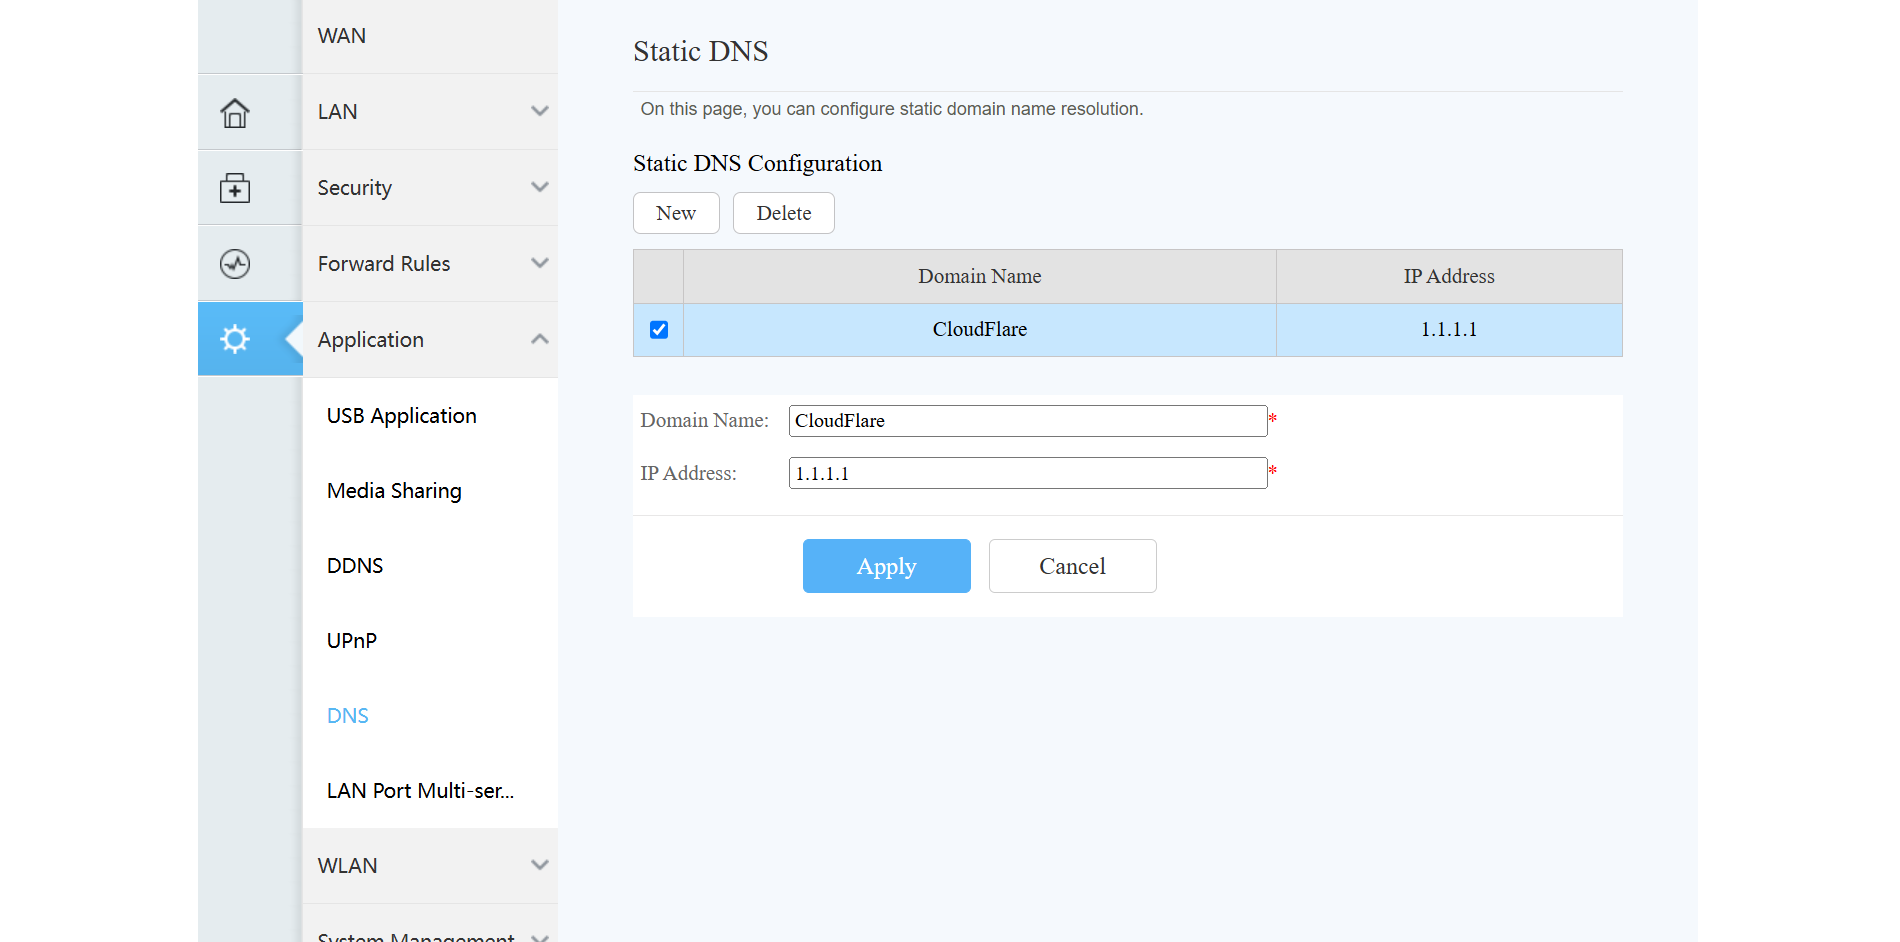
I adjusted the default DNS on my main router by going to Advanced > Network > DNS. Then, I changed the default DNS to Cloudflare’s DNS, 1.1.1.1. Aside from Cloudflare, there are other DNS addresses you can try, including Google’s public DNS (8.8.8.8) and Quad9 (9.9.9.9).
If you’re unsure which DNS will work best in your area, try the DNS Speed Test Benchmark and see which gives you the best performance. Some DNS providers also offer additional features like parental controls or malware blocking that might be useful depending on your needs.
3
Adjust Wi-Fi Channel Width
Wi-Fi frequency bands operate on different channel widths. In general, wider channels can carry more data but are more susceptible to interference from neighboring Wi-Fi networks. On the other hand, narrower channels offer slower transfer rates but tend to be more reliable.
For those living in more rural places, channel widths of 80MHz or even 160MHz will provide the highest performance on a 5GHz frequency band. But if you’re in a busy neighborhood close to many other Wi-Fi access points, you’ll want to go with narrower channel widths such as 40MHz on both 2.4GHz and 5GHz bands.
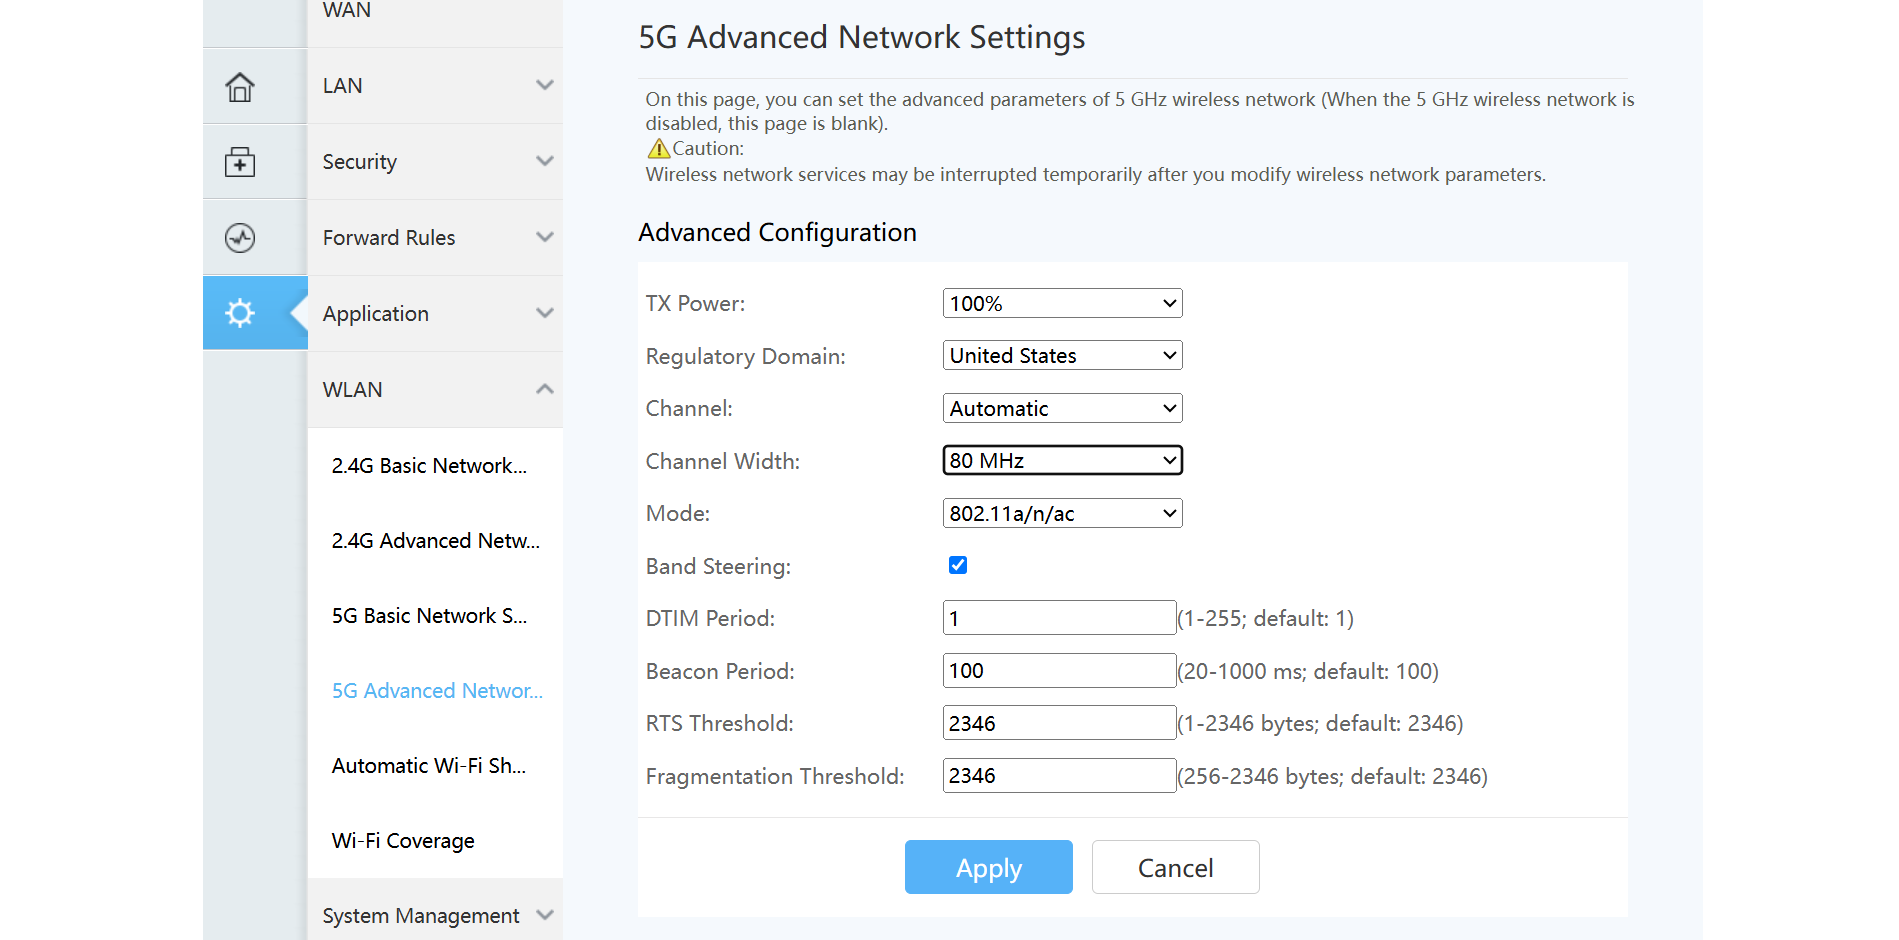
My Wi-Fi router already uses the auto 20/40/80MHz setting. I want to ensure my streaming devices constantly use the widest channel width possible. Luckily, I’m in a rural area, so setting my 5GHz band to only use the faster 80MHz channel width proved to be stable. Since my default setting was already using auto mode, the differences were subtle, but at least I know that my streaming devices always got the fastest possible Wi-Fi connection my router could provide.
2
Configure Traffic Shaping Settings
With traffic shaping (sometimes called QoS), you can set your router to prioritize certain types of internet traffic over others. This ensures that your streaming video gets priority over less time-sensitive activities like downloads or background updates. Without proper traffic shaping, a large download or backup can easily saturate your connection and cause streaming to buffer.
Traffic shaping works by creating bandwidth limits for less critical packets and prioritizing time-sensitive data like video streaming. This ensures your streaming services get a consistent portion of your bandwidth, even during peak usage times.
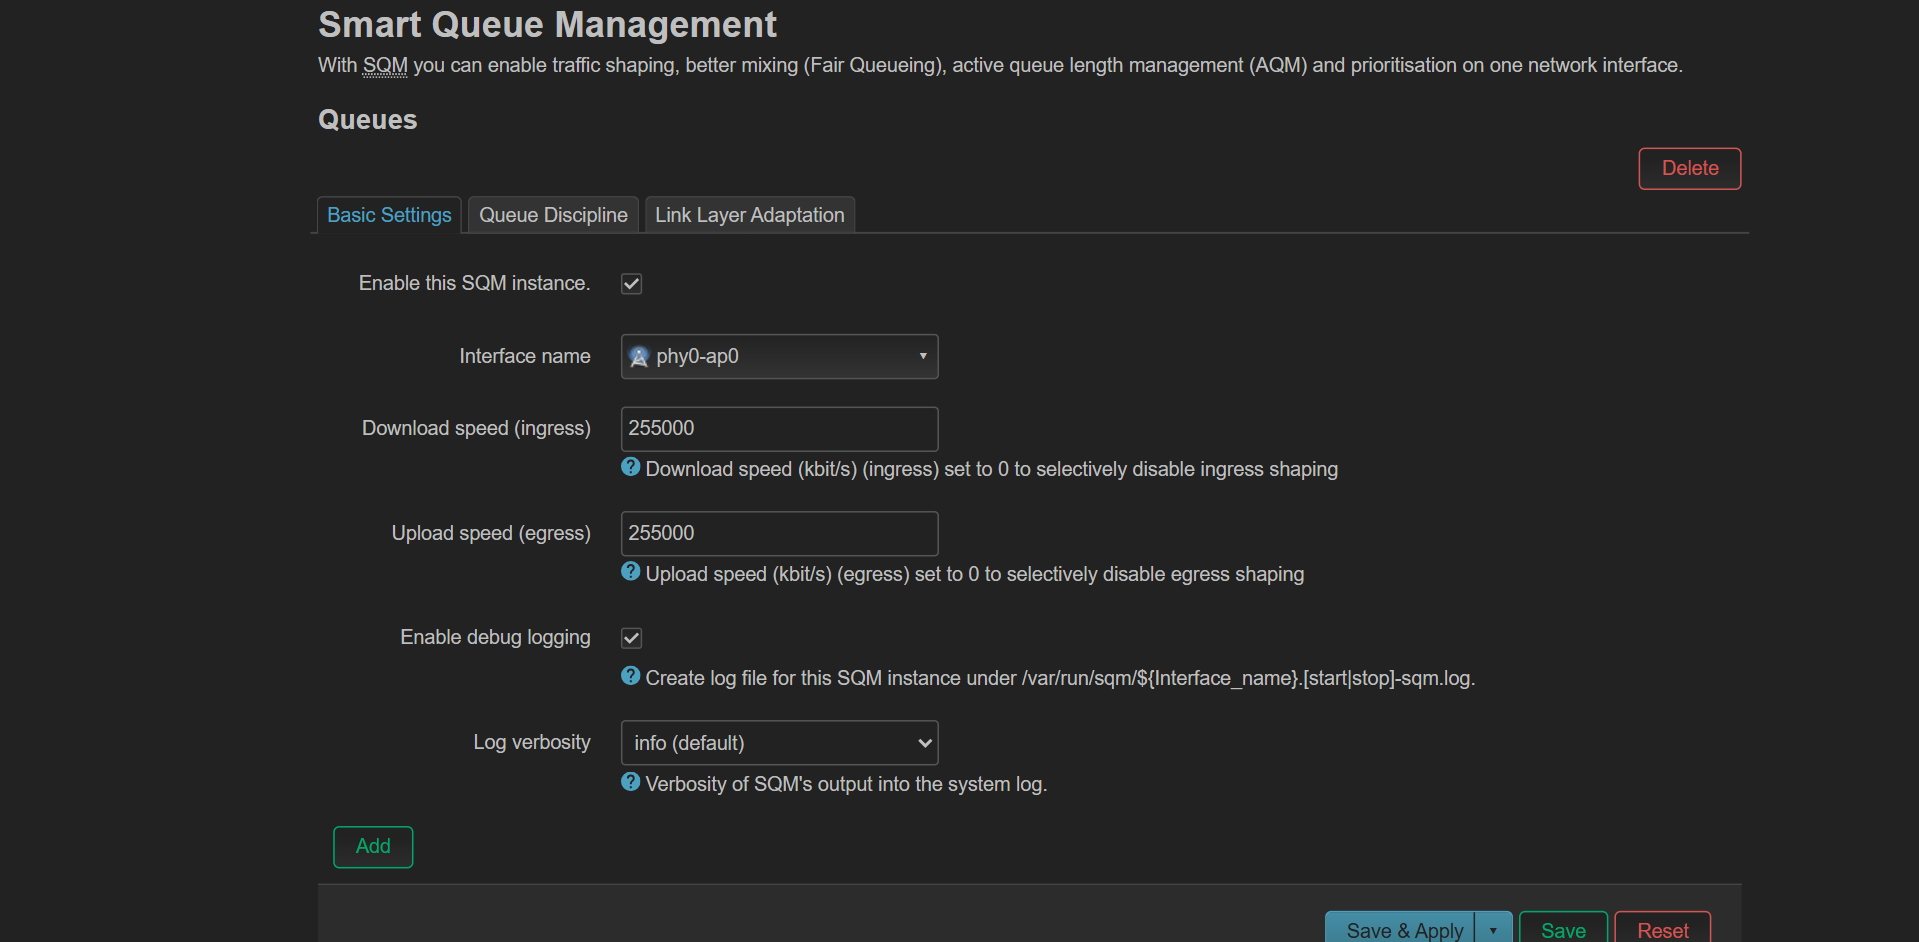
Most routers offer some level of QoS functionality to help control and prioritize network traffic for your devices. However, if your router lacks robust QoS options, you can often gain more control by flashing it with custom firmware or purchasing an affordable third-party router that supports advanced QoS features. I personally had to flash my old router with OpenWRT to use as a wireless bridge, which gave me advanced QoS functionalities.
1
Set Speed Limits on Devices
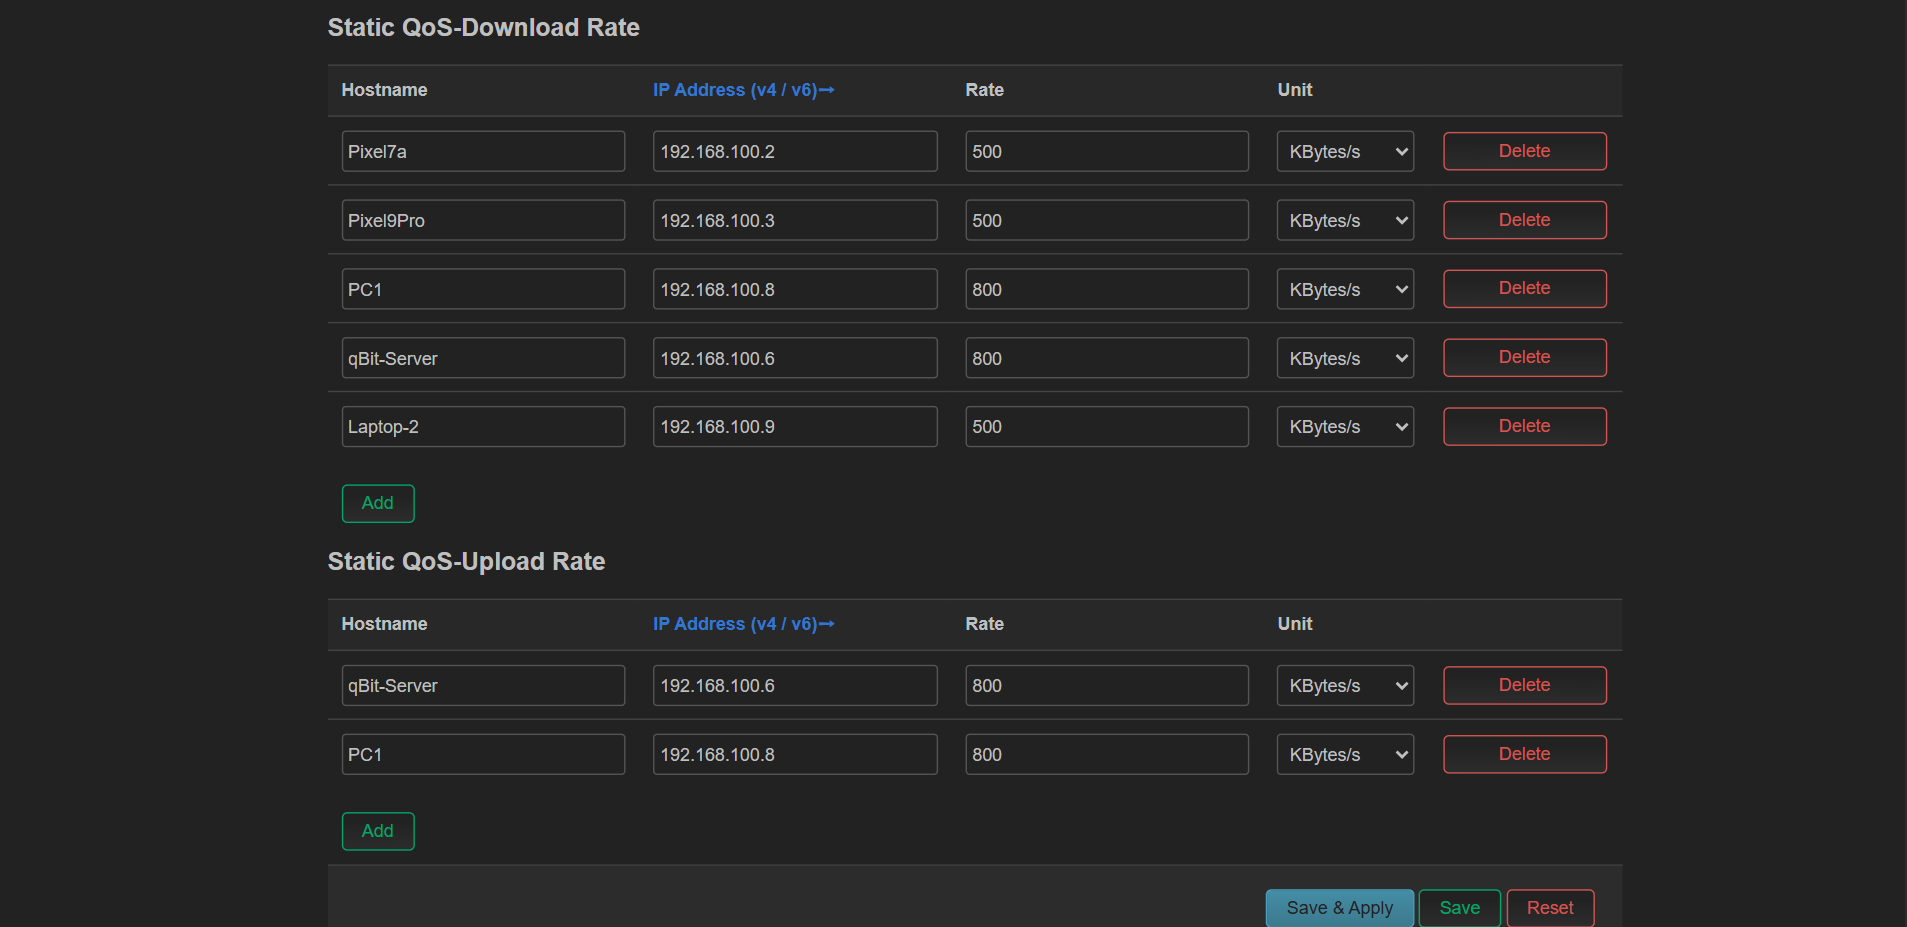
If you want even more rigid control over traffic, you can set static IP addresses for your devices and manually set speed limits. By setting specific speed limits on bandwidth-hungry devices, you can ensure there’s always enough left for your streaming.
On my network, I discovered that certain devices, such as smartphones and tablets with automatic cloud backups, would occasionally consume large amounts of bandwidth in the background. By setting reasonable speed limits on these devices, I was able to maintain a bandwidth reserve for streaming without affecting normal browsing.
The most effective approach is to identify which devices are causing problems (most routers show bandwidth usage by device) and then apply limits strategically rather than throttling everything.
After applying all five of these router settings, my streaming experience became significantly more reliable. If you’re frustrated by those annoying buffering circles interrupting your shows, I highly recommend testing these settings one at a time. Depending on how your router is currently configured, one or two of these changes could drastically improve your streaming situation.




Leave a Comment
Your email address will not be published. Required fields are marked *