Looking for a quick way to record your Linux terminal without going through the hassle of using full-blown screen recorders? asciinema is what you’re looking for, and I’ll show you how to get started with it.
What is asciinema?
asciinema is a command-line tool for recording your terminal. Unlike traditional screen recorders, which need some initial setup to record your device screen, asciinema does it differently. It records your terminal session in a special format. You can replay the recording directly on the terminal and share it with others.
Something that seemed quite interesting to me is that the recording you save is not a video. Instead, when you play it, asciinema replicates what you did on the terminal with text. So, for example, if you run a specific set of commands, those commands will be typed and run in the terminal automatically, replicating your actions.
However, it’s just a visual replication. Those commands won’t actually be run on the system again. It will just appear to you that those commands are being run.
Another important thing to know is that asciinema doesn’t produce any video files. The whole point of asciinema is to avoid heavy video files. Instead, it produces asciicast files ending with a .cast extension. If you really need a video, then you can either use a traditional screen recorder like SimpleScreenRecorder or convert the .cast file to a GIF or other video format.
Installing asciinema on Linux
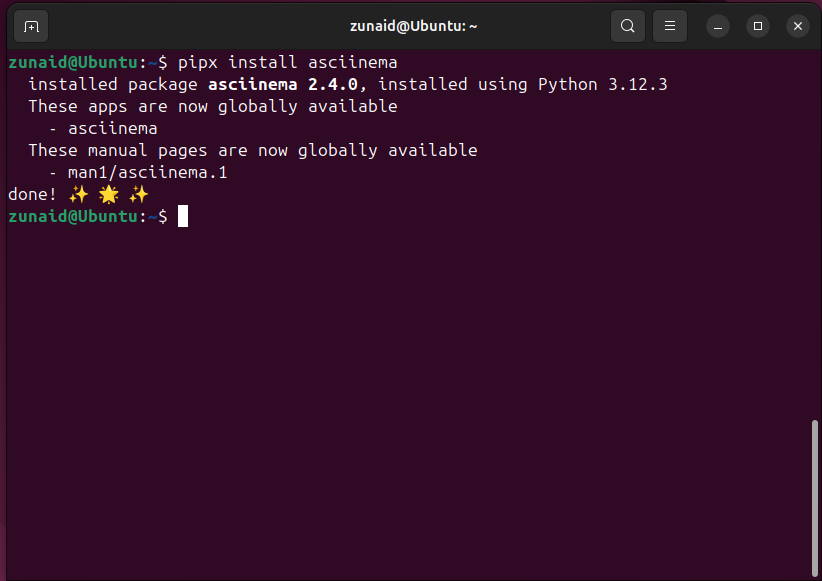
The easiest way to install asciinema on Linux is to use the Python pipx package manager. This is also the recommended way because it’ll always install the latest released version. For this method, you’ll first need to install pipx on your Linux system. After that, simply run this command:
pipx install asciinema
Once installed, try to check its version to confirm the installation.
asciinema --version
If you don’t want to install pipx, then you can use other package managers as well. For example, on Debian, Ubuntu, and their derivative distros, run:
sudo apt install asciinema
You can also use the PPA maintained by David Adam for Ubuntu.
sudo apt-add-repository ppa:zanchey/asciinemasudo apt update
sudo apt install asciinema
On Arch and Manjaro, you need to run:
sudo pacman -S asciinema
On Fedora, use:
sudo dnf install asciinema
If you’re using Gentoo, run:
sudo emerge -av asciinema
For openSUSE users, the command is:
sudo zypper install asciinema
If you prefer to build software from source, you can do that as well. All you have to do is clone the GitHub repository and run asciinema from there.
        git clone https:
cd asciinema
git checkout main
python3 -m asciinema
Recording a Basic Terminal Session Using asciinema
To record a quick terminal session using asciinema, run:
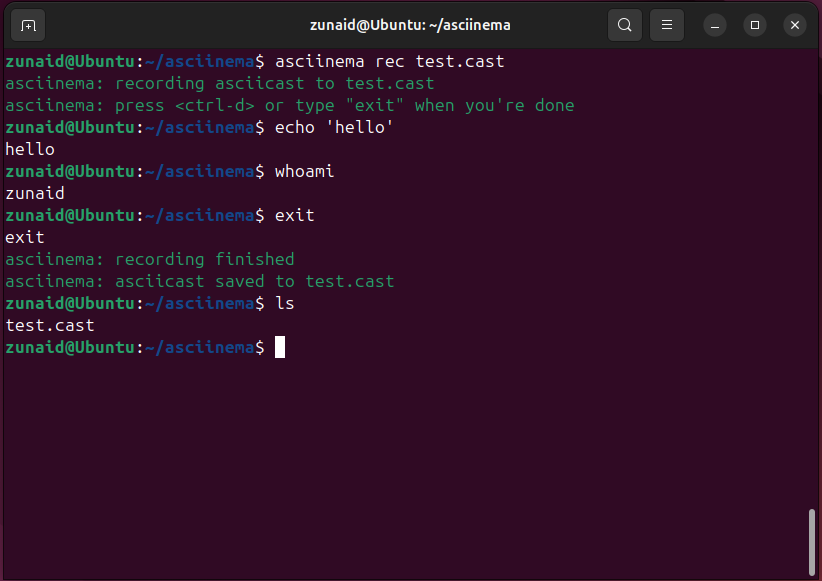
asciinema rec test.cast
We used rec command with the name of the recording file that the session will be saved in. This will start the recording. So, after running the above command, start doing anything on the terminal for it to be recorded. Once you’re done recording, you can either hit Ctrl+D or type exit and press Enter to finish the recording.
After finishing the recording, you’ll find test.cast or whatever file name you used in the current directory.
Once you’ve finished the recording, you can play it on your terminal using asciinema. Run:
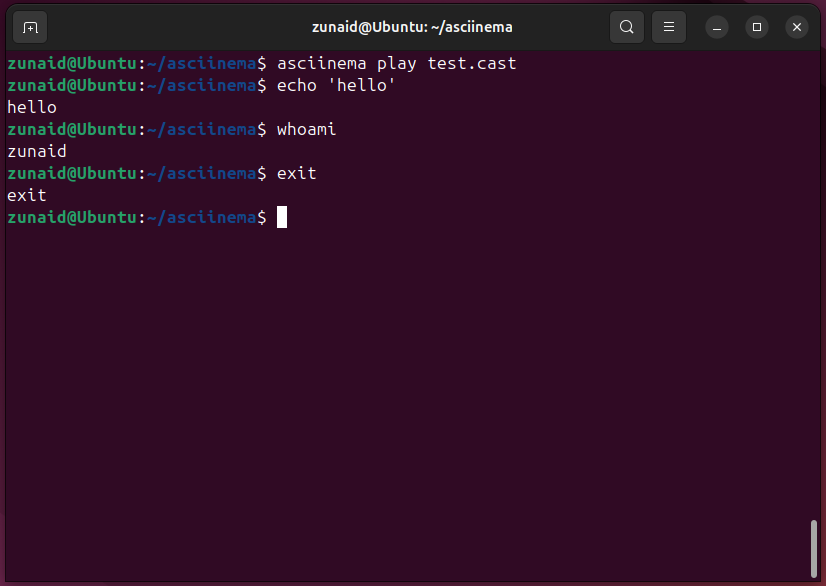
asciinema play test.cast
Related
Screen Recording in Linux with SimpleScreenRecorder
Recording your Linux desktop is a much sought after feature, for both gamers and business professionals alike.
As you can see, the commands you ran during the recording will be rerun on the terminal visually. While the replay is running, you can pause and resume the recording using Space. You can also control the playback speed using the –speed or -s option. To play the cast in twice the speed, run:
asciinema play -s 2 test.cast
If you want to stop the playback, hit Ctrl+C on your keyboard. One thing that stood our to me about asciinema is that you can also cut some idle time from the recording. You can do it while playing the cast or before you record it. This makes the recording much more enjoyable to watch. To do this, we pass the –idle-time-limit or -i option.
asciinema rec -i 2 demo.cast # For recording
asciinema play -i 2 demo.cast # For playing the recording
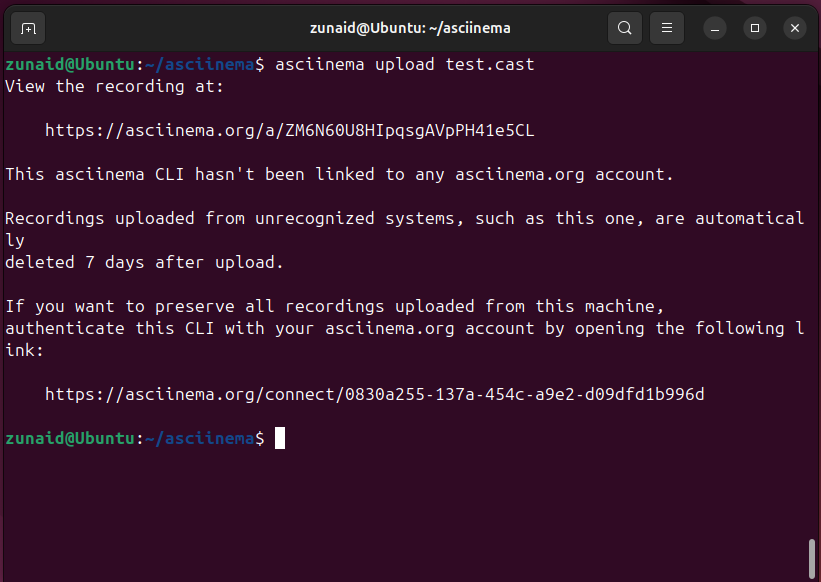
Another option you have is to share your cast via asciinema. The upload command in asciinema lets you share it with others through the asciinema.org server.
asciinema upload demo.cast
Once you run this command, you’ll get a secret link in the terminal. You can copy and paste the link in a web browser to view your terminal recording. Note that you’ll need an account with them to view the session. You’ll also have to link your account with the asciinema CLI tool to preserve your recordings on the server. Otherwise, they’ll be automatically deleted after 7 days.
Exploring Advanced Features
We’ve seen the basic commands you can use with asciinema. There’s a lot more you can do with it. Let’s dive a bit deeper into the commands you’ve already seen.
For recording a session, you can pick a command that you want to record instead of the whole terminal. For instance, let’s say you want to record the htop command. For that, you have to use the –command or -c option, like this:
asciinema rec -c htop test.cast
It will start recording the htop command interface instead of the whole shell. To finish recording, you need to exit htop by pressing q. While recording, you can pause and resume the recording, just like you can while recording in a real camera. For that, use Ctrl+\. This is useful when you have something confidential on the terminal that you’d like to skip.

Related
ShadowPlay for Linux? Make Screencasts With GPU Screen Recorder
This tool for recording games is just as good but built for Linux.
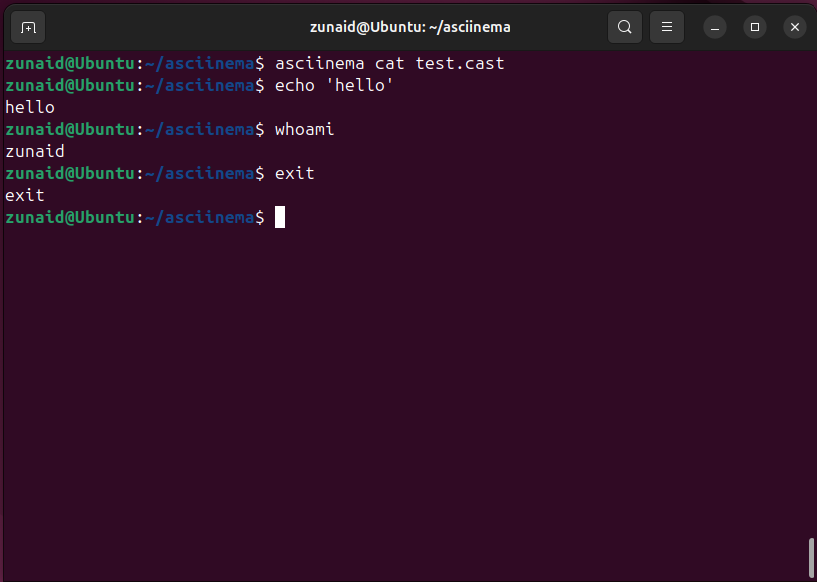
In addition to playing a session, you can also dump the whole session output to the terminal. For that, you have the cat option. So from the earlier example, let’s dump test.cast.
asciinema cat test.cast
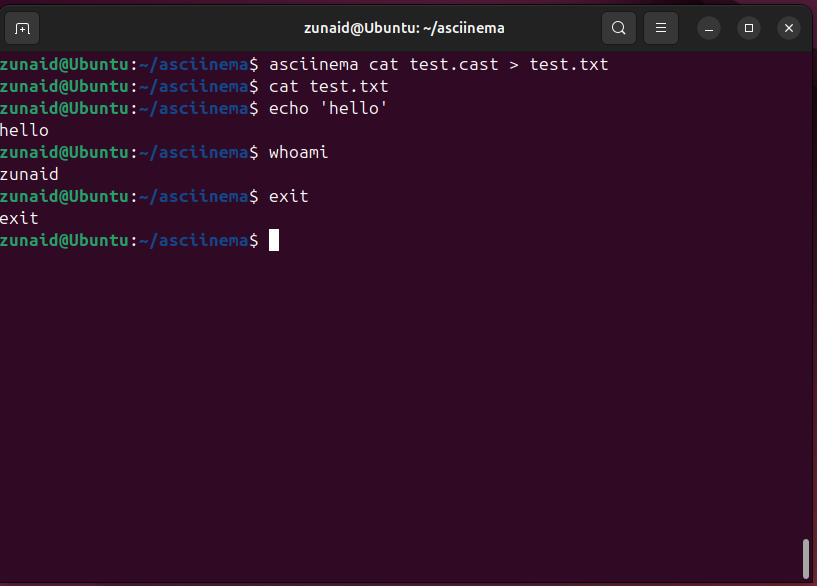
You can also save the command sequence in an output file.
asciinema cat existing.cast >output.txt # Or run
asciinema rec --raw output.txt
You can also dump multiple recordings together using a single command.
asciinema cat first.cast second.cast third.cast
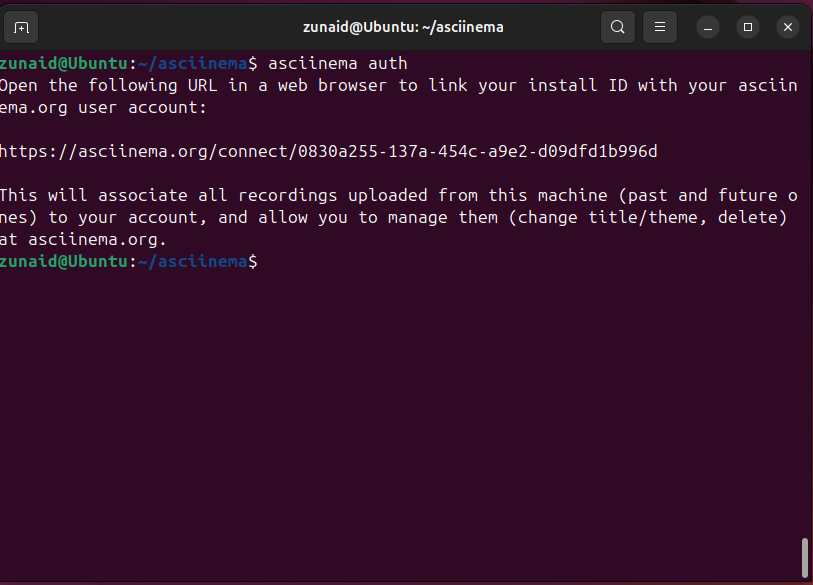
asciinema also supports an authentication system. If you have an account on asciinema.org, you can bind that with your CLI using the auth command.
asciinema auth
You’re given a link. When you visit it, you’re taken to a login portal. Once you successfully log in, it will authenticate your local system using that account. After that, you can preserve all your recordings on the server.
asciinema has a configuration file that you can use to change some settings. Keyboard shortcuts are one of them. Create a config file in the $HOME/.config/asciinema/config directory. There are a lot of options to explore. Here’s an example file you can follow:
[api]
url = https:[record]
command = /bin/bash -l
stdin = yes
env = SHELL,TERM,USER
idle_time_limit = 2
yes = true
quiet = true
pause_key = C-p
add_marker_key = C-x
prefix_key = C-a
[play]
speed = 2
idle_time_limit = 1
pause_key = p
step_key = s
next_marker_key = m
[notifications]
enabled = no
command = tmux display-message "$TEXT"
You can also set environment variables related to asciinema. The ASCIINEMA_API_URL variable defines URL for the asciinema server. By default, it’s set to If you’re self-hosting the server, you can set the base URL to your own server.
Another useful variable is ASCIINEMA_CONFIG_HOME. This one defines the path of the configuration file. The default is $HOME/.config/asciinema. However, if you have XDG_CONFIG_HOME set, then it’s default value is $XDG_CONFIG_HOME/asciinema.
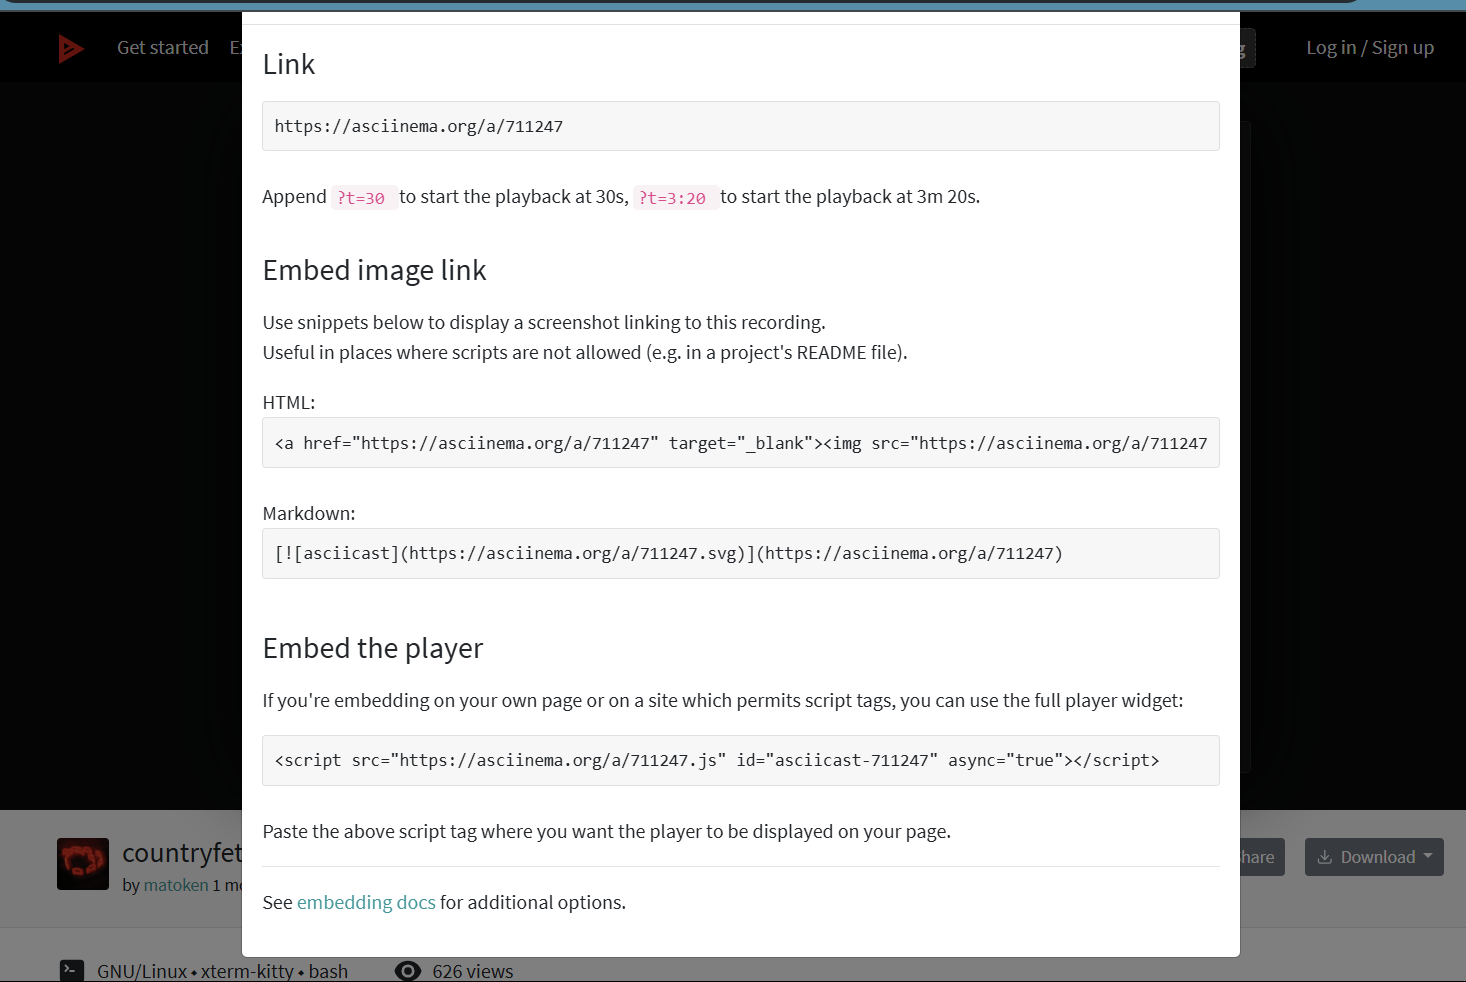
You can embed asciinema recordings on your website too. Once you upload a cast on the asciinema server, you can embed it on the website using the JavaScript
The source is available on the server where you uploaded the recording. Just click the “Share” button and copy the JavaScript embed line.
Some Fun Ways to Use asciinema
If you go to the explore page on the official website, you’ll see how different people are creatively using asciinema to record fun stuff. For instance, there’s a Star Wars example in the documentation. You can use other fun Linux commands with it. For example, to make the session a bit more colorful, you can use lolcat. You can do ASCII art and record it. The sky’s the limit when it comes to using asciinema.
There’s much more to explore about asciinema. If you’re interested in seeing what else you can do, check out the official documentation. Also, if you’re looking for a screen recording tool, there are many Linux screencasting tools available.




:max_bytes(150000):strip_icc()/twoku-twtich-roku-app-2053432b763a40d788ef726974d9ed2a.png?w=1174&resize=1174,862&ssl=1)

Leave a Comment
Your email address will not be published. Required fields are marked *