Most internet users don’t think twice about their IP address, but for anyone hosting servers or accessing devices remotely, choosing between dynamic DNS and static IP is crucial for both cost and convenience.
The Difference Between Static IP and Dynamic DNS
I’ve been repurposing my old laptops in various ways to experiment with networking and making my own home lab. While hosting services from home, I’ve faced a common dilemma that many tech enthusiasts encounter. Should I pay extra for a static IP address from my internet service provider, or could I make do with the dynamic IP address that comes standard with most home internet connections?
To understand this choice, you need to know how these two approaches work differently. A static IP address stays the same every time your router connects to the internet. Your internet service provider assigns you one specific set of numbers, and that becomes your consistent identity on the web.
Dynamic IP addresses work the opposite way. Every time your router reconnects to the internet, your ISP assigns you a different IP address from its available pool. This creates a problem if you want people to find your home server or security cameras from outside your network. How can someone connect to your devices if the address keeps changing?
This is where dynamic DNS steps in to bridge the gap. Dynamic DNS, or DDNS, creates a domain name that automatically updates to point to whatever IP address your ISP currently assigns you. Instead of trying to remember a changing string of numbers like 192.168.1.1, you get a consistent web address like “muoexample.duckdns.org” that always points to your current location on the internet.
The magic happens through automated updates. When your IP address changes, a small piece of software running on your router or computer immediately tells your DDNS provider about the new address. The DDNS service then updates its records so that anyone using your domain name gets redirected to your new IP address.
Why I Use Dynamic DNS Instead of a Static IP
After weighing the pros and cons, I chose DDNS for several practical reasons. It saves me money and actually provides better security than a static IP address.
Cost played a major role in my decision. Static IP addresses typically require upgrading to a business internet plan. This can cost anywhere from $20 to $50 extra per month, depending on your provider. For someone like me who runs a few home servers and occasionally needs remote access, spending that amount per month doesn’t make financial sense. DDNS services, on the other hand, often cost nothing. Services like DuckDNS provide free subdomains that work perfectly for personal use.
Security actually improves with DDNS in some ways. Static IP addresses make you a more predictable target for attackers who might want to probe your network over time. With a changing IP address, potential bad actors have a harder time maintaining persistent attacks against your home network. Even though the domain name stays the same, the underlying IP address shifts regularly, which disrupts many automated scanning tools that bad actors use to find vulnerable systems.
DDNS also gives me more flexibility with my internet service. I’m not locked into a specific ISP or plan just to maintain my static IP address. If I find a better deal or need to move, I can switch providers without worrying about updating services or losing access to my devices. The domain name stays the same regardless of which ISP assigns my actual IP address.
The reliability concerns that some people raise about DDNS don’t affect my use cases much. Yes, there can be a brief interruption when your IP address changes and the DNS records update. But modern DDNS services minimize this downtime to just a few minutes, and you can reduce it further by setting lower TTL values on your DNS records. For most home applications, like accessing a NAS device or checking security cameras, a few minutes of occasional downtime beats paying hundreds of dollars extra per year.
How I Set Up Dynamic DNS
Setting up DDNS was much simpler than I initially expected. I’ll walk you through the exact process I used with DuckDNS, which I chose because it’s free, reliable, and well-documented.
Step 1: Install the Right Tools
My default router doesn’t allow for DDNS, so I had to use a third-party router installed with OpenWrt. If your router already has an option for DDNS, you can skip this step.
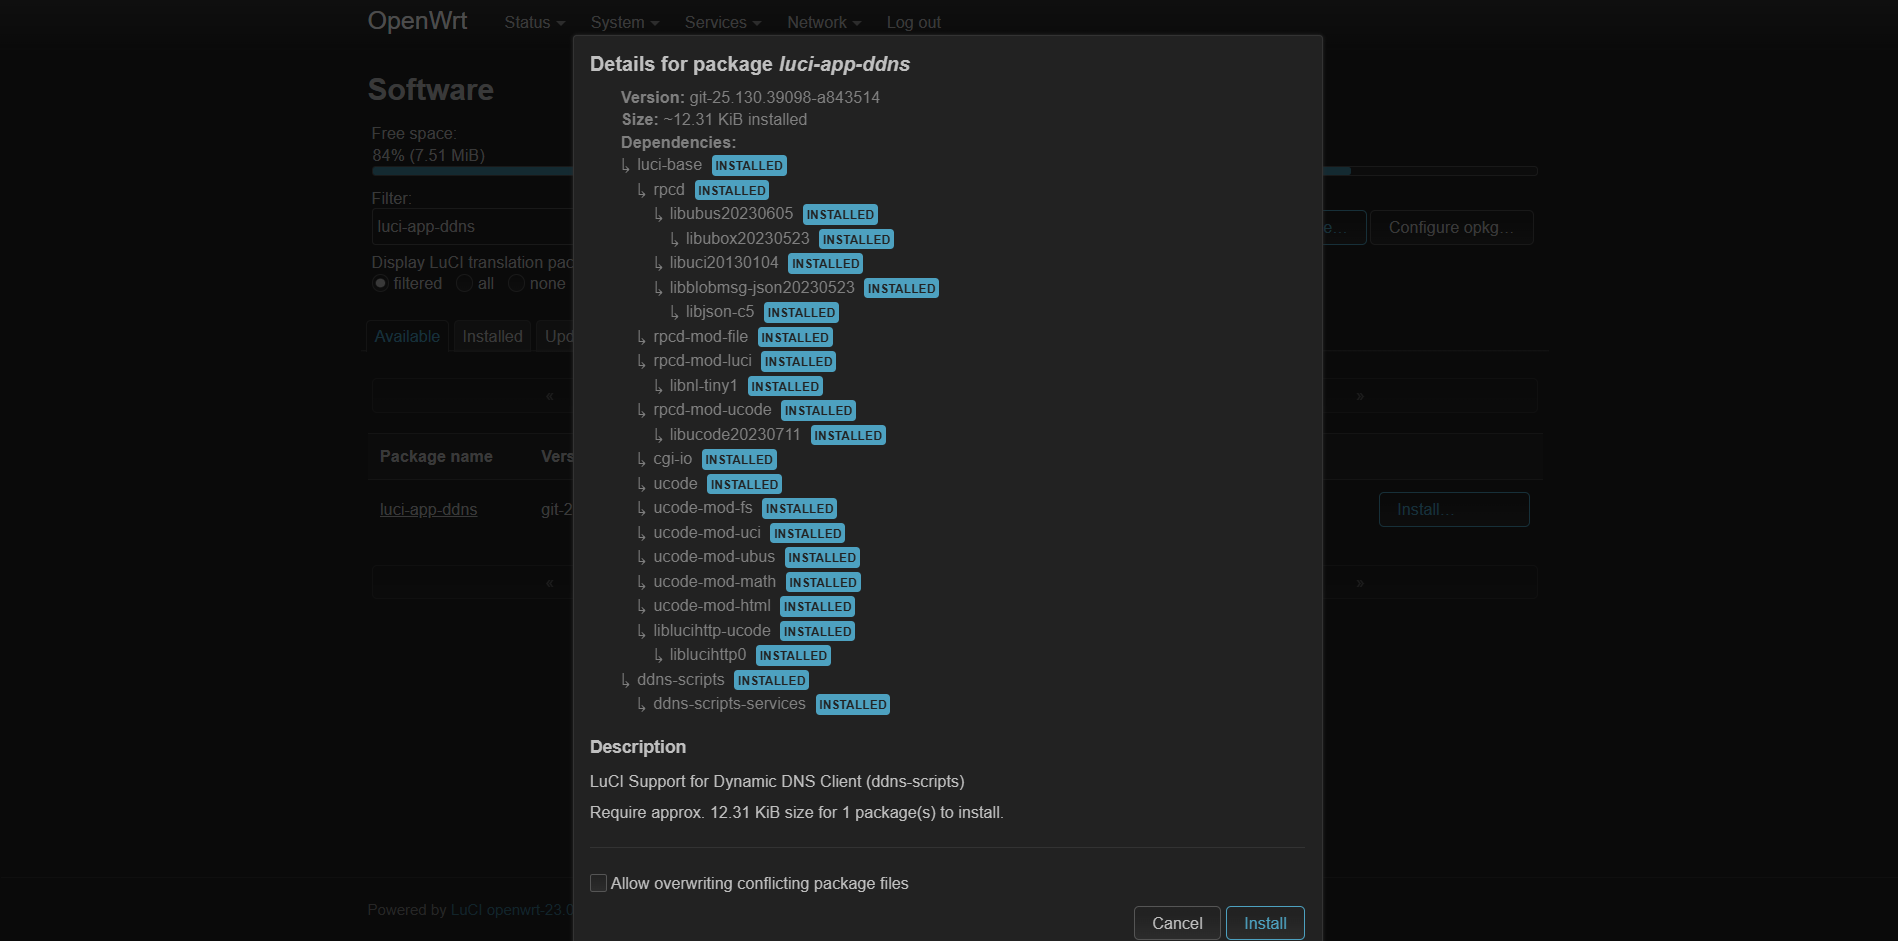
First, we need to install the proper tools in the OpenWrt router. Open the LuCI web interface and head to System > Software. Click Update Lists to refresh the package options. Install these two key packages:
-
ddns-scripts(the brains behind DDNS updates) -
luci-app-ddns(the user-friendly GUI)
These extensions are what allow the router to work with DDNS.
Step 2: Claim Your DuckDNS Domain
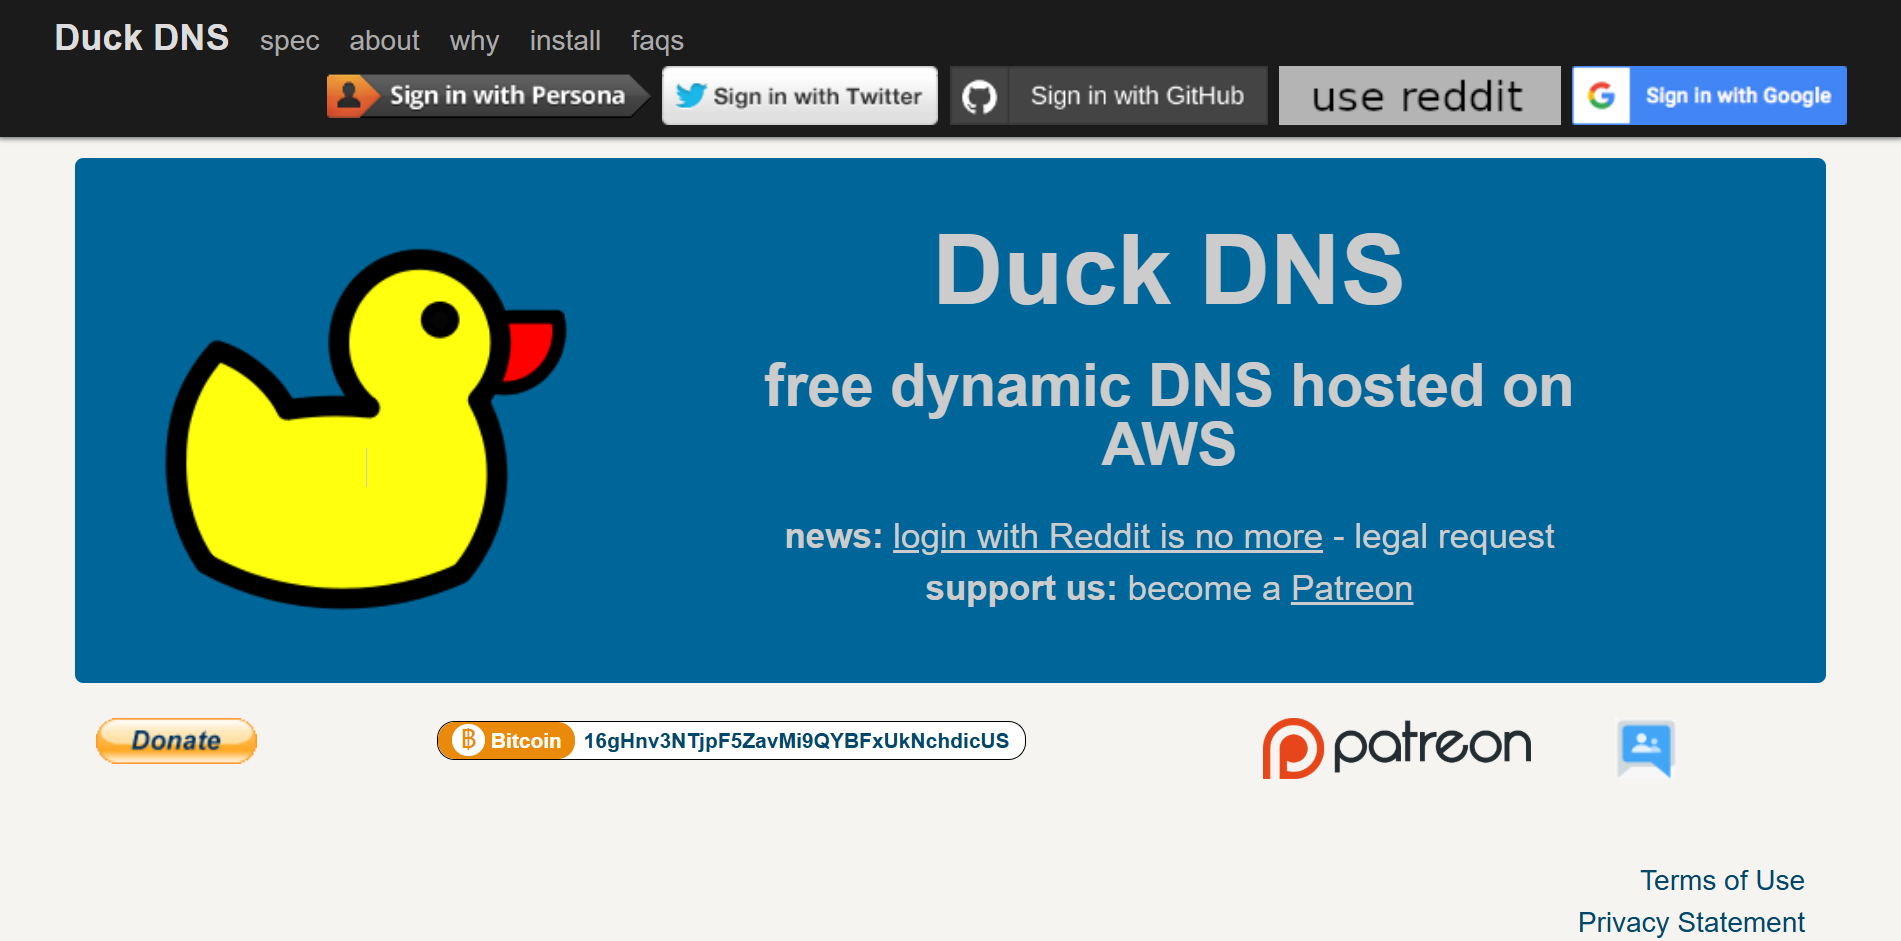
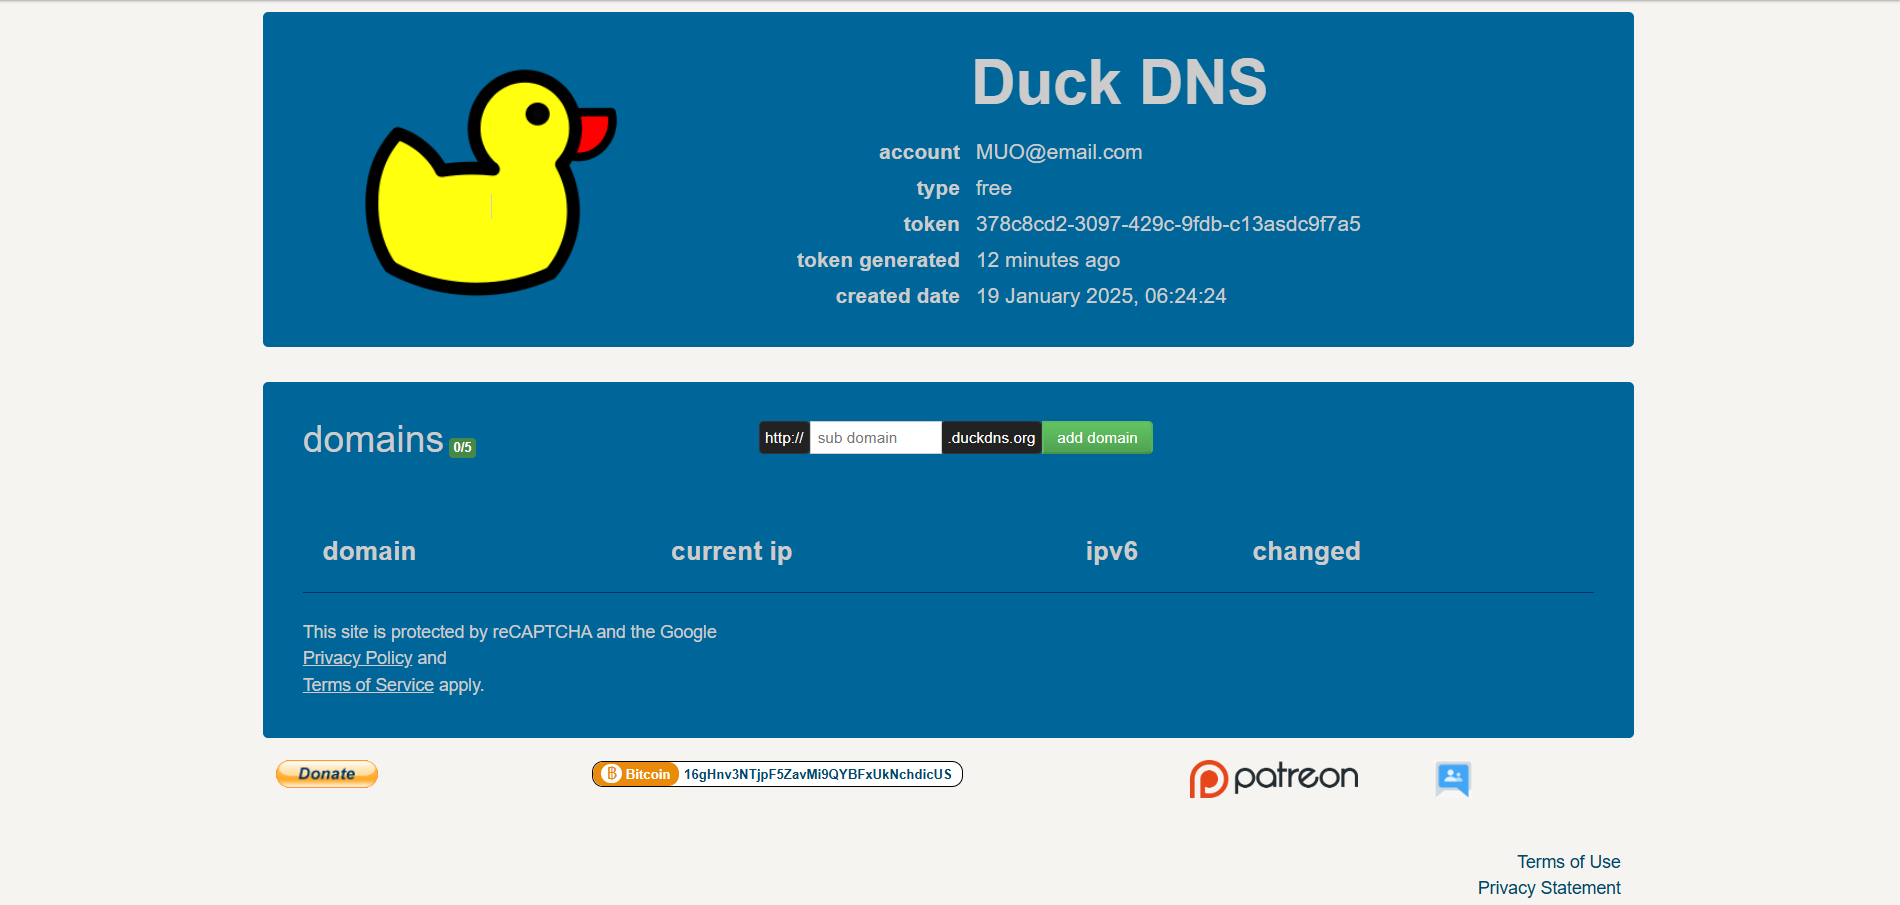
There are several free services that offer free dynamic DNS. I like using DuckDNS because it is one of the most popular options and provides up to five free DDNS services. First, go to duckdns.org and sign up. I used my Google account to make things easier. Once signed in, create a subdomain, such as muoexample.duckdns.org. Then, copy the API token (it’s like a password for DuckDNS) because you’ll need it later.
Step 3: Configure DuckDNS in OpenWrt
Next, go to your router and access the router interface:
- Go to Services > Dynamic DNS.
- Click Add to create a new DDNS entry.
-
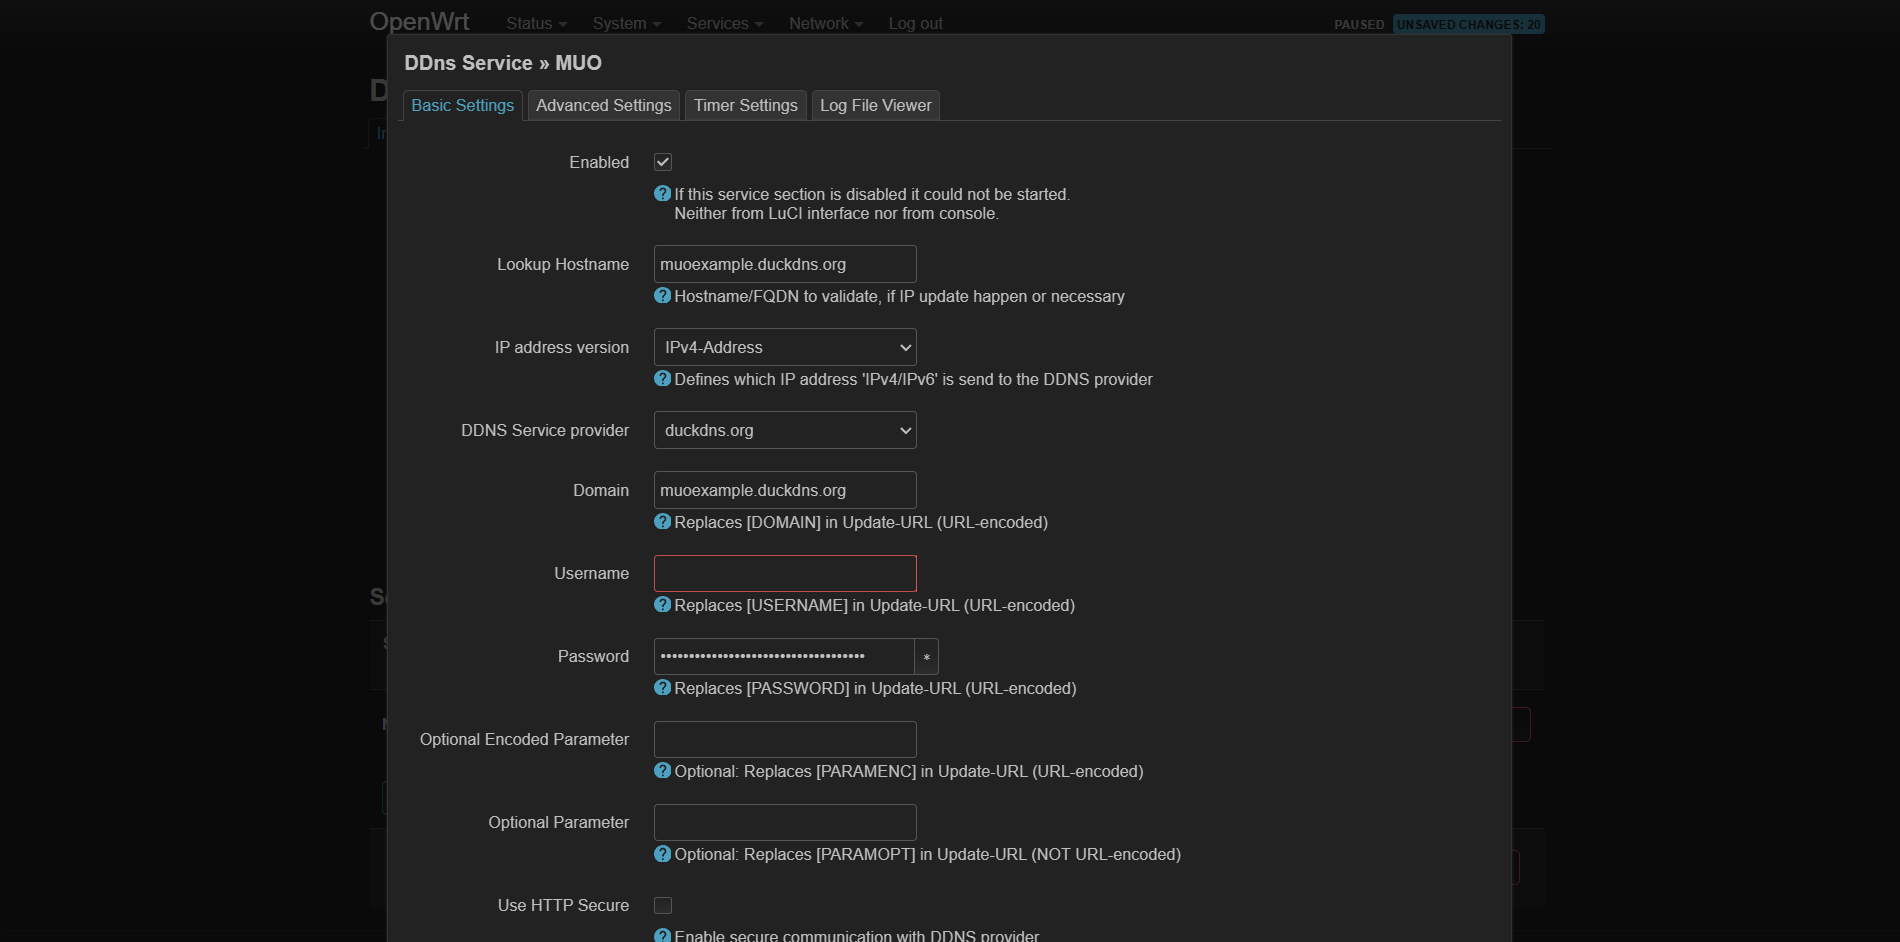
Fill in the fields like this:
- Service: duckdns.org (select from the dropdown)
- Hostname: muoexample.duckdns.org (replace with your subdomain)
- Username: I placed MUO, but you can leave this blank—DuckDNS doesn’t use it.
- Password: Paste your API token here.
- IP Address Source: Set to Network and select WAN (this tells OpenWrt to track your public IP).
- Hit Save & Apply.
Step 4: Test Your Dynamic DNS
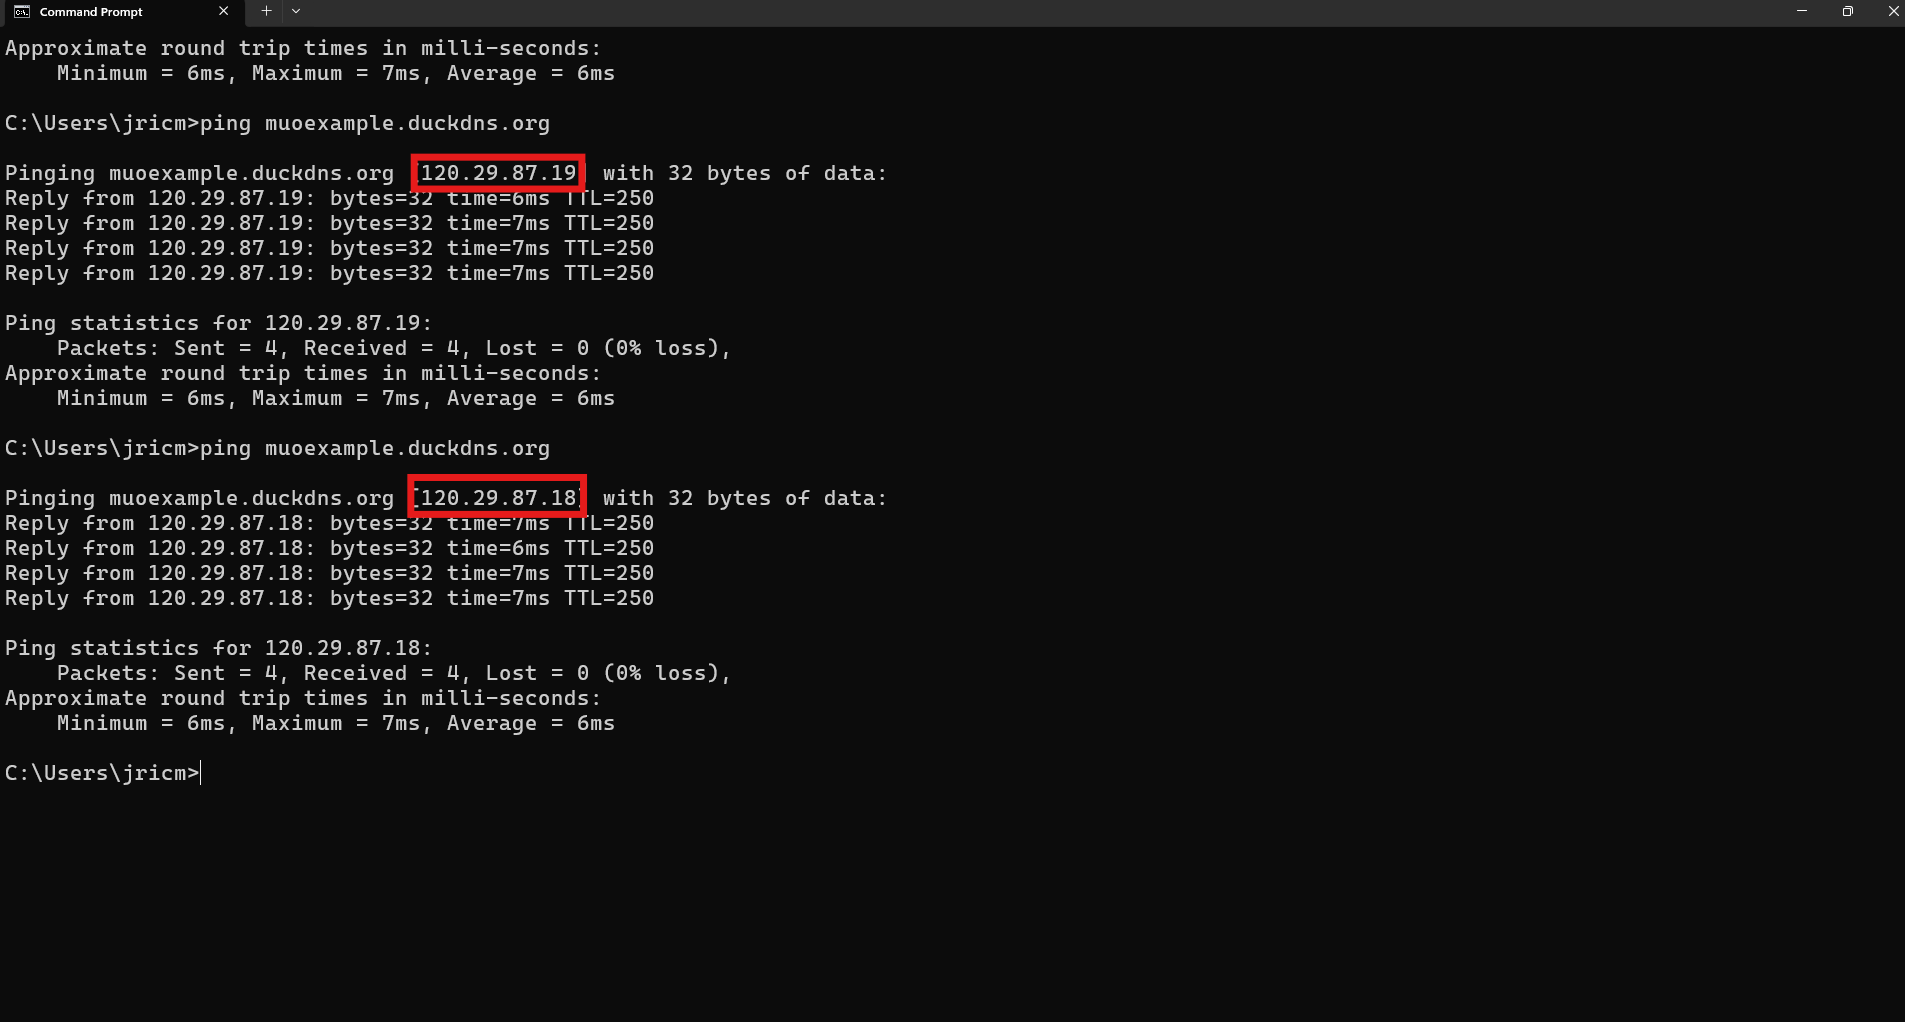
With everything configured, you need to test the setup. To do this, ping your domain the first time and then change the IP address in DuckDNS. After changing the IP, ping the subdomain again to test if everything worked.
As you can see from the example above, my subdomain still worked despite its IP address changing.
If you ping your subdomain the second time, and it doesn’t connect, it means the DDNS didn’t work. You’ll need to recheck your configurations. But if it does connect despite the IP change, that means the DDNS is now working.
Is Dynamic DNS for You?
DDNS is a great fit for most home users who want to reach their devices from anywhere without paying extra for a business internet plan. Maybe you’ve turned your old laptop into a Plex Media Server or installed Home Assistant on your Linux machine.
In these cases, using a DDNS service makes the most sense. It’s also handy for small businesses that want to host a basic website or app but don’t want to shell out for a pricey static IP.
That said, DDNS may not be the best fit for every situation. If you rely on services that require constant uptime, such as business email servers or mission-critical applications, a static IP address is usually the better choice. Certain services, especially those involving email, are sensitive about IP addresses and may flag or block traffic coming from dynamic IP ranges.
If you’re just getting started with self-hosting or want to experiment with remote access, DDNS is a low-risk, low-cost way to dip your toes in. You can always upgrade to a static IP later if your needs grow, or you want more reliability. For most folks, though, DDNS strikes the right balance between convenience and cost.




Leave a Comment
Your email address will not be published. Required fields are marked *